Peach Raspberry Velvet Bombs with Golden Mirror Glaze
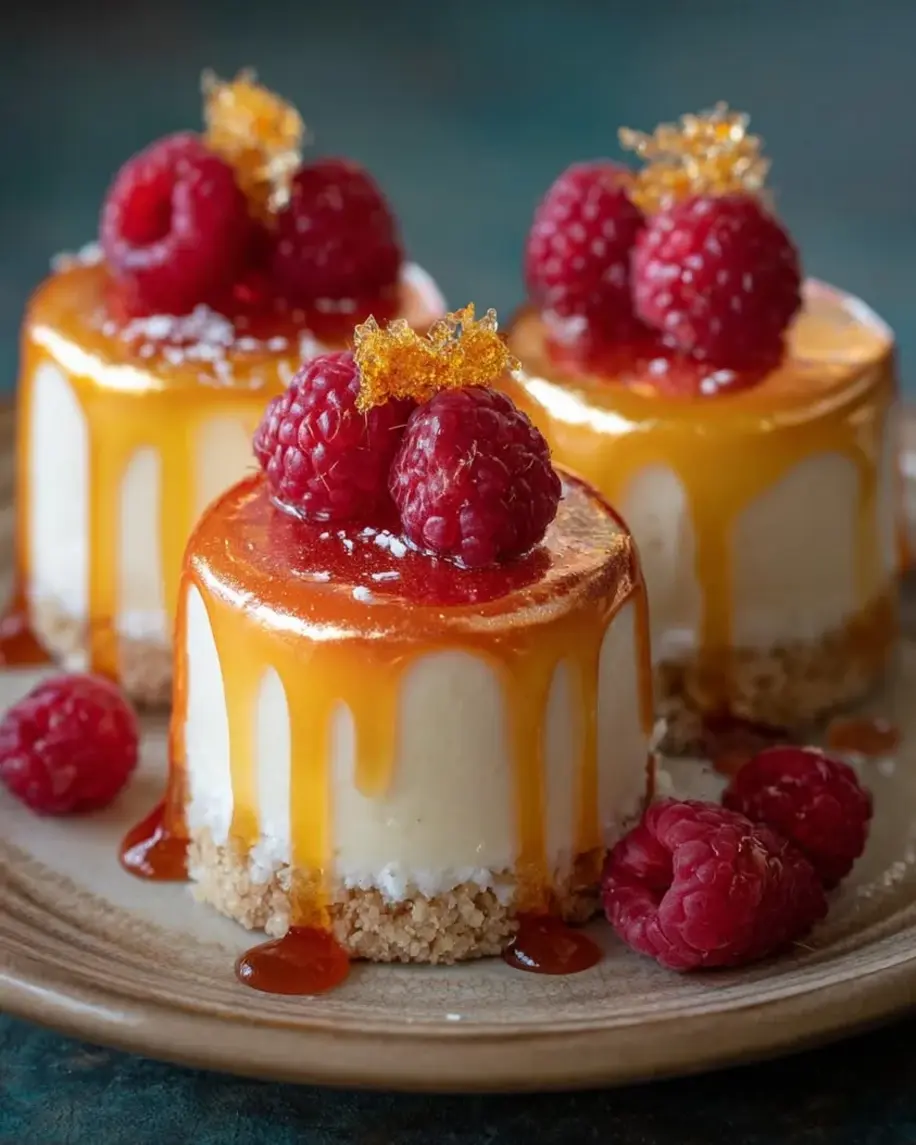
Table of Contents
Peach Raspberry Velvet Bombs with Liquid Gold Mirror Finish – A Stunning Fruity Dome Mousse Dessert
Some recipes feel like they were meant to be shared — and this Peach Raspberry Velvet Bombs dessert with a Liquid Gold Mirror Finish recipe is exactly that. I first dreamed up this stunning dome mousse dessert during a hot August week in my NYC kitchen, when the Union Square farmers market was overflowing with blushing peaches and jewel-like raspberries. Growing up in Morocco, my mother would layer fruit with cream for simple, soulful sweets. Years later, after training in Paris, I learned how to take those humble flavors and wrap them in French elegance — mirror glazes, silky mousses, and that crisp biscuit base that holds it all together. This fruity dome mousse dessert is the bridge between those worlds: a showstopper that tastes like sunshine and feels like a warm memory.
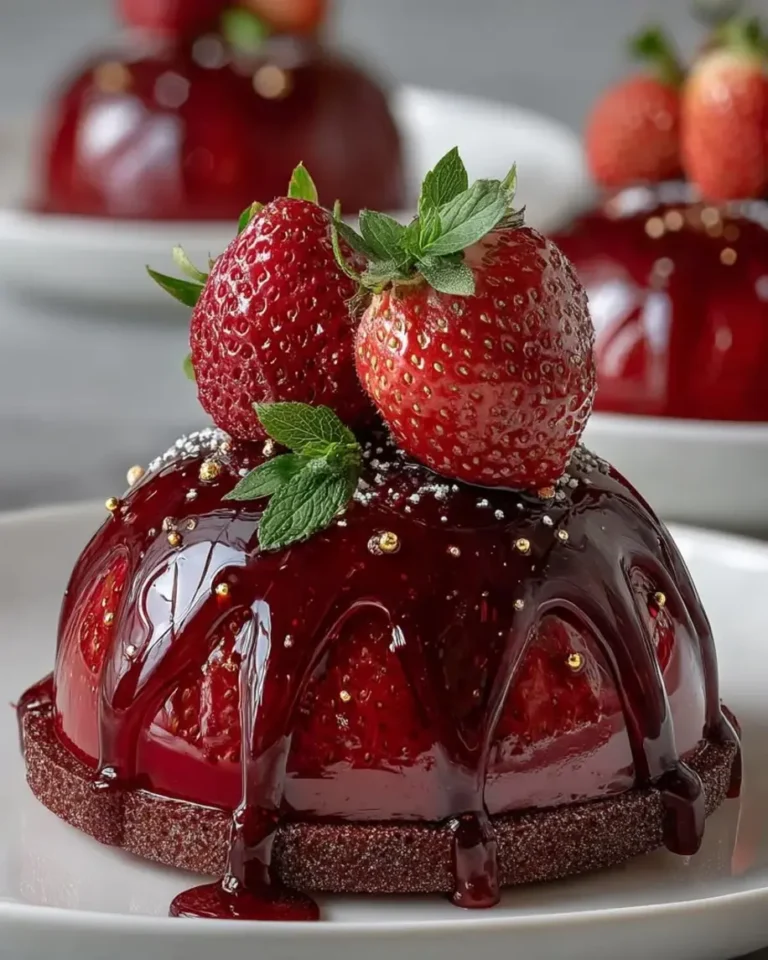
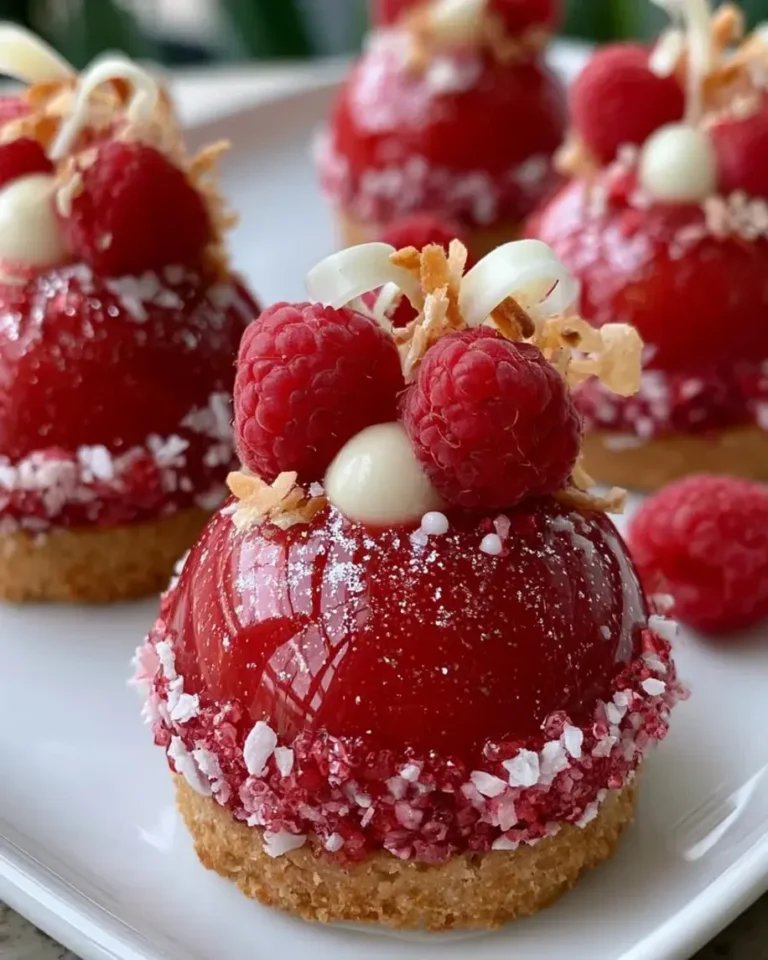
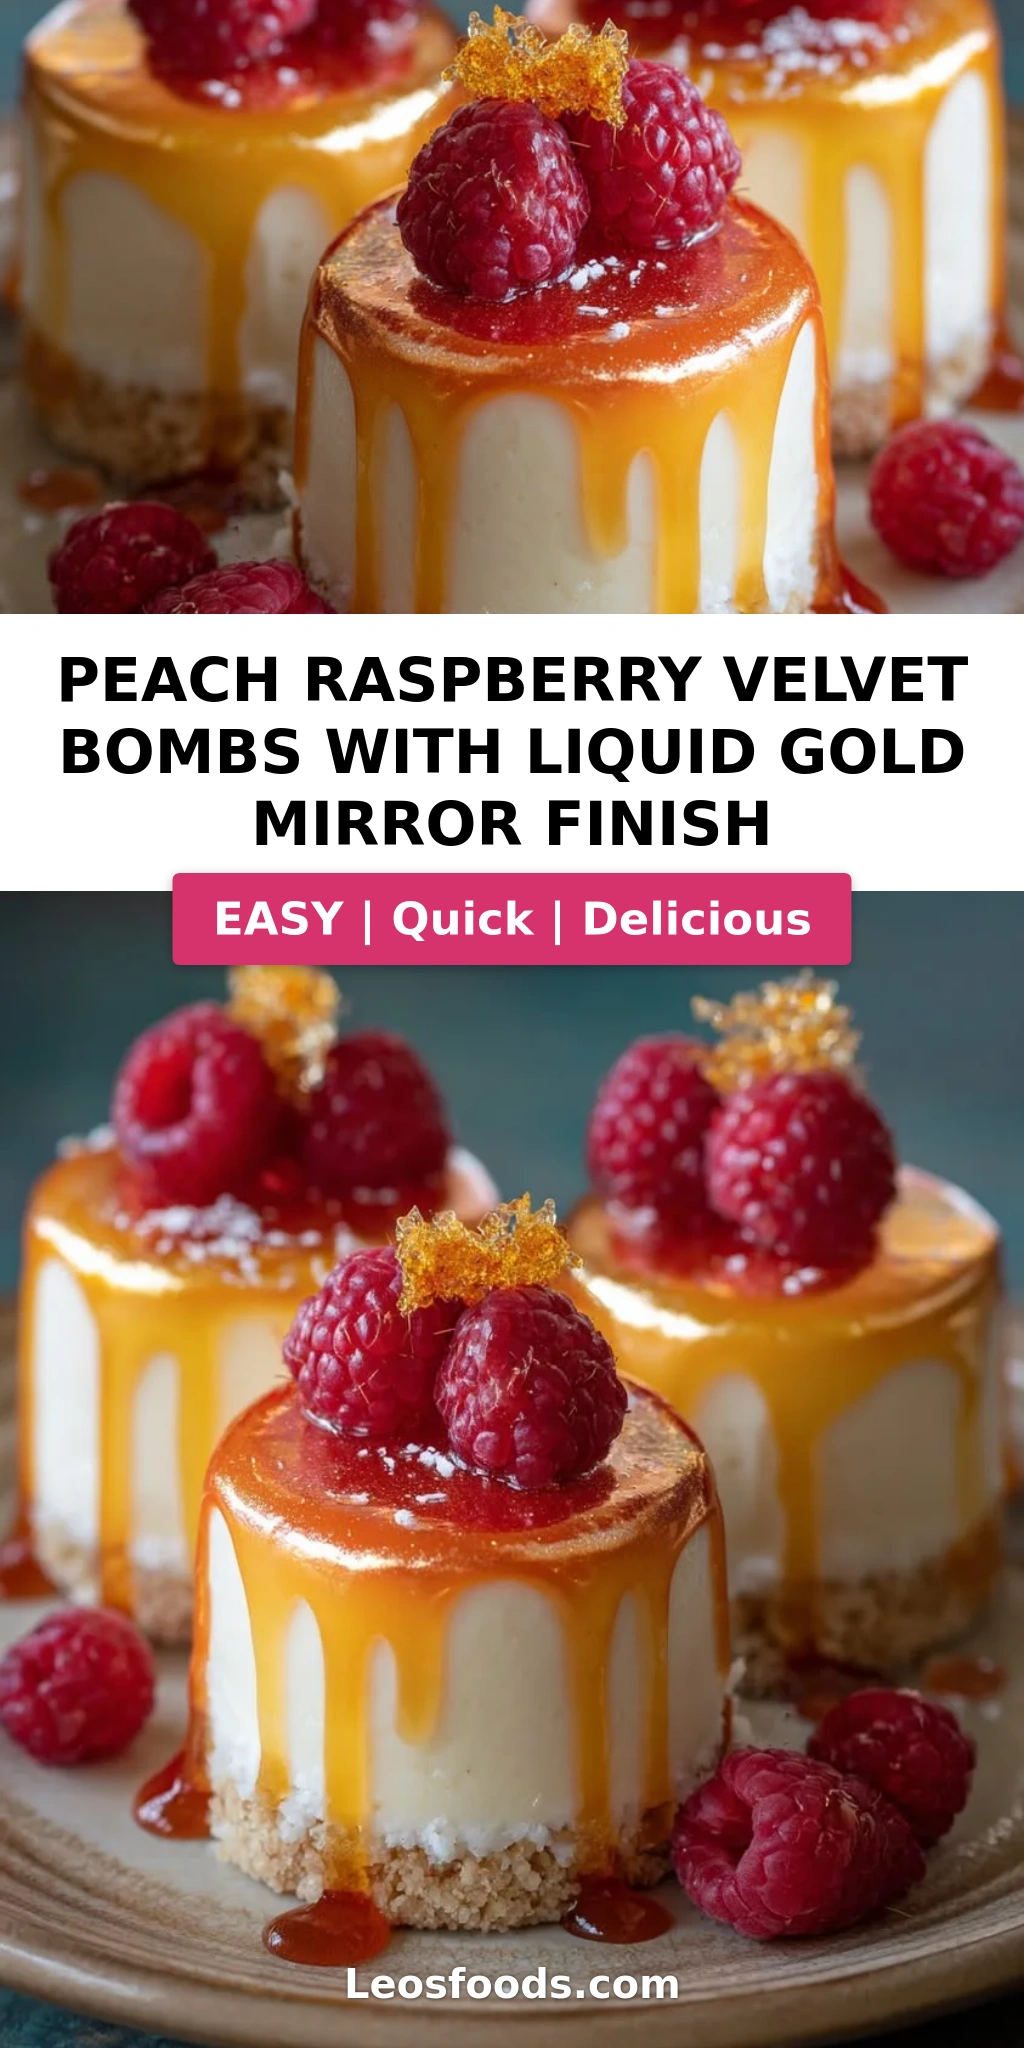
Let me paint you a picture. The first bite cracks through a flawless, gleaming gold mirror finish — glossy, smooth, almost too pretty to touch. Beneath it, a cloud-like peach-raspberry mousse melts on your tongue, creamy and bright with just the right tang. Then you hit the hidden ruby center: a concentrated raspberry core that bursts with fruit-forward intensity. The buttery biscuit base adds a gentle crunch, grounding all that silkiness. A whisper of vanilla and a hint of lemon weave through every layer. This is not just a dessert — it’s a moment. A conversation starter. The kind of edible gold dessert recipe that makes people lean in and say, “Wait, you made this?” Yes, you did.
What makes this homemade velvet bomb cake truly special is my method for the liquid gold mirror finish. I spent weeks testing ratios of gelatin, condensed milk, and edible gold luster dust to achieve that liquid metal effect that flows like honey and sets like a jewel. I’ll share my exact technique below — including the crucial temperature window for pouring. I’ll also walk you through a common mistake that can crack your glaze, and a Stella’s Pro Tip for getting that mirror shine every time. Whether you’re a confident baker or a brave beginner, this recipe is designed to guide you step-by-step into creating something truly magnificent. Let’s make some magic.
Why This Peach Raspberry Velvet Bombs Dessert Recipe Is the Best
The Flavor Secret. Most dome mousse desserts lean one-note — too sweet, too heavy. My version balances the floral sweetness of peach with the tart punch of raspberry, all anchored by cream cheese for a subtle tang that keeps every bite interesting. This is a trick I borrowed from my mother’s Moroccan kitchen, where she’d combine fresh fruit with labneh for a similar effect. The double raspberry layer — puree in the mousse plus a frozen core — amplifies the fruit flavor without making it cloying. It’s bright, it’s bold, and it tastes like peak summer in every spoonful.
Perfected Texture. Texture is everything in a homemade velvet bomb cake, and I’ve dialed in every layer. The mousse is whipped to soft peaks before folding, giving it an airy, cloud-like structure that still holds its shape. The biscuit base is pressed thin — just enough crunch without overwhelming the delicate mousse. And the liquid gold mirror finish? It sets to a thin, glassy shell that cracks open with the back of a spoon. No thick, gummy coatings here. My Paris training taught me that precision in temperature and timing is the difference between good and unforgettable, and I’ve built that precision into every step.
Foolproof & Fast. I know this looks like a project — and it is, in the best way. But I’ve broken it into manageable stages that fit into a busy schedule. The raspberry core and base can be made a day ahead. The mousse comes together in under 20 minutes. The glaze takes 10 minutes of active work. Most of the time is hands-off freezing and setting. I’ve tested this recipe with home bakers of all skill levels, and the feedback is always the same: “I can’t believe I made this.” You’ll feel like a pastry chef, I promise.
Peach Raspberry Velvet Bombs Dessert Ingredients
I source my peaches from the Union Square Greenmarket in summer — they’re fragrant and deeply flavorful. For the rest of the year, high-quality frozen peach puree works beautifully. Raspberries I love from the farmers market too, but frozen raspberries (unsweetened) are a fantastic standby. Let me walk you through exactly what you’ll need for this edible gold dessert recipe.
Ingredients List
- For the Peach Raspberry Velvet Mousse:
- 1 cup peach puree (from fresh or frozen peaches)
- 3/4 cup raspberry puree (from fresh or frozen raspberries, strained)
- 8 oz cream cheese, softened
- 1 cup heavy cream
- 1/2 cup granulated sugar
- 1 tsp vanilla extract
- 2 tsp powdered gelatin
- 3 tbsp cold water
- For the Raspberry Core:
- 3/4 cup raspberry puree (strained)
- 2 tbsp granulated sugar
- 1 tsp lemon juice
- 1 tsp powdered gelatin
- 1 tbsp cold water
- For the Biscuit Base:
- 1 cup digestive biscuits, finely crushed
- 3 tbsp melted butter
- For the Liquid Gold Mirror Finish:
- 1 cup granulated sugar
- 1/2 cup water
- 1/2 cup sweetened condensed milk
- 1 cup white chocolate, finely chopped
- 1 tbsp powdered gelatin
- 3 tbsp cold water
- 1 tsp clear vanilla extract
- 1 1/2 tsp edible gold luster dust
- For Garnish (optional):
- Fresh raspberries
- Peach slices
- Edible gold flakes
Ingredient Spotlight
Peach Puree. The heart of this fruity dome mousse dessert. Use ripe, fragrant peaches — yellow or white both work. To make puree, simply peel and blend until smooth. If using frozen peaches, thaw and drain excess liquid before pureeing. Canned peaches (in juice, not syrup) can work in a pinch, but the flavor will be less vibrant.
Raspberry Puree. You’ll need this for both the mousse and the core. Fresh raspberries are ideal, but frozen (unsweetened) are a great alternative. Always strain the puree through a fine-mesh sieve to remove seeds — this keeps the mousse silky and the core smooth. I use a food mill when I’m making large batches.
White Chocolate (for the Glaze). This is the backbone of the liquid gold mirror finish. Use a good-quality white chocolate with at least 30% cocoa butter — cheap white chips won’t melt smoothly and can leave the glaze grainy. I prefer Valrhona or Callebaut couverture for that ultra-glossy shine.
Edible Gold Luster Dust. This is what turns a simple mirror glaze into a showstopper. Look for “edible gold luster dust” at baking supply stores or online. A little goes a long way — 1 1/2 teaspoons is enough for a stunning metallic sheen. Make sure it’s labeled “edible” and not just decorative.
Gelatin. Powdered gelatin is used in three places in this recipe — the raspberry core, the mousse, and the mirror glaze. Always bloom it in cold water for 5 minutes before using. This ensures even hydration and smooth incorporation without lumps.
| Original Ingredient | Best Substitution | Flavor / Texture Impact |
|---|---|---|
| Peach puree | Mango puree (fresh or frozen) | More tropical, slightly less floral; same texture |
| Raspberry puree | Strawberry or blackberry puree | Less tart, more sweet; blackberry adds earthiness |
| Digestive biscuits | Shortbread cookies or graham crackers | Slightly sweeter; graham adds honey note |
| White chocolate | High-quality white couverture (Valrhona) | Smoother melt, glossier finish; no change in sweetness |
| Edible gold luster dust | Edible pearl dust or silver luster dust | Changes color only; texture and shine remain similar |
How to Make Peach Raspberry Velvet Bombs — Step-by-Step
I’ll guide you through every stage of this homemade velvet bomb cake — from the biscuit base to the liquid gold mirror finish. Take your time, read each step fully, and remember: even if something feels fiddly, you’re building something extraordinary.
Step 1: Prepare the Biscuit Base
Mix finely crushed digestive biscuits with melted butter until the texture resembles wet sand. Press a thin, even layer into the bottom of each dome mold — about 1/8 inch thick. Use the back of a small spoon or a measuring cup to compact it firmly. Chill the molds for 15 minutes while you prepare the raspberry core.
💡 Stella’s Pro Tip: To get perfectly even bases, use a flat-bottomed shot glass or a spice jar to press the crumbs. This prevents thick edges that can throw off the dome shape.
Step 2: Make the Raspberry Core
Bloom the gelatin for the core in cold water for 5 minutes. In a small saucepan, heat raspberry puree, sugar, and lemon juice until just warm — do not boil. Remove from heat, add the bloomed gelatin, and stir until fully dissolved. Pour the mixture into small silicone inserts (half-sphere or cube shapes work well). Freeze until completely firm, about 2 hours.
⚠️ Common Mistake to Avoid: If the puree mixture is too hot when you add the gelatin, it can weaken the gelatin’s setting power. Heat it only until warm to the touch — about 100°F (38°C).
Step 3: Make the Peach Raspberry Mousse
Bloom the gelatin for the mousse in cold water for 5 minutes. In a large bowl, beat cream cheese, peach puree, raspberry puree, sugar, and vanilla extract until completely smooth. Warm a small portion (about 2 tablespoons) of the heavy cream and dissolve the bloomed gelatin into it, then mix this into the fruit-cream cheese mixture. Whip the remaining heavy cream to soft peaks — they should just hold their shape but still be tender. Gently fold the whipped cream into the fruit mixture in three additions, using a rubber spatula. Be careful not to deflate the cream.
💡 Stella’s Pro Tip: For the smoothest mousse, make sure your cream cheese is genuinely at room temperature. Cold cream cheese will leave lumps that won’t disappear. Set it out 30 minutes before starting.
Step 4: Assemble the Bombs
Fill the chilled dome molds halfway with the mousse. Place a frozen raspberry core into the center of each mold, pressing it gently into the mousse. Cover completely with the remaining mousse, smoothing the tops flat with an offset spatula. Freeze for at least 6 hours, or overnight — the bombs must be completely frozen solid before glazing.
⚠️ Common Mistake to Avoid: If the raspberry core isn’t fully frozen when you insert it, it will sink into the mousse or bleed color too early. Make sure it’s frozen solid — at least 2 hours in the freezer.
Step 5: Make the Liquid Gold Mirror Glaze
Bloom the gelatin for the glaze in cold water. In a medium saucepan, heat sugar, water, and sweetened condensed milk until steaming — about 140°F (60°C). Remove from heat and stir in the bloomed gelatin and finely chopped white chocolate until completely smooth. Add clear vanilla extract and edible gold luster dust. Use an immersion blender to blend until glossy and uniform — avoid incorporating bubbles. Cool the glaze to about 90°F (32°C) before using. This is the sweet spot: too hot and it will melt the mousse; too cool and it will thicken and not coat evenly.
💡 Stella’s Pro Tip: An instant-read thermometer is your best friend here. The 90°F target is critical for that flawless mirror finish. If you don’t have one, test the glaze on the back of a spoon — it should coat evenly and drip slowly, like warm honey.
Step 6: Glaze and Serve
Unmold the frozen bombs and place them on a wire rack set over a baking sheet (to catch drips). Pour the liquid gold mirror finish evenly over each bomb, starting from the center and letting it flow down the sides. Work quickly — the glaze sets fast on the frozen surface. Let the excess drip off for about 30 seconds, then transfer the glazed bombs to a serving plate. Refrigerate for 30 minutes to allow the glaze to set fully. Garnish with fresh raspberries, peach slices, and edible gold flakes just before serving.
⚠️ Common Mistake to Avoid: Don’t glaze the bombs straight from the freezer without letting them sit for 1-2 minutes. If they’re too cold, the glaze will seize and form a matte, uneven surface. A brief rest allows the glaze to flow smoothly.
| Step | Action | Duration | Key Visual Cue |
|---|---|---|---|
| 1 – Base | Press crumb mixture into molds | 15 mins chill | Firm, compacted layer |
| 2 – Core | Heat puree, add gelatin, freeze | 5 mins + 2 hrs freeze | Solid, easy to pop out |
| 3 – Mousse | Mix, whip, fold | 15 mins | Smooth, airy, no lumps |
| 4 – Assembly | Layer mousse, core, more mousse | 10 mins + 6 hrs freeze | Bombs are solid to the touch |
| 5 – Glaze | Heat, blend, cool to 90°F | 15 mins | Glossy, smooth, coats spoon |
| 6 – Glaze & Serve | Pour glaze over frozen bombs | 5 mins + 30 mins set | Even gold coating, no bald spots |
Serving & Presentation
These Peach Raspberry Velvet Bombs are meant to be the centerpiece of any celebration. I love serving them on a simple white platter to let the gold shine. Place each bomb on a small doily or a smear of raspberry coulis for an elegant touch. The contrast of the glossy gold against the bright red coulis is absolutely stunning. For a dinner party, I sometimes add a tiny sprig of mint or a few fresh edible flowers alongside the raspberries and peach slices.
In my NYC apartment, I’ve served these at birthdays, anniversaries, and even a casual Sunday supper — they always steal the show. The key is to let them sit at room temperature for 5-8 minutes after coming out of the fridge. This softens the mousse just enough to make it spoonable while keeping the glaze perfectly intact. A warm coffee or a glass of chilled Moscato d’Asti pairs beautifully with the bright fruit notes.
Growing up in Morocco, we’d often finish a meal with fresh fruit and a simple syrup-soaked pastry. This recipe feels like a luxurious evolution of that tradition — still rooted in real fruit, still meant to be shared, but now with a golden crown. When you bring these to the table, watch people’s eyes light up. That’s the magic of homemade velvet bomb cake done right.
| Pairing Type | Suggestions | Why It Works |
|---|---|---|
| Side Dish | Light shortbread cookies, fresh fruit salad | Complementary textures, not too heavy |
| Sauce / Dip | Raspberry coulis, light caramel sauce | Enhances fruit notes, adds color contrast |
| Beverage | Moscato d’Asti, espresso, peach iced tea | Bright acidity or warmth balances richness |
| Garnish | Fresh raspberries, peach slices, edible gold flakes, mint | Visual pop, fresh flavor lift |
Make-Ahead, Storage & Reheating
One of the best things about this fruity dome mousse dessert is how well it works with a busy schedule. I often make the components over two days: the raspberry core and biscuit base on day one, then the mousse and assembly on day two, with glazing on day three. The frozen bombs (unglazed) can be stored in an airtight container for up to 2 weeks. The glaze is best made fresh, but the individual components are very forgiving.
| Method | Container | Duration | Reheating Tip |
|---|---|---|---|
| Refrigerator | Airtight container, single layer | Up to 3 days | Serve straight from fridge; let sit 5 mins |
| Freezer (unglazed) | Airtight container, parchment between layers | Up to 2 weeks | Glaze directly from frozen, then refrigerate |
| Make-Ahead (glazed) | Covered tray in fridge | Up to 24 hours | Add garnishes just before serving |
If you’re storing glazed bombs in the fridge, place them in a single layer in an airtight container. The glaze can sweat if exposed to too much humidity, so I recommend adding a paper towel to the container (not touching the bombs) to absorb excess moisture. For the best texture, serve within 24 hours of glazing — the mousse stays perfectly creamy and the glaze remains glossy. If you need to store longer, keep the bombs unglazed in the freezer and glaze them the day you plan to serve. This edible gold dessert recipe is actually designed for that kind of flexibility.
Variations & Easy Swaps
| Variation | Key Change | Best For | Difficulty Impact |
|---|---|---|---|
| Mango & Passion Fruit | Replace peach with mango, raspberry with passion fruit | Tropical-themed parties | Same difficulty |
| Gluten-Free | Use gluten-free graham crackers or almond flour base | Gluten-sensitive guests | Same difficulty |
| Rose & Berry | Add 1 tsp rose water to mousse, use strawberry core | Elegant, floral twist | Same difficulty |
Mango & Passion Fruit Variation
This is my go-to summer variation when I’m feeling tropical. Replace the peach puree with mango puree (fresh or frozen) and the raspberry puree with strained passion fruit pulp. The core can be a passion fruit gelée — it’s tart and bright against the sweet mango mousse. A pinch of smoked paprika in the biscuit base adds a subtle warmth that echoes my Moroccan spice cabinet. The gold glaze works beautifully with the yellow-orange color palette.
Gluten-Free Version
I’ve tested this with gluten-free graham crackers and also with a simple almond flour base (1 cup almond flour + 2 tbsp melted butter + 1 tbsp maple syrup, baked at 350°F for 8 minutes). Both work beautifully. The almond flour base adds a slightly nuttier flavor that complements the peach and raspberry. If using store-bought gluten-free cookies, check that they’re not too sweet — you may need to reduce the sugar in the mousse slightly. This version is a hit at my NYC dinner parties where gluten-free guests always appreciate a dessert that doesn’t feel like a compromise.
Rose & Berry Twist
For a floral, elegant dessert, add 1 teaspoon of rose water to the mousse mixture along with the vanilla. Replace the raspberry core with a strawberry core (strained strawberry puree + sugar + lemon + gelatin). The combination of rose and strawberry is a classic in French patisserie. Garnish with crystallized rose petals and fresh strawberries. I learned this pairing during my time in Paris, where floral notes are used with restraint and precision. The result is a dessert that feels like a garden in bloom.
How do you achieve a smooth liquid gold mirror finish on dessert bombs?
The key to a flawless liquid gold mirror finish is temperature control and proper blending. First, ensure your glaze is cooled to exactly 90°F (32°C) — any hotter and it will melt the mousse, any cooler and it will thicken and not coat evenly. Use an immersion blender to incorporate the edible gold luster dust and smooth out any lumps, but do it gently to avoid creating bubbles. The dessert bombs themselves must be frozen solid — straight from the freezer. Pour the glaze in a steady stream starting from the center, letting it flow naturally over the sides. A wire rack over a baking sheet catches drips and allows for a clean, even coating. Finally, tap the rack gently to release any trapped air bubbles. This technique gives you that glassy, professional mirror finish every time.
Can I use frozen peaches and raspberries for the filling in these velvet bombs?
Absolutely! Frozen peaches and raspberries work beautifully in this recipe — in fact, I often use them when fresh fruit is out of season. For the peach puree, thaw frozen peaches, drain off any excess liquid (this is important to avoid a watery mousse), then blend until smooth. For the raspberry puree, thaw the berries and strain them through a fine-mesh sieve to remove seeds. One note: frozen fruit can be slightly more tart than fresh, so taste your puree before adding sugar and adjust if needed. The texture of the mousse and the raspberry core will be identical to using fresh fruit. Just make sure to use unsweetened frozen fruit so you can control the sweetness yourself.
What is the best way to store Peach Raspberry Velvet Bombs to keep the mirror glaze intact?
To keep the liquid gold mirror glaze pristine, store the glazed bombs in a single layer in an airtight container in the refrigerator. Place a paper towel inside the container (not touching the bombs) to absorb any excess humidity that could cause the glaze to sweat or become tacky. The bombs are best served within 24 hours of glazing. For longer storage, I recommend keeping the unglazed bombs frozen and glazing them on the day you plan to serve. If you need to move or transport the glazed bombs, chill them thoroughly first and use a container with a lid that doesn’t touch the tops. The glaze is surprisingly durable once fully set — it’s the humidity and condensation that can cause issues, so keep them cold and dry.
How far in advance can I make the liquid gold mirror glaze for these dessert bombs?
The liquid gold mirror glaze is best used fresh, but you can make it up to 2 days in advance. Store the prepared glaze in an airtight container in the refrigerator. When you’re ready to use it, gently reheat the glaze in a double boiler or in short bursts in the microwave (15-second intervals, stirring in between) until it reaches 90°F (32°C). You may need to add a teaspoon of warm water if the glaze has thickened too much. Use an immersion blender again to restore the glossy, smooth texture before pouring. I personally prefer making the glaze fresh on the day of glazing — it takes only about 15 minutes and guarantees the most vibrant shine and easiest application.
What type of white chocolate is best for the mirror glaze?
For a truly glossy liquid gold mirror finish, use a high-quality white chocolate couverture with at least 30% cocoa butter. Brands like Valrhona Ivoire, Callebaut, or Guittard are excellent choices. Avoid white chocolate chips or candy melts — they often contain stabilizers and lower cocoa butter content that can make the glaze grainy or dull. The cocoa butter is what gives the glaze that brilliant shine and smooth mouthfeel. If you’re using white chocolate bars from the grocery store, check the ingredients list: cocoa butter should be listed first or second. I’ve tested this with several brands, and the difference in the final finish is dramatic. Good white chocolate is worth the investment for this edible gold dessert recipe.
Can I make these bombs without a dome mold?
Yes, you can! If you don’t have dome molds, you can use a standard muffin tin or even small silicone cups. The shape will be more like a rounded muffin top rather than a perfect dome, but the flavors and textures will be exactly the same. For a more elegant presentation, you can also make this as a single large dome using a 6-inch round cake pan lined with plastic wrap. Layer the biscuit base on the bottom, then the mousse and raspberry core, and freeze as directed. After freezing, unmold and glaze the entire dome for a stunning centerpiece cake. The serving size will change — one large dome serves about 10-12 people. I’ve made it this way for birthday parties and it’s always a hit.
Why did the mousse not set properly?
There are a few common reasons why the mousse might not set. First, make sure your gelatin is properly bloomed — sprinkle it evenly over cold water and let it sit for exactly 5 minutes until it becomes a firm, jelly-like mass. If the water is too warm, the gelatin won’t bloom correctly and will lose its setting power. Second, when dissolving the bloomed gelatin into the cream, warm the cream only until it’s hot to the touch (about 140°F) — boiling can degrade the gelatin. Third, ensure your cream cheese is fully softened to room temperature so it blends smoothly. Finally, the mousse needs at least 6 hours in the freezer to set completely. If you’ve followed these steps and it’s still soft, you may have used too little gelatin or over-whipped the cream, which can cause the structure to break down.
Can I skip the raspberry core and just make a simpler version?
Absolutely! The raspberry core adds a lovely burst of concentrated fruit flavor, but the Peach Raspberry Velvet Bombs are still delicious without it. For a simpler version, simply fill the dome molds completely with the peach-raspberry mousse (skip the core step). The texture will be more uniform, and the dessert will still have plenty of fruit flavor from the mousse itself. If you want to keep the surprise element but with less effort, you can place a fresh raspberry or a small piece of peach into the center of each bomb before freezing — no need to make a separate gelée. This streamlined version cuts about 20 minutes of active prep and 2 hours of freezing time. It’s a great option for weeknight dinner parties!
Share Your Version!
I absolutely love seeing how you make these Peach Raspberry Velvet Bombs your own. Leave a star rating and a comment below — tell me what variation you tried, how the glaze turned out, or any questions you have about the process. Your feedback helps me create better recipes and also helps other readers who might be trying this for the first time. Did you go for the tropical mango version? The floral rose twist? Or maybe you invented something entirely new — I’d love to hear about it!
Snap a photo of your golden beauties and tag me on Instagram or Pinterest @leosfoods — I feature reader creations on my stories every weekend. And if you’re wondering whether this liquid gold mirror finish recipe is as magical as it looks, just wait until you see your own photos. Trust me, you’ll be amazed at what you’re capable of. From my NYC kitchen to yours — I hope this recipe brings as much warmth to your table as it does to mine. — Stella 🧡
Love This Recipe? Save It to Pinterest!
If you enjoyed this Peach Raspberry Velvet Bombs with Liquid Gold Mirror Finish recipe, don’t let it get lost in your browser tabs! 😄 Pin it now so you can find it again anytime — and explore hundreds more tried-and-tested recipes waiting for you on my Pinterest boards.
👉 Follow Stella on Pinterest @stellarecipeblog
📌 Pin this recipe · 🔁 Re-pin your favorites · 💬 Tag me when you make it — I love seeing your creations!
⭐ Made This Recipe? Let Me Know!
Drop a star rating below, leave a comment, or share your photo on Instagram — tag @leosfoods so I can cheer you on! 🧡
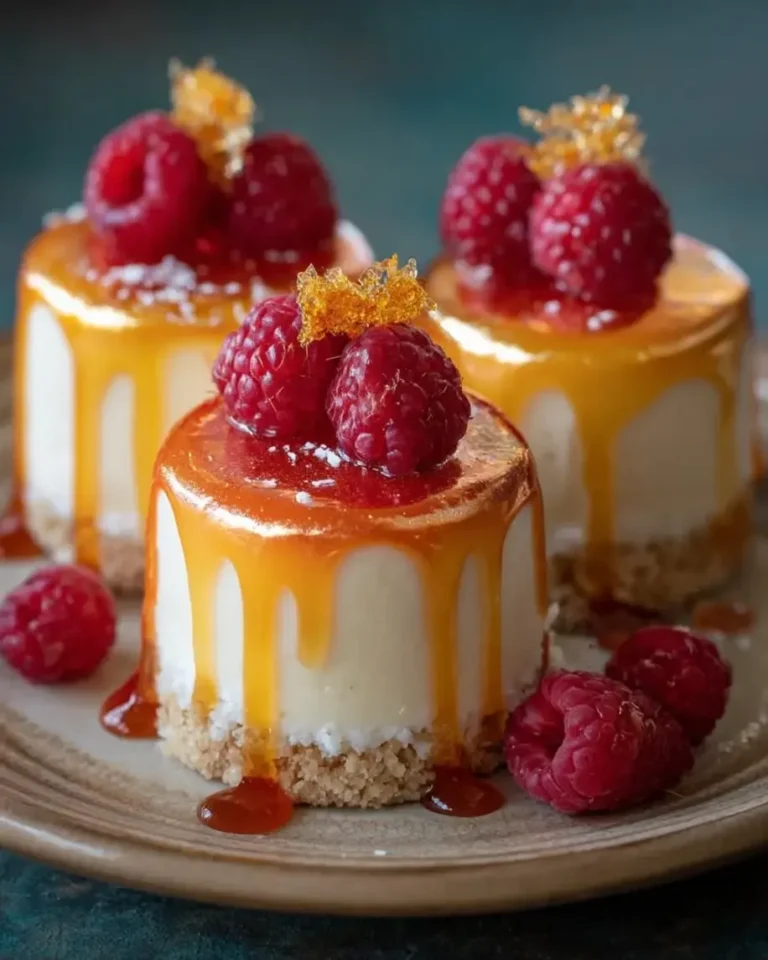
Peach Raspberry Velvet Bombs with Liquid Gold Mirror Finish
Decadent dome-shaped desserts featuring a creamy peach-raspberry mousse with a tangy raspberry core, a crisp biscuit base, and a stunning liquid gold mirror glaze.
- Yield: 8 1x
Ingredients
- For the Peach Raspberry Velvet Mousse:
- 1 cup peach puree
- 3/4 cup raspberry puree
- 8 oz cream cheese, softened
- 1 cup heavy cream
- 1/2 cup granulated sugar
- 1 tsp vanilla extract
- 2 tsp powdered gelatin
- 3 tbsp cold water
- For the Raspberry Core:
- 3/4 cup raspberry puree
- 2 tbsp granulated sugar
- 1 tsp lemon juice
- 1 tsp powdered gelatin
- 1 tbsp cold water
- For the Biscuit Base:
- 1 cup digestive biscuits, finely crushed
- 3 tbsp melted butter
- For the Liquid Gold Mirror Finish:
- 1 cup granulated sugar
- 1/2 cup water
- 1/2 cup sweetened condensed milk
- 1 cup white chocolate, finely chopped
- 1 tbsp powdered gelatin
- 3 tbsp cold water
- 1 tsp clear vanilla extract
- 1 1/2 tsp edible gold luster dust
- For Garnish (optional):
- Fresh raspberries
- Peach slices
- Edible gold flakes
Instructions
- 1. Mix crushed biscuits with melted butter and press into dome molds as a thin base layer. Chill for 15 minutes.
- 2. Bloom gelatin for the raspberry core in cold water for 5 minutes.
- 3. Heat raspberry puree, sugar, and lemon juice until warm.
- 4. Stir in gelatin until dissolved and pour into small silicone inserts.
- 5. Freeze until firm.
- 6. Bloom gelatin for the mousse in cold water for 5 minutes.
- 7. Beat cream cheese, peach puree, raspberry puree, sugar, and vanilla extract until smooth.
- 8. Warm a small portion of the cream and dissolve the gelatin, then mix into the fruit mixture.
- 9. Whip the remaining cream to soft peaks and fold into the mixture.
- 10. Fill dome molds halfway with mousse.
- 11. Place a frozen raspberry core into the center of each mold.
- 12. Cover with remaining mousse and smooth the tops.
- 13. Freeze for at least 6 hours or until completely firm.
- 14. Bloom gelatin for the mirror finish in cold water.
- 15. Heat sugar, water, and condensed milk until steaming.
- 16. Remove from heat and stir in gelatin and white chocolate until smooth.
- 17. Add vanilla extract and gold luster dust, then blend until glossy.
- 18. Cool glaze to about 90°F (32°C).
- 19. Unmold frozen bombs and place on a wire rack.
- 20. Pour the liquid gold mirror finish evenly over each bomb until fully coated.
- 21. Refrigerate for 30 minutes before serving.
- 22. Garnish with fresh raspberries, peach slices, and gold flakes.
Nutrition
- Calories: 355
- Sugar: 35g
- Fat: 20g
- Carbohydrates: 40g
- Protein: 4g
Tried This Recipe? Leave a Comment!
Did you make this recipe? I’d love to hear how it turned out! Please leave a comment and a rating below. Your feedback helps other home cooks and supports cheerychop.com!
For more delicious inspiration, follow me on Pinterest!