Diamond Pistachio Cheesecake Domes with Crystal Glaze
“`html
Table of Contents
Diamond Pistachio Cheesecake Domes with Crystal Glaze – A Star-Spangled Dessert
I still remember the first time I saw a mirrored glaze dome in a Parisian pâtisserie window—it was like looking at a jewel. I stood there, nose pressed to the glass, watching the light dance across that perfect, glossy surface. Years later, after training at Le Cordon Bleu and settling into my NYC kitchen, I knew I had to create my own version. These Diamond Pistachio Cheesecake Domes with Crystal Glaze are that dream realized: a no-bake pistachio cheesecake dome with a graham cracker crust, wrapped in a shimmering, mirror-like pistachio glaze that feels truly special. The best part? Despite the stunning look, the technique is absolutely achievable at home.
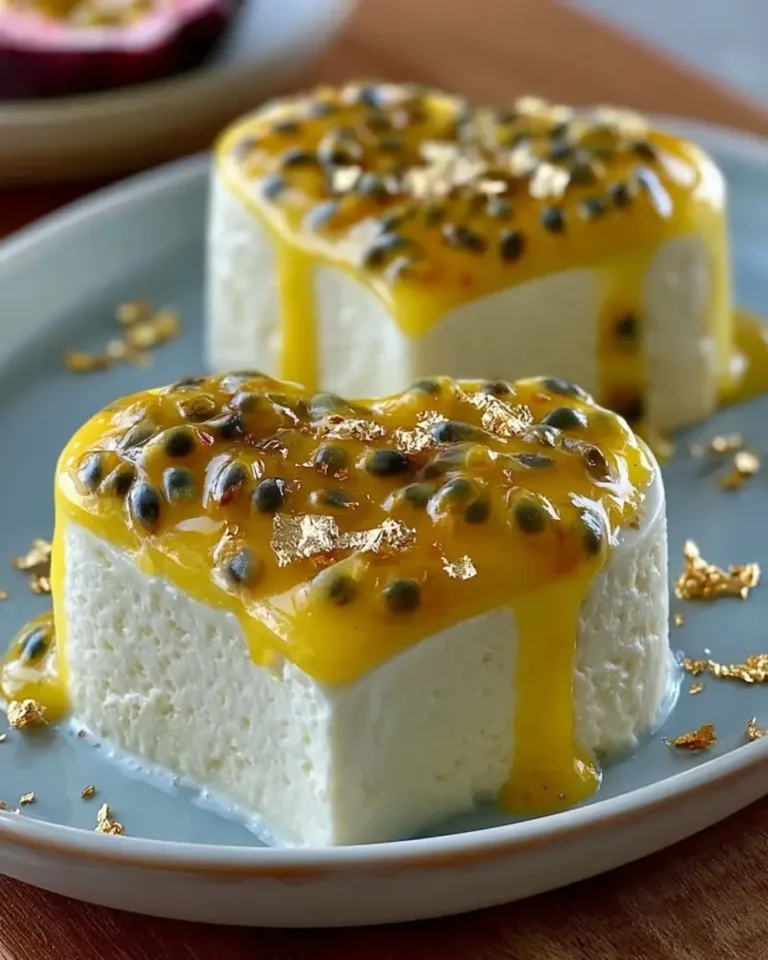
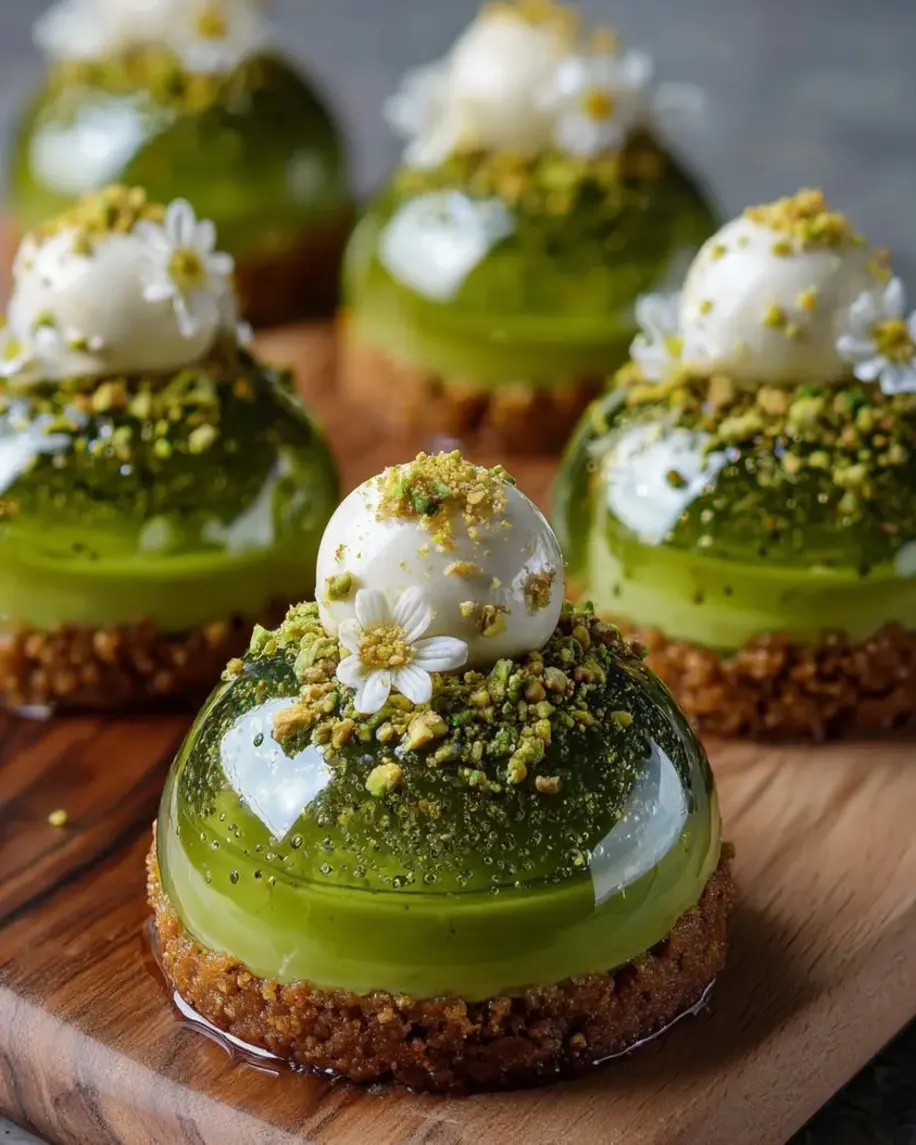
When you break through that crystal-clear glaze with your spoon, you’re met with a creamy, velvety pistachio cheesecake that’s both light and indulgent. The pistachio paste I use—imported from Sicily—gives the whole thing a warm, nutty, almost floral undertone that reminds me of the almond pastries my mother used to make in Morocco. The graham cracker base adds just the right amount of buttery crunch, and the crushed pistachios and white chocolate shavings on top give it a beautiful texture contrast. It’s a dessert that tastes as luxurious as it looks.
I’ve tested this recipe more times than I can count, and I’ve streamlined every step to make it foolproof. The key is the crystal glaze technique—getting that gelatin-to-sugar ratio just right so you get a smooth, shiny finish every time. In this post, I’ll share my pro tip for avoiding bubbles in the glaze and a common mistake that can make your dome look cloudy instead of clear. Whether you’re making these for a dinner party, a holiday gathering, or just because you deserve something beautiful, I promise these domes will deliver. Let’s get started!
Why This Pistachio Cheesecake Domes Recipe Is the Best
The flavor secret here is the pistachio paste—not pistachio extract or almond extract, but real, concentrated pistachio paste. I source mine from a specialty shop near Union Square, but you can find it online or at well-stocked grocery stores. It gives the cheesecake a deep, authentic nuttiness that you just can’t get from extracts. My French pastry training taught me to let the primary ingredient shine, and that’s exactly what we’re doing here. A pinch of salt and a touch of mascarpone round out the flavor and add a subtle tang that keeps every bite interesting.
Texture is everything in a dome dessert. The cheesecake filling strikes that perfect balance between rich and airy—thanks to the combination of cream cheese, mascarpone, and whipped cream. I use gelatin to stabilize the mixture so it holds its shape beautifully when unmolded, but without becoming rubbery. The graham cracker base is pressed firmly into the silicone molds and stays perfectly crisp even after freezing. And the glaze? It sets into a thin, glass-like shell that cracks open with the most satisfying sound. It’s a textural journey from glossy to creamy to crunchy.
This recipe is designed to be beginner-friendly despite its elegant appearance. There’s no baking involved—just mixing, chilling, and glazing. The most advanced technique is blooming gelatin, and I’ll walk you through that step by step. I’ve also included make-ahead instructions so you can prep the domes days in advance and glaze them right before serving. If you’ve ever been intimidated by mirror glazes or dome desserts, this is the recipe that will make you feel like a pro. 💡 Stella’s Pro Tip: Read through the entire recipe before starting—gelatin work moves quickly, and being prepared makes all the difference.
Pistachio Cheesecake Domes Ingredients
I picked up the pistachio paste at Eataly in the Flatiron district—their Sicilian selection is unmatched—and the mascarpone comes from a small dairy upstate that I discovered at the Union Square Greenmarket. Every ingredient here is chosen to make these pistachio cheesecake domes taste like a million bucks, and I’ll show you exactly how each one works.
Ingredients List
For the Pistachio Cheesecake Domes:
- 12 oz cream cheese, softened
- 1/2 cup mascarpone cheese
- 1/2 cup heavy cream
- 1/3 cup granulated sugar
- 1 tsp vanilla extract
- 1/2 cup pistachio paste
- 2 tsp gelatin powder
- 2 tbsp cold water
- Pinch of salt
For the Biscuit Base:
- 1 cup graham cracker crumbs
- 3 tbsp melted butter
- 1 tbsp sugar
- 1/2 tsp cinnamon
For the Crystal Pistachio Glaze:
- 1 cup granulated sugar
- 1/2 cup water
- 1/2 cup light corn syrup
- 1 tbsp gelatin powder
- 3 tbsp cold water
- 1 tbsp pistachio paste
- 1 tsp vanilla extract
- 1 tbsp coconut oil
For Garnish (optional):
- 2 tbsp crushed pistachios
- 1 tbsp white chocolate shavings
- Pinch of edible gold dust
Ingredient Spotlight
Pistachio Paste: This is the heart of the recipe. Look for 100% pure pistachio paste with no added sugar or oils. It’s available at specialty stores, Italian markets, or online. A good substitute is homemade pistachio paste: blanch shelled pistachios, then blend with a neutral oil until smooth. The flavor won’t be quite as concentrated, but it works beautifully.
Mascarpone: This Italian cream cheese adds a luxurious richness and a slightly tangy edge. It’s softer and more buttery than American cream cheese, and it helps create that velvety texture. You can substitute with equal parts cream cheese and a splash of heavy cream, but I really recommend using the real thing for the best result.
Gelatin: Both the cheesecake filling and the glaze rely on gelatin for structure and shine. I use powdered gelatin (Knox is my go-to) and bloom it in cold water before dissolving. Never substitute with agar-agar directly—the ratios are completely different and the texture won’t be the same.
Light Corn Syrup: This is non-negotiable for the crystal glaze. It prevents the sugar from crystallizing and gives the glaze that glass-like transparency. You can substitute with glucose syrup or honey, but honey will add its own flavor and may darken the glaze slightly.
| Original Ingredient | Best Substitution | Flavor / Texture Impact |
|---|---|---|
| Pistachio Paste | Homemade pistachio paste (blanched pistachios + oil) | Less concentrated, slightly grainier — still delicious |
| Mascarpone | Cream cheese + 2 tbsp heavy cream | Slightly tangier, less buttery — still creamy |
| Light Corn Syrup | Glucose syrup or honey (may darken glaze) | Glucose works same; honey adds flavor & slight color shift |
| Graham Crackers | Biscoff cookies or vanilla wafers | Sweeter, spicier — delicious with pistachio |
How to Make Diamond Pistachio Cheesecake Domes — Step-by-Step
Making these domes is easier than you think — just follow along and don’t rush the chilling steps. I’ll be right here with you through every stage.
Step 1: Bloom the Gelatin
In a small bowl, sprinkle 2 tsp gelatin powder over 2 tbsp cold water. Let it sit for 5 minutes until it becomes a firm, jiggly mass. This is called blooming, and it ensures the gelatin dissolves smoothly without clumps.
⚠️ Common Mistake to Avoid: Don’t skip the blooming step. Adding gelatin powder directly to the cream cheese mixture will result in grainy, lumpy spots that never fully dissolve.
Step 2: Make the Biscuit Base
In a mixing bowl, combine 1 cup graham cracker crumbs, 3 tbsp melted butter, 1 tbsp sugar, and 1/2 tsp cinnamon. Stir with a fork until the mixture looks like wet sand. Firmly press about 1 1/2 tablespoons of the mixture into the bottom of each silicone dome mold, using a small glass or your fingers to pack it tight.
💡 Stella’s Pro Tip: Use a measuring spoon or a tamper to press the base firmly. A loose base will fall apart when you unmold the domes.
Step 3: Make the Cheesecake Filling
In a large mixing bowl, beat 12 oz softened cream cheese, 1/2 cup mascarpone, 1/2 cup heavy cream, 1/3 cup sugar, 1 tsp vanilla, 1/2 cup pistachio paste, and a pinch of salt. Beat on medium speed for 2–3 minutes until the mixture is completely smooth, light, and fluffy. Scrape the bowl well.
⚠️ Common Mistake to Avoid: Over-beating can incorporate too much air and cause cracks later. Beat just until smooth and fluffy — about 2 minutes at medium speed.
Step 4: Dissolve and Fold the Gelatin
Scoop out about 1/4 cup of the cheesecake mixture into a small microwave-safe bowl. Heat it in the microwave for 10–15 seconds until warm but not hot. Add the bloomed gelatin and stir until completely dissolved. Then fold this gelatin mixture back into the main cheesecake filling, mixing gently until fully incorporated.
💡 Stella’s Pro Tip: Warming a small portion of the filling to dissolve the gelatin is safer than heating the whole batch. It ensures the gelatin distributes evenly without curdling the mascarpone.
Step 5: Fill and Freeze
Divide the cheesecake filling evenly among the molds, spooning it over the biscuit base. Smooth the tops with a small offset spatula. Transfer the molds to a baking sheet and freeze for at least 4 hours, or overnight. The domes must be fully frozen before glazing.
⚠️ Common Mistake to Avoid: Don’t rush the freezing step. If the domes aren’t completely solid, the glaze will be too warm and will melt the cheesecake, resulting in a messy, uneven surface.
Step 6: Make the Crystal Glaze
In a small saucepan, combine 1 cup sugar, 1/2 cup water, and 1/2 cup light corn syrup. Heat over medium heat, stirring gently, until the sugar is fully dissolved and the liquid is clear. Do not boil vigorously — just bring it to a gentle simmer. Remove from heat and stir in 1 tbsp bloomed gelatin (bloomed separately in 3 tbsp cold water), 1 tbsp pistachio paste, 1 tsp vanilla, and 1 tbsp coconut oil. Stir until completely smooth.
💡 Stella’s Pro Tip: Strain the glaze through a fine-mesh sieve to remove any undissolved gelatin or pistachio bits. This is the secret to a perfectly smooth, mirror-like finish.
Step 7: Cool the Glaze
Let the glaze cool at room temperature, stirring occasionally, until it reaches about 90°F (32°C) — it should be slightly thick but still pourable, like warm honey. If it gets too thick, you can gently reheat it in 5-second bursts in the microwave.
⚠️ Common Mistake to Avoid: Glaze that is too hot will melt the frozen domes; glaze that is too cold will thicken and not flow smoothly. Test the temperature on your wrist — it should feel warm, not hot.
Step 8: Glaze the Domes
Unmold the frozen domes and place them on a wire rack set over a baking sheet. Working one at a time, pour the crystal glaze evenly over each dome, starting from the top and letting it flow down the sides. Allow the excess to drip off completely before transferring to a serving plate.
💡 Stella’s Pro Tip: Hold the dome with a fork or a small spatula while glazing to keep your fingers clean. Work quickly — the glaze sets fast once it hits the cold surface.
Step 9: Chill and Garnish
Transfer the glazed domes to serving plates and refrigerate for at least 20 minutes to allow the glaze to fully set. Just before serving, garnish with crushed pistachios, white chocolate shavings, and a pinch of edible gold dust for that diamond-like sparkle.
⚠️ Common Mistake to Avoid: Don’t garnish immediately after glazing — the toppings will slide off. Wait for the glaze to set, then sprinkle on the garnishes.
| Step | Action | Duration | Key Visual Cue |
|---|---|---|---|
| 1 | Bloom gelatin | 5 mins | Firm, jiggly mass |
| 2 | Press base into molds | 5 mins | Firm, compacted layer |
| 3 | Whip cheesecake filling | 3 mins | Smooth, fluffy, pale green |
| 4 | Fold in gelatin | 1 min | Uniformly mixed, no streaks |
| 5 | Freeze domes | 4+ hrs | Solid to the touch, no give |
| 6 | Make glaze | 10 mins | Clear, glossy liquid |
| 7 | Cool glaze | 10–15 mins | Warm honey consistency |
| 8 | Glaze domes | 5 mins | Smooth, even coating |
| 9 | Chill & garnish | 20 mins | Set glaze, garnishes stick |
Serving & Presentation
These domes are showstoppers, so let them shine. Place each glazed dome on a small dessert plate or a slate board. I like to add a tiny dollop of whipped cream or a few extra crushed pistachios on the plate for color contrast. The edible gold dust is optional, but it really catches the light and gives that diamond effect. Serve the domes straight from the refrigerator—they’re best cold, when the filling is firm but still creamy and the glaze is perfectly set.
In my NYC apartment, I often serve these after a dinner party when I want to end the meal with something unforgettable. They pair beautifully with a strong espresso (my French training insists on it) or a glass of cold-brew coffee. For a special occasion, a dessert wine like Moscato d’Asti or a late-harvest Riesling complements the pistachio flavor beautifully. If you’re serving a crowd, you can arrange the domes on a large platter with fresh mint leaves and white chocolate curls—it looks like a jewelry display.
The garnishes aren’t just decorative—they add texture and flavor. The crushed pistachios bring back that nutty crunch, the white chocolate shavings add a sweet, creamy note, and the gold dust makes it feel like a celebration. I sometimes add a tiny sprinkle of flaky sea salt on top to balance the sweetness, a trick I picked up from a pastry chef in Paris.
| Pairing Type | Suggestions | Why It Works |
|---|---|---|
| Side Dish | Fresh berries, citrus salad, mint leaves | Bright acidity cuts through richness |
| Sauce / Dip | Raspberry coulis, salted caramel, chocolate ganache | Fruity or caramel notes complement pistachio |
| Beverage | Espresso, cold brew, Moscato d’Asti, late-harvest Riesling | Coffee enhances nuttiness; wine adds sweetness |
| Garnish | Crushed pistachios, white chocolate shavings, edible gold dust, flaky sea salt | Texture contrast + visual sparkle |
Make-Ahead, Storage & Reheating
One of the best things about these Diamond Pistachio Cheesecake Domes is how well they work for busy schedules. I often make the full recipe through Step 5 (freezing the domes) up to a week in advance, then glaze them the day I plan to serve. This makes them perfect for holiday entertaining or dinner parties when you want to minimize last-minute work. Just keep the frozen domes in an airtight container so they don’t absorb freezer odors.
| Method | Container | Duration | Reheating Tip |
|---|---|---|---|
| Refrigerator | Airtight container in single layer | Up to 3 days (glazed) | Serve cold — no reheating needed |
| Freezer | Airtight container, wax paper between layers | Up to 2 months (unglazed) | Thaw in fridge 2 hrs, then glaze |
| Make-Ahead | Freeze in molds, then pop out and wrap | Up to 1 week (unglazed) | Glaze directly from freezer — no thawing |
If you’re storing glazed domes in the refrigerator, place them on a plate and cover loosely with plastic wrap — don’t seal tightly or the glaze might sweat. They’ll stay beautiful for up to 3 days, though the glaze will lose a bit of its mirror shine after 24 hours. For the absolute best presentation, I recommend glazing within 4–6 hours of serving. And if you have leftovers (rare in my house!), they’re still delicious the next day — the flavor actually deepens as the pistachio and mascarpone meld together overnight.
Variations & Easy Swaps
| Variation | Key Change | Best For | Difficulty Impact |
|---|---|---|---|
| Almond or Hazelnut Version | Replace pistachio paste with almond or hazelnut paste | Nut allergy preferences or different flavor profile | Same difficulty |
| Gluten-Free Base | Use gluten-free graham crackers or almond flour crust | Gluten-sensitive guests | Same difficulty |
| Rose-Pistachio Fusion | Add 1/2 tsp rose water to filling and glaze | Middle Eastern-inspired flavor twist | Same difficulty |
Almond or Hazelnut Version
If you want to explore different nut flavors, this recipe adapts beautifully. Swap the pistachio paste for high-quality almond or hazelnut paste (available at most specialty stores). The texture remains identical, and the flavor becomes more delicate with almond or deeper, toastier with hazelnut. I love a hazelnut version with a chocolate glaze instead of the crystal glaze — it feels like a fancy Nutella dessert. Just be aware that different nut pastes have varying sweetness levels, so taste the filling before adding the full amount of sugar.
Gluten-Free Base Option
For a gluten-free version, simply substitute the graham cracker crumbs with gluten-free graham crackers or use a mixture of almond flour, melted butter, and a touch of honey. Press the mixture into the molds just as you would the regular base. The almond flour version is actually my personal favorite — it adds an extra layer of nutty flavor that complements the pistachio beautifully. I tested this with my gluten-sensitive friends in NYC, and they couldn’t tell the difference. Just make sure your almond flour is finely ground for the best texture.
Rose-Pistachio Fusion
This variation is inspired by the flavors of my Moroccan childhood, where rose and pistachio are a classic combination. Add 1/2 teaspoon of food-grade rose water to both the cheesecake filling and the glaze. The floral note lifts the pistachio flavor and makes the dessert taste even more elegant. I found rose water at a Middle Eastern market in Brooklyn, but it’s also available at Whole Foods or online. Garnish with a few dried rose petals along with the pistachios for a stunning presentation. The rose water should be subtle — you want a whisper, not a shout.
What is the best way to achieve a smooth and shiny crystal glaze for cheesecake domes?
The key to a perfectly smooth and shiny crystal glaze is all in the technique. First, make sure your gelatin is fully bloomed in cold water before using — this prevents lumps. When heating the sugar, water, and corn syrup, stir gently and avoid vigorous boiling, which can create bubbles. After adding the gelatin and other ingredients, strain the entire glaze through a fine-mesh sieve to catch any undissolved bits or air bubbles. Let the glaze cool to about 90°F (warm to the touch but not hot) before pouring. Finally, make sure your cheesecake domes are fully frozen — the cold surface helps the glaze set quickly and evenly, giving you that mirror-like finish.
Can I use a different type of nut instead of pistachio in this diamond cheesecake recipe?
Absolutely! This recipe is very adaptable. You can substitute the pistachio paste with almond paste, hazelnut paste, or even walnut paste. Each will give the cheesecake a completely different personality — almond makes it lighter and more delicate, hazelnut gives it a deep, toasty richness, and walnut adds a slightly bitter, earthy note. Just keep in mind that different nut pastes have different sweetness levels and moisture contents. I recommend starting with the same amount (1/2 cup) and adjusting to taste. If you’re using a homemade nut paste, make sure it’s very smooth so the filling stays creamy.
How far in advance can I prepare diamond pistachio cheesecake domes before serving?
You can prepare these domes several days in advance, which makes them perfect for entertaining. The unglazed frozen domes can be made up to 2 months ahead — just keep them in an airtight container in the freezer with wax paper between layers. When you’re ready to serve, you can glaze them directly from the freezer without thawing. If you want to glaze them in advance, glazed domes keep well in the refrigerator for up to 3 days in an airtight container. However, the mirror shine of the glaze will be at its absolute best within the first 24 hours. For the most stunning presentation, I recommend glazing the morning of your event or the night before at most.
What is the ideal baking time and temperature for the pistachio cheesecake base in these domes?
This is a no-bake cheesecake recipe, so there’s no baking required for the cheesecake base! The graham cracker crust is pressed directly into the silicone molds and then frozen along with the filling. The cheesecake filling sets in the freezer thanks to gelatin, not heat. This is actually one of the reasons I love this recipe — it’s incredibly forgiving and doesn’t require any oven time. The only “cooking” involved is heating the glaze ingredients on the stovetop for about 5 minutes. If you’re looking for a baked pistachio cheesecake recipe, that would be a different method entirely, but for these domes, freezing is the way to go.
Can I make these cheesecake domes without a silicone mold?
Yes, you can, though silicone dome molds give you the most professional-looking result. If you don’t have dome molds, you can use a muffin tin lined with plastic wrap — press the graham cracker base into the bottom, then fill with cheesecake mixture and freeze. Once frozen, you can use the plastic wrap to lift out the dome-shaped portions. Another option is to use small glass bowls or ramekins lined with plastic wrap, though the shape will be more rounded than a true dome. The key is to make sure whatever vessel you use allows for easy removal once frozen. Silicone molds are inexpensive online and worth the investment if you plan to make domes regularly.
What is pistachio paste and where can I find it?
Pistachio paste is a smooth, concentrated paste made from finely ground pistachios, often with a touch of oil to achieve a spreadable consistency. It’s different from pistachio butter (which is coarser) and pistachio extract (which is artificial). You can find it at Italian specialty markets, gourmet grocery stores, or online retailers. In NYC, I buy mine at Eataly or Buon Italia in Chelsea Market. The most common brands are Sicilian (like Regalati or Agrimontana) and are made from Sicilian pistachios, which have a vibrant green color and intense flavor. Store it in the refrigerator after opening, and it will last for months.
How do I get the perfect dome shape for these cheesecakes?
Achieving a perfect dome shape starts with the right mold and proper filling technique. Use silicone dome molds that are at least 2 inches in diameter — they’re flexible and release the frozen domes easily. When filling, press the graham cracker base firmly and evenly into the bottom, then spoon the cheesecake filling on top and smooth it flush with the rim. Freeze the domes for at least 4 hours, ideally overnight. The domes must be fully frozen before unmolding — if they’re even slightly soft, they can lose their shape. To unmold, gently flex the silicone mold and push from the bottom. If a dome sticks, let it sit at room temperature for 30 seconds and try again.
Can I use a different type of cheese instead of mascarpone?
Mascarpone gives the filling a silky, buttery texture and a subtle tang that balances the sweetness. If you can’t find mascarpone, you can substitute it with an equal amount of softened cream cheese plus 2 tablespoons of heavy cream — this will approximate the richness and texture. Another option is to use full-fat Greek yogurt (strained overnight to remove excess liquid), which will add a tangier, lighter texture. For a dairy-free version, you can use a high-quality vegan cream cheese, but the texture will be slightly less creamy and the flavor will be different. I always recommend using mascarpone if possible — it truly elevates the dessert.
Why did my crystal glaze turn out cloudy instead of clear?
A cloudy glaze is usually caused by one of three things: undissolved gelatin, air bubbles, or the glaze being too cold when poured. First, make sure your gelatin is fully bloomed and then completely dissolved in the warm liquid — any undissolved particles will scatter light and create cloudiness. Second, avoid whisking vigorously, which incorporates air bubbles. Instead, stir gently with a spatula. Finally, the glaze needs to be at the right temperature — about 90°F, or warm honey consistency. If it’s too cool, the sugar can recrystallize and cause cloudiness. Straining the glaze through a fine-mesh sieve before pouring is your best insurance policy for a crystal-clear finish.
Can I add food coloring to the glaze for a different color?
Absolutely! The crystal glaze is a beautiful base for custom colors. If you want a different color, add a few drops of gel food coloring (not liquid, which can alter the consistency) after dissolving the gelatin and other ingredients. For a pastel pink, add a tiny drop of pink gel; for a vibrant green to enhance the pistachio color, add a drop of green gel. Keep in mind that the pistachio paste already gives the glaze a pale green tint, so account for that when adding color. I’ve made these domes in pale pink for Valentine’s Day and in deep emerald green for Christmas — both looked stunning. Just add the color slowly and stir until evenly distributed.
Share Your Version!
I absolutely love seeing how you make these Diamond Pistachio Cheesecake Domes your own. Did you try the rose-pistachio variation? Or maybe you went with a hazelnut twist? Drop a star rating and a comment below to let me know how it turned out — your feedback helps other home cooks feel confident trying this recipe for themselves. If you run into any tricky spots, just ask; I read every comment and I’m here to help.
Snap a photo of your beautiful domes and share it on Instagram or Pinterest — tag @leosfoods so I can see your creation and feature it in my stories. I’m especially curious: what garnish combination did you choose? Did you go all-out with the gold dust, or did you keep it simple with just crushed pistachios? There’s no wrong answer, and I can’t wait to see what you come up with. From my NYC kitchen to yours — I hope this recipe brings as much warmth to your table as it does to mine. — Stella 🧡
Love This Recipe? Save It to Pinterest!
If you enjoyed this Diamond Pistachio Cheesecake Domes recipe, don’t let it get lost in your browser tabs! 😄 Pin it now so you can find it again anytime — and explore hundreds more tried-and-tested recipes waiting for you on my Pinterest boards.
👉 Follow Stella on Pinterest @stellarecipeblog
📌 Pin this recipe · 🔁 Re-pin your favorites · 💬 Tag me when you make it — I love seeing your creations!
⭐ Did you make this recipe?
I’d love to hear how it went! Leave a star rating in the comments, share a photo on Instagram with @leosfoods, or save it to Pinterest for later.
Your feedback helps me create better recipes for our community — thank you! 🙏
“`
Print
Diamond Pistachio Cheesecake Domes with Crystal Glaze
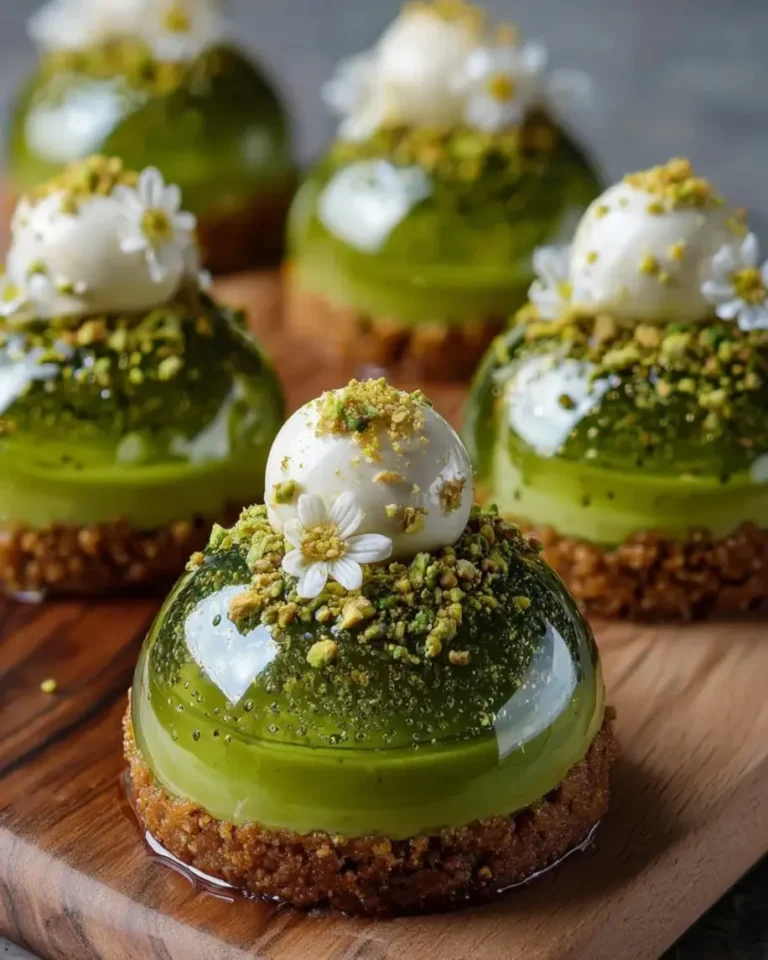
Elegant individual cheesecake domes with a pistachio flavor, a graham cracker base, and a glossy crystal glaze, garnished with crushed pistachios, white chocolate shavings, and edible gold dust.
- Yield: 6 1x
Ingredients
- For the Pistachio Cheesecake Domes:
- 12 oz cream cheese, softened
- 1/2 cup mascarpone cheese
- 1/2 cup heavy cream
- 1/3 cup granulated sugar
- 1 tsp vanilla extract
- 1/2 cup pistachio paste
- 2 tsp gelatin powder
- 2 tbsp cold water
- Pinch of salt
- For the Biscuit Base:
- 1 cup graham cracker crumbs
- 3 tbsp melted butter
- 1 tbsp sugar
- 1/2 tsp cinnamon
- For the Crystal Pistachio Glaze:
- 1 cup granulated sugar
- 1/2 cup water
- 1/2 cup light corn syrup
- 1 tbsp gelatin powder
- 3 tbsp cold water
- 1 tbsp pistachio paste
- 1 tsp vanilla extract
- 1 tbsp coconut oil
- For Garnish (optional):
- 2 tbsp crushed pistachios
- 1 tbsp white chocolate shavings
- Pinch of edible gold dust
Instructions
- Bloom gelatin in cold water for 5 minutes.
- Mix graham cracker crumbs, melted butter, sugar, and cinnamon until evenly combined. Press firmly into silicone dome molds as the base layer.
- Whip cream cheese, mascarpone, heavy cream, sugar, vanilla, pistachio paste, and salt until smooth and fluffy.
- Warm a small portion of the mixture and dissolve the bloomed gelatin, then fold it back into the full mixture.
- Fill molds over the biscuit base and smooth the tops. Freeze for at least 4 hours until fully set.
- For the glaze, bloom gelatin in cold water for 5 minutes.
- Heat sugar, water, and corn syrup until fully dissolved and clear. Remove from heat and stir in gelatin, pistachio paste, vanilla extract, and coconut oil until glossy.
- Allow glaze to cool until slightly thick but still pourable.
- Unmold frozen domes and place on a wire rack. Pour the crystal pistachio glaze evenly over each dome, allowing excess to drip off.
- Transfer to serving plates and chill for 20 minutes before serving.
- Finish with crushed pistachios, white chocolate shavings, and edible gold dust.
Nutrition
- Calories: 450
- Sugar: 30g
- Fat: 31g
- Carbohydrates: 38g
- Protein: 7g
Tried This Recipe? Leave a Comment!
Did you make this recipe? I’d love to hear how it turned out! Please leave a comment and a rating below. Your feedback helps other home cooks and supports cheerychop.com!
For more delicious inspiration, follow me on Pinterest!