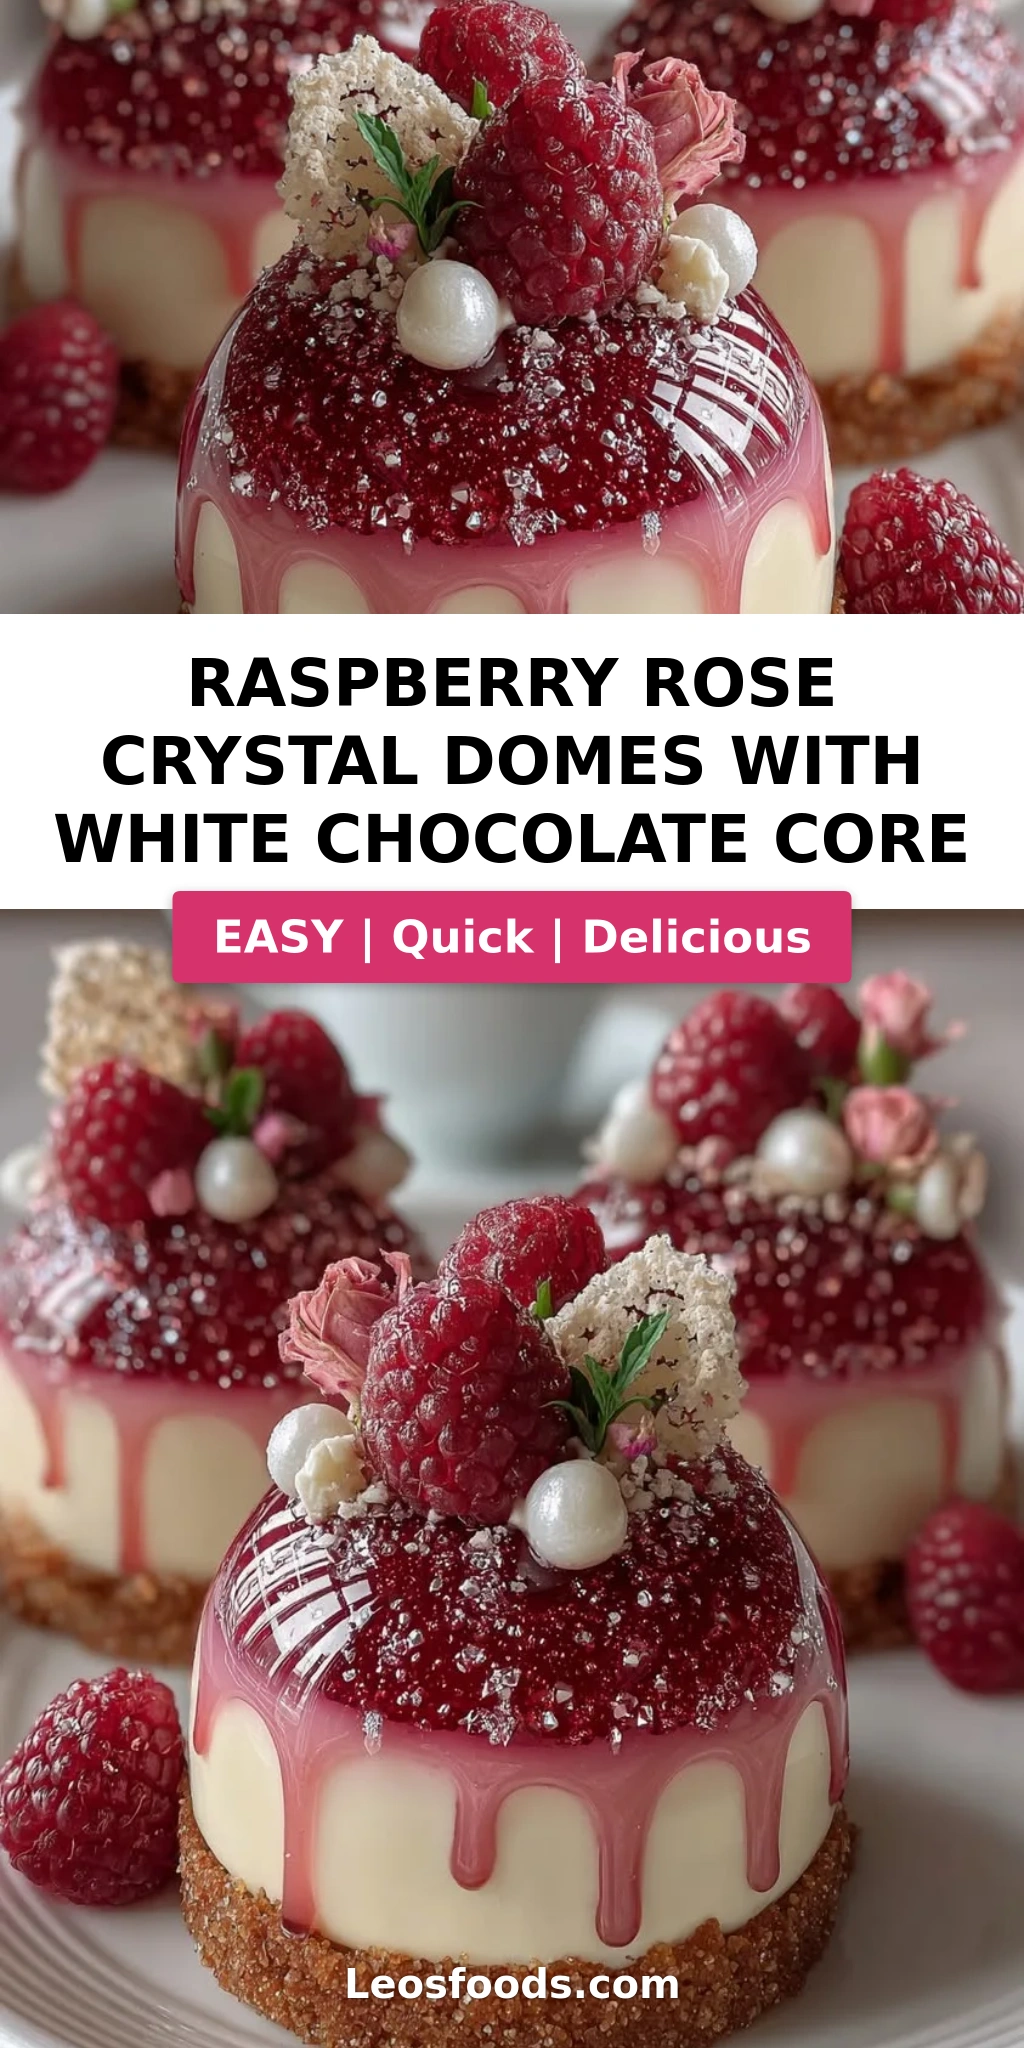
Raspberry Rose Crystal Domes with White Chocolate Core

Table of Contents
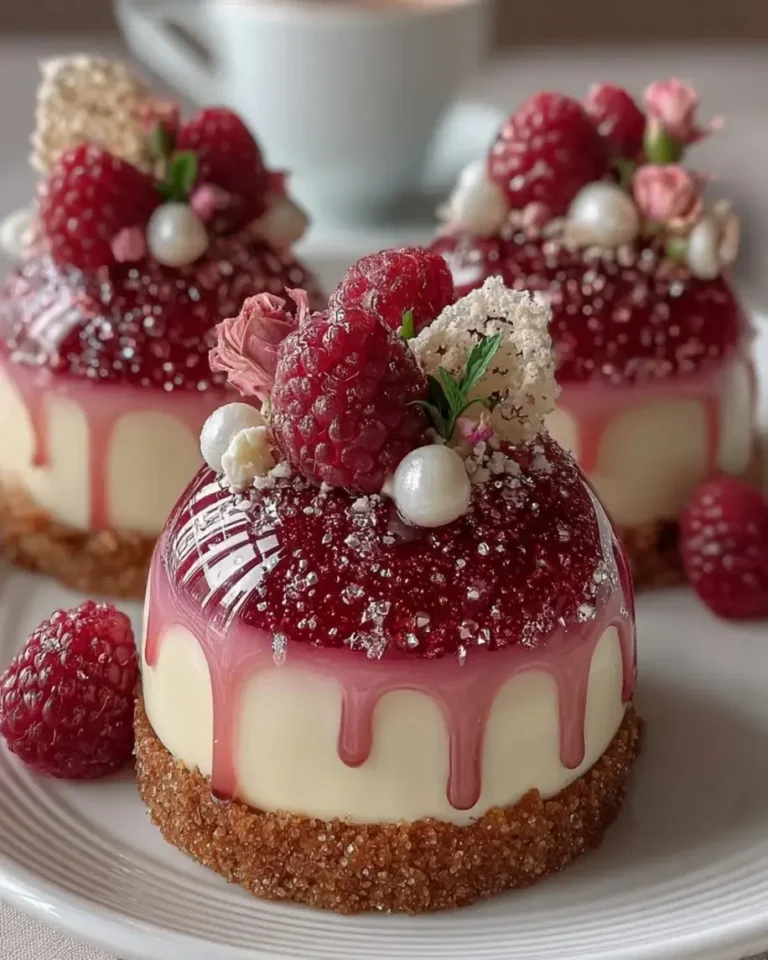
Raspberry Rose Crystal Domes with White Chocolate Core – The Ultimate Crystal Glaze Dessert
Let me tell you about the first time I made these Raspberry Rose Crystal Domes with White Chocolate Core—it was a rainy Saturday in my NYC kitchen, and I was missing the perfume of rose gardens in Marrakech. That’s when I knew I had to marry the floral elegance of North Africa with the precision of Parisian pastry. This raspberry rose crystal domes recipe is that dream come true: a luscious raspberry rose mousse wrapped around a velvety white chocolate core, sitting on a buttery biscuit base, and finished with a shimmering crystal glaze dessert that looks like frozen jewels. The edible pearl luster dust gives it that ethereal sheen—pure magic on a plate. I’m Stella, and I’m so excited to walk you through every step, from my Paris chef days to your table.
Imagine breaking through a glistening, mirror-like shell to reveal a cloud of raspberry rose mousse—bright, tangy, and delicately floral. Then you hit the white chocolate core: creamy, sweet, and perfectly contrasting the berries. The biscuit base adds a gentle crunch, grounding all that silkiness. The crystal glaze isn’t just a looker—it’s a textural marvel, crisp at first bite then melting away. I’ve tested this recipe dozens of times to get the glaze temperature just right, drawing on my training in Paris at Le Cordon Bleu, where we learned that a true crystal glaze is about patience and timing. The rosewater? That’s a nod to my mother’s Moroccan kitchen, where she’d sprinkle it over pastries like edible perfume.
What sets this raspberry rose dome cake apart is the foolproof core-centered technique I’ll share, and the crystal glaze that stays glossy for hours. In my years as a pastry chef in NYC, I learned that home bakers often struggle with even coverage—so I’ve simplified it. I’ll also reveal a common mistake that makes the glaze crack, and how to avoid it. Whether you’re making these for a Valentine’s dinner, a bridal shower, or just because you deserve something extraordinary, this recipe is designed to impress without the stress. Trust me, if you can make a boxed cake, you can make these crystal domes—I’ll be right here with you.
Why This Raspberry Rose Crystal Domes Recipe Is the Best
The Flavor Secret – Most dessert domes use a plain mousse, but I layer raspberry puree with real rosewater (not extract) for a floral note that transports you straight to a Moroccan garden. The white chocolate core is enriched with a splash of cream for a silky, truffle-like center. Having spent summers in Marrakech learning from my mother’s spice blends, I know exactly how to balance sweet and floral without it tasting like soap. This balance is what makes these domes unforgettable.
Perfected Texture – The crystal glaze requires precision—I learned in Paris that the glaze must cool to exactly 90°F (32°C) to pour like heavy cream. At that temperature, it sets into a smooth, mirror-like shell that shatters ever so slightly when you cut into it. The mousse is whipped to soft peaks for an airy, light texture, while the biscuit base stays crisp thanks to a thorough chill before assembling. Every bite has a contrast that keeps you coming back.
Foolproof & Fast – I’ve broken down the freezing and glazing into simple steps that work for a home kitchen. No special equipment needed—you can use half-sphere silicone molds. The active time is just over an hour; the rest is freezer time. I’ve also included make-ahead instructions so you can prepare these a day before serving. For beginners, I recommend reading through the entire recipe once, then watching for my pro tips—they’re the shortcuts I wish I’d known when I started.
Raspberry Rose Crystal Domes Recipe Ingredients
When I shop for these ingredients, I head to the Union Square Greenmarket for fresh raspberries (or high-quality frozen ones from the grocer), and I pick up rosewater from a Middle Eastern market on Atlantic Avenue—it’s so much more fragrant than the supermarket kind. The white chocolate should be a good brand like Guittard or Lindt; it melts better and gives a creamier core. For the edible pearl luster dust, I buy mine online or at specialty baking stores—just a tiny bit transforms the glaze into something truly magical.
Ingredients List
- For the Raspberry Rose Mousse:
- 1 cup raspberry puree (from fresh or frozen raspberries)
- 8 oz cream cheese, softened
- 1 cup heavy cream
- 1/2 cup granulated sugar
- 1 tsp rosewater
- 1 tsp vanilla extract
- 2 tsp powdered gelatin
- 3 tbsp cold water
- For the White Chocolate Core:
- 4 oz white chocolate, melted
- 1/4 cup heavy cream
- 1 tbsp powdered sugar
- For the Biscuit Base:
- 1 cup digestive biscuits, finely crushed (or graham crackers)
- 3 tbsp melted butter
- For the Crystal Glaze:
- 1 cup granulated sugar
- 1/2 cup water
- 1/2 cup sweetened condensed milk
- 1 cup white chocolate, finely chopped
- 1 tbsp powdered gelatin
- 3 tbsp cold water
- 1 tsp clear vanilla extract
- 1 tsp edible pearl luster dust
- 1 drop pink food coloring (optional)
- For Garnish (optional):
- Fresh raspberries
- Dried rose petals
- Edible silver flakes
Ingredient Spotlight
Raspberry Puree: The base of our mousse. You can buy it or make your own by blending strained raspberries. I prefer making it with fresh summer berries, but frozen work perfectly—just thaw and strain. The seeds can make the mousse gritty, so always strain through a fine-mesh sieve. Substitute: strawberry puree for a different berry note.
Rosewater: This is the soul of the dish. Real rosewater (made from distilled rose petals) is floral and subtle. Avoid imitation rose extract—it tastes like perfume. Find it in Middle Eastern stores or online. Substitute: orange blossom water for a North African twist, or 1/2 tsp vanilla if you want to skip floral altogether.
White Chocolate (for core and glaze): Quality matters. Cheap white chocolate often seizes or stays grainy. Use a high-cocoa-butter white chocolate (like Callebaut or Lindt). For the core, the heavy cream keeps it creamy. Substitute: milk chocolate for a different sweetness, but the glaze requires white chocolate for that translucent look.
Edible Pearl Luster Dust: This gives the crystal glaze its shimmer. It’s a mix of mica and food coloring—completely safe to eat. I buy mine from Wilton or specialty baking shops. A little goes a long way; 1 tsp is plenty for a full batch of glaze. Substitute: if you can’t find it, the glaze will still be glossy and beautiful, just without the pearlescent effect.
| Original Ingredient | Best Substitution | Flavor / Texture Impact |
|---|---|---|
| Raspberry puree | Strawberry puree | Sweeter, less tart; still works beautifully |
| Rosewater | Orange blossom water | Citrusy floral; different but lovely |
| White chocolate | High-quality milk chocolate | Richer, less sweet; glaze becomes more opaque |
| Pearl luster dust | Edible gold dust (or omit) | Different shimmer; omit for a clear glaze |
How to Make Raspberry Rose Crystal Domes – Step-by-Step
Let’s get started! These steps are designed to build confidence—even if you’ve never worked with gelatin or glaze before. Read through once, then dive in. I’ll guide you with visual cues and my favorite tricks from years in the pastry kitchen.
Step 1: Prepare the Biscuit Base
Mix 1 cup finely crushed digestive biscuits with 3 tbsp melted butter until it resembles wet sand. Press evenly into the bottom of 8 half-sphere dome molds (silicone works best). Use the back of a spoon to compact it. Chill in the freezer for 15 minutes to firm up. This thin layer provides the perfect crunch and seals the bottom.
💡 Stella’s Pro Tip: Use a small glass or a measuring spoon to press the crumbs—it creates an even, flat surface. If you don’t have digestive biscuits, graham crackers are a perfect swap.
Step 2: Make the White Chocolate Core
In a small bowl, stir together 4 oz melted white chocolate, 1/4 cup heavy cream, and 1 tbsp powdered sugar until smooth. Spoon this mixture into small silicone inserts (like mini half-sphere or heart molds) – you need 8 cores. Freeze until firm, about 30 minutes. These frozen cores will stay centered in the mousse, giving every dome a surprise center.
⚠️ Common Mistake to Avoid: If the white chocolate mixture is too thick, add another tsp of cream. Too thin? Add a bit more chopped white chocolate (melted). The core should be scoopable but not runny.
Step 3: Bloom Gelatin for Mousse
Sprinkle 2 tsp powdered gelatin over 3 tbsp cold water in a small bowl. Let stand for 5 minutes until it becomes a firm, clear mass. This is called “blooming” and ensures the gelatin dissolves evenly. Meanwhile, start the mousse base.
💡 Stella’s Pro Tip: Use ice-cold water for blooming. If the gelatin clumps, it wasn’t cold enough. You can also use sheet gelatin—2 sheets (gold strength) equals 2 tsp powdered.
Step 4: Make the Mousse Base
In a large bowl, beat 8 oz softened cream cheese, 1 cup raspberry puree, 1/2 cup sugar, 1 tsp rosewater, and 1 tsp vanilla extract until smooth and creamy. In a separate small saucepan, warm 2 tbsp of the heavy cream (take from the 1 cup total) until steaming. Remove from heat, add the bloomed gelatin, and stir until dissolved. Quickly whisk this gelatin mixture into the raspberry cream cheese mixture.
⚠️ Common Mistake to Avoid: If the gelatin mixture hits cold mousse base too quickly, it can form streaks. Stream it in while mixing at medium speed for a smooth emulsion.
Step 5: Fold in Whipped Cream
Whip the remaining heavy cream (about 3/4 cup) to soft peaks—you want it to hold a gentle shape but not be stiff. Fold one-third of the whipped cream into the raspberry mixture to lighten it, then gently fold in the rest until no white streaks remain. This is your mousse: airy, pink, and heavenly.
💡 Stella’s Pro Tip: Fold with a rubber spatula in a J-shape motion, rotating the bowl. Do not overmix or the mousse will deflate. It should be thick but pillowy.
Step 6: Fill Molds and Insert Core
Spoon the mousse into the prepared dome molds, filling each halfway. Take the frozen white chocolate cores out of their inserts and gently press one into the center of each dome. Top with the remaining mousse, smoothing the tops so they’re even. Tap the molds gently on the counter to remove air bubbles.
⚠️ Common Mistake to Avoid: The core must be fully frozen and placed directly in the center. If it’s too warm, it will sink to the bottom. Freeze for at least 30 minutes before inserting.
Step 7: Freeze Solid
Place the filled molds in the freezer for at least 6 hours, preferably overnight. The domes must be completely frozen—this is essential for the glaze to coat evenly and not soak into the mousse.
💡 Stella’s Pro Tip: If you’re short on time, freeze for 4 hours and check by pressing the top—it should feel rock hard. You can also make these up to a week ahead and freeze.
Step 8: Bloom Gelatin for Glaze
For the crystal glaze, sprinkle 1 tbsp powdered gelatin over 3 tbsp cold water in a small bowl. Let sit for 5 minutes. Meanwhile, start heating the glaze base.
Step 9: Make the Glaze
In a medium saucepan, combine 1 cup sugar, 1/2 cup water, and 1/2 cup sweetened condensed milk. Heat over medium, stirring until the sugar dissolves and the mixture is steaming (do not boil). Remove from heat, add the bloomed gelatin, and stir until melted. Add 1 cup finely chopped white chocolate and stir until smooth. Then mix in 1 tsp vanilla, 1 tsp edible pearl luster dust, and 1 drop pink food coloring (optional). For a super-glossy finish, use an immersion blender to blend until silky.
💡 Stella’s Pro Tip: Let the glaze cool to 90°F (32°C) before pouring. If it’s too hot, it will melt the mousse; too cold, it will set thick and not coat evenly. Use a thermometer—this is the key to a perfect crystal dome.
Step 10: Unmold and Glaze
Remove the frozen domes from the molds. Place them on a wire rack over a baking sheet (to catch drips). Pour the warm (90°F) glaze over each dome in a steady stream, covering the entire surface. The glaze will set almost immediately from the cold. Refrigerate for 30 minutes to allow the glaze to fully harden and the mousse to soften to the perfect texture.
⚠️ Common Mistake to Avoid: Pour the glaze all at once—do not brush it on. The frozen dome will cause the glaze to set quickly, sealing in a mirror-like finish. If the glaze is too thin before pouring, cool it a bit more.
Step 11: Garnish and Serve
Transfer the glazed domes to serving plates. Garnish with fresh raspberries, dried rose petals, and edible silver flakes. Let them sit at room temperature for 5-10 minutes before serving—the mousse will be creamy but still hold its shape.
💡 Stella’s Pro Tip: For the most dramatic presentation, serve on a dark plate—the pink and silver pop beautifully.
| Step | Action | Duration | Key Visual Cue |
|---|---|---|---|
| 1 | Biscuit base | 15 min chill | Firm, compacted crumbs |
| 2 | White choc core | 30 min freeze | Solid, easily released from mold |
| 3-5 | Mousse base + fold | 15 min | Smooth, airy, no lumps |
| 6-7 | Fill & freeze | 6+ hours | Rock-hard domes |
| 8-9 | Glaze preparation | 15 min | Glossy, smooth, 90°F |
| 10 | Glaze & refrigerate | 30 min | Smooth, shiny coating |
| 11 | Garnish & serve | 5 min | Elegant, sparkly finish |
Serving & Presentation
These crystal domes are a showstopper on any table. I like to serve them straight from the refrigerator—the glaze stays firm, and the mousse is creamy but holds its shape. Place each dome on a dessert plate with a small swoosh of raspberry coulis or a dusting of freeze-dried raspberry powder for extra color contrast. Garnish with a fresh raspberry on top, a pinch of dried rose petals, and a few edible silver flakes for that magical shimmer.
In my NYC apartment, I often pair them with a mint tea (a Moroccan tradition) or a crisp Prosecco for celebrations. The floral rose notes sing alongside the bubbles. For a more indulgent pairing, serve with a dollop of lightly sweetened whipped cream or a side of white chocolate sauce. If you’re plating for a party, arrange three domes on a cake stand with fresh flowers—edible pansies or rose buds work beautifully.
I also love to serve these at room temperature for about 10 minutes after refrigeration—the mousse softens to a mousse-like texture rather than a frozen one. The glaze will remain glossy and crisp. This is a dessert that invites oohs and aahs, perfect for Valentine’s Day, anniversaries, or a dinner party that needs a stunning finale.
| Pairing Type | Suggestions | Why It Works |
|---|---|---|
| Side Dish | Raspberry coulis, whipped cream, fresh berries | Adds freshness and contrast to rich mousse |
| Sauce / Dip | White chocolate ganache, passion fruit sauce | Tangy or creamy complements rose & raspberry |
| Beverage | Moroccan mint tea, Prosecco, rosé wine | Floral & bubbly notes harmonize with rose |
| Garnish | Dried rose petals, edible silver flakes, fresh mint | Enhances visual appeal and adds flavor |
Make-Ahead, Storage & Reheating
One of the best things about these Raspberry Rose Crystal Domes is that they’re a dream to make ahead. In my busy NYC schedule, I often prepare the mousse domes (un-glazed) up to a week in advance and keep them frozen. The glaze can be made and stored separately. On the day you serve, simply thaw the glaze to 90°F and pour. This divides the workload and reduces stress.
| Method | Container | Duration | Reheating Tip |
|---|---|---|---|
| Refrigerator (glazed) | Airtight container | 2-3 days | Serve directly from fridge; let sit 5 min |
| Freezer (un-glazed) | Wrap individually in plastic wrap | Up to 2 months | Glaze directly from frozen; add 5 min to set |
| Make-Ahead (mousse) | Molds, covered | Up to 1 week frozen | Unmold and glaze when ready |
For reheating tips: The glaze itself doesn’t need reheating—just let it come to the right temperature (90°F) if stored. If the domes have been refrigerated for more than a day, the glaze may soften slightly. To restore that crystal snap, place the glazed domes in the freezer for 5 minutes before serving. This firms the glaze without freezing the mousse solid. Remember, these domes are best eaten within 2 days of glazing for the most dramatic texture contrast.
Variations & Easy Swaps
One of the joys of this raspberry rose dome cake is how easily it adapts to different tastes and dietary needs. I’ve experimented with all of these variations in my own kitchen, and each one is equally stunning. Whether you want to go gluten-free, change the fruit, or add a boozy kick, there’s a version for you.
| Variation | Key Change | Best For | Difficulty Impact |
|---|---|---|---|
| Gluten-Free Biscuit Base | Use gluten-free graham crackers or almond flour crust | Celiac or gluten sensitivity | No change |
| Passion Fruit & Coconut | Replace raspberry puree with passion fruit; add coconut flakes to base | Tropical twist, summer entertaining | Slightly more acidic mousse |
| Boozy Adult Version | Add 2 tbsp raspberry liqueur (Chambord) to mousse | Cocktail party, date night | No extra steps |
Gluten-Free Biscuit Base Variation
For a gluten-free version, simply swap the digestive biscuits with gluten-free graham crackers (widely available in the US, like Kinnikinnick brand) or make a crust from almond flour, melted butter, and a touch of sugar. Toast almond flour in a dry pan for 3 minutes to deepen the flavor. I find the almond version adds a lovely nuttiness that pairs beautifully with the raspberry. The texture will be slightly more crumbly but still holds together when frozen. This is a great option for anyone with celiac—just confirm that all other ingredients (like gelatin) are gluten-free.
Dairy-Free Variation (Tested)
To make these domes dairy-free, substitute the cream cheese with a full-fat plant-based version (like Miyoko’s or Violife), and use canned coconut cream (chilled) for the heavy cream. The white chocolate core is trickier—use a dairy-free white chocolate (such as Enjoy Life brand) and mix with coconut cream instead of heavy cream. The glaze needs full-fat condensed coconut milk (check the can, it must be thick) and dairy-free white chocolate. I tested this for a friend’s dairy allergy, and the texture is slightly softer but equally delicious. Note that the glaze may be less glossy, but the flavor is still wonderful.
Passion Fruit & Coconut Variation
For a tropical escape, swap the raspberry puree with passion fruit pulp (strained to remove seeds) and reduce the sugar slightly because passion fruit is naturally sweet. Add 1/4 cup toasted coconut flakes to the biscuit base. The rosewater can be replaced with a splash of coconut milk for extra tropical vibe. This version is a hit at summer picnics—I brought it to a rooftop party in Brooklyn and it disappeared in minutes. The tangy passion fruit cuts through the richness of the white chocolate core beautifully.
How do you make the white chocolate core stay centered inside the raspberry rose crystal dome?
Great question! The key is to freeze the white chocolate core until it’s rock hard—at least 30 minutes, but I recommend 1 hour. When you place it into the half-filled mousse mold, press it gently into the center, then immediately top with more mousse. The frozen core will stay suspended because the surrounding mousse is thick and cold. Also, make sure the mousse itself is well-chilled (not warm from the mixing bowl). I often freeze the mousse molds for 10 minutes after filling halfway before inserting the core—this creates a stable base. And always use a core that’s slightly smaller than the dome’s cavity, so it doesn’t touch the sides.
What can I use as a substitute for rose water in the raspberry rose crystal domes?
If you don’t have rosewater, the best substitute is orange blossom water—it’s also light and floral, used in many Moroccan and Middle Eastern desserts. You’ll find it at Middle Eastern grocery stores or online. Use the same amount (1 tsp). Another option is 1/2 teaspoon of vanilla extract plus a tiny pinch of cardamom to mimic the floral warmth. Avoid artificial rose extract—it’s usually too strong and tastes like perfume. For an alcohol-based alternative, you could add 1 teaspoon of rose liqueur (like Empress 1908 Indigo Gin’s rose version), but that will change the texture slightly.
How long do the raspberry rose crystal domes need to set in the freezer before serving?
The domes need to freeze for a minimum of 4-6 hours after assembly, but I always recommend freezing them overnight. The mousse must be completely solid to hold its shape when you unmold and pour the glaze. If they’re not frozen enough, the mousse will be too soft and the glaze will soak in or cause the dome to collapse. For the best texture, once glazed, you only need 30 minutes in the refrigerator to set the glaze and let the mousse soften slightly. Total freezer time before glazing: at least 6 hours. You can make them up to a week in advance and keep them frozen.
Can I use frozen raspberries for the jelly layer in the raspberry rose crystal domes?
Absolutely! Frozen raspberries work beautifully for the raspberry puree. They’re often sweeter than fresh, since they’re picked at peak ripeness. Thaw them completely, then blend and strain to remove seeds. The jelly layer (our mousse base) will set perfectly. However, if you’re making a separate jelly layer (like a raspberry jelly insert inside the mousse), frozen berries can be used the same way. Just note that frozen berries release more water, so you might need to cook the puree longer to thicken it, or add a little extra gelatin. For this recipe, the puree is used directly in the mousse, so no extra steps needed—just strain well.
Can I use a different shape instead of domes?
Yes! While half-sphere silicone molds are classic for domes, you can use any shape you like. Mini bundt pans, hemisphere molds, even silicone egg shapes work. The key is to have smooth, un-rimmed edges for the glaze to run off evenly. If you use a tall shape (like a cylinder), make sure it’s not too deep—the core might not stay centered. I’ve even used mini heart molds for Valentine’s Day! Just adjust the baking/freezing time accordingly: smaller shapes freeze faster, larger ones need more time. For the glaze, pour slowly and ensure even coverage.
How do I get the crystal glaze perfectly smooth and glossy?
The secret is temperature and blending. First, make sure your glaze reaches exactly 90°F (32°C)—use an instant-read thermometer. Too hot and it will melt the mousse and become thin; too cold and it will be thick and uneven. Use an immersion blender at the end to emulsify the glaze until it’s completely smooth with no lumps or air bubbles. Also, strain the glaze through a fine-mesh sieve before pouring if you see any undissolved gelatin or chocolate bits. Finally, the domes must be frozen solid—the sudden temperature contrast helps the glaze set into a mirror-like finish. Do not refrigerate before pouring; work directly from the freezer.
What is edible pearl luster dust and where can I buy it?
Edible pearl luster dust is a fine, food-safe powder made from mica and synthetic coloring that gives a metallic or pearlescent sheen. It’s commonly used in cake decorating to make designs shimmer. You can find it at baking supply stores, craft stores (like Michaels or JoAnn), or online at Amazon or specialty sites like Global Sugar Art or The Sugarpaste Shop. It’s usually labeled as “edible lustre dust” or “pearl dust.” For this recipe, I use a clear pearl dust to keep the glaze pink and reflective. A 1 tsp jar will last you for many projects. Always check that it’s specifically labeled “edible”—not all craft glitters are safe to eat.
Can I make these domes vegan?
Yes, but it requires careful substitutions. For the mousse, use a vegan cream cheese (like Violife or Kite Hill), a high-fat coconut cream (chilled, whipped to soft peaks) instead of heavy cream, and agar-agar instead of gelatin (1 tbsp agar powder to 1/4 cup water, boiled and cooled). The white chocolate core needs a dairy-free white chocolate (like Enjoy Life or Pascha). The glaze is the trickiest—use condensed coconut milk, dairy-free white chocolate, and agar-agar instead of gelatin. I’ve tested this version and it works, but the texture is slightly less creamy and more gel-like. The glaze also loses some gloss. If you’re serving vegans, it’s still a stunning option, but the original is more forgiving for beginners.
How do I store leftovers and can I freeze glazed domes?
Leftover glazed domes can be stored in an airtight container in the refrigerator for up to 2 days. The glaze may soften slightly but will remain glossy. To refreeze glazed domes, place them on a baking sheet in the freezer until solid, then wrap each in plastic wrap and store in a freezer bag for up to 2 weeks. However, the texture of the mousse may become slightly icy after thawing, and the glaze can crack when frozen then thawed. I recommend storing the domes un-glazed in the freezer (for up to 2 months) and glazing them fresh on the day you serve. That way you get the perfect crystal finish every time.
Can I use a different fruit puree instead of raspberry?
Absolutely! This recipe is very adaptable. Strawberry puree is the easiest swap—use the same amount (1 cup). You can also try mango (for a tropical version), blackberry, or even mixed berries. Keep in mind that tart fruits (like raspberry, passion fruit, or cranberry) provide a nice contrast to the sweet white chocolate core. When using a sweeter fruit like mango, you may want to reduce the sugar in the mousse by 2 tablespoons. Also, berries with small seeds (like blackberries) should be strained well. For stone fruits like peach, puree and cook down to concentrate flavor. The rosewater can stay or be replaced with a complementary flavor—vanilla pairs with nearly everything.
Share Your Version!
I absolutely love hearing how these Raspberry Rose Crystal Domes turn out in your kitchen. Did you try the passion fruit twist? Or make them for a special birthday? Drop a comment below and let me know—your feedback helps me tweak recipes and inspire others. If you share a photo on Instagram or Pinterest, tag me @stellarecipeblog so I can feature your creation. I read every comment and I’m always here to answer questions, especially about the crystal glaze—it’s the part people worry about most, but I promise it’s easier than it looks.
What’s your favorite way to plate these? I’d love to hear your garnish ideas. And if you’ve never made a crystal glaze before, let me know how it went—I’m rooting for you! From my NYC kitchen to yours — I hope this recipe brings as much warmth to your table as it does to mine. — Stella 🧡
Love This Recipe? Save It to Pinterest!
If you enjoyed this Raspberry Rose Crystal Domes recipe, don’t let it get lost in your browser tabs! 😄 Pin it now so you can find it again anytime — and explore hundreds more tried-and-tested recipes waiting for you on my Pinterest boards.
👉 Follow Stella on Pinterest @stellarecipeblog
📌 Pin this recipe · 🔁 Re-pin your favorites · 💬 Tag me when you make it — I love seeing your creations!
💬 Leave a comment below! Tell me: Which variation will you try first? And if you hit any bumps with the glaze, I’m right here to help. ⭐
Raspberry Rose Crystal Domes with White Chocolate Core
Raspberry Rose Crystal Domes with White Chocolate Core are a stunning dessert featuring a raspberry rose mousse, a white chocolate core, a digestive biscuit base, and a glossy crystal glaze.
- Yield: 8 1x
Ingredients
- For the Raspberry Rose Mousse:
- 1 cup raspberry puree
- 8 oz cream cheese, softened
- 1 cup heavy cream
- 1/2 cup granulated sugar
- 1 tsp rosewater
- 1 tsp vanilla extract
- 2 tsp powdered gelatin
- 3 tbsp cold water
- For the White Chocolate Core:
- 4 oz white chocolate, melted
- 1/4 cup heavy cream
- 1 tbsp powdered sugar
- For the Biscuit Base:
- 1 cup digestive biscuits, finely crushed
- 3 tbsp melted butter
- For the Crystal Glaze:
- 1 cup granulated sugar
- 1/2 cup water
- 1/2 cup sweetened condensed milk
- 1 cup white chocolate, finely chopped
- 1 tbsp powdered gelatin
- 3 tbsp cold water
- 1 tsp clear vanilla extract
- 1 tsp edible pearl luster dust
- 1 drop pink food coloring
- For Garnish (optional):
- Fresh raspberries
- Dried rose petals
- Edible silver flakes
Instructions
- 1. Mix crushed biscuits with melted butter and press into dome molds as a thin base layer. Chill for 15 minutes.
- 2. Stir melted white chocolate, heavy cream, and powdered sugar until smooth.
- 3. Spoon into small silicone inserts and freeze until firm.
- 4. Bloom gelatin for the mousse in cold water for 5 minutes.
- 5. Beat cream cheese, raspberry puree, sugar, rosewater, and vanilla extract until smooth.
- 6. Warm a small portion of the cream and dissolve gelatin, then mix into the raspberry mixture.
- 7. Whip the remaining cream to soft peaks and fold into the mixture.
- 8. Fill dome molds halfway with mousse.
- 9. Place a frozen white chocolate core into the center of each mold.
- 10. Cover with remaining mousse and smooth the tops.
- 11. Freeze for at least 6 hours or until completely firm.
- 12. Bloom gelatin for the glaze in cold water.
- 13. Heat sugar, water, and condensed milk until steaming.
- 14. Remove from heat and stir in gelatin and white chocolate until smooth.
- 15. Add vanilla extract, pearl luster dust, and pink food coloring.
- 16. Blend until glossy and smooth.
- 17. Cool glaze to about 90°F (32°C).
- 18. Unmold frozen domes and place on a wire rack.
- 19. Pour the crystal glaze evenly over each dome until fully coated.
- 20. Refrigerate for 30 minutes before serving.
- 21. Garnish with fresh raspberries, dried rose petals, and edible silver flakes.
Nutrition
- Calories: 355
- Sugar: 35g
- Fat: 20g
- Carbohydrates: 40g
- Protein: 4g
Tried This Recipe? Leave a Comment!
Did you make this recipe? I’d love to hear how it turned out! Please leave a comment and a rating below. Your feedback helps other home cooks and supports cheerychop.com!
For more delicious inspiration, follow me on Pinterest!