Stunning Rose Gold Cherry Blossom Pavlova Bombs

Table of Contents
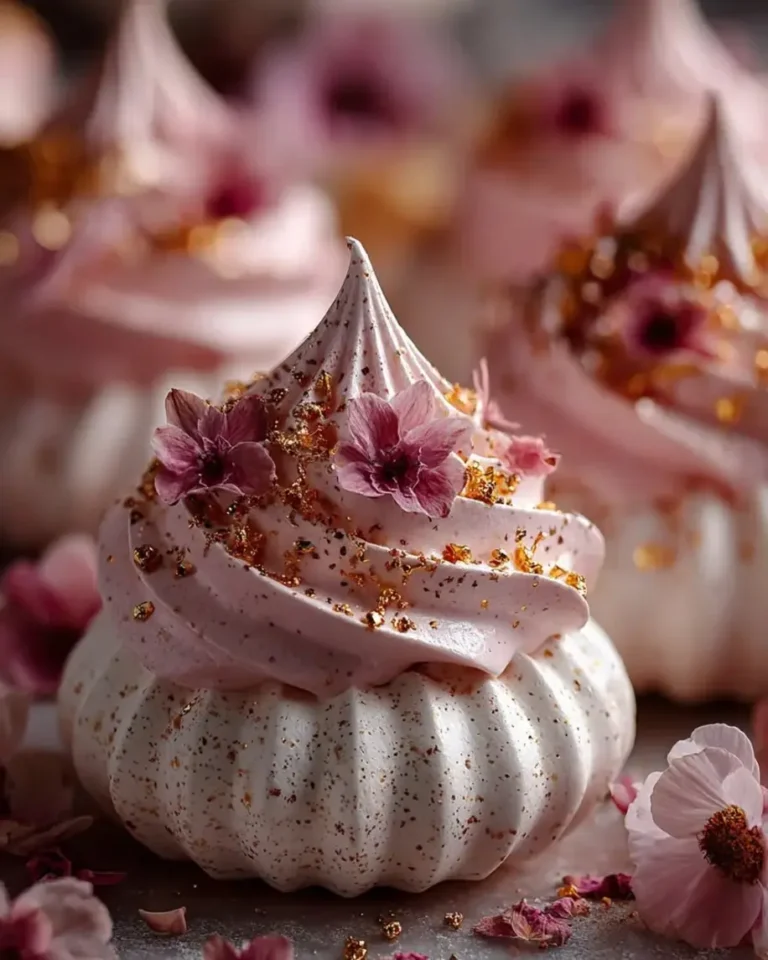
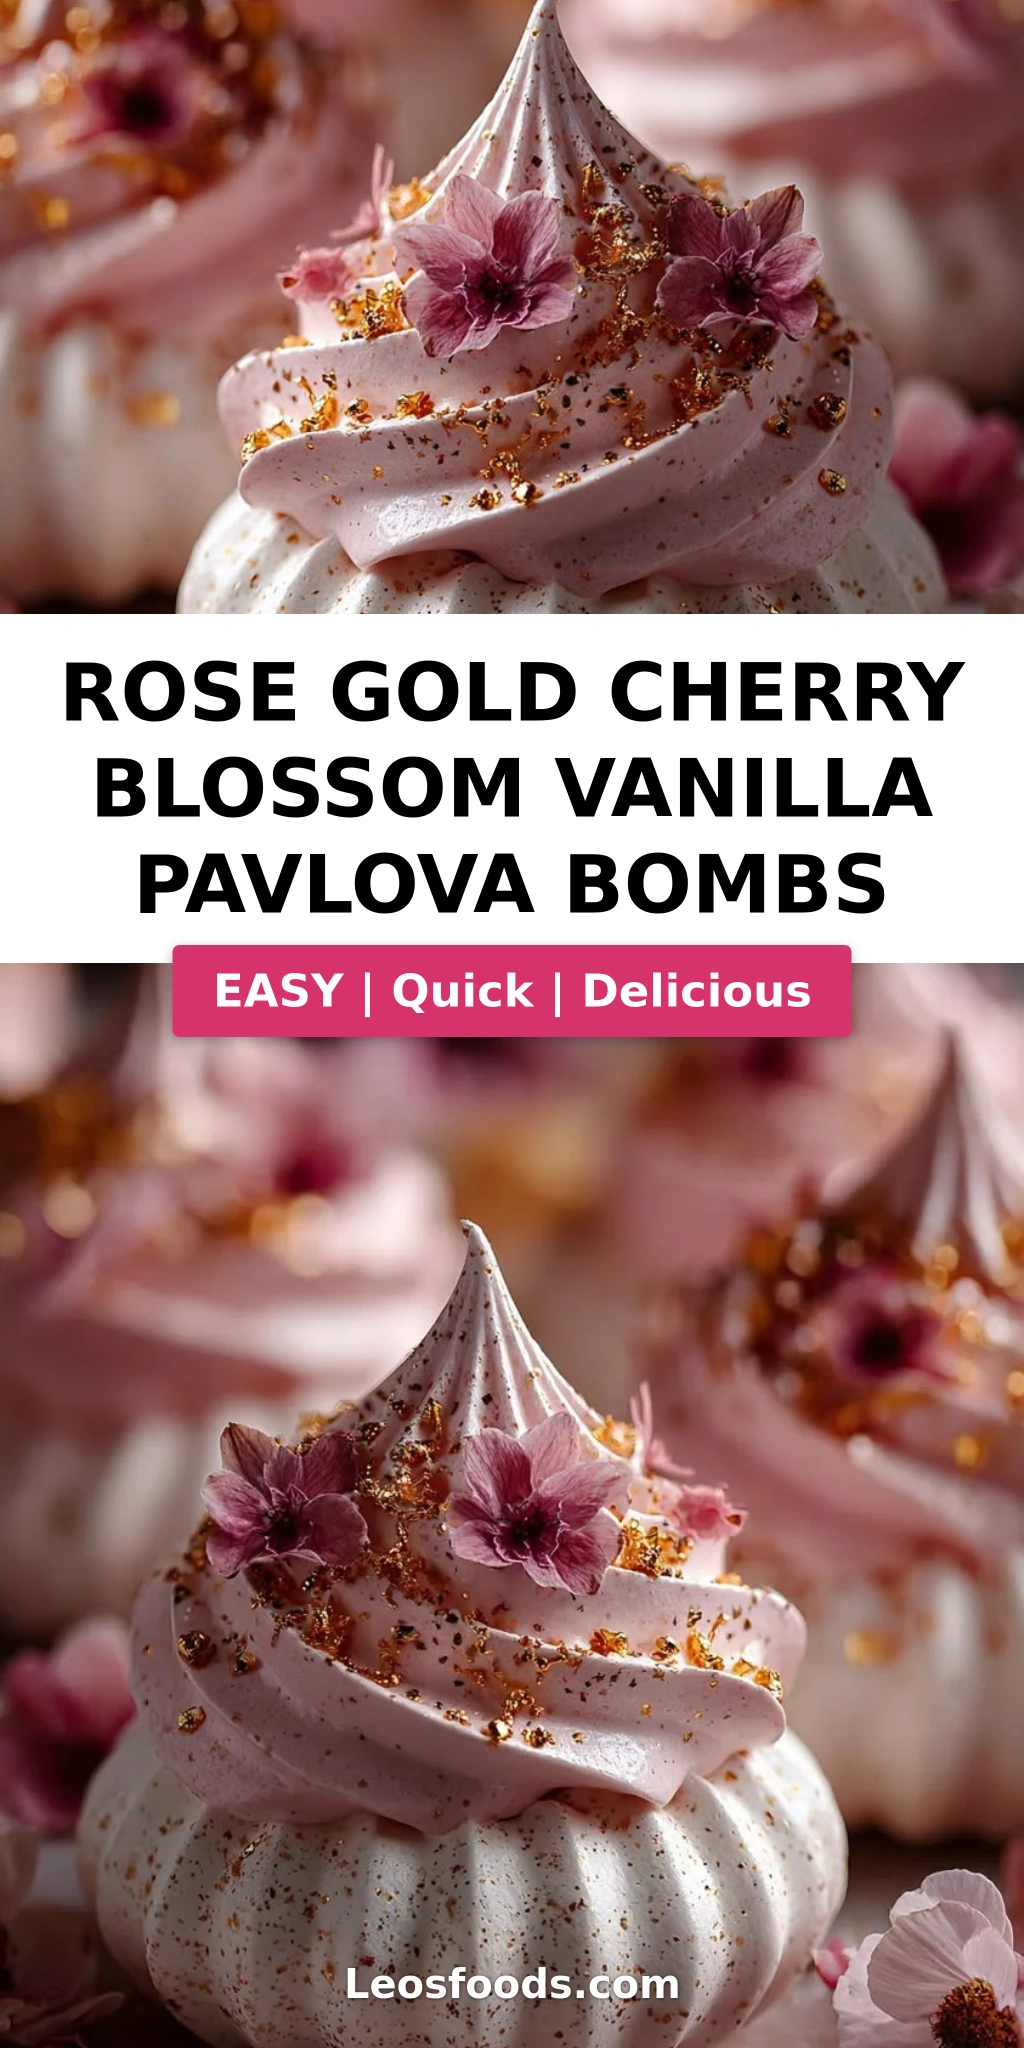
Rose Gold Cherry Blossom Vanilla Pavlova Bombs – Edible Rose Gold Delight
Introduction
I’ll never forget the first time I tasted a pavlova – it was during my pastry training in Paris, and the chef served it with a tangy passionfruit curd and a cloud of whipped cream. The contrast of the brittle shell and the soft, marshmallow-like center was pure magic. Years later, after settling in New York City, I began experimenting with ways to bring that same ethereal texture into something even more dazzling: rose gold pavlova bombs. These little spheres of bliss combine my French training with the prettiest spring flavors – cherry blossom and vanilla – all wrapped in a shimmering edible rose gold glaze. It’s a dessert that feels like a celebration, perfect for bridal showers, Easter, or just because you deserve something beautiful.
Imagine cracking through a delicate, crisp meringue shell to reveal a luscious, creamy filling infused with delicate cherry blossom syrup and real vanilla bean. The filling is airy yet rich – I use a touch of cream cheese to add stability and a subtle tang that balances the sweetness. Then comes the crowning glory: a drizzle of white chocolate glaze tinted with edible rose gold luster dust. It catches the light like jewelry and tastes like a dream. The cherry blossom flavor is subtle, floral, and utterly elegant – it whispers of springtime in Brooklyn’s botanical garden, where I often find inspiration for my seasonal recipes.
Now, I know pavlova can be intimidating – I’ve had my share of weeping meringues and collapsed shells. But I’ve tested every variable to make this cherry blossom pavlova recipe as foolproof as possible. My secret? A touch of cornstarch and vinegar in the meringue, low-and-slow baking, and a crucial cooling step inside the oven. I’ll also share my best hack for assembling the “bombs” without crushing the shells. Whether you’re a seasoned baker or a beginner, I promise you can make these showstoppers at home. Let’s dive in!
Why This Rose Gold Pavlova Bombs Recipe Is the Best
Growing up in Morocco, my mother taught me to appreciate the beauty of simple ingredients transformed by patience and technique. That same philosophy drives this recipe. The flavor secret lies in the edible rose gold dessert concept: the combination of a classic vanilla pavlova with a whisper of cherry blossom and a glamorous metallic finish. It’s not just about looks – the floral notes pair beautifully with the creamy filling, while the rose gold glaze adds a hint of sweetness and a satisfying snap.
Texture is everything in a pavlova bomb. I’ve perfected the meringue to give you that classic crisp shell that shatters under your fork, giving way to a soft, marshmallowy center. The key is whipping the egg whites to stiff, glossy peaks and folding in cornstarch and vinegar – the cornstarch absorbs excess moisture, and the vinegar stabilizes the foam. Baking at 250°F (120°C) for a full 60–70 minutes ensures gentle drying without browning. Then, cooling the shells completely in the turned-off oven with the door ajar prevents sudden temperature changes that cause cracking.
Finally, this recipe is designed to be approachable. I’ve streamlined the steps so you can break it into manageable chunks – make the meringue shells a day ahead, whip up the filling in minutes, and assemble just before serving. No complicated equipment needed: a stand mixer or hand mixer works perfectly. And the rose gold glaze is incredibly simple – just melt, stir, and drizzle. Whether you’re preparing for a special occasion or a weekend treat, these vanilla pavlova dessert bombs will make you feel like a pastry chef in your own kitchen.
Rose Gold Pavlova Bombs Ingredients
When I shop for ingredients at my local farmers market in Union Square, I look for the freshest eggs and the best-quality vanilla. For the cherry blossom syrup, I order online – it’s a specialty item that brings an authentic floral note. Below is everything you’ll need, divided into components for clarity.
Ingredients List
- For the Pavlova Shells:
- 4 large egg whites (room temperature)
- 1 cup granulated sugar
- 1 tsp cornstarch
- 1 tsp white vinegar
- 1 tsp vanilla extract
- For the Cherry Blossom Vanilla Filling:
- 1 cup heavy cream, cold
- 4 oz (115 g) cream cheese, softened
- 2 tbsp powdered sugar
- 1 tsp vanilla bean paste (or vanilla extract)
- 1 tsp food-grade cherry blossom syrup
- For the Rose Gold Glaze:
- 1 cup white chocolate chips or chopped white chocolate, melted
- 1 tbsp coconut oil
- 1 tsp edible rose gold luster dust
- For Garnish (optional):
- Dried edible cherry blossom petals
- White chocolate shavings
Ingredient Spotlight
Egg whites are the backbone of pavlova. For the best volume, use eggs that are at least a few days old – the whites whip more easily. Separate them while cold, then let them come to room temperature before beating. If you can’t find cherry blossom syrup, substitute with ½ tsp almond extract plus a drop of rose water (see substitutions table below).
White chocolate for the glaze should be high-quality – I prefer Ghirardelli or Callebaut. Cheap white chocolate can seize or taste waxy. Coconut oil helps thin the chocolate to a drizzle consistency without adding flavor.
Edible rose gold luster dust is available at baking supply stores or online. It’s completely safe to eat and gives that gorgeous shimmer. If you can’t find it, you can use edible gold dust or skip it – the glaze will still be pretty.
Substitutions Table
| Original Ingredient | Best Substitution | Flavor / Texture Impact |
|---|---|---|
| Cherry blossom syrup | ½ tsp almond extract + ¼ tsp rose water | More nutty/floral, still lovely |
| Vanilla bean paste | 1 tsp vanilla extract | Milder flavor, no specks |
| Coconut oil | 1 tbsp neutral oil (e.g., canola) | Slightly less glossy, still works |
| Edible rose gold dust | Edible gold dust or skip | Different color, still sparkly |
How to Make Rose Gold Cherry Blossom Vanilla Pavlova Bombs — Step-by-Step
Follow these carefully tested steps, and you’ll have stunning pavlova bombs that taste as incredible as they look. I’ve included my chef’s tips and common pitfalls so you can skip the guesswork.
Step 1: Prepare the Meringue
Preheat your oven to 250°F (120°C) and line a baking sheet with parchment paper. In a clean, grease-free bowl, beat the egg whites on medium speed until soft peaks form – the whites should hold a gentle curl when you lift the whisk. Gradually add the sugar, one tablespoon at a time, beating on high after each addition. Continue until the meringue is stiff, glossy, and holds a firm peak when you lift the whisk. Rub a little meringue between your fingers – if it feels smooth (not gritty), the sugar is fully dissolved. Fold in the cornstarch, vinegar, and vanilla extract gently with a spatula until just combined.
💡 Stella’s Pro Tip: For extra stability, make sure your bowl and whisk are perfectly clean – any trace of grease or yolk will prevent the whites from whipping. I like to wipe my bowl with a cut lemon before starting.
Step 2: Pipe and Bake
Transfer the meringue to a piping bag fitted with a large round tip (or just snip the corner of a zip-top bag). Pipe 16 small dome shapes onto the parchment, spacing them about 2 inches apart. Use a spoon to create a slight hollow in the center of each dome – this will later hold the filling. Bake for 60–70 minutes, until the shells are dry and firm to the touch. Turn off the oven and leave the door slightly ajar (prop it open with a wooden spoon). Let the meringues cool completely inside the oven – at least 2 hours or overnight. This gradual cooling prevents cracking.
⚠️ Common Mistake to Avoid: Opening the oven door during baking! Sudden drafts can cause the meringue to crack. Wait until the full bake time is complete, then turn off the heat and crack the door.
Step 3: Make the Cherry Blossom Vanilla Filling
In a large bowl, beat the softened cream cheese with powdered sugar, vanilla bean paste, and cherry blossom syrup until smooth and creamy. In a separate bowl, whip the cold heavy cream to soft peaks – it should hold a gentle shape but not be stiff. Gently fold the whipped cream into the cream cheese mixture until combined. Be careful not to overmix; you want a light, airy filling. Transfer to a piping bag and refrigerate until ready to assemble.
💡 Stella’s Pro Tip: For the best texture, use cream cheese that’s fully softened to room temperature. Cold cream cheese will leave lumps. I set mine out an hour before starting.
Step 4: Assemble the Bombs
Take the cooled meringue shells and pair them up by size. Pipe a generous amount of filling onto the flat side of one shell, then gently press the second shell on top to create a round “bomb.” The filling should be thick enough to hold the shells together without squishing out. Place the assembled bombs on a wire rack set over a baking sheet.
⚠️ Common Mistake to Avoid: Overfilling! Too much filling will cause the bombs to slide apart. Use about 2 tablespoons per bomb – enough to fill the hollow and create a nice layer.
Step 5: Make the Rose Gold Glaze
In a microwave-safe bowl, melt the white chocolate and coconut oil together in 20-second bursts, stirring after each, until smooth. Stir in the edible rose gold luster dust until fully incorporated and the glaze is a shimmering rose gold color. Let the glaze cool for a few minutes until it thickens slightly – it should be thick enough to coat the back of a spoon but still flow in a ribbon.
💡 Stella’s Pro Tip: If the glaze is too thick to drizzle, add a tiny bit more coconut oil (1 tsp at a time). If it’s too thin, let it cool longer or add a few more white chocolate chips.
Step 6: Glaze and Garnish
Drizzle the rose gold glaze over the assembled bombs, letting it drip down the sides. Alternatively, you can fully dip the bombs in the glaze for a more dramatic look – just hold them by the base and dip into the glaze, letting the excess drip off. Before the glaze sets, sprinkle with dried edible cherry blossom petals and white chocolate shavings. Allow the glaze to set completely at room temperature (about 20 minutes) before serving. If you’re in a hurry, you can refrigerate for 10 minutes, but keep in mind the meringue may soften slightly.
⚠️ Common Mistake to Avoid: Adding the garnishes after the glaze has set – they won’t stick. Sprinkle immediately while the glaze is still wet.
Quick Reference Table
| Step | Action | Duration | Key Visual Cue |
|---|---|---|---|
| 1 | Whip meringue | 8–10 min | Stiff, glossy peaks |
| 2 | Bake shells | 60–70 min + cooling | Dry, firm, no browning |
| 3 | Make filling | 10 min | Smooth, fluffy, pale pink |
| 4 | Assemble bombs | 5 min | Shells held together |
| 5 | Prepare glaze | 5 min | Smooth, shiny, rose gold |
| 6 | Glaze & garnish | 15 min set time | Glaze hardened, garnishes stuck |
Serving & Presentation
These pavlova bombs are meant to be the centerpiece of any spring celebration. Arrange them on a large platter lined with a doily or a bed of edible flowers for a truly stunning effect. The contrast of the white shells, pale pink filling, and shimmering rose gold glaze against fresh greenery is absolutely gorgeous. I love to serve them after a light meal – perhaps a Moroccan-inspired lamb tagine or a simple roast chicken – to let the delicate flavors shine.
For garnish, go beyond the cherry blossom petals and white chocolate shavings: add a few fresh raspberries or a tiny mint leaf for a pop of color. If you’re feeling extra decadent, serve each bomb on a pool of raspberry coulis or a drizzle of extra rose gold glaze. Pair with a chilled glass of prosecco or a floral iced tea for a perfect afternoon tea experience.
When I host at my NYC apartment, I often put these bombs out on a cake stand and watch guests’ eyes light up. They’re easy to pick up with your hands (the shells hold together well) or you can use a fork to crack them open. Either way, they’re a conversation starter.
Pairing Guide
| Pairing Type | Suggestions | Why It Works |
|---|---|---|
| Side Dish | Fresh berries, citrus salad | Acidity cuts the sweetness |
| Sauce / Dip | Raspberry coulis, chocolate sauce | Adds richness or tart contrast |
| Beverage | Prosecco, floral iced tea, latte | Bubbles or floral notes complement |
| Garnish | Edible flowers, mint, gold leaf | Enhances visual elegance |
Make-Ahead, Storage & Reheating
As a busy NYC mom and blogger, I love recipes that can be prepped in stages. The meringue shells can be baked up to 3 days in advance and stored in an airtight container at room temperature. Just keep them away from humidity – a dry, cool cabinet works best. The filling can be made a day ahead and refrigerated in a piping bag. Assemble the bombs only a few hours before serving for maximum crunch, but they can be assembled up to 4 hours ahead if kept refrigerated.
Once assembled and glazed, these pavlova bombs are best enjoyed within 6 hours. The meringue will start to soften from the moisture in the filling, but they’ll still taste wonderful. Do not freeze assembled bombs – the texture will suffer. However, you can freeze the unfilled meringue shells for up to 2 months. Thaw them at room temperature for 30 minutes before filling.
Storage Table
| Method | Container | Duration | Reheating Tip |
|---|---|---|---|
| Refrigerator (assembled) | Airtight container | Up to 6 hours | Serve cold, no reheating |
| Freezer (unfilled shells) | Zip-top bag, layered with parchment | Up to 2 months | Thaw at room temp 30 min, then fill |
| Make-Ahead (shells + filling separate) | Shells: airtight; Filling: piping bag | Shells: 3 days; Filling: 1 day | Assemble before serving |
Variations & Easy Swaps
This recipe is wonderfully adaptable. Over the years, I’ve played with different flavors to suit the season or dietary needs. Here are my favorite variations – each one has been tested in my own kitchen.
| Variation | Key Change | Best For | Difficulty Impact |
|---|---|---|---|
| Rose & Pistachio | Replace cherry blossom syrup with rose water + crushed pistachios in filling | Middle Eastern-inspired flavors | Easy |
| Pavlova Hearts (Valentine’s Day) | Pipe meringue into heart shapes; use strawberry syrup | Romantic occasions | Medium (shaping) |
| Dairy-Free / Vegan (sort of) | Use coconut cream + vegan cream cheese for filling; use dairy-free white chocolate | Dairy-sensitive guests | Medium (texture changes) |
Rose & Pistachio Variation
This version is a nod to my Moroccan roots – in Marrakech, rose and pistachio are a classic combination. Simply swap the cherry blossom syrup for 1 teaspoon rose water and fold ¼ cup crushed pistachios into the filling. The glaze stays the same, but you can also sprinkle extra crushed pistachios on top. The floral rose pairs beautifully with the nutty crunch.
Dairy-Free Variation
For a dairy-free option that still tastes indulgent, replace the heavy cream with full-fat coconut cream (chill a can of unsweetened coconut cream overnight, then scoop the solid part). Use a dairy-free cream cheese alternative (like Kite Hill) and dairy-free white chocolate. The filling will be slightly less rich but still creamy. The meringue itself is naturally dairy-free, so the bombs remain mostly vegan-friendly.
Seasonal Fruit Twist
In summer, I love adding fresh passionfruit pulp to the filling – the tart seeds provide a beautiful contrast to the sweet meringue and glaze. Swap the cherry blossom syrup for 2 tablespoons passionfruit pulp (strained). The tangy flavor cuts through the sweetness perfectly. This is one of my favorite ways to enjoy spring pavlova recipe year-round by adapting seasonal fruits.
Frequently Asked Questions
What is the best way to get a crisp shell and marshmallow center in a pavlova bomb?
The secret is a combination of technique and timing. First, make sure your egg whites are at room temperature – this helps them whip to stiff, glossy peaks. Adding a teaspoon each of cornstarch and white vinegar stabilizes the foam and creates that soft center. Bake at a low temperature (250°F) for 60–70 minutes to dry the shells slowly without browning. Finally, cool them completely inside the turned-off oven with the door slightly ajar – this gradual cooling prevents cracking and ensures the center stays marshmallowy while the exterior becomes crisp. If you rush the cooling, you’ll end up with a soggy shell.
Can I use frozen cherries instead of fresh for the cherry blossom pavlova topping?
Absolutely, but you need to adjust the preparation. Frozen cherries release a lot of juice when thawed, which can make the pavlova soggy if added directly. If using frozen cherries, thaw them completely and drain off the excess liquid. Pat them dry with paper towels before using as a garnish. For the cherry blossom flavor, I recommend using the syrup or extract rather than relying on cherries – their flavor is different and more fruity than floral. If you want a cherry-flavored filling, you can cook down thawed cherries with a little sugar to make a compote and swirl it into the cream.
How far in advance can I assemble a rose gold pavlova dessert before serving?
You can assemble the pavlova bombs up to 4–6 hours before serving, but I recommend doing it no more than 2 hours ahead for the best crunch. The meringue shells will start to absorb moisture from the filling and soften over time. If you need to prep in advance, bake the shells up to 3 days ahead and store them airtight at room temperature, make the filling a day ahead, and then assemble just before your guests arrive. The glaze should be applied right before serving so it stays glossy. For a dinner party, I usually assemble and glaze about an hour before serving – they still taste incredible.
What can I substitute for cherry blossom extract in this vanilla pavlova recipe?
Cherry blossom extract (or syrup) can be a specialty item, but you have several excellent substitutes. My top recommendation is to use ½ teaspoon almond extract plus a few drops of rose water – the almond gives a nutty, cherry-like note, and the rose adds the floral element. You can also use 1 teaspoon of vanilla bean paste alone for a pure vanilla flavor, which is still lovely. Another option is to use a tablespoon of fruit syrup, like raspberry or passionfruit, for a different floral-fruit profile. If you want to keep the color pale pink, add a tiny drop of pink food coloring.
Why did my meringue shells crack during baking?
Meringue cracks typically happen for two reasons: oven temperature too high or sudden temperature changes. Make sure your oven is accurate – use an oven thermometer. Baking at 250°F (120°C) is ideal. Also, don’t open the oven door while the shells are baking; the rush of cool air can cause cracking. Finally, let the shells cool completely inside the oven after turning it off. If you remove them too soon, the sudden drop in temperature will cause cracks. If cracks are minor, don’t worry – the filling and glaze will cover them nicely.
Can I use a hand mixer instead of a stand mixer for the meringue?
Yes, a hand mixer works perfectly, though it will take a little longer. Use a large, deep bowl and beat the egg whites on medium speed until foamy, then gradually add the sugar while beating on high. It may take 10–12 minutes total to reach stiff peaks. The key is to make sure the sugar is fully dissolved – rub a little meringue between your fingers; if it feels gritty, keep beating. A stand mixer is faster and more hands-free, but a hand mixer is absolutely fine. Just be patient and don’t rush the process.
How do I store leftover pavlova bombs without them getting soggy?
Unfortunately, assembled pavlova bombs don’t store well – the meringue will soften. If you have leftovers, it’s best to remove the filling and glaze, and store the meringue shells separately in an airtight container at room temperature for up to 2 days. The filling can be refrigerated for 2 days and used as a dip for fruit or spooned over pancakes. To repurpose, crush the meringue shells and layer them with whipped cream and berries to make an Eton mess – a delicious British trifle-like dessert.
Can I make the pavlova bombs gluten-free?
Yes, this recipe is naturally gluten-free because meringue contains no flour. Just double-check your ingredients: vanilla extract, white chocolate, and edible dust should be certified gluten-free if you’re highly sensitive. The cornstarch used in the meringue is also gluten-free. So you can confidently serve these to gluten-intolerant guests – they’re a wonderful gluten-free dessert option for spring celebrations.
Share Your Version!
I’d love to see how your rose gold pavlova bombs turn out! Have you tried a different flavor combination? Did you top them with something special? Drop a comment below – reading your kitchen stories is one of my greatest joys. And if you’re on Instagram or Pinterest, tag @leosfoods so I can see your beautiful creations. Your feedback helps me create even better recipes for you.
From my NYC kitchen to yours – I hope this recipe brings as much warmth to your table as it does to mine. — Stella 🧡
Love This Recipe? Save It to Pinterest!
If you enjoyed this Rose Gold Cherry Blossom Vanilla Pavlova Bombs recipe, don’t let it get lost in your browser tabs! 😄 Pin it now so you can find it again anytime — and explore hundreds more tried-and-tested recipes waiting for you on my Pinterest boards.
👉 Follow Stella on Pinterest @stellarecipeblog
📌 Pin this recipe · 🔁 Re-pin your favorites · 💬 Tag me when you make it — I love seeing your creations!
Did you make these Rose Gold Pavlova Bombs? I’d love to hear how they turned out! Leave a star rating below, and let me know in the comments what variation you tried. 💖
Rose Gold Cherry Blossom Vanilla Pavlova Bombs
- Yield: 8 1x
Ingredients
- For the Pavlova Shells:
- 4 large egg whites
- 1 cup granulated sugar
- 1 tsp cornstarch
- 1 tsp white vinegar
- 1 tsp vanilla extract
- For the Cherry Blossom Vanilla Filling:
- 1 cup heavy cream, cold
- 4 oz (115 g) cream cheese, softened
- 2 tbsp powdered sugar
- 1 tsp vanilla bean paste
- 1 tsp food-grade cherry blossom syrup
- For the Rose Gold Glaze:
- 1 cup white chocolate, melted
- 1 tbsp coconut oil
- 1 tsp edible rose gold luster dust
- For Garnish (optional):
- Dried edible cherry blossom petals
- White chocolate shavings
Instructions
- 1. Preheat oven to 250°F (120°C) and line a baking sheet with parchment paper.
- 2. Beat egg whites until soft peaks form. Gradually add sugar and continue beating until stiff, glossy peaks develop.
- 3. Fold in cornstarch, vinegar, and vanilla extract.
- 4. Pipe small hollow dome shapes onto the baking sheet.
- 5. Bake for 60–70 minutes, then cool completely inside the oven with the door slightly open.
- 6. Beat cream cheese, powdered sugar, vanilla bean paste, and cherry blossom syrup until smooth.
- 7. Whip heavy cream to soft peaks and fold into the cream cheese mixture.
- 8. Fill the cooled pavlova shells with the cherry blossom vanilla filling.
- 9. Gently seal two filled shells together to create round bombs.
- 10. Mix melted white chocolate, coconut oil, and rose gold luster dust until smooth.
- 11. Drizzle or lightly coat the pavlova bombs with the rose gold glaze.
- 12. Allow the glaze to set before serving.
- 13. Garnish with edible cherry blossom petals and white chocolate shavings.
Nutrition
- Calories: 240
- Sugar: 25 g
- Fat: 14 g
- Carbohydrates: 27 g
- Protein: 3 g
Tried This Recipe? Leave a Comment!
Did you make this recipe? I’d love to hear how it turned out! Please leave a comment and a rating below. Your feedback helps other home cooks and supports cheerychop.com!
For more delicious inspiration, follow me on Pinterest!