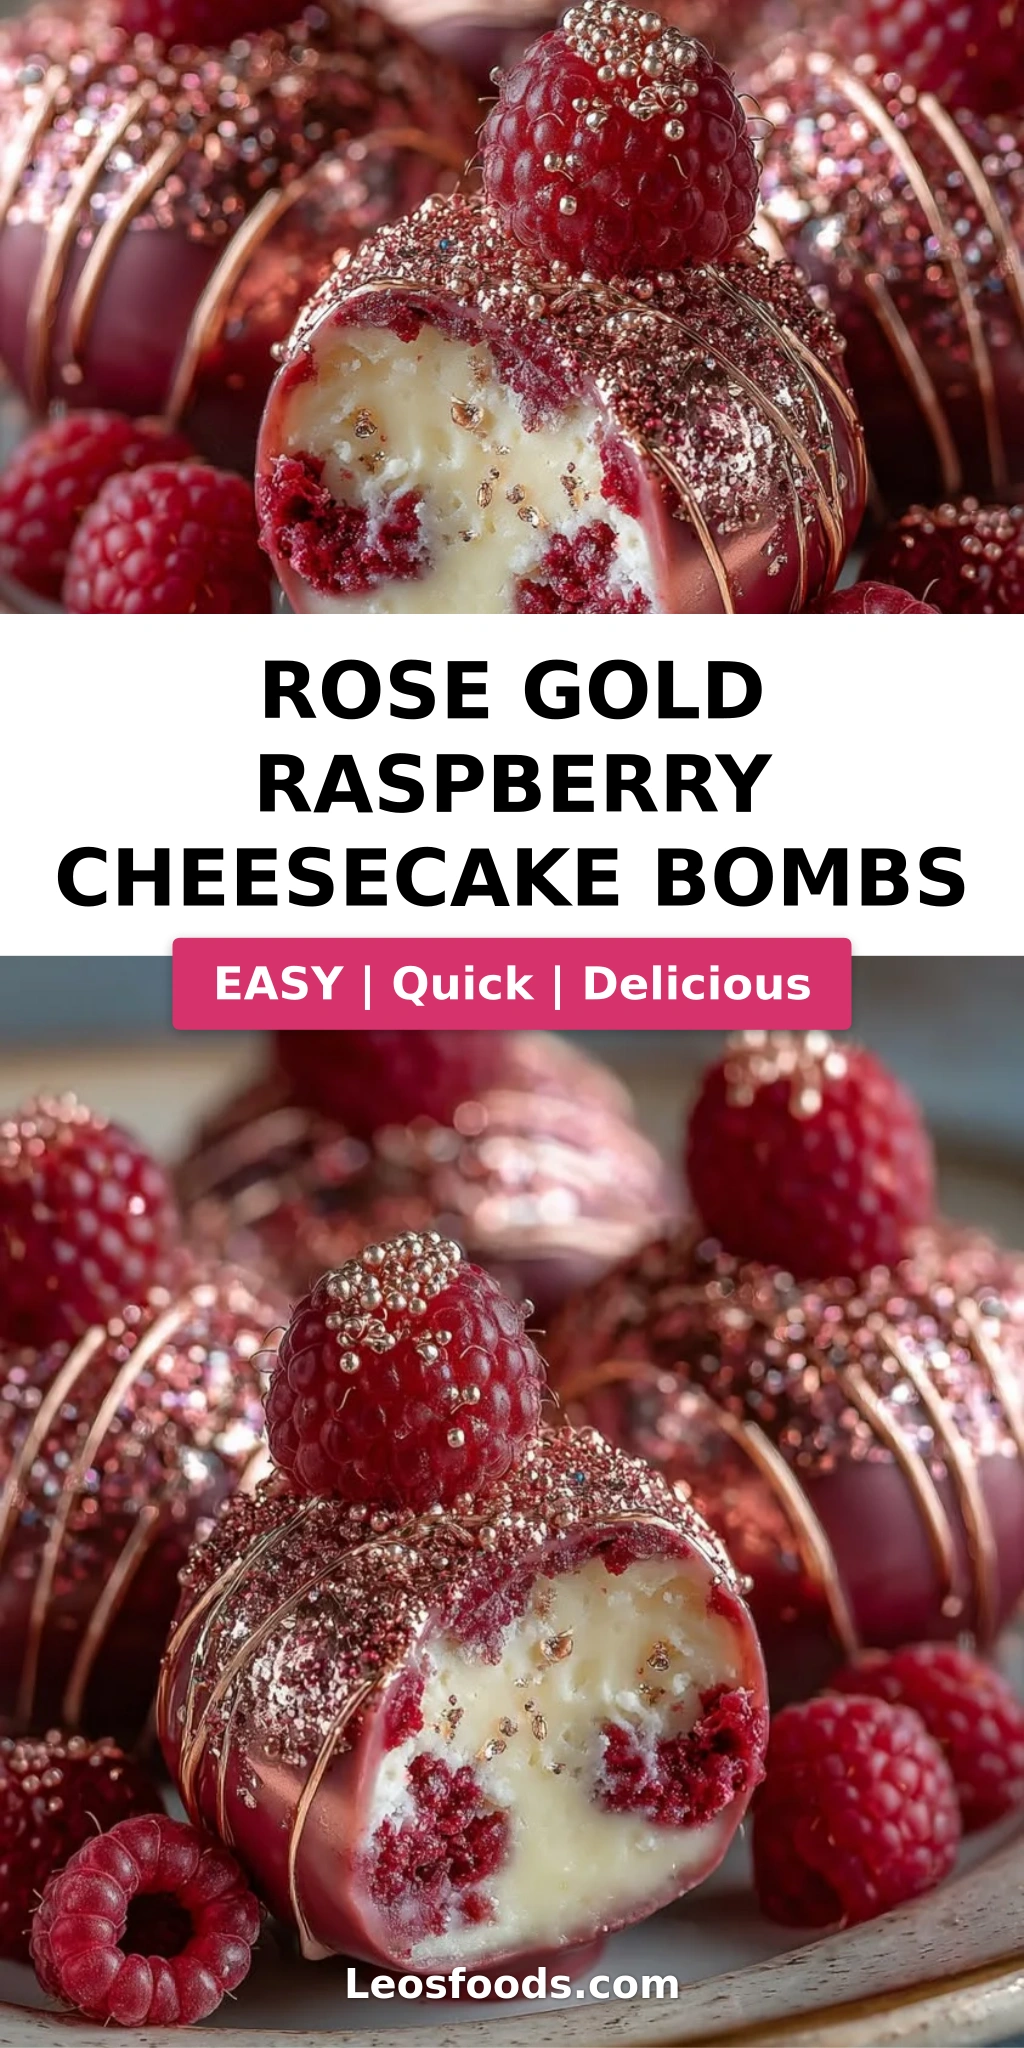
Shimmering No-Bake Rose Gold Raspberry Cheesecake Bombs

Table of Contents
Rose Gold Raspberry Cheesecake Bombs – The Ultimate No-Bake Jewel Dessert
I still remember the first time I saw a rose gold jewel up close. It was at a tiny antique shop in the Marais district of Paris, and the warm pink-gold glow caught the afternoon light like captured starlight. That same feeling is what I wanted to bottle in these rose gold raspberry cheesecake bombs. Growing up in Morocco, my mother would make delicate fruit-filled pastries for holidays, and in New York City, I’ve learned to translate those family traditions into showstopping desserts. This no-bake raspberry cheesecake recipe is my love letter to both worlds — a creamy, berry-rich filling encased in a shimmering ruby shell that looks like a gemstone on your plate.
The first bite is pure magic: the translucent agar-agar shell cracks open to reveal a cloud-light, almost mousse-like cheesecake filling kissed with real raspberry puree and vanilla bean paste. The glaze — a warm mix of raspberry preserves, honey, and a whisper of edible rose-gold luster dust — gives each bomb that luminous, ethereal finish. It’s the kind of dessert that makes a dinner party feel like a celebration, and honestly, it’s just as satisfying to make on a quiet Sunday afternoon with jazz playing in the background.
What sets my version apart is the technique I learned in Paris: using agar-agar instead of gelatin to create a stable, glossy shell that sets at room temperature — perfect for make-ahead entertaining. I’ll also share my trick for preventing that dreaded sogginess (it’s all in the order of assembly). And if you’ve ever struggled with edible glitter desserts that taste like nothing, you’ll love how the glaze actually amplifies the raspberry flavor. This is a luxurious berry cheesecake dessert that looks impossible but comes together beautifully with a little patience — and the right pro tips.
Why This Rose Gold Raspberry Cheesecake Bombs Recipe Is the Best
The Flavor Secret: I use a double hit of raspberry — puree in the shell and preserves in the glaze — plus a touch of lemon juice to brighten the fruit without overpowering it. The cream cheese filling is lightened with whipped cream and sweetened just enough with powdered sugar, so the raspberry stays front and center. This isn’t a sugar bomb; it’s a sophisticated treat that tastes like the best raspberry cheesecake you’ve ever had, with a luxurious visual twist.
Perfected Texture: The agar-agar shell is the star here. Unlike gelatin, it doesn’t melt at room temperature, which means your bombs stay beautifully glossy and firm even on a warm day. The filling is piped into a partially set shell — that’s the trick that prevents the cream cheese from sinking or making the shell soggy. I tested this a dozen times in my tiny NYC kitchen until the layers were perfectly distinct yet united.
Foolproof & Fast: Despite the elegant appearance, there’s no oven involved and no complicated tempering. With just a saucepan, silicone sphere molds, and a piping bag, you can create these gems in under an hour of active time. The hardest part is waiting for them to set in the fridge! Beginners love this recipe because each step builds on the last, and the results are so rewarding.
Rose Gold Raspberry Cheesecake Bombs Ingredients
I source my raspberries from the Union Square Greenmarket in the summer, but frozen berries work just as well for the puree. The agar-agar I order online or find at any Asian grocery — it’s a pantry staple from my Paris pastry days. And the edible rose-gold luster dust? That little jar sits on my shelf like a piece of jewelry, ready to turn any dessert into something special.
Ingredients List
- For the Rose Gold Raspberry Shell: 2 cups raspberry puree, strained; 1 cup raspberry juice; 1 1/2 cups water; 3/4 cup granulated sugar; 2 1/2 tsp agar-agar powder; 1 tbsp fresh lemon juice; 1/4 tsp salt; a few drops rose-gold food coloring (optional)
- For the Raspberry Cheesecake Filling: 8 oz cream cheese, softened; 1/2 cup heavy whipping cream; 1/4 cup powdered sugar; 2 tbsp raspberry puree; 1 tsp vanilla bean paste
- For the Rose Gold Crystal Glaze: 1/4 cup raspberry preserves; 2 tbsp honey; 1 tbsp water; 1 tsp lemon juice; edible rose-gold luster dust (optional)
- Optional Garnish: fresh raspberries, white chocolate curls, edible rose-gold flakes, edible pearl dust
Ingredient Spotlight
Agar-Agar Powder is the key to a firm, glossy shell. It’s a plant-based gelatin derived from seaweed, which means this dessert is naturally vegetarian. Look for pure agar-agar powder (not flakes) — I use the Now Foods brand or any Thai brand from the Asian market. One teaspoon of agar-agar is enough to set 2 cups of liquid, but since we want a sturdy mould, I go with 2 1/2 tsp.
Raspberry Puree should be smooth and seedless. I strain fresh or frozen berries through a fine-mesh sieve after blending. In a pinch, you can use store-bought puree, but check the label for added sugar. The puree gives the shell its deep ruby color and tangy sweetness.
Cream Cheese must be at room temperature for a silky filling. Full-fat Philadelphia is my go-to for consistent results. Low-fat cream cheese will work but the filling won’t be as luxuriously creamy.
Edible Rose-Gold Luster Dust is optional but transforms the glaze into a shimmering mirror. I buy it from Wilton or any cake decorating supply. A little goes a long way — just dip a brush and stir into the warm glaze.
| Original Ingredient | Best Substitution | Flavor / Texture Impact |
|---|---|---|
| Agar-agar powder | Gelatin (1 tbsp + 3 tbsp water, bloomed) | Softer, less firm; must keep refrigerated; not vegetarian |
| Raspberry puree | Strawberry or mixed berry puree | Different berry flavor; still delicious |
| Heavy whipping cream | Coconut cream (chilled, whipped) | Slightly coconut flavor; dairy-free option |
| Edible rose-gold luster dust | Gold edible glitter or skip | Visual impact only; can omit |
How to Make Rose Gold Raspberry Cheesecake Bombs — Step-by-Step
Trust me, this recipe is easier than it looks. Once you get the hang of the shell setting, you’ll feel like a pastry chef. Let’s break it down.
Step 1: Prepare the Shell Mixture
In a saucepan, combine 2 cups raspberry puree, 1 cup raspberry juice, 1 1/2 cups water, 3/4 cup sugar, 2 1/2 tsp agar-agar powder, 1 tbsp lemon juice, 1/4 tsp salt, and a few drops of rose-gold food coloring if using. Whisk until the agar-agar dissolves completely. Bring to a gentle simmer over medium heat, stirring constantly, and let it bubble for 2 minutes to activate the agar. Do not boil vigorously; a gentle simmer is key.
💡 Stella’s Pro Tip: Whisk continuously while heating — agar-agar loves to clump if left alone. If you see any specks, strain through a fine-mesh sieve before pouring into molds.
Step 2: Partially Set the Shells
Carefully pour the warm mixture into sphere-shaped silicone molds (I use 2-inch half-sphere cavities). Fill each cavity only halfway — you need room for the filling. Refrigerate for 15–20 minutes until the shell is set but still slightly tacky to the touch. It should hold its shape when you poke it gently.
⚠️ Common Mistake to Avoid: Over-chilling the shell before adding filling. If the shell becomes fully hard, the filling won’t bond and you’ll get a separate center. Aim for a jelly-like set, not rubbery.
Step 3: Make the Cheesecake Filling
In a mixing bowl, beat 8 oz softened cream cheese until smooth. Add 1/2 cup heavy whipping cream, 1/4 cup powdered sugar, 2 tbsp raspberry puree, and 1 tsp vanilla bean paste. Whip on medium-high until the mixture is thick, fluffy, and holds soft peaks — about 2–3 minutes. Transfer to a piping bag fitted with a round tip.
💡 Stella’s Pro Tip: For an extra-stable filling, chill the bowl and beaters for 10 minutes before whipping. In my Paris pastry days, we called this “the cold cream trick” — it gives you a mousse-like texture every time.
Step 4: Fill and Seal
Pipe a generous amount of the cheesecake filling into the center of each partially set shell, filling about three-quarters of the cavity. Then, pour or spoon the remaining warm raspberry shell mixture over the top to completely cover the filling. Smooth the surface with a small spatula. Return to the refrigerator for at least 2 hours, or until fully firm.
⚠️ Common Mistake to Avoid: Pouring the top layer while the shell is still too warm — it can melt the filling. Let the top mixture cool to lukewarm (around 90°F) before sealing.
Step 5: Unmold
Once fully set, gently press the bottom of the silicone mold to release each bomb. If stubborn, dip the mold in warm water for 5 seconds. Transfer the bombs to a chilled platter.
💡 Stella’s Pro Tip: Lightly grease the silicone molds with a drop of neutral oil before the first pour — it makes unmolding effortless and keeps the shells glossy.
Step 6: Make the Rose Gold Crystal Glaze and Finish
In a small saucepan, gently warm 1/4 cup raspberry preserves, 2 tbsp honey, 1 tbsp water, and 1 tsp lemon juice. Stir until smooth and glossy. Remove from heat and whisk in a tiny pinch of edible rose-gold luster dust (if using). Let cool for 5 minutes — it should be syrupy but not hot. Brush or drizzle the glaze over each bomb. Garnish with fresh raspberries, white chocolate curls, edible rose-gold flakes, and a light dusting of pearl dust. Serve chilled.
⚠️ Common Mistake to Avoid: Don’t overheat the glaze — honey can turn bitter. Warm just until combined, not bubbling.
| Step | Action | Duration | Key Visual Cue |
|---|---|---|---|
| 1 | Simmer shell mixture | 5 min | Fully dissolved, gentle bubbles |
| 2 | Fill half-molds & chill | 15–20 min | Set but tacky surface |
| 3 | Whip cheesecake filling | 3 min | Thick, soft peaks |
| 4 | Pipe filling & seal | 5 min | Filling fully enclosed |
| 5 | Set in fridge | 2+ hours | Firm to the touch |
| 6 | Glaze and garnish | 10 min | Shimmering, glossy finish |
Serving & Presentation
These rose gold raspberry cheesecake bombs are meant to be the centerpiece of any table. I love serving them on a black slate board or a white porcelain platter — the contrast makes the ruby-red shells and gold glaze pop like precious gems. For a party, I arrange them in a small cluster with fresh mint leaves and extra raspberries scattered around. Each bomb is a single-serve portion, so guests can pick one up and enjoy without any cutting.
In my Moroccan kitchen, we would serve fruit-based desserts with a hot mint tea and small honey-soaked pastries. For a modern twist, I pair these bombs with a chilled glass of Prosecco or a creamy vanilla latte. The acidity of the raspberry cuts through the creaminess of the filling, making it a perfect finish after a rich meal.
If you’re feeling extra festive, add a tiny pinch of edible pearl dust right before serving — it catches the light and creates a truly magical effect. I’ve seen grown adults gasp at the dinner table over this!
| Pairing Type | Suggestions | Why It Works |
|---|---|---|
| Side Dish | Dark chocolate truffles, almond tuiles | Earthy notes balance the tart berries |
| Sauce / Dip | Lemon curd, passion fruit coulis | Adds brightness and contrast |
| Beverage | Prosecco, rose lemonade, espresso | Bubbles and acidity cut richness |
| Garnish | Fresh mint, freeze-dried raspberries, gold leaf | Elevates visual appeal and freshness |
Make-Ahead, Storage & Reheating
For my busy NYC life, I often make these bombs a day or two before a party. They actually taste better after a full night in the fridge — the flavors meld and the shell develops an even silkier texture. Here’s how I store them safely.
| Method | Container | Duration | Reheating Tip |
|---|---|---|---|
| Refrigerator | Airtight container, layered with parchment | Up to 4 days | Serve straight from fridge; no reheating |
| Freezer | Freezer-safe bag, remove air | Up to 1 month | Thaw in fridge overnight; glaze may lose shine |
| Make-Ahead | Assemble but glaze just before serving | 2 days in advance | Glaze day-of for best shine |
One important note: Do not reheat these bombs — they are meant to be served cold. If you freeze them, thaw in the refrigerator and expect the glaze to be slightly less glossy. You can always re-glaze with a fresh batch of the Rose Gold Crystal Glaze after thawing. I store any leftover glaze in a jar in the fridge for up to a week — just warm gently before using.
Variations & Easy Swaps
One of the best things about this recipe is how easily it adapts to different tastes and dietary needs. Here are a few of my favorite variations, tested right in my NYC kitchen.
| Variation | Key Change | Best For | Difficulty Impact |
|---|---|---|---|
| Passion Fruit & Gold | Replace raspberry puree with passion fruit pulp | Tropical flavor; summer parties | Same |
| Vegan Version | Use vegan cream cheese and coconut cream for filling | Plant-based diets | Slightly harder (texture) |
| Chocolate Raspberry Bombs | Add 2 tbsp cocoa powder to shell; use chocolate filling | Chocolate lovers; holidays | Same |
Passion Fruit & Gold Variation
For a taste of the tropics, swap the raspberry puree for the same amount of passion fruit pulp (strained to remove seeds). The shell turns a stunning amber-gold. I serve these with a coconut cream filling and a gold luster glaze — they’re a hit at summer rooftop parties in NYC. The sharp passion fruit flavor pairs beautifully with the creamy filling, much like a Moroccan citrus salad my mother made.
Vegan Version (Dairy-Free)
To make these bombs entirely plant-based, substitute the cream cheese with a high-quality vegan cream cheese (I like Violife or Kite Hill) and use full-fat coconut cream (chilled and whipped) instead of heavy cream. The texture will be slightly lighter, but still luscious. Make sure your heavy whipping cream substitute is well chilled. The agar-agar shell is already vegan, so you’re good there. This version has been popular with my vegan friends who miss cheesecake!
Chocolate Raspberry Bombs
Fold 2 tablespoons of unsweetened cocoa powder into the raspberry shell mixture before heating for a dark chocolate-raspberry fusion. For the filling, replace the raspberry puree with melted dark chocolate (2 oz) and reduce the powdered sugar to 2 tablespoons. The result is a rich black-raspberry jewel that tastes like a chocolate-covered raspberry in dessert form. I discovered this combo after a trip to the Union Square winter market.
What is a good substitute for rose gold food coloring in cheesecake bombs?
If you don’t have rose-gold food coloring, you can achieve a similar warm pink-gold hue by mixing a small drop of red or pink gel coloring with a tiny amount of yellow gel — about 3 parts pink to 1 part yellow. Another option is to use a pinch of turmeric to add a soft golden undertone, then complement it with a blush pink from beet powder. For a true shimmer, stir in a dusting of edible gold luster dust after the shell cools slightly. The taste won’t change, just the color. If you want a completely natural version, skip the coloring altogether — the raspberry puree already gives a deep ruby red that’s gorgeous on its own.
How do you keep raspberry cheesecake bombs from getting soggy?
The key to preventing sogginess is the order of assembly and proper set of the shells. First, ensure you partially set the raspberry shell in the mold before adding any filling — if the shell is still liquid, the moisture from the filling will soak in and create a sad, mushy bomb. Second, whip your cheesecake filling until it’s thick and stable (soft peaks) so it doesn’t release excess water. Third, when you add the top layer of shell mixture to seal, let it cool to lukewarm (around 90°F) — too hot, and it may melt the filling. Finally, always store the bombs in an airtight container in the fridge, unwrapped until fully set, then cover. Following these steps, I’ve kept bombs fresh for up to four days without any sogginess.
Can I use frozen raspberries instead of fresh for the filling in rose gold raspberry cheesecake bombs?
Absolutely — and honestly, I often prefer frozen raspberries for this recipe! They’re picked at peak ripeness and puree just as beautifully as fresh. Simply thaw the berries, then blend and strain through a fine-mesh sieve to remove seeds. The puree will be a bit more liquid, so you might need to simmer it for a couple extra minutes to reduce slightly before using in the shell. For the filling, you can use the same puree straight from the sieve. Just be sure not to add any extra sugar unless you like it sweeter. Frozen berries also make a consistently good puree year-round, which is a blessing in a New York winter.
How far in advance can I make rose gold raspberry cheesecake bombs for a party?
You can make these bombs up to three days ahead and still have them taste and look spectacular. I recommend assembling the bombs completely (shell, filling, and top seal) one to two days before your party, then refrigerating them in an airtight container. On the day of the party, make the glaze fresh and brush or drizzle it over the chilled bombs. The glaze is what gives them that brilliant shimmer, and applying it just before serving ensures the shine is at its peak. If you want to make them even further ahead, you can freeze the unglazed bombs for up to a month. Thaw overnight in the fridge, then glaze the day of. This make-ahead plan has saved me countless times during busy NYC holiday seasons.
Can I use gelatin instead of agar-agar for these bombs?
Yes, you can substitute gelatin, but the texture and setting time will differ. Use 1 tablespoon of unflavored gelatin powder bloomed in 3 tablespoons of cold water for 5 minutes, then dissolve it into the warm raspberry mixture. Gelatin sets softer and more jelly-like than agar-agar, and it melts at room temperature, so these bombs must stay chilled until serving. Also, gelatin is not vegetarian, so keep that in mind for guests with dietary restrictions. If you do use gelatin, reduce the water in the shell mixture by 3 tablespoons to compensate for the bloom liquid. The resulting bombs will be less firm and more delicate — still delicious, but different. I personally prefer agar-agar for its firm, glossy set and stability.
What can I use instead of silicone sphere molds?
If you don’t have silicone sphere molds, don’t worry — you have options. You can use a standard half-sphere silicone mold (the kind for making dome cakes) and simply fill one half and seal with another, or use small glass bowls or ramekins lined with plastic wrap. Another creative idea: freeze the shell mixture into ice cube spheres using a metal sphere ice cube tray (spray with nonstick spray first). Just be aware that metal trays are harder to unmold, so you may need to dip them briefly in warm water. For a freestyle approach, you can pour the shell mixture into a baking dish, let it set, cut out circles, and form them around a dollop of filling — it’s rustic but charming.
How do I get the edible glitter to stick to the cheesecake bombs?
The key is to use a slightly sticky surface. The best way is to mix the edible glitter (luster dust or flakes) into the glaze right before brushing it on, so the glitter is suspended and adheres evenly. If you’re dusting dry glitter on top, wait until the glaze has set for about 5 minutes — it should still be tacky but not wet. Use a soft brush to gently press the glitter onto the surface. Another trick I love: after glazing, let the bombs sit for 2 minutes, then sprinkle the glitter from a height using a fine-mesh sieve for a delicate, even coating. Avoid touching the glitter with your fingers — body oils can dull the sparkle. And remember, a little goes a long way; you want a subtle shimmer, not a disco ball.
Are these cheesecake bombs gluten-free?
Yes, absolutely! All the ingredients in this recipe are naturally gluten-free. The shell uses agar-agar and raspberry puree (no wheat or grains), the filling is cream cheese and cream, and the glaze is fruit preserves and honey. There are no flour, cookies, or crust involved. However, if you’re using store-bought raspberry puree or preserves, always check the label to ensure there’s no added wheat starch or gluten. The same goes for your edible glitter — most are gluten-free, but some may use wheat-based coatings. My tested brands (Now Foods agar-agar, Philadelphia cream cheese, and Wilton luster dust) are all gluten-free. This makes the bombs a perfect dessert for guests with celiac disease or gluten sensitivity.
Why did my shells turn out cloudy or dull instead of clear and glossy?
Cloudy shells are usually caused by one of three things: over-boiling the mixture, incorporating too much air while stirring, or using cold ingredients. Agar-agar needs to be boiled for a full 2 minutes to activate, but vigorous boiling can introduce air bubbles that make the shell look milky. Instead, keep the mixture at a gentle simmer and stir slowly with a whisk. Always start with room-temperature liquids. Another common culprit is the lemon juice — if you add it when the mixture is too hot, it can react with the pectin and cause cloudiness. Add the lemon juice at the end, just as you remove the pan from heat. Finally, make sure your silicone molds are completely clean and dry. With these adjustments, you’ll get a beautifully clear, jewel-like shell every time.
Can I make a larger batch of these bombs for a crowd?
Definitely — this recipe scales wonderfully. I often double or triple it for holiday parties and bridal showers. Just keep a few things in mind: make the shell mixture in batches if your biggest pot can’t hold more than 4 cups of liquid. Agar-agar sets quickly, so work with one mold tray at a time to avoid the mixture gelling in the pot. You can keep the shell mixture warm over very low heat, stirring occasionally, but don’t let it boil again. For the filling, double the ingredients and whip in a large bowl — it holds up well. For storage, layer the bombs in a single layer in a large airtight container with parchment between each layer. With a little organization, you can easily make 24 bombs for a big celebration.
Share Your Version!
I absolutely love seeing how these rose gold raspberry cheesecake bombs turn out in your kitchen. Did you try a variation? Use a different fruit? Get creative with the glaze? Drop a star rating and a comment below — I read every single one and I’m always here to answer questions. And if you snap a photo, tag me on Instagram or Pinterest @leosfoods — there’s nothing more rewarding than knowing my recipes are bringing joy to your table.
Before you go, I have one question for you: which variation are you most excited to try — the passion fruit gold, the vegan version, or the chocolate raspberry? Let me know in the comments, and I’ll share even more tips and tricks for your chosen twist. From my NYC kitchen to yours — I hope this recipe brings as much warmth to your table as it does to mine. — Stella 🧡
Love This Recipe? Save It to Pinterest!
If you enjoyed this Rose Gold Raspberry Cheesecake Bombs recipe, don’t let it get lost in your browser tabs! 😄 Pin it now so you can find it again anytime — and explore hundreds more tried-and-tested recipes waiting for you on my Pinterest boards.
👉 Follow Stella on Pinterest @stellarecipeblog
📌 Pin this recipe · 🔁 Re-pin your favorites · 💬 Tag me when you make it — I love seeing your creations!
Did you make these Rose Gold Raspberry Cheesecake Bombs? Leave a ⭐ rating & comment below! I respond to every question. 💬

Rose Gold Raspberry Cheesecake Bombs
A luxurious berry cheesecake dessert with a radiant gemstone appearance.
- Yield: 6 1x
Ingredients
- For the Rose Gold Raspberry Shell:
- 2 cups raspberry puree, strained
- 1 cup raspberry juice
- 1 1/2 cups water
- 3/4 cup granulated sugar
- 2 1/2 tsp agar-agar powder
- 1 tbsp fresh lemon juice
- 1/4 tsp salt
- A few drops rose-gold food coloring (optional)
- For the Raspberry Cheesecake Filling:
- 8 oz cream cheese, softened
- 1/2 cup heavy whipping cream
- 1/4 cup powdered sugar
- 2 tbsp raspberry puree
- 1 tsp vanilla bean paste
- For the Rose Gold Crystal Glaze:
- 1/4 cup raspberry preserves
- 2 tbsp honey
- 1 tbsp water
- 1 tsp lemon juice
- Edible rose-gold luster dust (optional)
- For Garnish (optional):
- Fresh raspberries
- White chocolate curls
- Edible rose-gold flakes
- Edible pearl dust
Instructions
- Combine raspberry puree, raspberry juice, water, sugar, agar-agar powder, lemon juice, salt, and optional rose-gold coloring in a saucepan. Heat while stirring until fully dissolved and bring to a gentle simmer.
- Pour the mixture into sphere-shaped silicone molds, coating the sides and filling each cavity halfway. Refrigerate until partially set.
- Whip cream cheese, heavy whipping cream, powdered sugar, raspberry puree, and vanilla bean paste until smooth, creamy, and fluffy. Transfer to a piping bag.
- Pipe a generous amount of raspberry cheesecake filling into the center of each partially set shell. Cover with the remaining raspberry mixture and refrigerate until fully set and firm.
- Carefully unmold the cheesecake bombs onto a chilled serving platter.
- Warm raspberry preserves, honey, water, and lemon juice until smooth and glossy. Stir in a small amount of edible rose-gold luster dust if desired. Allow to cool slightly while remaining pourable.
- Brush or drizzle the crystal glaze over each bomb to create a shimmering rose-gold jewel finish.
- Garnish with fresh raspberries, white chocolate curls, edible rose-gold flakes, and a light dusting of pearl dust.
- Serve thoroughly chilled for a luxurious berry cheesecake dessert with a radiant gemstone appearance.
Nutrition
- Calories: 305
- Sugar: 34g
- Fat: 16g
- Carbohydrates: 39g
- Protein: 4g
Tried This Recipe? Leave a Comment!
Did you make this recipe? I’d love to hear how it turned out! Please leave a comment and a rating below. Your feedback helps other home cooks and supports cheerychop.com!
For more delicious inspiration, follow me on Pinterest!