Ruby Cherry Cheesecake Spheres with Hidden Cream Burst
“`html
Table of Contents
Ruby Cherry Cheesecake Spheres with Hidden Cream Burst Center – The Ultimate Elegant No-Bake Dessert
I still remember the first time I made these cherry cheesecake spheres — it was a rainy Saturday in my tiny NYC kitchen, and I was homesick for the cherry orchards outside Marrakech where my mother would pick fruit for her famous tagines. I wanted to create something that captured that same jewel-toned beauty but with a French pastry soul. The hidden cream burst center was born from a mistake — I froze some mascarpone cream too long, and when I bit into the finished sphere, that cold, silky center exploded with richness. It was one of those happy accidents that became the whole point of the recipe. These ruby mirror glaze beauties are now my go-to for dinner parties and celebratory gatherings, and they never fail to stop a conversation mid-sentence.
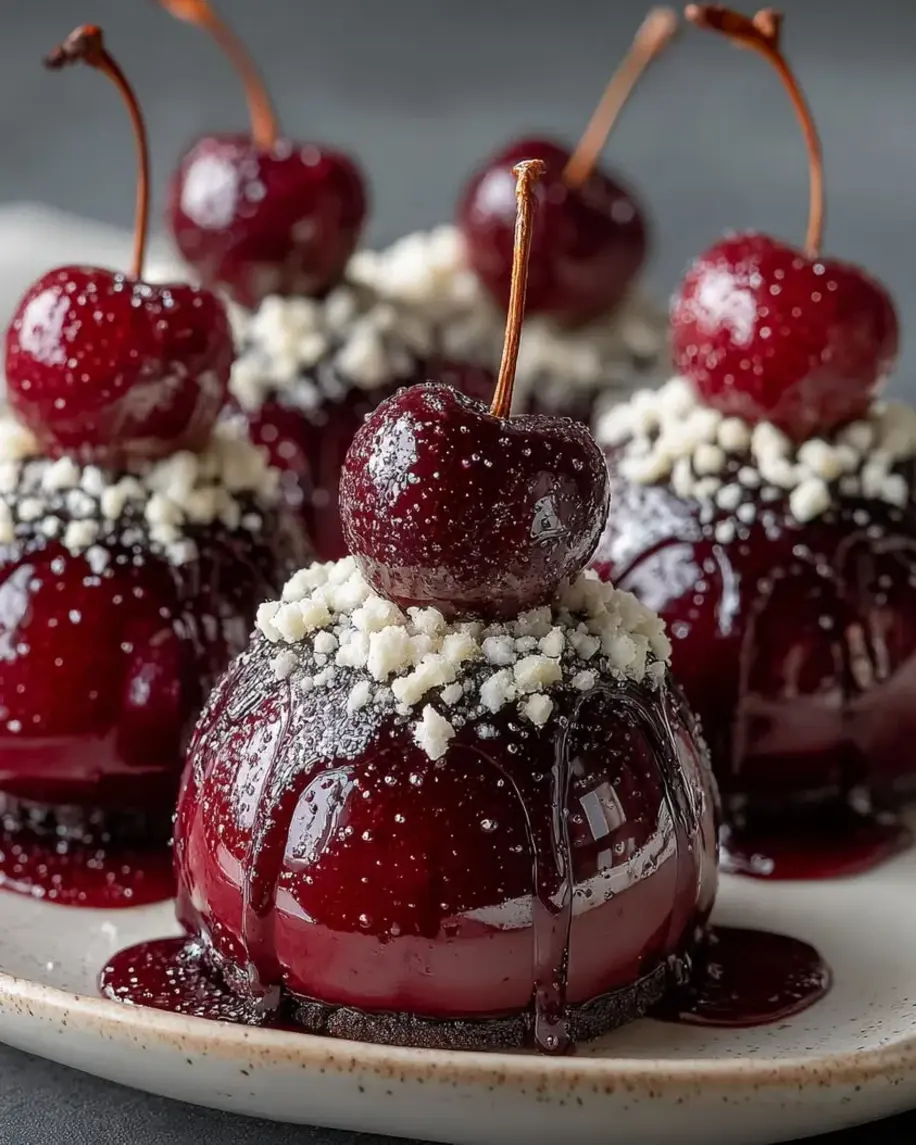
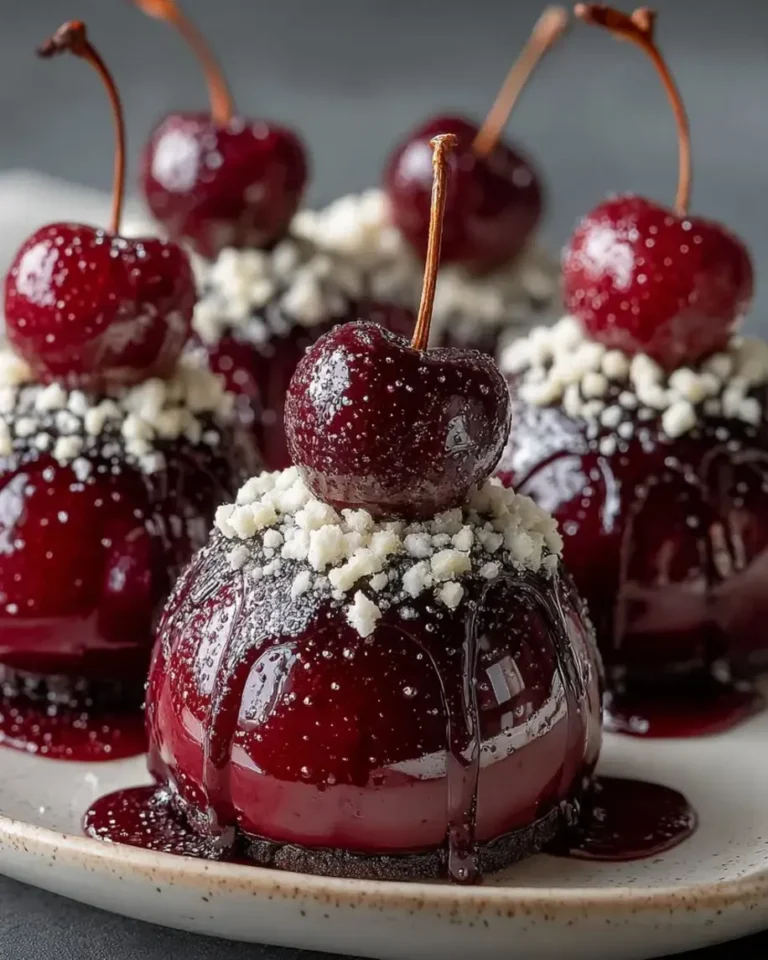
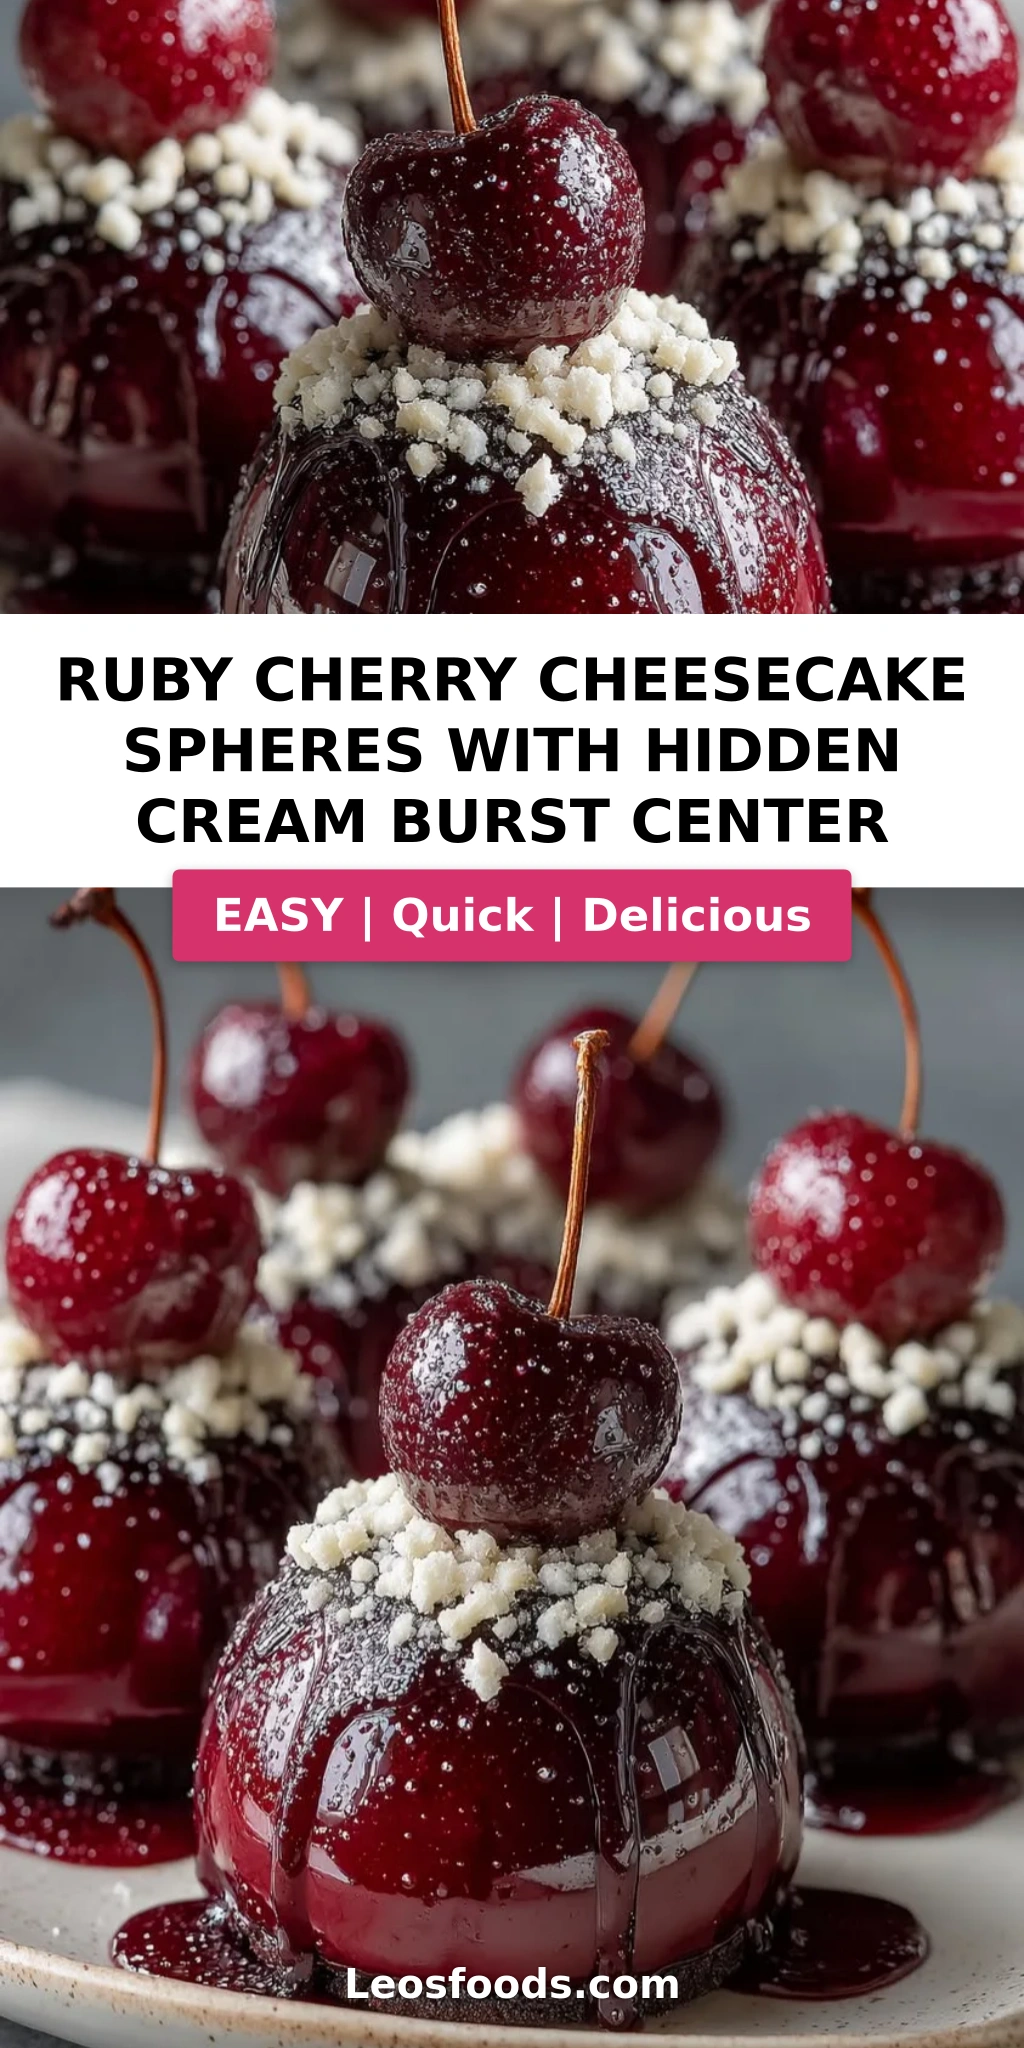
Imagine a perfectly round sphere, lacquered in a brilliant ruby mirror glaze so glossy you can see your reflection, sitting on a plate like a piece of edible jewelry. The first crack of the spoon reveals a light, airy cherry cheesecake mousse — not too sweet, with just enough tang from the lemon and cream cheese. Then comes the surprise: a hidden cream burst center that spills out like a secret, adding a luscious, velvety contrast to the fruity mousse. A tiny vanilla sponge base at the bottom gives it just enough structure, and the optional white chocolate curls and fresh cherries on top make it look like something from a Parisian pâtisserie window. Every bite is a dance of textures — smooth, creamy, bouncy, and crisp.
What sets this recipe apart from other cherry cheesecake desserts is the hidden cream burst center — a technique I perfected during my time at Le Cordon Bleu in Paris, where we learned that freezing components separately is the key to layered dessert magic. Many home bakers struggle with mirror glaze because it cracks or isn’t shiny enough, so I’m going to share my foolproof method for getting that flawless ruby finish every time. I’ll also walk you through the one mistake that can cause the cream center to leak out of the sphere, so you can avoid it completely. Whether you’re an experienced baker or a confident home cook ready for a challenge, these ruby cherry cheesecake spheres are worth every step — and your guests will absolutely lose their minds over them.
Why This Ruby Cherry Cheesecake Spheres Recipe Is the Best
The Flavor Secret: This recipe uses a double-cherry approach — cherry puree in the mousse and fresh cherries as garnish — which gives a deep, layered fruit flavor that doesn’t get lost in the cream cheese. I learned this layering technique from my mother, who always said that in Moroccan cooking, you taste a dish three times before it’s done. The lemon juice brightens the cherries without making them tart, and the mascarpone in the hidden center adds a buttery richness that cuts through the sweetness. The result is a perfectly balanced dessert that’s fruity, tangy, creamy, and indulgent without being heavy.
Perfected Texture: The magic of these cherry cheesecake spheres lies in the contrast between the frozen cream center and the airy mousse. I spent weeks testing the right ratios of cream cheese to heavy cream to get a mousse that’s sturdy enough to hold its shape in a sphere mold but light enough to melt on your tongue. The gelatin gives it just enough structure without making it rubbery — a trick I picked up in Paris where we used gelatin sheets for everything from mousses to glazes. The mirror glaze is thin enough to coat evenly but thick enough to set into that signature shiny shell that cracks beautifully when you bite into it.
Foolproof & Fast: Despite its showstopping appearance, this recipe is surprisingly forgiving if you follow a few key rules. The entire active prep time is about 45 minutes, and while the spheres need to freeze for 4 hours, that’s hands-off time where you can clean up, prep other dishes, or just relax. I’ve designed the steps so that even if you’ve never worked with gelatin or mirror glaze before, you’ll feel confident. The recipe uses standard US ingredients like cream cheese, heavy cream, and white chocolate chips — no specialty items required except maybe the edible ruby shimmer dust, which you can find online or skip entirely. I’ve also included tested substitutions for almost every component, so you can adapt this to what you have on hand.
Cherry Cheesecake Spheres Ingredients
When I shop for these ingredients in NYC, I head straight to the Union Square farmers market for fresh cherries in summer, or I grab frozen organic cherry puree from Whole Foods when cherries aren’t in season. The cream cheese should be full-fat and at room temperature — that’s non-negotiable for a smooth mousse. For the white chocolate in the glaze, use a good-quality brand like Ghirardelli or Lindt; cheap white chocolate will seize and ruin the shine. And if you can find it, the edible ruby shimmer dust is worth the splurge — it gives the glaze that deep, jewel-like glow that makes these spheres look like they belong in a museum case.
Ingredients List
- For the Cherry Cheesecake Mousse:
- 2 cups cherry puree (from fresh or frozen cherries)
- 8 oz cream cheese, softened to room temperature
- 1/3 cup granulated sugar
- 1 tbsp fresh lemon juice
- 1 cup heavy cream, cold
- 2 tsp powdered gelatin
- 2 tbsp cold water (for blooming gelatin)
- For the Hidden Cream Burst Center:
- 1/2 cup heavy cream, cold
- 2 tbsp powdered sugar
- 1 tsp vanilla extract
- 4 oz mascarpone cheese, softened
- For the Vanilla Sponge Base:
- 1 cup all-purpose flour
- 1/2 tsp baking powder
- 1/4 tsp salt
- 1/4 cup unsalted butter, softened
- 1/3 cup granulated sugar
- 1 large egg, at room temperature
- 1/2 tsp vanilla extract
- 1/4 cup whole milk
- For the Ruby Mirror Glaze:
- 1 cup white chocolate, finely chopped (about 6 oz)
- 1/3 cup sweetened condensed milk
- 1/4 cup water
- 1/2 cup granulated sugar
- 2 tsp powdered gelatin
- 2 tbsp cold water (for blooming gelatin)
- Red food coloring, as needed (gel-based preferred)
- Edible ruby shimmer dust, as needed (optional but recommended)
- For Garnish (optional):
- Fresh cherries with stems, for topping
- White chocolate curls
Ingredient Spotlight
Cherry Puree: This is the backbone of the mousse flavor. You can make your own by simmering pitted cherries with a little sugar and blending until smooth, or buy a good-quality puree. In a pinch, thawed frozen cherries blitzed in a food processor work perfectly. Avoid cherry pie filling — it has added thickeners and stabilizers that will make the mousse gummy.
Mascarpone: This Italian cream cheese is richer and silkier than regular cream cheese, which is exactly what you want for the hidden center. It won’t curdle when frozen and it melts smoothly on your tongue. If you can’t find mascarpone, use equal parts cream cheese and heavy cream blended together, but the texture will be slightly firmer.
White Chocolate for Glaze: The quality of your white chocolate determines the shine and texture of the mirror glaze. Use a brand that contains real cocoa butter (at least 20%). White chips or melting wafers often have additives that prevent a smooth, glossy finish. I prefer Ghirardelli white chocolate bars chopped finely.
Powdered Gelatin: This is what gives both the mousse and the glaze their structure. Make sure to bloom it in cold water for at least 5 minutes before heating. Too hot of a liquid will kill the gelatin’s setting power. If you use sheet gelatin, convert 2 tsp powdered gelatin = 3 sheets (gold strength).
Edible Ruby Shimmer Dust: This is optional but transformative. It’s a fine, food-grade glitter that gives the glaze a subtle, gem-like sparkle. You can find it online or at specialty baking stores. Start with a pinch and add more until you get the desired effect — a little goes a long way.
| Original Ingredient | Best Substitution | Flavor / Texture Impact |
|---|---|---|
| Cherry puree | Thawed frozen cherries blended smooth + 1 tbsp sugar | Slightly less concentrated, but still vibrant |
| Mascarpone cheese | 4 oz cream cheese + 2 tbsp heavy cream whipped in | Firmer center, less silky but still good |
| White chocolate (glaze) | High-quality white chocolate chips (must have cocoa butter) | May be slightly less shiny, still works |
| Powdered gelatin | 3 sheets gold-strength gelatin (bloomed in cold water) | Same result, just different format |
| Edible ruby shimmer dust | Luster dust in “ruby red” or “burgundy” | Color may vary slightly, still sparkles |
How to Make Ruby Cherry Cheesecake Spheres — Step-by-Step
I’ll guide you through every step of this recipe, from baking the sponge to pouring the mirror glaze. The key is to work in stages — the sponge and cream centers can be made ahead while the mousse sets. Don’t rush the freezing times; they’re essential for the structural integrity of the spheres and the hidden cream burst center.
Step 1: Bake the Vanilla Sponge
Preheat your oven to 350°F (175°C) and line a small 8-inch square baking pan with parchment paper. Whisk together 1 cup all-purpose flour, 1/2 tsp baking powder, and 1/4 tsp salt in a small bowl. In a separate larger bowl, beat 1/4 cup softened unsalted butter with 1/3 cup granulated sugar until light and fluffy, about 2–3 minutes using a hand mixer. Add 1 large egg and 1/2 tsp vanilla extract and beat until incorporated. Alternate adding the dry ingredients and 1/4 cup milk, starting and ending with the dry ingredients, mixing just until smooth — don’t overmix. Pour the batter into the prepared pan and spread evenly. Bake for 18–20 minutes, or until a toothpick inserted in the center comes out clean. Cool in the pan for 5 minutes, then turn out onto a wire rack to cool completely. Once cool, use a round cutter slightly smaller than your sphere mold to cut out 8 circles. Set aside.
💡 Stella’s Pro Tip: You can bake the sponge up to 2 days in advance and store it in an airtight container at room temperature. Or freeze the sponge rounds for up to 1 month — just thaw at room temperature before using.
Step 2: Make the Hidden Cream Burst Center
In a medium bowl, beat 4 oz softened mascarpone cheese with 2 tbsp powdered sugar and 1 tsp vanilla extract until smooth. In a separate cold bowl, whip 1/2 cup cold heavy cream to stiff peaks. Gently fold the whipped cream into the mascarpone mixture until no streaks remain. Transfer the cream to a piping bag fitted with a small round tip (or a zip-top bag with a tiny corner snipped). Pipe small dollops — about 1 tablespoon each — onto a parchment-lined tray that fits in your freezer. You should have 8 portions. Freeze the cream dollops for at least 2 hours, or until rock solid. This is critical: if the centers aren’t fully frozen, they’ll melt into the mousse and you’ll lose the hidden burst effect.
⚠️ Common Mistake to Avoid: Don’t use a star tip or large opening for piping the centers — they’ll be too wide and might poke through the mousse. Keep the dollops compact and round, like a large marble.
Step 3: Make the Cherry Cheesecake Mousse
In a small bowl, bloom 2 tsp powdered gelatin in 2 tbsp cold water. Let it sit for 5–10 minutes until thick and spongy. In a large bowl, beat 8 oz softened cream cheese with 1/3 cup granulated sugar until completely smooth — no lumps. In a small saucepan, gently heat 2 cups cherry puree with 1 tbsp lemon juice over medium heat until warm (not boiling). Remove from heat and whisk in the bloomed gelatin until fully dissolved. Slowly pour the warm cherry mixture into the cream cheese while mixing on low speed, until combined and smooth. Let this mixture cool to room temperature — about 15 minutes — stirring occasionally. In a separate cold bowl, whip 1 cup cold heavy cream to soft peaks (the cream should hold a gentle curl when you lift the whisk). Gently fold the whipped cream into the cooled cherry-cream cheese mixture in three additions, using a rubber spatula. Fold just until combined — overfolding will deflate the mousse.
💡 Stella’s Pro Tip: To speed up cooling the cherry-cream cheese mixture, place the bowl in a larger bowl filled with ice water and stir gently for 3–5 minutes. This prevents the mixture from getting too cold and seizing the gelatin.
Step 4: Assemble the Spheres
Fill half-sphere silicone molds (2-inch diameter works best) about halfway with the cherry cheesecake mousse. Place one frozen cream center dollop into the center of each half-sphere, pressing it gently into the mousse so it’s fully surrounded. Pipe or spoon the remaining mousse over the cream centers, filling the molds completely. Press a vanilla sponge circle onto the top of each filled half-sphere — the sponge should sit flush with the rim of the mold. Repeat for all 8 spheres. Place the filled molds on a baking sheet and freeze for at least 4 hours, or preferably overnight. The spheres must be fully frozen before glazing, otherwise the mousse will absorb the warm glaze and collapse.
⚠️ Common Mistake to Avoid: If you don’t push the frozen cream center deep enough into the mousse, it will poke out of the top of the sphere when you unmold it. Make sure it’s fully encased by mousse on all sides.
Step 5: Make the Ruby Mirror Glaze
In a small bowl, bloom 2 tsp powdered gelatin in 2 tbsp cold water. Set aside. Finely chop 1 cup white chocolate and place it in a heat-safe bowl. In a small saucepan, combine 1/4 cup water, 1/2 cup granulated sugar, and 1/3 cup sweetened condensed milk. Heat over medium heat, stirring occasionally, until the sugar is completely dissolved and the mixture is hot but not boiling (about 140°F / 60°C). Remove from heat and stir in the bloomed gelatin until fully dissolved. Pour this hot liquid over the chopped white chocolate and let it sit for 30 seconds, then whisk gently until the chocolate is fully melted and the mixture is smooth and glossy. Add red food coloring drop by drop until you reach a deep ruby red — I usually need about 4–5 drops of gel coloring. Add a pinch of edible ruby shimmer dust and whisk to combine. Let the glaze cool to 90–95°F (32–35°C) — it should be thick but still pourable, like warm honey. If the glaze is too warm, it will melt the frozen spheres; if too cold, it will set too thick and not coat evenly.
💡 Stella’s Pro Tip: To test the glaze consistency, dip a spoon into the glaze and lift it up. The glaze should flow off the spoon in a smooth, continuous ribbon. If it’s too thick, warm it gently over a double boiler for 10 seconds. If too thin, let it cool for a few more minutes.
Step 6: Glaze the Spheres
Remove the frozen spheres from the molds — they should pop out easily. Work quickly but carefully. Place each frozen sphere on a wire rack set over a baking sheet (to catch drips). Pour the ruby mirror glaze evenly over each sphere, using a back-and-forth motion to cover the entire surface. Make sure the glaze runs down all sides and covers the sponge base as well. Alternatively, hold each sphere on a fork or skewer and pour the glaze over it, letting the excess drip off. Allow the glaze to set for 10–15 minutes at room temperature — it will form a shiny, firm shell. If you notice any bare spots, you can do a second thin coat after the first sets for 5 minutes.
⚠️ Common Mistake to Avoid: Don’t touch the glazed spheres with your fingers while the glaze is still wet — fingerprints will ruin the mirror finish. Use a fork, skewer, or tongs to handle them until the glaze is fully set.
Step 7: Garnish and Serve
Once the glaze is set, carefully transfer each sphere to a serving plate or a parchment-lined tray. Garnish the top of each sphere with a fresh cherry (with stem on for elegance) and a few white chocolate curls. If you want extra sparkle, dust a tiny bit more ruby shimmer dust over the top using a small fine-mesh sieve. Serve immediately, or refrigerate for up to 4 hours before serving. The spheres are best enjoyed within 24 hours of glazing, while the shell is still shiny and crisp.
💡 Stella’s Pro Tip: For the white chocolate curls, use a vegetable peeler on a room-temperature white chocolate bar. The curls will be more fragile in warm weather, so chill them on a plate before placing on the spheres.
| Step | Action | Duration | Key Visual Cue |
|---|---|---|---|
| 1 | Bake vanilla sponge | 18–20 mins | Toothpick clean, golden edges |
| 2 | Prepare cream centers | 10 mins prep + 2 hrs freeze | Frozen solid, no give when pressed |
| 3 | Make cherry mousse | 15 mins prep | Smooth, thick, folds hold shape |
| 4 | Assemble and freeze spheres | 10 mins + 4 hrs freeze | Spheres pop out cleanly from mold |
| 5 | Make ruby mirror glaze | 15 mins prep + cooling | Glossy ribbon, 90–95°F, deep ruby |
| 6 | Glaze spheres | 5 mins + 10–15 mins set | Shiny, smooth shell, no cracks |
| 7 | Garnish and serve | 5 mins | Cherries on top, chocolate curls |
Serving & Presentation
These cherry cheesecake spheres are showstoppers on a dessert table. I like to serve them on individual white porcelain spoons or small pedestal plates so the glaze catches the light. The contrast between the ruby red sphere and a white plate is stunning. If you’re plating multiple spheres on a larger platter, space them at least 2 inches apart so they don’t stick together. A few fresh cherries scattered around the plate and a light dusting of powdered sugar or cocoa powder on the plate adds a professional touch.
In terms of pairings, these spheres are rich enough to stand alone, but they’re also lovely with a dollop of lightly sweetened crème fraîche or a drizzle of warm dark chocolate sauce for contrast. For a Moroccan-inspired twist that my mother would approve of, sprinkle a little ground cardamom or cinnamon over the plate — it echoes the cherry flavor beautifully. In NYC, I’ve served these at dinner parties alongside a bright citrus sorbet to cut the richness, and they’re always the first thing to disappear.
| Pairing Type | Suggestions | Why It Works |
|---|---|---|
| Side Dish | Lemon sorbet, fresh berries, mint salad | Brightness cuts the richness |
| Sauce / Dip | Warm dark chocolate sauce, crème fraîche, raspberry coulis | Adds depth and contrast |
| Beverage | Espresso, cold brew, dessert wine (Muscat), cherry tea | Coffee cuts sweetness, wine complements fruit |
| Garnish | Fresh cherries, white chocolate curls, edible flowers, mint | Adds color, texture, and elegance |
Make-Ahead, Storage & Reheating
In my busy NYC schedule, I almost always make these cherry cheesecake spheres in stages. The sponge and cream centers freeze beautifully, and the assembled spheres can hang out in the freezer for several days before glazing. The mirror glaze is best made fresh on the day of serving, but you can prep all the other components up to a week ahead. Here’s my storage guide so nothing goes to waste.
| Method | Container | Duration | Reheating Tip |
|---|---|---|---|
| Refrigerator | Airtight container, single layer | Up to 2 days (glazed) | Serve cold; do not reheat |
| Freezer | Airtight container, layers separated by parchment | Up to 1 month (unglazed) | Thaw in fridge 1 hr, then glaze |
| Make-Ahead | Freeze assembled spheres on tray, then bag | Up to 1 week before glazing | Glaze directly from frozen |
A quick note on reheating: these are a cold dessert and should never be microwaved or warmed. If you’ve stored glazed spheres in the fridge, let them sit at room temperature for 10–15 minutes before serving to take the chill off and let the flavors open up. If the glaze develops condensation (which can happen if the spheres are moved from freezer to a warm room), gently blot with a paper towel — the shine will return as they sit. And if you’re hosting a party, I recommend glazing the spheres no more than 6 hours before serving for the best visual impact.
Variations & Easy Swaps
| Variation | Key Change | Best For | Difficulty Impact |
|---|---|---|---|
| Berry Bliss | Replace cherry puree with mixed berry puree | Summer gatherings, berry season | Same – just swap fruit |
| Chocolate Lover’s | Add 1/4 cup melted dark chocolate to mousse | Chocolate + cherry fans | Slightly richer texture |
| Citrus Burst | Substitute orange puree for cherry, add orange zest | Winter holidays, citrus season | Same – adjust sugar to taste |
Berry Bliss Variation
For a mixed berry version, replace the 2 cups of cherry puree with an equal amount of strawberry-rhubarb or raspberry-blueberry puree. This is a lovely option in early summer when berries are at their peak at the NYC farmers markets. The acidity of rhubarb or raspberries pairs beautifully with the creamy mascarpone center, and the natural color will still give you a gorgeous ruby glaze — just add a touch more red food coloring if needed. I like to garnish this version with a mix of fresh berries and mint leaves.
Gluten-Free / Dairy-Free Variation
For a gluten-free version, replace the all-purpose flour in the sponge with a 1:1 gluten-free baking blend that contains xanthan gum. The texture will be slightly more tender, so handle the sponge rounds gently. For a dairy-free version, use a plant-based cream cheese (I like Miyoko’s), coconut cream instead of heavy cream (chill the can and scoop the solid top), and a dairy-free white chocolate for the glaze. Note that the mousse will be slightly less stable, so freeze the spheres for a full 6 hours or overnight before glazing. The cream center can be made with a thick coconut cream blended with powdered sugar and a pinch of salt — it won’t be as rich but will still give that satisfying burst.
Chocolate Lover’s Twist
Cherry and chocolate are a classic pairing for good reason. Fold 1/4 cup of melted and slightly cooled dark chocolate (70% cacao) into the cherry mousse after you’ve added the whipped cream, just before filling the molds. The chocolate adds a deep, bittersweet note that balances the sweetness of the cherry and the glaze. You can also add a tiny pinch of cayenne pepper or cinnamon to the chocolate for a Moroccan-inspired heat — my mother always added a touch of cinnamon to her cherry dishes, and it works beautifully here. Garnish with dark chocolate shavings instead of white chocolate curls.
What is the best way to create a hidden cream burst center inside a cheesecake sphere without it leaking out?
The key to a hidden cream burst center that stays put is making sure the cream center is fully frozen solid before you enclose it in the mousse. Pipe the mascarpone cream into small, compact dollops (about 1 tablespoon each) on a parchment-lined tray and freeze for at least 2 hours, or until they are rock hard. When you place them into the half-filled sphere molds, press them gently into the mousse so they are completely surrounded — no part of the frozen center should touch the edge of the mold. Cover with the remaining mousse and add the sponge base, then freeze the assembled spheres for at least 4 hours. If the cream centers aren’t fully frozen, they’ll melt into the mousse during freezing and you’ll lose the distinct burst effect.
Can I use frozen ruby cherries instead of fresh ones for the cheesecake spheres?
Absolutely, frozen cherries work wonderfully for this recipe and are often more convenient and consistent in flavor year-round. Use frozen sweet cherries like Bing or Rainier — they have a deep, rich flavor that makes excellent puree. Thaw them completely, drain any excess liquid (you can reserve the juice for another use), then blend them into a smooth puree. If you want to boost the ruby color, add a tablespoon of cherry juice concentrate or a few drops of red food coloring to the puree. The texture and flavor of the mousse will be just as good as with fresh cherries. Just avoid frozen cherries that are packed in syrup, as they’ll be too sweet and might throw off the sugar balance.
How long do Ruby Cherry Cheesecake Spheres need to chill before serving to keep their shape?
The assembled spheres must freeze for at least 4 hours before glazing, but I recommend overnight for best results. After glazing, they need just 10–15 minutes at room temperature for the glaze to set, then they can be served immediately. If you’re not glazing until later, keep the unglazed spheres in the freezer for up to 1 week. Once glazed, they can sit at room temperature for up to 30 minutes without losing their shape, but if your kitchen is warm, keep them refrigerated until just before serving. The spheres are best served cold — the mousse should be firm but creamy, not rock hard. If they’ve been in the freezer long-term, let them thaw in the refrigerator for 30 minutes before glazing and serving.
What can I substitute for ruby cherries if they are out of season for this recipe?
When ruby cherries aren’t in season, you have several excellent options. Frozen cherries are your best bet — they’re picked at peak ripeness and work perfectly in the puree. You can also use jarred sour cherries (drained and rinsed) mixed with a little sugar to balance the tartness, or even high-quality cherry preserves thinned with a splash of water and lemon juice. For a different fruit altogether, try raspberries, strawberries, or a blend of berries — the texture of the mousse will be similar, and you can color the glaze to match. Avoid canned cherry pie filling, as it contains thickeners that will make the mousse gummy. Whatever you choose, taste and adjust the sugar level since different fruits vary in sweetness.
Can I make these cherry cheesecake spheres without gelatin for a vegetarian version?
Yes, you can substitute the gelatin with a plant-based alternative like agar-agar powder, though the texture will be different. For the mousse, use 1 tsp agar-agar powder (dissolved in 2 tbsp water and simmered for 1 minute) in place of the gelatin. The mousse will set slightly firmer and less silky, but it will still hold its shape. For the mirror glaze, agar-agar is trickier because it sets at a higher temperature and can make the glaze too firm. I recommend using a gelatin-free mirror glaze recipe that relies on white chocolate and condensed milk alone — it won’t be as shiny but will still look beautiful. Always test a small batch first to see if you like the texture before making the full recipe.
How do I get the ruby mirror glaze perfectly smooth and shiny without streaks or bubbles?
A flawless mirror glaze is all about temperature and technique. First, make sure your white chocolate is very finely chopped so it melts evenly — large chunks can cause lumps. When you pour the hot gelatin-sugar mixture over the chocolate, let it sit for 30 seconds before whisking, then whisk gently in one direction to avoid incorporating air bubbles. If you do see bubbles, strain the glaze through a fine-mesh sieve before using. The ideal temperature for pouring is 90–95°F (32–35°C) — too warm and it will melt the frozen spheres; too cool and it will set too thick. When pouring, use a steady, even motion and make sure the sphere is fully covered in one go. If you need a second coat, wait 5 minutes for the first coat to set slightly.
Can I use a different fruit flavor for the hidden cream center instead of vanilla mascarpone?
Absolutely — the hidden cream center is a blank canvas! For a chocolate cream center, swap the mascarpone for a chocolate ganache made with dark chocolate and heavy cream, chilled until firm. For a fruity center, fold 2 tablespoons of fruit puree (raspberry, strawberry, or mango) into the mascarpone mixture before freezing — just be careful not to add too much liquid or the center won’t freeze solid. A lemon or orange curd center is also lovely, offering a bright citrus surprise against the cherry mousse. Whatever flavor you choose, make sure the center is fully frozen before encasing it in the mousse to maintain that distinct burst effect.
What size sphere mold do I need for this recipe, and can I use a different shape?
I recommend a 2-inch (5 cm) diameter half-sphere silicone mold, which yields perfectly portioned individual desserts. You’ll need a mold with 8 cavities (or you can work in batches). If you only have larger spheres (2.5–3 inches), you’ll need to increase the mousse and cream center amounts by about 20% and freeze for an additional hour. You can also use other shapes like egg-shaped molds or even small dome molds — just make sure the volume is similar and that the sponge base is cut to fit the bottom. Square or rectangular molds will also work, but the glaze may pool differently on the corners. Silicone molds are essential for easy release — metal or plastic molds will stick and damage the spheres.
Why did my mirror glaze crack after I poured it over the frozen spheres?
Cracked mirror glaze is usually caused by a temperature shock — the frozen sphere is too cold, or the glaze is too hot (or too cold). Make sure your glaze is at 90–95°F when you pour it. If the spheres are straight out of the freezer at 0°F, the drastic temperature difference can cause the glaze to contract too quickly and crack. Let the frozen spheres sit at room temperature for 2–3 minutes before glazing to take the edge off. Also, make sure your glaze isn’t too thick — if it’s too cool it will set too fast and crack as the sphere continues to cold-contract. A thin, even coat is less likely to crack than a thick one. If you see a small crack, you can sometimes fix it with a second thin coat after the first sets for 5 minutes.
Can I prepare the cherry cheesecake mousse and cream centers a day ahead before assembling?
Yes, you can absolutely prepare components a day ahead, and I often do this for dinner parties. The cream centers can be piped and frozen up to 1 week ahead — just transfer the frozen dollops to a zip-top bag once they’re solid. The cherry cheesecake mousse should be made fresh on the day of assembly because it contains gelatin and whipped cream that can deflate or separate if stored overnight. However, you can prep the cherry puree (blend and strain) and have your cream cheese at room temperature ready to go. The vanilla sponge can be baked up to 2 days ahead and stored airtight. Assemble and freeze the spheres the day before you plan to glaze and serve, and you’ll have a beautifully structured dessert with minimal day-of work.
Share Your Version!
I absolutely love seeing how these cherry cheesecake spheres turn out in your kitchen! Did you try the hidden cream burst center with a different flavor? Did you go for a different glaze color or skip the shimmer dust? Leave a star rating and a comment below telling me how it went — your feedback helps other readers and inspires me to keep creating new recipes.
Snap a photo of your ruby beauties and share them on Instagram or Pinterest — tag me @leosfoods so I can see your creations and feature them in my stories. And if you have a question about a specific step or substitution, drop it in the comments and I’ll answer personally within 48 hours. From my NYC kitchen to yours — I hope this recipe brings as much warmth to your table as it does to mine. — Stella 🧡
What’s the most impressive dessert you’ve ever made for a dinner party? I’d love to hear your stories in the comments! And if you try these Ruby Cherry Cheesecake Spheres, let me know which variation you’re most excited to test first. 🍒✨
Love This Recipe? Save It to Pinterest!
If you enjoyed this Ruby Cherry Cheesecake Spheres with Hidden Cream Burst Center recipe, don’t let it get lost in your browser tabs! 😄 Pin it now so you can find it again anytime — and explore hundreds more tried-and-tested recipes waiting for you on my Pinterest boards.
👉 Follow Stella on Pinterest @stellarecipeblog
📌 Pin this recipe · 🔁 Re-pin your favorites · 💬 Tag me when you make it — I love seeing your creations!
“`
Print
Ruby Cherry Cheesecake Spheres with Hidden Cream Burst Center
Decadent cherry cheesecake spheres with a surprise cream center, coated in a ruby mirror glaze.
- Yield: 8 1x
Ingredients
- For the Cherry Cheesecake Mousse:
- 2 cups cherry puree
- 8 oz cream cheese, softened
- 1/3 cup granulated sugar
- 1 tbsp lemon juice
- 1 cup heavy cream
- 2 tsp powdered gelatin
- 2 tbsp cold water
- For the Hidden Cream Burst Center:
- 1/2 cup heavy cream
- 2 tbsp powdered sugar
- 1 tsp vanilla extract
- 4 oz mascarpone cheese
- For the Vanilla Sponge Base:
- 1 cup all-purpose flour
- 1/2 tsp baking powder
- 1/4 tsp salt
- 1/4 cup unsalted butter, softened
- 1/3 cup granulated sugar
- 1 large egg
- 1/2 tsp vanilla extract
- 1/4 cup milk
- For the Ruby Mirror Glaze:
- 1 cup white chocolate, finely chopped
- 1/3 cup sweetened condensed milk
- 1/4 cup water
- 1/2 cup granulated sugar
- 2 tsp powdered gelatin
- 2 tbsp cold water
- Red food coloring, as needed
- Edible ruby shimmer dust, as needed
- For Garnish (optional):
- Fresh cherries
- White chocolate curls
Instructions
- Preheat oven to 350°F (175°C) and line a small baking pan.
- Whisk together flour, baking powder, and salt.
- Beat butter and sugar until fluffy.
- Add egg and vanilla extract.
- Alternate adding dry ingredients and milk until smooth.
- Bake for 18–20 minutes. Cool completely and cut into small circles.
- Beat mascarpone, powdered sugar, vanilla, and heavy cream until thick.
- Pipe small portions onto a tray and freeze until firm.
- Bloom gelatin in cold water for the mousse.
- Beat cream cheese until smooth.
- Heat cherry puree, sugar, and lemon juice until warm and stir in gelatin until dissolved.
- Combine with cream cheese and cool slightly.
- Whip heavy cream to soft peaks and fold into the cherry mixture.
- Fill sphere molds halfway with mousse.
- Place a frozen cream center inside each sphere and cover with more mousse.
- Add sponge circles and freeze until fully set, about 4 hours.
- Bloom gelatin in cold water for the glaze.
- Heat water, sugar, and condensed milk until smooth.
- Remove from heat and stir in gelatin.
- Pour over white chocolate and mix until glossy.
- Add red food coloring and ruby shimmer dust.
- Cool glaze to a pourable consistency.
- Unmold frozen spheres and place on a wire rack.
- Pour glaze evenly over each sphere until fully coated.
- Allow glaze to set for 10–15 minutes.
- Garnish with fresh cherries and white chocolate curls before serving.
Nutrition
- Calories: 390
- Sugar: 35 g
- Fat: 22 g
- Carbohydrates: 44 g
- Protein: 6 g
Tried This Recipe? Leave a Comment!
Did you make this recipe? I’d love to hear how it turned out! Please leave a comment and a rating below. Your feedback helps other home cooks and supports cheerychop.com!
For more delicious inspiration, follow me on Pinterest!