Ruby Strawberry Mirror Glaze Bombs with Hidden Cheesecake
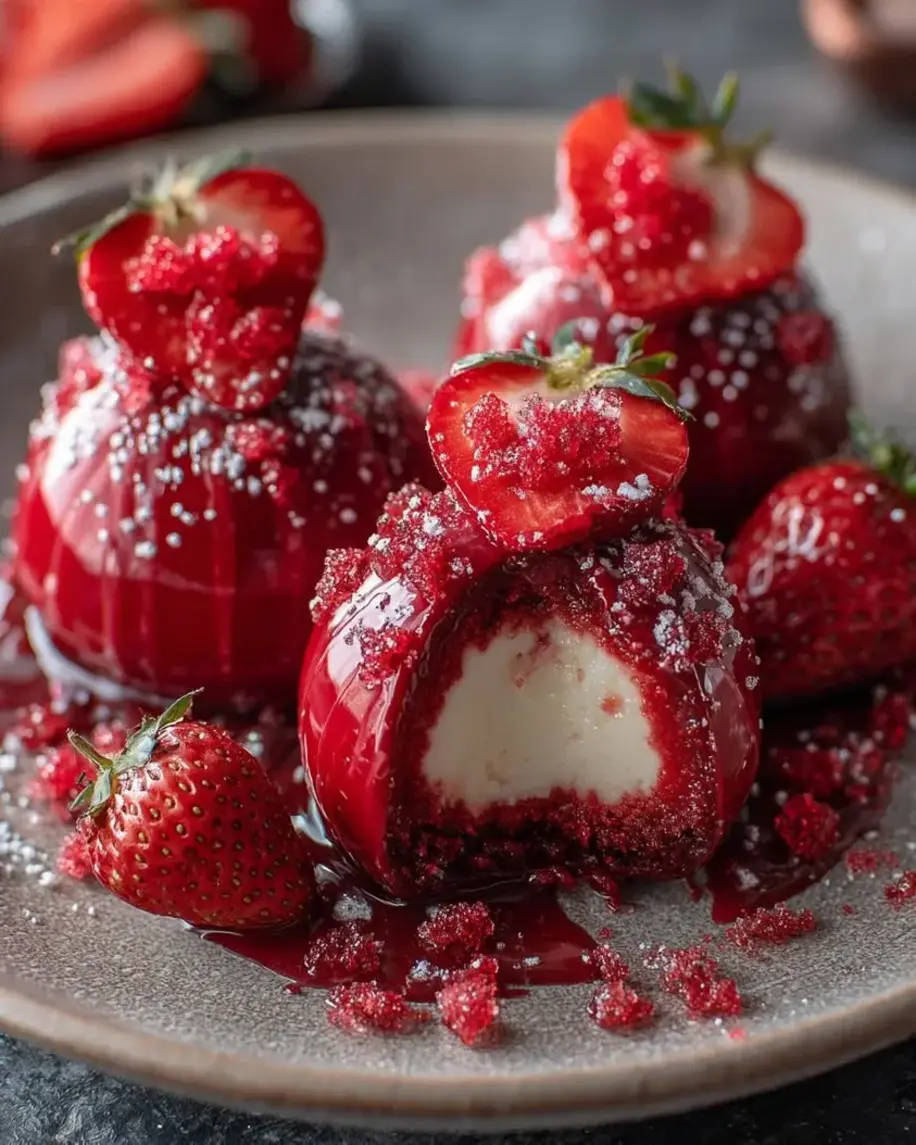
Table of Contents
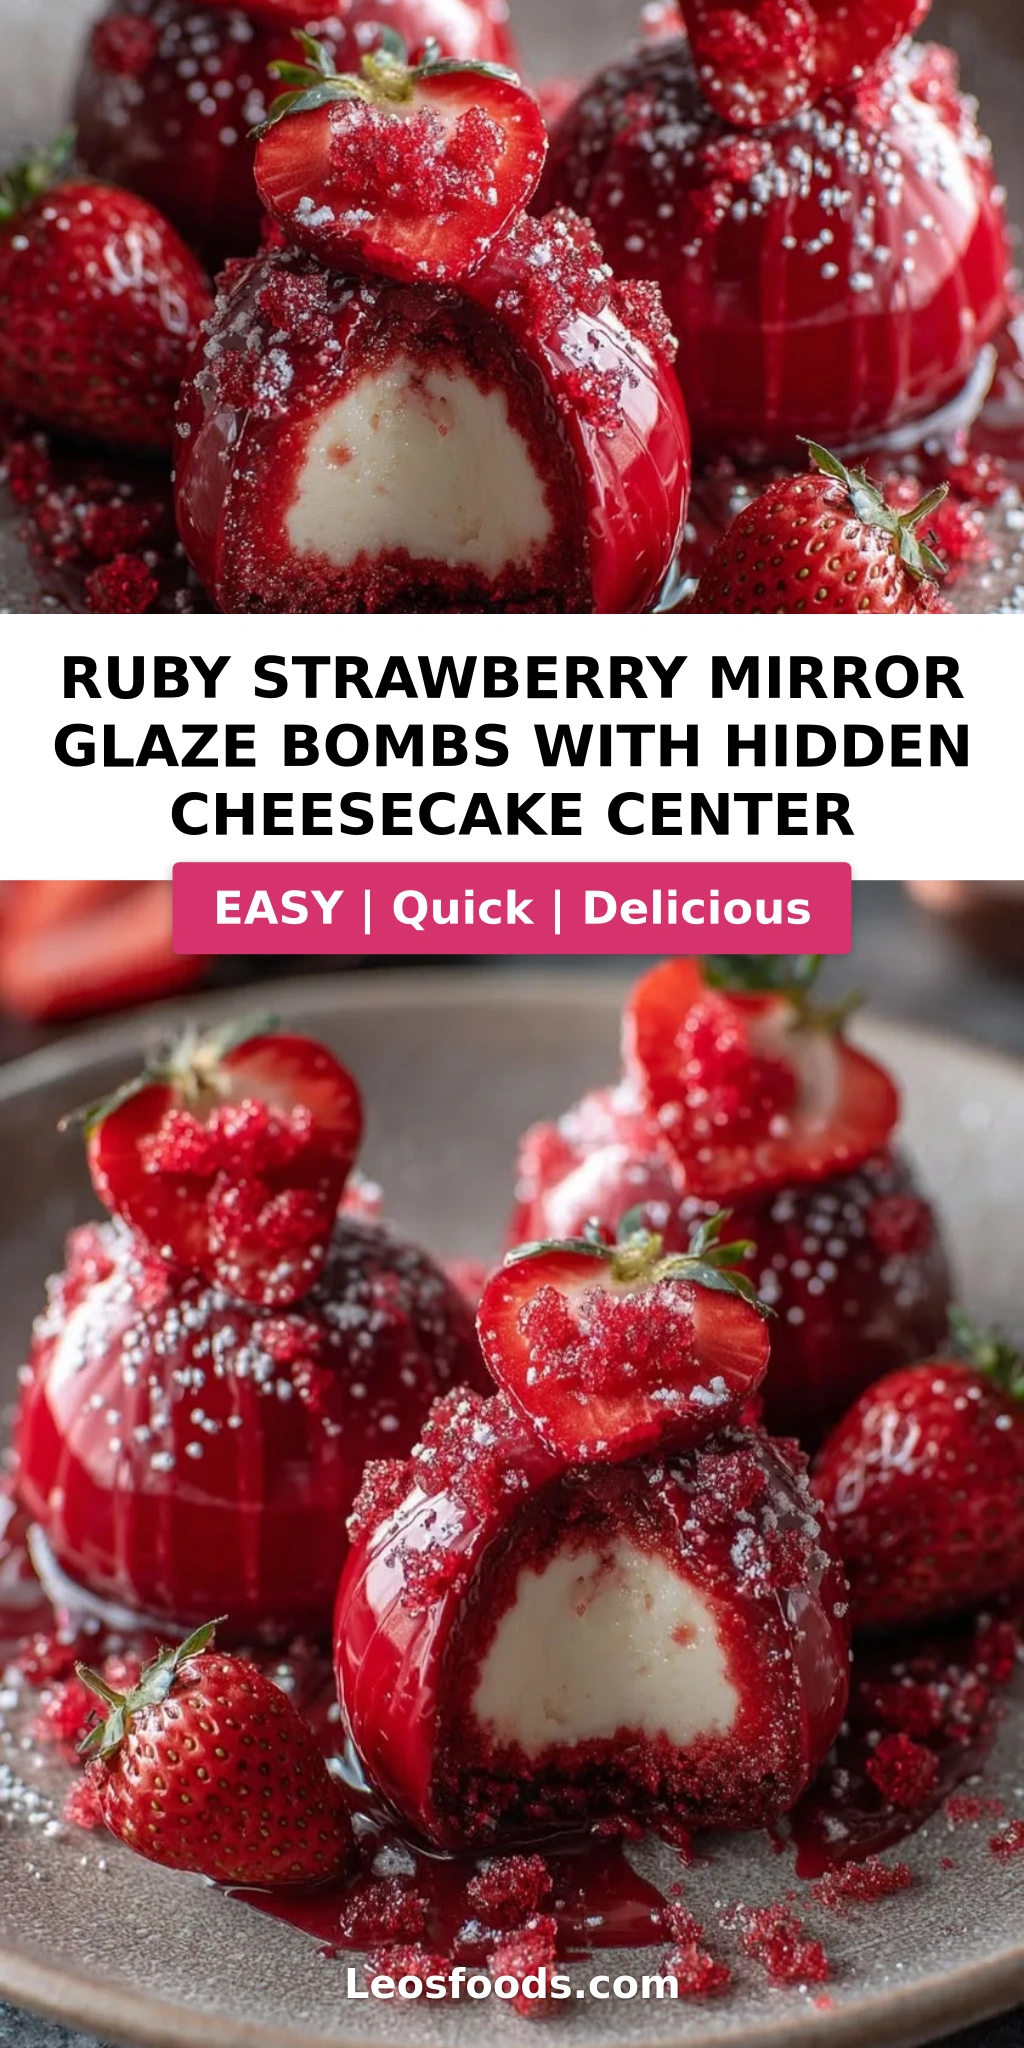
Ruby Strawberry Mirror Glaze Bombs with Hidden Cheesecake Center – A Stunning Dessert That Tastes as Beautiful as It Looks
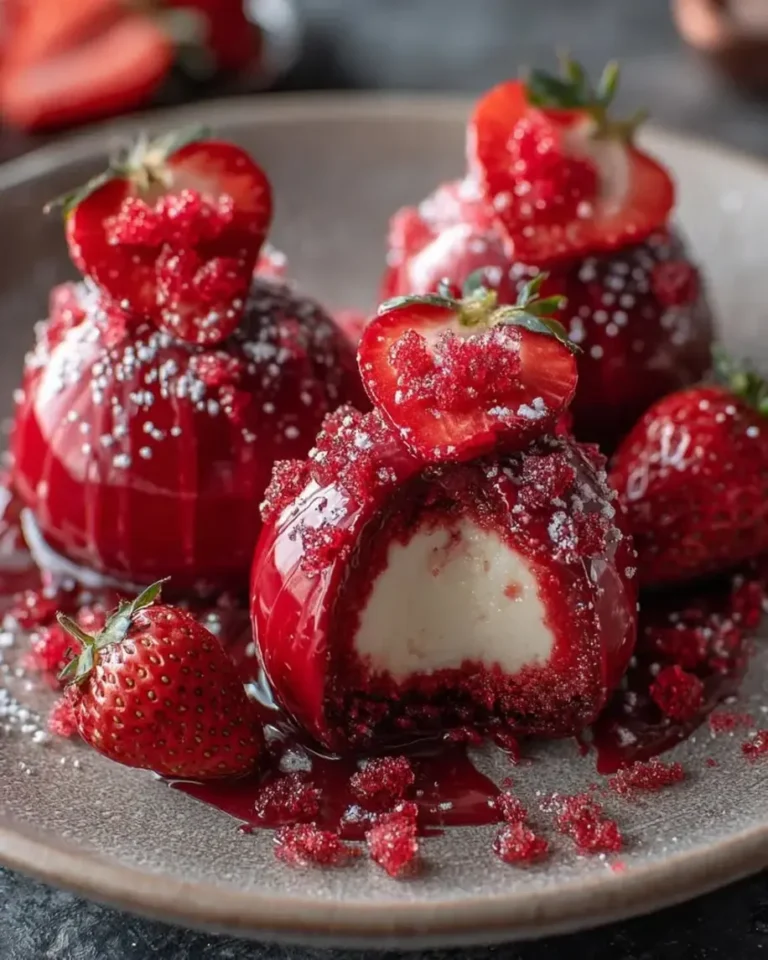
I still remember the first time I saw a mirror glaze cake in a Parisian pâtisserie window — a perfect ruby dome catching the afternoon light like a jewel. I was fresh out of culinary school, spending every spare franc on butter and chocolate, and I thought, that is what I want to create. Fast forward to my tiny NYC kitchen, and these Ruby Strawberry Mirror Glaze Bombs with Hidden Cheesecake Center are the love letter I never knew I was writing. Each bite starts with a glassy, shimmering shell that gives way to a creamy strawberry mousse, then reveals a surprise cheesecake center that tastes like the best slice of New York cheesecake wrapped in summer fruit. This ruby strawberry mirror glaze bombs recipe is the showstopper you have been searching for.
The magic of this hidden cheesecake center recipe lies in the contrast — the mirror glaze is silky and sweet, the strawberry bomb is light and airy, and the cheesecake center is dense, tangy, and utterly luxurious. When you cut into one of these strawberry cheesecake dessert bombs, the deep ruby exterior glistens, the pink mousse peeks through, and the pale cheesecake heart sits right in the middle like a hidden treasure. It is a dessert that feels both nostalgic (my mom used to make a simple strawberry cream dessert in Morocco with fresh-picked berries from the market) and thoroughly modern. The ruby mirror glaze recipe I developed here uses a touch of pearl shimmer dust for that ethereal glow, and I will show you exactly how to pour it so it stays flawless.
I have tested this strawberry mirror glaze cake variation more times than I can count, and I promise you — if you follow the timing and temperatures, you will get a professional finish at home. The hidden cheesecake center is the trickiest part, but I have a foolproof method to keep it suspended right in the middle. 💡 Stella’s Pro Tip: patience with the freezing stages is everything. Rushing leads to sinking cheesecake centers or a glaze that cracks. I will walk you through every step, including the one common mistake I see home bakers make that turns a gorgeous mirror glaze into a cracked mess. Let us make something beautiful together.
Why This Ruby Strawberry Mirror Glaze Bombs Recipe Is the Best
The Flavor Secret: Most ruby mirror glaze recipes rely solely on artificial coloring for that dramatic red hue. I take a different route. By using real strawberry puree as the base of the bomb and a concentrated red gel color in the glaze, you get a genuinely fruity, tangy flavor that cuts through the sweetness of the white chocolate. My Moroccan grandmother taught me that fruit should shine, not hide — and that philosophy lives in every layer of this dessert. The mascarpone in the hidden cheesecake center adds a subtle tang that elevates the whole experience.
Perfected Texture: The difference between a good frozen mousse bomb and a great one is the balance of cream to gelatin. Too much gelatin and you get rubbery bombs; too little and they collapse when you pour the warm glaze. I spent three weeks testing ratios in my NYC kitchen until I landed on exactly 2 teaspoons of gelatin for the strawberry base — enough to hold the sphere shape after glazing, but still silky on the tongue. The hidden cheesecake center stays firm because we freeze it separately first, a technique I picked up from a pastry chef in Paris who made the most incredible frozen soufflés.
Foolproof & Fast: I know this recipe looks like a project, but I have broken it into manageable steps that even a confident beginner can handle. The active work is only about 45 minutes; the rest is freezer time. I will tell you exactly what each mixture should look like, how to tell when the glaze is at the perfect pouring temperature, and the simple trick to unmold frozen bombs without breaking them. This hidden cheesecake center recipe is designed to impress without the stress.
Ruby Strawberry Mirror Glaze Bombs Ingredients
I source my strawberries from the Union Square Greenmarket when they are in season — the flavor is incomparably deeper than supermarket berries. In winter, I use frozen wild strawberries from the freezer aisle (see my note below). For the white chocolate in the ruby mirror glaze recipe, spend a little extra on a brand that contains real cocoa butter; it makes a huge difference in the gloss and flow. Here is everything you need to make these strawberry cheesecake dessert bombs.
Ingredients List
For the Ruby Strawberry Bombs:
- 1 1/2 cups fresh strawberries, pureed
- 8 oz cream cheese, softened
- 1 cup heavy cream
- 1/3 cup powdered sugar
- 1 tsp vanilla extract
- 2 tsp unflavored gelatin
- 2 tbsp cold water (for blooming)
- Red gel food coloring, as needed
For the Hidden Cheesecake Center:
- 1/2 cup cream cheese, softened
- 2 tbsp mascarpone cheese
- 1 tbsp powdered sugar
- 1 tbsp heavy cream
- 1/2 tsp vanilla bean paste
For the Ruby Mirror Glaze:
- 1 cup white chocolate, finely chopped
- 1/2 cup sweetened condensed milk
- 2 tsp unflavored gelatin
- 2 tbsp cold water (for blooming)
- 1/4 cup warm water
- Red gel food coloring, as needed
- 1 tsp edible pearl shimmer dust
For Garnish (optional):
- Fresh strawberry slices
- Edible ruby sugar crystals
Ingredient Spotlight
| Original Ingredient | Best Substitution | Flavor / Texture Impact |
|---|---|---|
| Fresh strawberries | Frozen strawberries, thawed and drained | Slightly more watery, so reduce puree by 2 tbsp; flavor is still excellent |
| Mascarpone cheese | Full-fat cream cheese + 1 tsp heavy cream | Slightly less tangy, still rich and creamy |
| White chocolate (chopped) | High-quality white chocolate chips | Chips contain less cocoa butter, so glaze may be slightly thicker; still glossy |
| Vanilla bean paste | Pure vanilla extract (use 1 tsp) | Loses the specks but flavor is still lovely |
| Edible pearl shimmer dust | Disco dust or skip (glaze will still be glossy) | Without shimmer, the ruby color is matte but still beautiful |
How to Make Ruby Strawberry Mirror Glaze Bombs — Step-by-Step
I promise, if you take each stage one at a time and trust the process, you will end up with eight stunning ruby strawberry mirror glaze bombs that look like they came from a high-end pastry shop. Let us break it down together.
Step 1: Bloom the Gelatin
In a small bowl, combine 2 tsp unflavored gelatin with 2 tbsp cold water. Stir gently and let it sit for about 5 minutes until it becomes a firm, jiggly mass. This process, called blooming, ensures the gelatin dissolves evenly and gives your strawberry bombs a smooth, stable texture. Do not skip this resting time — it is the foundation of a silky mousse.
💡 Stella’s Pro Tip: Use cold water, not warm. Warm water will start dissolving the gelatin unevenly and can create lumps. The gelatin should look like a solid, translucent block after blooming.
Step 2: Make the Strawberry Bomb Mixture
In a large bowl, beat 8 oz softened cream cheese, 1/3 cup powdered sugar, 1 tsp vanilla extract, and 1 1/2 cups strawberry puree until completely smooth. I use an electric hand mixer on medium speed for about 2 minutes. In a separate small microwave-safe bowl, microwave the bloomed gelatin for 10-second bursts until it is liquid (about 20 seconds total), then stir it into the strawberry mixture immediately. Add a few drops of red gel food coloring and mix well — you want a deep, vibrant ruby pink.
⚠️ Common Mistake to Avoid: Adding too much food coloring at once. Start with 2-3 drops, stir, then add more. The color deepens as the mixture sets, so you want it slightly lighter than your target shade.
In a separate chilled bowl, whip 1 cup heavy cream to soft peaks — when you lift the whisk, the cream should form gentle, drooping folds. Gently fold the whipped cream into the strawberry-cream cheese mixture using a spatula, using a cutting and turning motion until no white streaks remain. Set aside while you prepare the cheesecake centers.
Step 3: Make the Hidden Cheesecake Center
Combine 1/2 cup softened cream cheese, 2 tbsp mascarpone, 1 tbsp powdered sugar, 1 tbsp heavy cream, and 1/2 tsp vanilla bean paste in a small bowl. Beat with a spoon or small whisk until perfectly smooth — no lumps allowed. Transfer the mixture to a piping bag fitted with a small round tip (or a zip-top bag with a tiny corner snipped off). Pipe small portions, about 1 teaspoon each, into the wells of a mini silicone mold or onto a parchment-lined tray in small domes. Freeze for at least 1 hour, until rock solid.
💡 Stella’s Pro Tip: The cheesecake centers must be completely frozen before you embed them. If they are even slightly soft, they will sink to the bottom of the bomb during freezing. I freeze mine for a full 2 hours to be safe.
Step 4: Assemble the Bombs
Fill your sphere molds (I use 3-inch half-sphere silicone molds) halfway with the strawberry mixture. Place one frozen cheesecake center into each mold, pressing it gently into the center of the strawberry mixture. Immediately cover with the remaining strawberry mixture, filling each mold to the top. Use a small offset spatula or the back of a spoon to smooth the tops so they are flat and even — this helps the two halves seal together later.
⚠️ Common Mistake to Avoid: Not smoothing the tops. If the mixture is uneven, the two halves won’t align perfectly, and you will get lopsided bombs. Take 10 seconds to level each one.
Step 5: Freeze the Bombs
Place the filled molds on a baking sheet and freeze for at least 5 hours, but preferably overnight. The bombs must be completely solid — not just firm, but frozen through. If you try to unmold them while still soft in the center, they will lose their shape and the cheesecake center may dislodge. I usually make these a day ahead and freeze overnight.
💡 Stella’s Pro Tip: To unmold, gently flex the silicone mold and the bombs should pop right out. If they resist, let them sit at room temperature for 60 seconds — no longer — and try again. Never use a knife to pry them out.
Step 6: Make the Ruby Mirror Glaze
Bloom 2 tsp gelatin in 2 tbsp cold water in a small bowl (same as Step 1). Let it sit for 5 minutes. In a small saucepan, combine 1/2 cup sweetened condensed milk and 1/4 cup warm water. Heat over medium-low, stirring occasionally, until the mixture is hot but not boiling — about 2 minutes. Remove from heat, add the bloomed gelatin, and stir until completely dissolved. Pour the hot liquid over 1 cup finely chopped white chocolate in a heatproof bowl. Let it sit for 1 minute, then stir gently until the chocolate is fully melted and the glaze is smooth. Add red gel food coloring (start with 4-5 drops) and 1 tsp edible pearl shimmer dust, stirring until the color is uniform and the glaze is glossy. Let the glaze cool to about 95°F — it should still be liquid but feel just warm to the touch, like bath water.
⚠️ Common Mistake to Avoid: Pouring the glaze when it is too hot (above 100°F) will melt the frozen bomb and cause the glaze to slide off in patches. Too cold (below 85°F) and it will thicken and clump. Use an instant-read thermometer for accuracy.
Step 7: Glaze the Bombs
Unmold the frozen bombs and place them on a wire rack set over a baking sheet (to catch drips). Working quickly but carefully, pour the ruby mirror glaze evenly over each bomb, starting at the top and letting it flow down the sides. Rotate the rack slightly if needed to cover any bare spots. The glaze should set almost instantly on contact with the frozen surface. Let the excess drip off for about 30 seconds, then use a small offset spatula to gently lift each bomb and transfer it to a serving plate or parchment-lined tray.
💡 Stella’s Pro Tip: For the cleanest finish, hold the glaze pitcher about 6 inches above the bomb and pour in a steady, circular motion. If you pour too close, the glaze can pool and look thick. Too far, and it splashes.
Step 8: Garnish and Serve
While the glaze is still tacky (within 30 seconds of pouring), garnish each bomb with a fresh strawberry slice and a sprinkle of edible ruby sugar crystals. Work quickly — the glaze sets fast on the frozen surface. Serve immediately, or keep refrigerated for up to 2 hours before serving. The bombs should be eaten chilled, but not frozen solid — let them sit at room temperature for 5-7 minutes before serving for the best creamy texture.
| Step | Action | Duration | Key Visual Cue |
|---|---|---|---|
| 1 | Bloom gelatin for bomb base | 5 min | Gelatin becomes firm, jiggly block |
| 2 | Make strawberry bomb mixture | 10 min | Smooth, pink, no lumps |
| 3 | Make and freeze cheesecake centers | 1-2 hours freezing | Rock solid, holds shape |
| 4 | Assemble bombs in molds | 10 min | Smooth tops, no air pockets |
| 5 | Freeze assembled bombs | 5+ hours | Completely solid throughout |
| 6 | Make and cool mirror glaze | 15 min | Glossy, smooth, ~95°F |
| 7 | Glaze the frozen bombs | 5 min | Even coverage, sets instantly |
| 8 | Garnish and serve | 5 min | Garnish sticks, glaze set |
Serving & Presentation
These ruby strawberry mirror glaze bombs are at their absolute best when served chilled but not frozen solid. I recommend letting them sit at room temperature for about 5-7 minutes after glazing (or after coming out of the refrigerator) so the mousse softens to a creamy, luscious texture while the glaze stays firm and glossy. Place each bomb on a small dessert plate or a pedestal cake stand for maximum drama. A dollop of lightly sweetened whipped cream on the side adds a lovely contrast, and a few fresh strawberry slices arranged around the plate make the ruby color pop even more.
In my NYC apartment, I often serve these after a dinner party with a glass of chilled Prosecco or a fragrant jasmine tea — the bubbles or floral notes balance the richness of the cheesecake center beautifully. For a touch of Moroccan flair, I sometimes dust the plate with a pinch of ground pistachio or rose petal crumbs, which echoes the flavors I grew up with in my mother’s kitchen. The edible ruby sugar crystals are non-negotiable for me — they catch the light and make every bite feel like a celebration.
| Pairing Type | Suggestions | Why It Works |
|---|---|---|
| Side / Accompaniment | Light whipped cream, fresh mint, raspberry coulis | Adds freshness and cuts the richness of the cheesecake center |
| Sauce / Dip | Warm chocolate sauce, salted caramel, berry compote | Warm sauce contrasts with cold bomb for a sensational mouthfeel |
| Beverage | Prosecco, sparkling rosé, mint tea, espresso | Bubbles cleanse the palate; tea adds aromatic warmth |
| Garnish | Fresh strawberry slices, edible ruby sugar crystals, rose petals | Adds visual drama and textural contrast |
Make-Ahead, Storage & Reheating
One of the best things about this hidden cheesecake center recipe is how well it works for entertaining. I almost always make the components a day or two ahead so that on the day of my party, all I have to do is glaze and serve. Here is exactly how to store each element and how long everything keeps.
| Method | Container | Duration | Reheating / Serving Tip |
|---|---|---|---|
| Refrigerator (glazed bombs) | Airtight container, single layer | Up to 24 hours | Let sit 5 min at room temp before serving; glaze may soften slightly |
| Freezer (unglazed bombs) | Airtight container, separated by parchment | Up to 2 weeks | Glaze directly from frozen — do not thaw first |
| Make-Ahead (cheesecake centers) | Small airtight container in freezer | Up to 1 month | Use directly from frozen — no thawing needed |
My go-to make-ahead strategy: I prepare the cheesecake centers and freeze them up to a week ahead. The day before serving, I make the strawberry bomb mixture, assemble the bombs, and freeze them overnight. The morning of the event, I make the ruby mirror glaze and pour it fresh. This way, the glaze is at its glossiest and the bombs are perfectly frozen for a clean pour. Leftover glazed bombs can be refrigerated for up to 24 hours, but the glaze may lose some of its mirror shine after that — so glaze as close to serving time as possible for the best visual impact.
Variations & Easy Swaps
| Variation | Key Change | Best For | Difficulty Impact |
|---|---|---|---|
| Rose & Raspberry Bombs | Substitute raspberry puree for strawberry; add 1 tsp rose water | Romantic occasions, Valentine’s Day | Same difficulty |
| Dairy-Free / Vegan Version | Use vegan cream cheese, coconut cream, and dairy-free white chocolate | Dairy-free diets, vegan guests | Slightly harder — texture may be softer |
| Chocolate-Hazelnut Center | Replace cheesecake center with Nutella or chocolate-hazelnut ganache | Chocolate lovers, kids’ parties | Easier — fewer ingredients |
Rose & Raspberry Bombs
This is my favorite variation when I want to channel my Moroccan roots. Swap the strawberry puree for an equal amount of raspberry puree (fresh or frozen, strained to remove seeds) and add 1 teaspoon of rose water to the cheesecake center mixture. The floral notes of rose water pair beautifully with the tangy raspberry, and the mirror glaze can be tinted a deeper magenta with a touch of violet gel color. Garnish with dried rose petals and a tiny gold leaf square for an absolutely stunning presentation. I serve these at bridal showers and they always disappear first.
Dairy-Free / Vegan Version
I tested this for a friend with a dairy allergy, and while the texture is slightly softer (coconut cream doesn’t whip as firmly as heavy cream), the flavor is still delicious. Use a high-quality vegan cream cheese (I like Miyoko’s or Violife), full-fat coconut cream chilled overnight and whipped to soft peaks, and a dairy-free white chocolate that contains cocoa butter (some brands use palm oil, which doesn’t set as well). The gelatin can be replaced with agar-agar, but you will need to adjust the quantity — use 2 tsp agar-agar for the bomb base and 2 tsp for the glaze, and heat it to 185°F to activate. The bombs will be a bit less stable, so handle them gently.
Chocolate-Hazelnut Center
For a crowd-pleasing twist that requires less effort, replace the entire cheesecake center mixture with a small frozen ball of Nutella or a homemade chocolate-hazelnut ganache (melt 1/2 cup dark chocolate with 1/4 cup heavy cream and 2 tbsp hazelnut butter, then freeze in tiny domes). The ruby mirror glaze still provides that stunning jewel-like exterior, but the inside becomes a gooey, hazelnut-chocolate surprise. This variation is especially popular with kids and at birthday parties — I have made it for my niece’s celebration and the bombs were gone in minutes.
How do you make a ruby strawberry mirror glaze without it cracking?
The key to a crack-free mirror glaze is temperature management. Make sure your frozen bombs are completely solid (at least 5 hours in the freezer) and that your glaze is cooled to exactly 95°F. If the glaze is too hot, it will melt the surface of the frozen bomb, causing the glaze to pool and crack as it cools. If it is too cold, it will thicken and apply unevenly, leading to cracks. I always use an instant-read thermometer to check the glaze temperature before pouring. Also, make sure your white chocolate is finely chopped and fully melted — any lumps in the glaze can create weak spots that crack later. Finally, pour in one smooth, steady motion without stopping, and let the excess drip off naturally without touching the glaze with a spatula.
Can you use frozen strawberries for the mirror glaze in these bombs?
Yes, you can absolutely use frozen strawberries for the bomb base — I do it myself when fresh strawberries are out of season. Thaw the berries completely in a strainer set over a bowl, and reserve the juice for another use (it is great in smoothies). You will need about 2 cups of frozen strawberries to yield 1 1/2 cups of puree after draining. The flavor of frozen strawberries can be slightly less intense than fresh, so I recommend adding an extra teaspoon of vanilla extract or a tiny splash of strawberry extract to boost the flavor. For the mirror glaze itself, you are not using strawberry puree — the color comes from gel food coloring — so frozen vs. fresh only affects the bomb filling, not the glaze.
What is the best way to hide a cheesecake center inside a strawberry bomb?
The trick to a perfectly centered hidden cheesecake center is a two-step freezing process. First, freeze the cheesecake centers in small dome shapes (about 1 teaspoon each) for at least 1 hour until they are rock solid. Second, when assembling the bombs, fill your sphere molds only halfway with the strawberry mixture, then press the frozen cheesecake dome gently into the center — make sure it is fully surrounded and not touching the edges of the mold. Finally, cover with the remaining strawberry mixture and smooth the tops flat. Freeze the assembled bombs for at least 5 hours. The frozen cheesecake center stays suspended in the partially frozen strawberry mixture because it is denser and already solid. If you skip the pre-freezing step, the cheesecake will sink to the bottom.
How far in advance can you prepare ruby strawberry mirror glaze bombs?
You can prepare the components several days ahead for the best results. The cheesecake centers can be frozen up to 1 month in advance in an airtight container. The assembled (unglazed) bombs can be frozen for up to 2 weeks — just keep them well wrapped so they don’t absorb freezer odors. The ruby mirror glaze should always be made fresh on the day you plan to serve, as it loses its high-gloss shine after about 24 hours in the refrigerator. I recommend glazing the bombs no more than 2-3 hours before serving. If you need to serve them the next day, you can glaze them up to 24 hours ahead and store them in the refrigerator, but the glaze may become slightly dull. A quick pass with a warm hair dryer on low heat can revive the shine slightly.
What is the best way to get a smooth mirror glaze?
A smooth mirror glaze starts with properly emulsified ingredients. When you pour the hot condensed milk mixture over the white chocolate, let it sit undisturbed for 1 full minute before stirring. Then stir gently in one direction — do not whisk vigorously, which can introduce air bubbles. After adding the food coloring and shimmer dust, pass the glaze through a fine-mesh strainer into a clean bowl to catch any undissolved gelatin or chocolate bits. Let the glaze cool to 95°F while stirring occasionally to prevent a skin from forming. When pouring, hold the pitcher about 6 inches above the bomb and pour in a steady, circular stream. If the glaze is too thick, add warm water 1 teaspoon at a time until it flows like warm honey.
Can I use white chocolate chips instead of chopped white chocolate for the glaze?
Yes, you can use white chocolate chips, but I recommend using a high-quality brand that contains real cocoa butter (such as Ghirardelli or Guittard). Many budget white chocolate chips are made with palm oil and other vegetable fats, which do not melt as smoothly and can make the glaze thick and grainy. If you use chips, chop them slightly with a knife to break them into smaller pieces so they melt more evenly. Also, be aware that chips often contain stabilizers that can make the glaze set a little faster, so work quickly once the glaze reaches 95°F. For the absolute best results, I use a bar of white chocolate (such as Valrhona Ivoire or Callebaut) and chop it finely with a serrated knife.
How do I store leftover ruby strawberry mirror glaze bombs?
Leftover glazed bombs should be stored in an airtight container in the refrigerator for up to 24 hours. Place them in a single layer and cover gently with plastic wrap so the glaze doesn’t stick to the lid. The glaze will soften slightly in the refrigerator and lose some of its mirror shine, but the flavor will still be excellent. If you have unglazed frozen bombs, they can be stored in the freezer in an airtight container separated by parchment paper for up to 2 weeks. Glaze them directly from frozen whenever you are ready to serve. I do not recommend freezing glazed bombs — the glaze can crack and become cloudy when thawed. The bombs are best served chilled, not frozen solid, so let refrigerated bombs sit at room temperature for 5-7 minutes before eating.
Can I make this recipe without gelatin?
Yes, you can substitute agar-agar powder for the gelatin, but the texture and handling will be different. Use 2 tsp agar-agar for the bomb base and 2 tsp for the glaze. Unlike gelatin, agar-agar needs to be heated to 185°F to activate fully — so you will need to heat the strawberry mixture and the glaze base to that temperature. The bombs will be slightly firmer and more fragile than gelatin-set bombs, so handle them carefully when unmolding. The mirror glaze made with agar-agar sets more firmly and at a higher temperature, which means you need to work quickly and pour the glaze when it is around 110°F rather than 95°F. I have tested this both ways, and while gelatin gives a superior silky texture, agar-agar is a reliable plant-based alternative.
What sphere mold size is best for these strawberry cheesecake dessert bombs?
I recommend using 3-inch diameter half-sphere silicone molds for this recipe. This size yields a single-serve portion that is large enough to feel substantial but not overwhelming. With 3-inch spheres, you will get exactly 8 bombs from this recipe. If you use smaller 2-inch molds, you will get about 12-14 bombs, but you will need to reduce the amount of cheesecake center to about 1/2 teaspoon per bomb and adjust the freezing time slightly. If you use larger 4-inch molds, you will get about 4-5 bombs, and you will need to increase the cheesecake center to about 2 teaspoons each and freeze for at least 6 hours. Silicone molds are essential for easy unmolding — do not use metal or plastic sphere molds, as the bombs will stick.
Why did my mirror glaze crack after pouring?
Mirror glaze cracking is almost always caused by one of three issues. First, the bombs were not frozen solid enough — if the surface is even slightly soft, the warm glaze partially melts it, and as the whole thing re-freezes in the refrigerator, the glaze contracts and cracks. Second, the glaze was too cold (below 90°F) when poured — a thick, cool glaze doesn’t flow evenly and can pull apart as it sets. Third, the bombs went through too extreme a temperature change — if you took the bombs directly from a very cold freezer (0°F or below) into a warm kitchen (75°F+), the condensation alone can cause cracking. To fix cracked glaze, you can warm a small amount of fresh glaze to 95°F and pour a very thin second layer over the cracked one. It won’t be perfect, but it will mask most of the cracks.
Share Your Version!
I absolutely love seeing how these ruby strawberry mirror glaze bombs turn out in your kitchen. Did the hidden cheesecake center stay perfectly suspended? Did you try the rose and raspberry variation? Drop a star rating and a comment below — your feedback helps me refine my recipes and inspires the home cooks who visit this blog. I read every single comment and I answer questions personally, so do not hesitate to ask if something wasn’t clear.
Snap a photo of your creation and tag @leosfoods on Instagram or Pinterest — I feature my favorites in my stories! And if you are looking for more stunning dessert recipes, check out my mirror glaze collection and my Moroccan-inspired pastry series. The hidden cheesecake center technique in this recipe is one of my proudest developments, and I would love to hear how you make it your own.
From my NYC kitchen to yours — I hope this recipe brings as much warmth to your table as it does to mine. — Stella 🧡
Love This Recipe? Save It to Pinterest!
If you enjoyed this Ruby Strawberry Mirror Glaze Bombs with Hidden Cheesecake Center recipe, don’t let it get lost in your browser tabs! 😄 Pin it now so you can find it again anytime — and explore hundreds more tried-and-tested recipes waiting for you on my Pinterest boards.
👉 Follow Stella on Pinterest @stellarecipeblog
📌 Pin this recipe · 🔁 Re-pin your favorites · 💬 Tag me when you make it — I love seeing your creations!
🌟 Made this recipe? Let us connect!
Leave a ⭐⭐⭐⭐⭐ rating and tell me how your hidden cheesecake center turned out in the comments below. Did you try a variation? I would love to hear about it!
📸 Tag @leosfoods on Instagram and Pinterest for a chance to be featured in my stories. Happy cooking! — Stella 🧡
Ruby Strawberry Mirror Glaze Bombs with Hidden Cheesecake Center
Ruby Strawberry Mirror Glaze Bombs with Hidden Cheesecake Center
- Yield: 8 1x
Ingredients
- For the Ruby Strawberry Bombs:
- 1 1/2 cups fresh strawberries, pureed
- 8 oz cream cheese, softened
- 1 cup heavy cream
- 1/3 cup powdered sugar
- 1 tsp vanilla extract
- 2 tsp unflavored gelatin
- 2 tbsp cold water
- Red gel food coloring, as needed
- For the Hidden Cheesecake Center:
- 1/2 cup cream cheese, softened
- 2 tbsp mascarpone cheese
- 1 tbsp powdered sugar
- 1 tbsp heavy cream
- 1/2 tsp vanilla bean paste
- For the Ruby Mirror Glaze:
- 1 cup white chocolate, finely chopped
- 1/2 cup sweetened condensed milk
- 2 tsp unflavored gelatin
- 2 tbsp cold water
- 1/4 cup warm water
- Red gel food coloring, as needed
- 1 tsp edible pearl shimmer dust
- For Garnish (optional):
- Fresh strawberry slices
- Edible ruby sugar crystals
Instructions
- Mix gelatin and cold water in a small bowl and let bloom for 5 minutes.
- Beat cream cheese, powdered sugar, vanilla extract, and strawberry puree until smooth.
- Melt the bloomed gelatin and stir into the strawberry mixture.
- Add a few drops of red gel food coloring to create a vibrant ruby color.
- Whip heavy cream to soft peaks and gently fold into the mixture.
- Combine cream cheese, mascarpone cheese, powdered sugar, heavy cream, and vanilla bean paste until smooth.
- Pipe small portions of the cheesecake mixture into mini molds and freeze until firm.
- Fill sphere molds halfway with the strawberry mixture.
- Place a frozen cheesecake center into each mold.
- Cover with the remaining strawberry mixture and smooth the tops.
- Freeze for at least 5 hours or until completely firm.
- Bloom gelatin for the mirror glaze.
- Heat condensed milk and warm water, then stir in gelatin until dissolved.
- Pour over white chocolate and mix until smooth.
- Add red food coloring and pearl shimmer dust, stirring until glossy.
- Allow the glaze to cool to a pourable consistency.
- Unmold frozen bombs and place on a wire rack.
- Pour the ruby mirror glaze evenly over each bomb.
- Garnish with fresh strawberry slices and edible ruby sugar crystals.
- Serve chilled.
Nutrition
- Calories: 360
- Sugar: 26 g
- Fat: 25 g
- Carbohydrates: 30 g
- Protein: 5 g
Tried This Recipe? Leave a Comment!
Did you make this recipe? I’d love to hear how it turned out! Please leave a comment and a rating below. Your feedback helps other home cooks and supports cheerychop.com!
For more delicious inspiration, follow me on Pinterest!