Strawberry Sakura Cheesecake Cubes with Blush Glaze
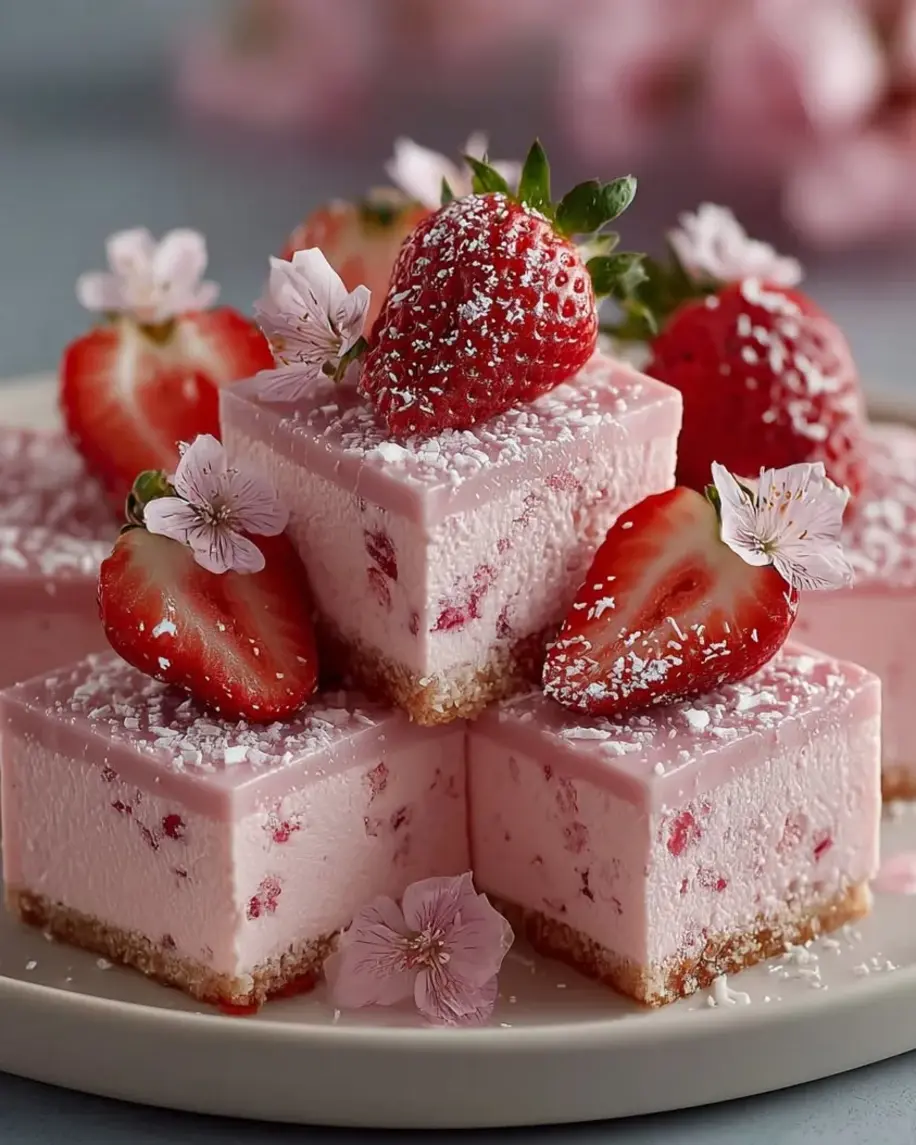
Table of Contents
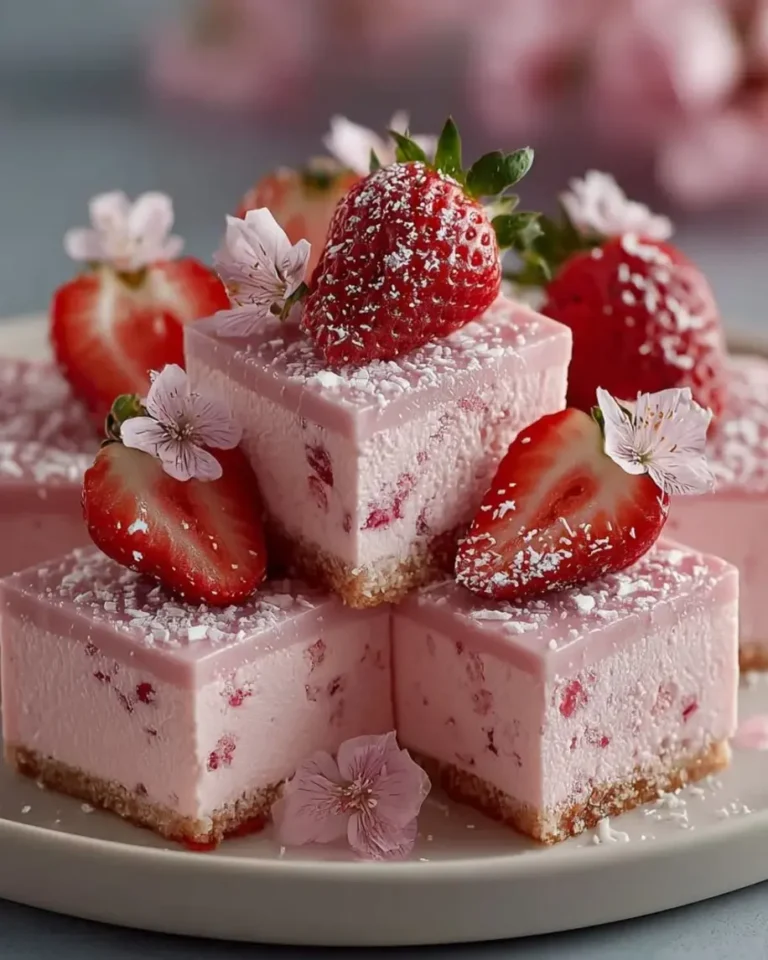
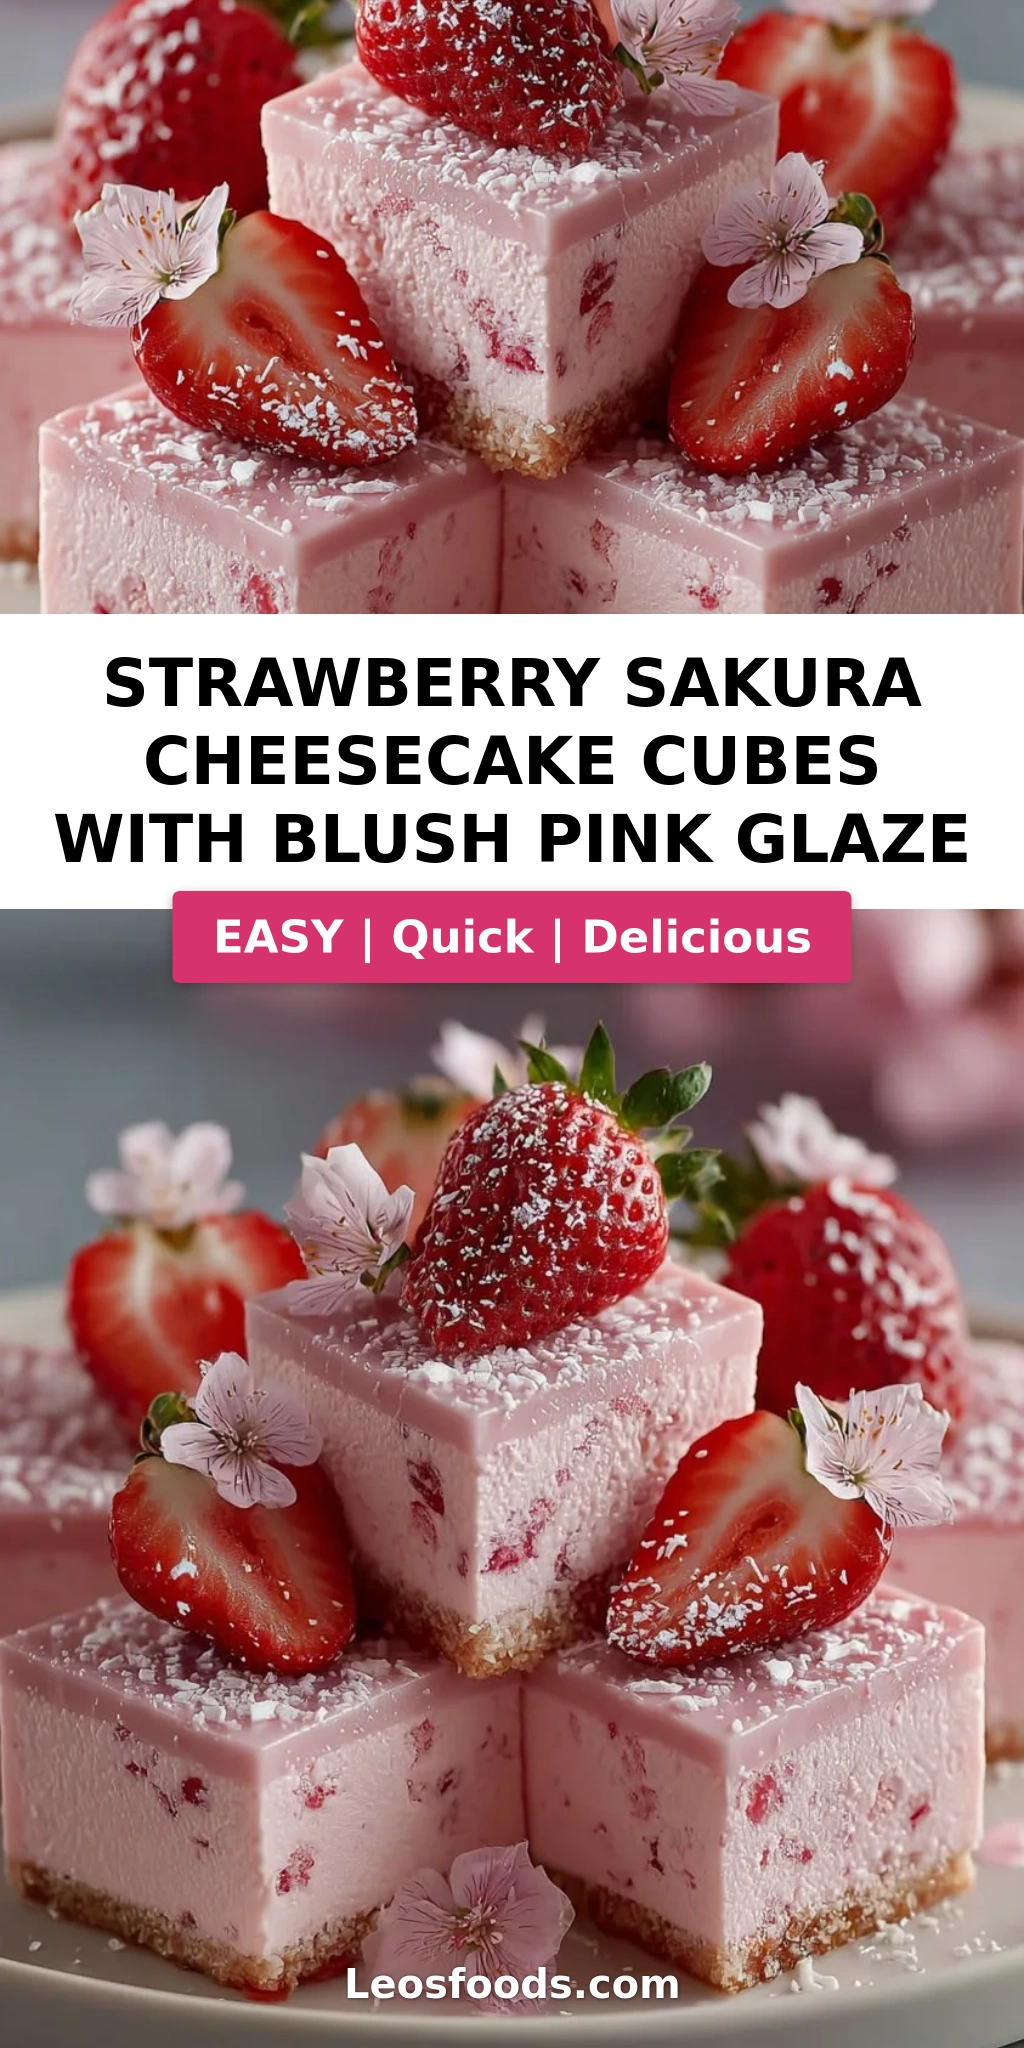
Strawberry Sakura Cheesecake Cubes with Blush Pink Glaze – The Perfect Japanese Cherry Blossom Dessert
I still remember the first time I tasted sakura — cherry blossom — in a dessert. It was a chilly spring afternoon in Paris, and my pastry instructor at Le Cordon Bleu had just returned from a culinary tour of Japan. She handed me a small, pale pink macaron filled with a white chocolate ganache infused with sakura extract. One bite and I was transported: floral, delicate, and impossibly elegant. Years later, now living in New York City, I find myself blending that memory with my own North African roots and French training. These Strawberry Sakura Cheesecake Cubes with Blush Pink Glaze are the result — a dessert that feels both refined and warmly familiar, with a hidden strawberry core that surprises and delights. It’s my take on a sakura cheesecake cubes recipe that brings together the best of spring in every single bite.
Picture this: a creamy, cloud-like cheesecake cube infused with sweet strawberry puree and floral sakura extract, wrapped around a bright, tangy strawberry gelée center. Then it’s draped in a glossy blush pink glaze that shimmers like the first light of dawn. The texture is sublime — silky, slightly firm from the gelatin, yet luxuriously smooth on the tongue. The sakura lends a gentle, perfumed note that whispers of cherry blossoms drifting in the breeze, while the strawberry keeps it bright and familiar. It’s a dessert that tastes as beautiful as it looks, and it’s exactly the kind of thing I love to bring to a spring gathering or a special afternoon tea.
What I’ve done differently here is build layers of flavor and texture into a single, elegant cube. Instead of a plain cheesecake, I’ve added a frozen strawberry core that stays beautifully distinct when you slice into it. The sakura extract is the star — authentic, floral, and utterly unique — and I’ll show you exactly where to find it and what to use if you can’t. I’ll also share my chef-tested technique for achieving that glass-smooth blush pink glaze every time, plus the one mistake most home cooks make when working with gelatin that I’ll help you avoid. Whether you’re new to Japanese-inspired desserts or a seasoned baker, this pink glazed cheesecake bites recipe will walk you through every step with confidence.
Why This Strawberry Sakura Cheesecake Cubes Recipe Is the Best
The Flavor Secret: Most cheesecake cube recipes are one-note — sweet and creamy, and that’s it. But by combining strawberry puree with sakura extract, I’ve created a flavor profile that’s both bright and floral, familiar and exotic. The sakura brings a delicate, almond-like cherry blossom note that elevates the strawberry into something truly special. It’s a pairing I first experimented with in my Paris pastry days, and it’s been a signature ever since. The hidden strawberry core adds a burst of concentrated fruitiness that cuts through the richness of the cheesecake — it’s like finding a treasure in every bite.
Perfected Texture: The key to a great cheesecake cube is structure without density. I use a precise ratio of gelatin to cream cheese and heavy cream, whipped to soft peaks before folding, which gives the cubes an airy, mousse-like texture that still holds its shape beautifully. The glaze is another texture triumph: it sets to a glossy, just-firm-enough shell that cracks ever so slightly when you bite into it, revealing the creamy interior. This is French pastry technique at its most practical — the same principles I learned while making mirror-glaze entremets in Paris, scaled down for the home kitchen.
Foolproof & Fast: Despite its elegant appearance, this strawberry cheesecake cubes recipe is surprisingly forgiving. The gelatin-based cheesecake mixture doesn’t require a water bath or precise oven temperatures — you simply mix, pour, and freeze. The glaze comes together in minutes and pours like a dream. I’ve tested this recipe with home bakers of all skill levels, and the feedback is always the same: “I can’t believe I made something that looks this professional.” Whether you’re hosting a bridal shower, celebrating cherry blossom season, or just want a stunning weekend baking project, these cubes deliver every time.
Strawberry Sakura Cheesecake Cubes Recipe Ingredients
I source my strawberries from the Union Square Greenmarket in NYC when they’re in season — the smell alone is intoxicating. For sakura extract, I order online from a trusted Japanese specialty store, and I’ll share my go-to brand below. Every ingredient here is chosen for a reason, and I’ll walk you through what each one does so you can shop and swap with confidence.
Ingredients List
- For the Strawberry Sakura Cheesecake: 8 oz cream cheese, softened
- 1/2 cup granulated sugar
- 1 cup heavy cream
- 1 cup strawberry puree (from fresh or frozen strawberries)
- 1 tsp sakura extract
- 1 tsp vanilla extract
- 2 tsp powdered gelatin
- 3 tbsp cold water
- For the Strawberry Core: 3/4 cup strawberry puree
- 2 tbsp granulated sugar
- 1 tsp lemon juice
- 1 tsp powdered gelatin
- 1 tbsp cold water
- For the Blush Pink Glaze: 1 cup granulated sugar
- 1/2 cup water
- 1/2 cup sweetened condensed milk
- 1 cup white chocolate, finely chopped
- 1 tbsp powdered gelatin
- 3 tbsp cold water
- 1 tsp vanilla extract
- 2 drops pink food coloring (gel or liquid)
- For Garnish (optional): Fresh strawberry slices, edible cherry blossom petals, white chocolate curls
Ingredient Spotlight
Sakura Extract: This is the heart of the recipe. Sakura extract is made from preserved cherry blossom leaves and flowers, and it has a distinct floral, slightly almond-like flavor. You can find it at Japanese grocery stores or online. A little goes a long way — 1 teaspoon is perfect here. If you can’t find it, the best substitute is 1/2 teaspoon almond extract plus 1/2 teaspoon rose water. Avoid using artificial cherry flavor, which tastes medicinal.
Strawberry Puree: I make mine by blending fresh or frozen strawberries and straining out the seeds for a silky texture. Frozen strawberries work beautifully — just thaw them first and drain off any excess liquid. The puree appears in both the cheesecake base and the core, so it’s worth making a batch. If you’re short on time, good-quality store-bought strawberry puree works too; just look for one without added sugar.
White Chocolate for the Glaze: Use a good-quality white chocolate that you’d enjoy eating on its own — I prefer Valrhona or Callebaut. White chocolate chips often contain stabilizers that prevent smooth melting, so a chopped bar is best. The white chocolate gives the glaze its creamy body and glossy finish, and it balances the tartness of the strawberry beautifully.
Powdered Gelatin: This is the structural backbone of the recipe. I use powdered gelatin because it’s widely available and easy to work with. Always bloom it in cold water for 5 minutes before heating — this ensures it dissolves evenly and gives you a smooth, lump-free texture. Sheet gelatin can be substituted: use 3 sheets (gold strength) for every 1 teaspoon of powdered gelatin.
| Original Ingredient | Best Substitution | Flavor / Texture Impact |
|---|---|---|
| Sakura extract | 1/2 tsp almond extract + 1/2 tsp rose water | Slightly more almond-forward, less floral; still very pleasant |
| Powdered gelatin | Sheet gelatin (3 sheets gold per 1 tsp) | Identical result; sheets are easier to bloom uniformly |
| Heavy cream | Full-fat coconut cream (chilled) | Slightly coconut flavor, dairy-free; whip to soft peaks |
| White chocolate | High-quality white chocolate chips + 1 tsp coconut oil | Slightly less glossy; coconut oil helps smoothness |
How to Make Strawberry Sakura Cheesecake Cubes — Step-by-Step
Let me walk you through every step of making these gorgeous strawberry sakura cheesecake cubes. I’ve broken it down into clear stages so you can work through them with confidence. Trust me — once you see that first cube emerge from the mold, you’ll be so proud of yourself.
Step 1: Make the Strawberry Core
Bloom 1 teaspoon of powdered gelatin in 1 tablespoon of cold water for 5 minutes. In a small saucepan, warm 3/4 cup strawberry puree with 2 tablespoons sugar and 1 teaspoon lemon juice over medium heat until it’s steaming but not boiling. Remove from heat and stir in the bloomed gelatin until fully dissolved. Pour the mixture into small cube-shaped silicone molds (about 1-inch cubes work perfectly) and freeze for at least 2 hours, until completely firm. These little gems will be the surprise center of each cheesecake cube.
💡 Stella’s Pro Tip: Use silicone cube molds with smooth surfaces — they release the frozen cores effortlessly. If you don’t have small cube molds, pour the mixture into a shallow dish and cut it into small squares once frozen.
Step 2: Bloom Gelatin for Cheesecake
In a small bowl, sprinkle 2 teaspoons of powdered gelatin over 3 tablespoons of cold water. Let it sit undisturbed for 5 minutes. It will look like a firm, translucent sponge — that’s exactly what you want. This process, called blooming, ensures the gelatin dissolves smoothly into the cheesecake mixture without any lumps.
⚠️ Common Mistake to Avoid: Don’t skip the bloom! Adding dry gelatin directly to the cream mixture will result in grainy, uneven texture. Always bloom in cold water first — it’s a non-negotiable step in professional pastry.
Step 3: Make the Cheesecake Base
In a large bowl, beat 8 oz softened cream cheese with 1/2 cup granulated sugar until completely smooth and fluffy — about 2 minutes with an electric mixer. Add 1 cup strawberry puree, 1 teaspoon sakura extract, and 1 teaspoon vanilla extract. Beat until well combined. The mixture should be smooth and pale pink. Take a moment to smell it — the sakura and strawberry together are absolutely intoxicating.
Step 4: Dissolve Gelatin into Cream
Warm about 1/4 cup of the heavy cream in a small saucepan or microwave until it’s just steaming — not boiling. Add the bloomed gelatin and stir until completely dissolved. Pour this gelatin-cream mixture into the cheesecake base and mix well. This step ensures the gelatin is evenly distributed throughout the cheesecake.
💡 Stella’s Pro Tip: If the gelatin-cream mixture starts to seize or form lumps, gently reheat it for a few seconds and whisk vigorously. It should be smooth and liquid before you add it to the cheesecake.
Step 5: Whip and Fold the Cream
Whip the remaining 3/4 cup heavy cream to soft peaks — you want it to hold its shape but still be billowy and soft, not stiff. Gently fold the whipped cream into the cheesecake mixture in three additions. Use a rubber spatula and a light hand; you want to keep as much air in the mixture as possible for a light, mousse-like texture.
⚠️ Common Mistake to Avoid: Over-folding will deflate the mixture and result in dense cheesecake cubes. Fold just until no white streaks remain — a few tiny lumps are fine and will smooth out as the mixture sets.
Step 6: Assemble the Cubes
Fill your silicone cube molds halfway with the cheesecake mixture. Place one frozen strawberry core in the center of each cube, pressing it gently into the mixture. Then cover with the remaining cheesecake mixture, smoothing the tops with an offset spatula. Freeze for at least 6 hours or overnight — the cubes need to be completely solid for the glazing step to work.
💡 Stella’s Pro Tip: Place the filled molds on a baking sheet before freezing — it makes moving them in and out of the freezer much easier. Also, cover loosely with plastic wrap to prevent freezer odors from affecting the cheesecake.
Step 7: Make the Blush Pink Glaze
Bloom 1 tablespoon of powdered gelatin in 3 tablespoons of cold water for 5 minutes. In a saucepan, combine 1 cup sugar, 1/2 cup water, and 1/2 cup sweetened condensed milk. Heat over medium heat, stirring gently, until the mixture is steaming and the sugar is fully dissolved — about 3-4 minutes. Remove from heat and stir in the bloomed gelatin and 1 cup finely chopped white chocolate until smooth and glossy. Add 1 teaspoon vanilla extract and 2 drops of pink food coloring, then blend with an immersion blender or whisk vigorously until completely smooth and shiny.
⚠️ Common Mistake to Avoid: Don’t let the glaze boil — it can cause the white chocolate to separate and become grainy. Heat only until steaming, then remove from heat immediately before adding the chocolate.
Step 8: Cool and Glaze
Let the glaze cool to about 90°F (32°C) — it should feel warm but not hot to the touch. If it’s too hot, it will melt the frozen cheesecake; too cold, and it will set too thick to pour smoothly. Unmold the frozen cheesecake cubes and place them on a wire rack set over a baking sheet. Pour the blush pink glaze evenly over each cube, covering all sides. Let the excess drip off, then use a small offset spatula to clean up the bottom if needed.
💡 Stella’s Pro Tip: For the most even coverage, work with one or two cubes at a time and keep the rest in the freezer until ready to glaze. The colder the cubes, the better the glaze will adhere.
Step 9: Garnish and Set
Before the glaze sets completely, place your garnishes on top — fresh strawberry slices, edible cherry blossom petals, and delicate white chocolate curls. Transfer the glazed cubes to a parchment-lined tray and refrigerate for at least 30 minutes to allow the glaze to set fully. The glaze will become firm and glossy, with a beautiful mirror-like finish.
⚠️ Common Mistake to Avoid: Don’t wait too long to garnish! The glaze begins setting within minutes, and once it’s firm, garnishes won’t stick properly. Have everything ready before you start glazing.
| Step | Action | Duration | Key Visual Cue |
|---|---|---|---|
| 1 | Make strawberry core | 2 hrs freeze | Firm, solid, releases cleanly from mold |
| 2 | Bloom gelatin for cheesecake | 5 mins | Gelatin forms firm, translucent sponge |
| 3 | Make cheesecake base | 5 mins | Smooth, pale pink, fluffy |
| 4 | Dissolve gelatin into cream | 2 mins | Gelatin fully dissolved, no lumps |
| 5 | Whip and fold cream | 5 mins | Soft peaks, airy, no white streaks |
| 6 | Assemble cubes | 10 mins | Core centered, tops smooth |
| 7 | Freeze cubes | 6+ hrs | Completely solid, no give when pressed |
| 8 | Make blush pink glaze | 10 mins | Glossy, smooth, pink, 90°F |
| 9 | Glaze and garnish | 15 mins | Glaze evenly coated, garnishes placed |
| 10 | Set in fridge | 30 mins | Glaze firm, glossy, holds fingerprint |
Serving & Presentation
These Strawberry Sakura Cheesecake Cubes are a showstopper on any dessert table. I love to serve them on a simple white platter that lets the blush pink glaze take center stage. Place each cube with a bit of space around it — they’re individual works of art, and they deserve to be seen. For a spring tea party, I arrange them on a tiered stand with fresh strawberries and edible flowers scattered around the base.
The garnish is where you can really make these your own. Fresh strawberry slices add a bright pop of red that contrasts beautifully with the pink glaze. Edible cherry blossom petals — available at Japanese grocery stores or online — bring the whole sakura theme full circle. And white chocolate curls, made by running a vegetable peeler along the edge of a white chocolate bar, add a touch of elegance. In my NYC kitchen, I sometimes add a tiny pinch of flaky sea salt on top of each cube — it’s a trick I picked up from a pastry chef friend in Paris, and it makes the strawberry flavor sing.
| Pairing Type | Suggestions | Why It Works |
|---|---|---|
| Side Dish | Fresh strawberry slices, mint leaves, lychee fruit | Bright, fresh flavors complement the creamy cheesecake |
| Sauce / Dip | Warm chocolate sauce, strawberry coulis, honey drizzle | Adds contrast in temperature and sweetness level |
| Beverage | Earl Grey tea, jasmine green tea, rosé wine, sparkling water with lemon | Floral and fruity notes harmonize with sakura and strawberry |
| Garnish | Edible cherry blossoms, white chocolate curls, fresh mint, gold leaf | Elevates visual appeal and adds textural interest |
Make-Ahead, Storage & Reheating
One of the things I love most about this recipe is how well it fits into a busy schedule. In my NYC life, I often make the strawberry cores and the cheesecake mixture a day ahead, then assemble and freeze overnight. The next day, I just make the glaze and finish them — it feels like a baking win without the all-day commitment. Here’s everything you need to know about storing and prepping ahead.
| Method | Container | Duration | Reheating Tip |
|---|---|---|---|
| Refrigerator | Airtight container, single layer | Up to 5 days | Serve cold — no reheating needed |
| Freezer | Freezer-safe container, parchment between layers | Up to 2 months | Thaw overnight in fridge — do not microwave |
| Make-Ahead | Un-glazed cubes in freezer | Up to 1 week | Glaze frozen cubes directly — no thawing needed |
The most important storage tip I can give you: never freeze the cubes after they’ve been glazed. The glaze will sweat and become sticky when thawed. Instead, freeze the un-glazed cubes, then glaze them fresh the day you plan to serve. Once glazed, they’ll keep beautifully in the refrigerator for up to 5 days — though honestly, they’re so good they rarely last that long in my house. If you’re transporting them to a party, keep them chilled in a cooler with an ice pack, and add any delicate garnishes like edible flowers just before serving.
Variations & Easy Swaps
One of the things I adore about this Japanese cherry blossom dessert recipe is how versatile it is. Over the years, I’ve experimented with countless variations — some inspired by my Moroccan roots, others by seasonal ingredients from the Union Square market. Here are my favorite ways to change it up.
| Variation | Key Change | Best For | Difficulty Impact |
|---|---|---|---|
| Rose & Raspberry | Replace sakura with rose water; use raspberry puree | Valentine’s Day, romantic dinners | Same difficulty |
| Matcha White Chocolate | Add 1 tbsp matcha to cheesecake; use white chocolate glaze | Green tea lovers, St. Patrick’s Day | Same difficulty |
| Dairy-Free / Vegan | Use vegan cream cheese, coconut cream, agar-agar instead of gelatin | Dairy-free diets, vegan guests | Slightly harder (agar sets differently) |
Rose & Raspberry Variation
This variation is inspired by the rose-scented pastries I grew up with in Morocco. Simply replace the sakura extract with 1 teaspoon of rose water (add more to taste) and swap the strawberry puree for raspberry puree. The rose and raspberry combination is classic and romantic — perfect for Valentine’s Day or a bridal shower. The blush pink glaze works beautifully here too, just use a touch more pink food coloring if needed. I sometimes add a few crushed freeze-dried raspberries to the glaze for a natural pink color and a hint of tartness.
Matcha White Chocolate Variation
For a greener twist — literally and figuratively — add 1 tablespoon of high-quality culinary matcha powder to the cheesecake mixture along with the sugar. The matcha’s earthy, slightly bitter notes are a beautiful counterpoint to the sweet white chocolate glaze. Skip the strawberry core and use a white chocolate ganache center instead: mix 1/4 cup white chocolate melted with 2 tablespoons heavy cream, chill, and form into small balls. This version has become a favorite at my NYC tea parties, served alongside cups of steaming jasmine green tea.
Dairy-Free / Vegan Variation
I developed this version for a friend who’s dairy-free, and it turned out so well that I now make it regularly. Use vegan cream cheese (I like Miyoko’s or Kite Hill), full-fat coconut cream instead of heavy cream, and agar-agar powder instead of gelatin (1 teaspoon agar-agar per 1 cup liquid, boiled for 2 minutes to activate). The texture is slightly firmer than the original, but still creamy and delicious. For the glaze, use a dairy-free white chocolate (Enjoy Life makes a good one) and coconut condensed milk. The flavor is subtly tropical from the coconut, which pairs surprisingly well with the sakura.
How do you make a blush pink glaze for strawberry sakura cheesecake cubes?
To make a blush pink glaze for these strawberry sakura cheesecake cubes, bloom 1 tablespoon of powdered gelatin in 3 tablespoons of cold water for 5 minutes. In a saucepan, combine 1 cup granulated sugar, 1/2 cup water, and 1/2 cup sweetened condensed milk. Heat until steaming (not boiling), then remove from heat and stir in the bloomed gelatin and 1 cup finely chopped white chocolate until completely smooth. Add 1 teaspoon vanilla extract and 2 drops of pink food coloring — gel food coloring works best for a vibrant, consistent hue. Blend with an immersion blender for a glossy, lump-free finish, then cool to about 90°F (32°C) before pouring over your frozen cheesecake cubes. The glaze should be thick enough to coat the back of a spoon but fluid enough to pour smoothly.
Can I use frozen strawberries instead of fresh for the cheesecake cubes?
Yes, absolutely! Frozen strawberries work wonderfully for this recipe, and I often use them myself — especially in the winter when fresh berries aren’t at their peak. Thaw the frozen strawberries completely, then puree them in a blender or food processor. Strain the puree through a fine-mesh sieve to remove the seeds for the smoothest texture. One important tip: frozen strawberries release more liquid than fresh, so after pureeing, let the puree sit for a few minutes and drain off any excess watery liquid that separates. This ensures your cheesecake filling isn’t too loose and your strawberry core sets up properly. The flavor of frozen berries is actually quite concentrated, which works beautifully in both the cheesecake base and the core.
How long does it take to set the cheesecake cubes in the refrigerator?
For this recipe, the cheesecake cubes are set in the freezer, not the refrigerator. The cubes need to be completely frozen solid — at least 6 hours, but overnight is even better — before you can glaze them successfully. The freezing step is crucial because the blush pink glaze is poured over the frozen cubes, and the cold temperature helps the glaze set quickly into a smooth, glossy shell. If you’re in a hurry, you can speed things up by placing the filled molds on a baking sheet in the coldest part of your freezer (usually the back, away from the door). Once glazed, the cubes are refrigerated for about 30 minutes to set the glaze, then they’re ready to serve. So while the initial freezing takes several hours, the active hands-on time is actually quite short.
What is the best substitute for sakura flavor if I can’t find cherry blossom extract?
If you can’t find sakura extract, the best substitute is a combination of 1/2 teaspoon almond extract and 1/2 teaspoon rose water. This mimics the floral, slightly nutty profile of cherry blossoms surprisingly well. Almond extract provides the subtle marzipan-like note that sakura shares with stone fruits, while rose water adds the delicate floral dimension. Start with these amounts and adjust to your taste — you can always add more, but you can’t take it out. Another option is to use 1 teaspoon of cherry blossom syrup (sold at Japanese grocery stores for drinks and cocktails), though you may need to reduce the sugar slightly to balance the sweetness. Avoid using artificial cherry flavoring, which tends to taste medicinal and lacks the floral sophistication of real sakura.
What type of mold should I use for the cheesecake cubes?
I recommend using silicone cube molds for the best results. Silicone is flexible, non-stick, and makes unmolding the frozen cubes effortless — just pop them out from the bottom. Look for molds with individual cube cavities that are about 1.5 to 2 inches in size. This gives you a generous single-serving dessert that’s still easy to eat and present beautifully. If you don’t have silicone cube molds, you can line a small baking dish with plastic wrap, pour in the cheesecake mixture, freeze it, and then cut it into cubes with a sharp knife. This method works but produces less uniform shapes, and you’ll need to work quickly to prevent the cubes from softening as you cut. For the strawberry cores, very small silicone ice cube trays (about 1 inch) are ideal.
Can I make these cheesecake cubes without gelatin?
Yes, you can make these cheesecake cubes without gelatin, but the texture and setting method will change. The best gelatin substitute is agar-agar, a plant-based setting agent derived from seaweed. Use 1 teaspoon of agar-agar powder for every 1 cup of liquid in the recipe. Unlike gelatin, agar-agar needs to be brought to a full boil for 2 minutes to activate — simply blooming it in cold water won’t work. Agar-agar sets at room temperature and creates a firmer, slightly more brittle texture than gelatin. For the strawberry core and the glaze, you’ll need to adjust the ratios slightly: use about 1/2 teaspoon agar-agar per cup of liquid. I’ve tested this substitution, and while the result is a bit firmer, it’s still delicious and works beautifully for a dairy-free or vegetarian version of this recipe.
How should I store leftover strawberry sakura cheesecake cubes?
Store leftover glazed cheesecake cubes in an airtight container in the refrigerator for up to 5 days. Place them in a single layer with a piece of parchment paper between layers if you need to stack them. The glaze will remain glossy and the cheesecake will stay creamy and fresh. I do not recommend freezing the cubes after they’ve been glazed — the glaze will sweat and become sticky when thawed, and the texture of the cheesecake can become slightly icy. If you want to make them further ahead, freeze the un-glazed cubes for up to 2 months, then glaze them fresh the day you plan to serve. When you’re ready to enjoy a refrigerated leftover, simply take it out 10 minutes before serving to take the chill off — this allows the flavors of the sakura and strawberry to really shine.
Can I use a different fruit for the core instead of strawberry?
Absolutely! The hidden fruit core is one of my favorite elements of this recipe, and it’s very adaptable. Raspberry puree is a natural swap — it has a similar consistency and a bright, tart flavor that cuts through the creamy cheesecake beautifully. Mango puree works wonderfully for a tropical twist, especially if you’re making this in the summer. Lychee puree is another gorgeous option that pairs perfectly with the sakura flavor. For any substitution, follow the same method: use 3/4 cup fruit puree, 2 tablespoons sugar, 1 teaspoon lemon juice, and 1 teaspoon powdered gelatin bloomed in 1 tablespoon cold water. The key is to use a puree that’s not too watery — if your fruit is very juicy, simmer it gently to reduce and concentrate the flavor before adding the gelatin. Stone fruit purees like peach or nectarine also work beautifully in late summer.
What can I use instead of white chocolate in the glaze?
If you don’t have white chocolate on hand, you can substitute it with an equal amount of good-quality white candy melts or white confectionery coating. These are designed to melt smoothly and set with a glossy finish, though the flavor won’t be as rich as real white chocolate. For a dairy-free option, use dairy-free white chocolate (brands like Enjoy Life or Pascha work well). Another creative substitute: use 1 cup of full-fat coconut cream mixed with 2 tablespoons of cornstarch and 1/2 cup powdered sugar, heated until thickened, though this won’t be as glossy. Avoid using white chocolate chips unless they’re a high-quality brand — many chips contain stabilizers that prevent smooth melting. If that’s all you have, add 1 teaspoon of coconut oil or vegetable shortening to help them melt smoothly. The taste will still be delicious, even if the texture is slightly less perfect.
How do I get the glaze perfectly smooth and glossy?
The secret to a perfectly smooth and glossy blush pink glaze is threefold: proper gelatin blooming, temperature control, and blending. First, always bloom your gelatin in cold water for exactly 5 minutes — this ensures it dissolves evenly. Second, heat the sugar, water, and condensed milk only until steaming; if it boils, the glaze can become grainy. Third, after adding the white chocolate and gelatin, use an immersion blender to emulsify the glaze — this removes any tiny air bubbles and creates that mirror-like shine you see in professional patisseries. If you don’t have an immersion blender, pour the glaze through a fine-mesh sieve into a clean bowl. Let the glaze cool to 90°F (32°C) before using; if it’s too hot, it will melt the frozen cheesecake, and if it’s too cool, it will set too thick to pour smoothly. A final tip: make sure your frozen cheesecake cubes are completely solid before glazing — any soft spots will cause the glaze to slide off unevenly.
Share Your Version!
I can’t wait to see how your Strawberry Sakura Cheesecake Cubes turn out! There’s something so special about making a dessert that looks this beautiful — it’s a moment of pure joy in the kitchen. If you try this recipe, please leave a star rating and a comment below to let me know how it went. Did you try one of the variations? Did your family go silent for a moment after that first bite? I’d love to hear every detail.
And if you’re sharing on Instagram or Pinterest, tag me @leosfoods so I can see your gorgeous creations. I love scrolling through photos of these cubes — each one is unique, and the blush pink glaze never looks the same way twice. One question I’d love for you to answer: what’s one flavor combination you’ve been wanting to try in cube form? Your answer might just inspire my next recipe! From my NYC kitchen to yours — I hope this recipe brings as much warmth to your table as it does to mine. — Stella 🧡
Love This Recipe? Save It to Pinterest!
If you enjoyed this Strawberry Sakura Cheesecake Cubes with Blush Pink Glaze recipe, don’t let it get lost in your browser tabs! 😄 Pin it now so you can find it again anytime — and explore hundreds more tried-and-tested recipes waiting for you on my Pinterest boards.
👉 Follow Stella on Pinterest @stellarecipeblog
📌 Pin this recipe · 🔁 Re-pin your favorites · 💬 Tag me when you make it — I love seeing your creations!
💬 What’s Your Favorite Spring Dessert?
I’d love to hear from you! Drop a comment below with your rating, any questions, or a photo of your Strawberry Sakura Cheesecake Cubes. Your feedback helps me create better recipes — and it makes my day every single time. 🧡
From my NYC kitchen to yours — Stella 🌸
Strawberry Sakura Cheesecake Cubes with Blush Pink Glaze
A delightful dessert combining strawberry and sakura flavors in a creamy cheesecake cube, topped with a blush pink glaze and garnished with fresh strawberries and edible cherry blossoms.
- Yield: 8 1x
Ingredients
- For the Strawberry Sakura Cheesecake:
- 8 oz cream cheese, softened
- 1/2 cup granulated sugar
- 1 cup heavy cream
- 1 cup strawberry puree
- 1 tsp sakura extract
- 1 tsp vanilla extract
- 2 tsp powdered gelatin
- 3 tbsp cold water
- For the Strawberry Core:
- 3/4 cup strawberry puree
- 2 tbsp granulated sugar
- 1 tsp lemon juice
- 1 tsp powdered gelatin
- 1 tbsp cold water
- For the Blush Pink Glaze:
- 1 cup granulated sugar
- 1/2 cup water
- 1/2 cup sweetened condensed milk
- 1 cup white chocolate, finely chopped
- 1 tbsp powdered gelatin
- 3 tbsp cold water
- 1 tsp vanilla extract
- 2 drops pink food coloring
- For Garnish (optional):
- Fresh strawberry slices
- Edible cherry blossom petals
- White chocolate curls
Instructions
- 1. Bloom the gelatin for the strawberry core in cold water for 5 minutes.
- 2. Heat strawberry puree, sugar, and lemon juice until warm.
- 3. Stir in the bloomed gelatin until dissolved.
- 4. Pour into small cube molds and freeze until firm.
- 5. Bloom the gelatin for the cheesecake in cold water for 5 minutes.
- 6. Beat cream cheese, sugar, strawberry puree, sakura extract, and vanilla until smooth.
- 7. Warm a small portion of the cream and dissolve the gelatin, then mix into the cheesecake mixture.
- 8. Whip the remaining cream to soft peaks and fold into the mixture.
- 9. Fill cube molds halfway with cheesecake mixture.
- 10. Place a frozen strawberry core in the center of each cube and cover with remaining cheesecake mixture.
- 11. Freeze for at least 6 hours or until completely firm.
- 12. Bloom the gelatin for the glaze in cold water.
- 13. Heat sugar, water, and condensed milk until steaming.
- 14. Remove from heat and stir in gelatin and white chocolate until smooth.
- 15. Add vanilla extract and pink food coloring, then blend until glossy.
- 16. Cool glaze to about 90°F (32°C).
- 17. Unmold frozen cheesecake cubes and place on a wire rack.
- 18. Pour blush pink glaze evenly over each cube.
- 19. Refrigerate for 30 minutes before serving.
- 20. Garnish with strawberry slices, cherry blossom petals, and white chocolate curls.
Nutrition
- Calories: 340
- Sugar: 34 g
- Fat: 18 g
- Carbohydrates: 39 g
- Protein: 4 g
Tried This Recipe? Leave a Comment!
Did you make this recipe? I’d love to hear how it turned out! Please leave a comment and a rating below. Your feedback helps other home cooks and supports cheerychop.com!
For more delicious inspiration, follow me on Pinterest!