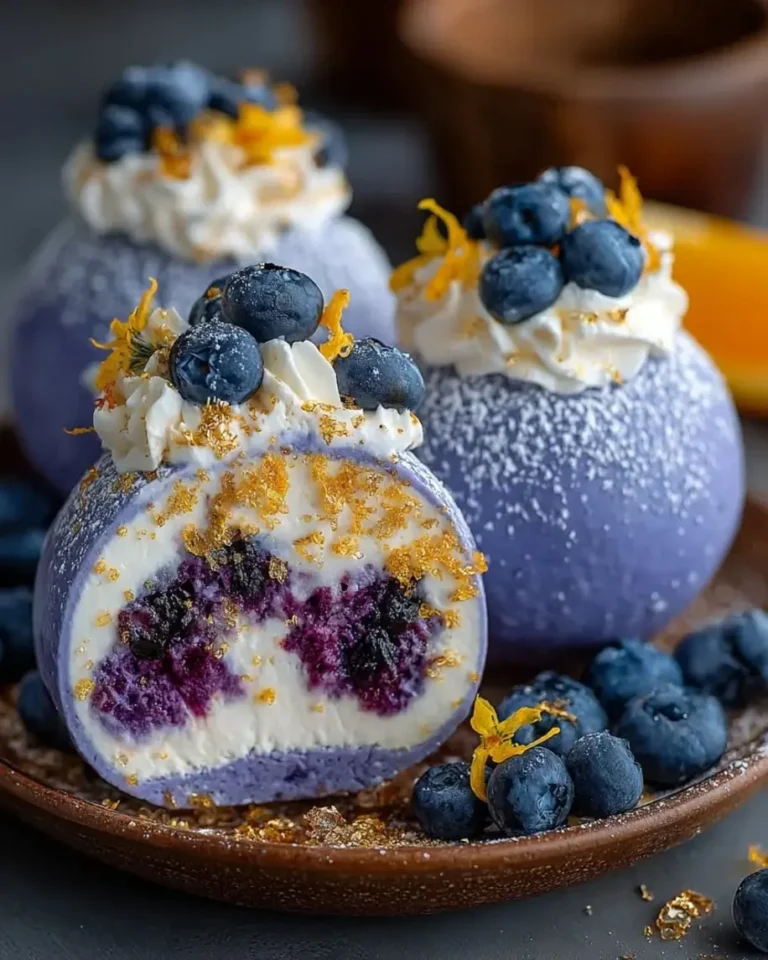
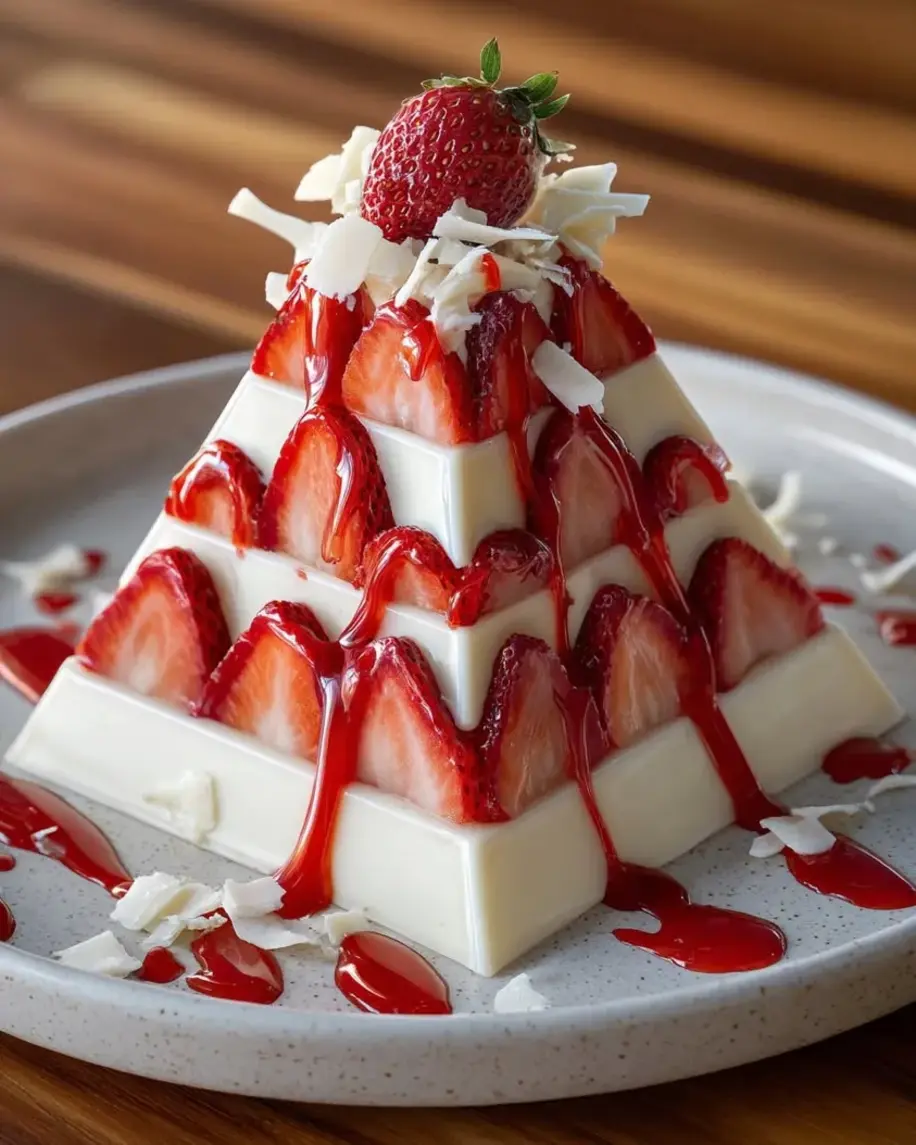
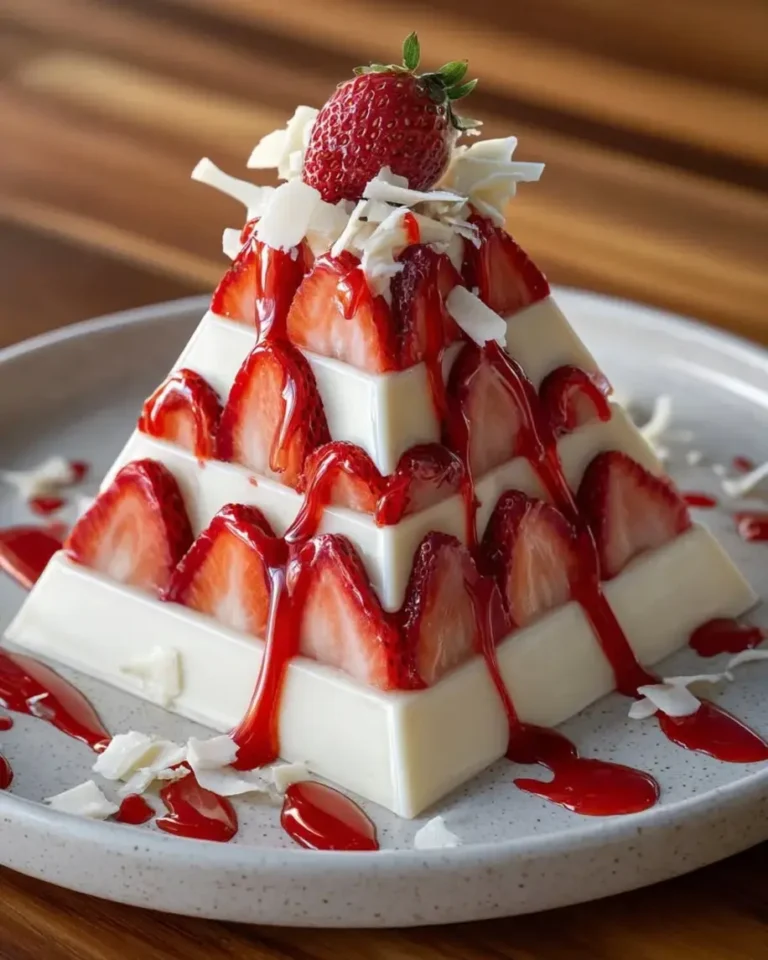
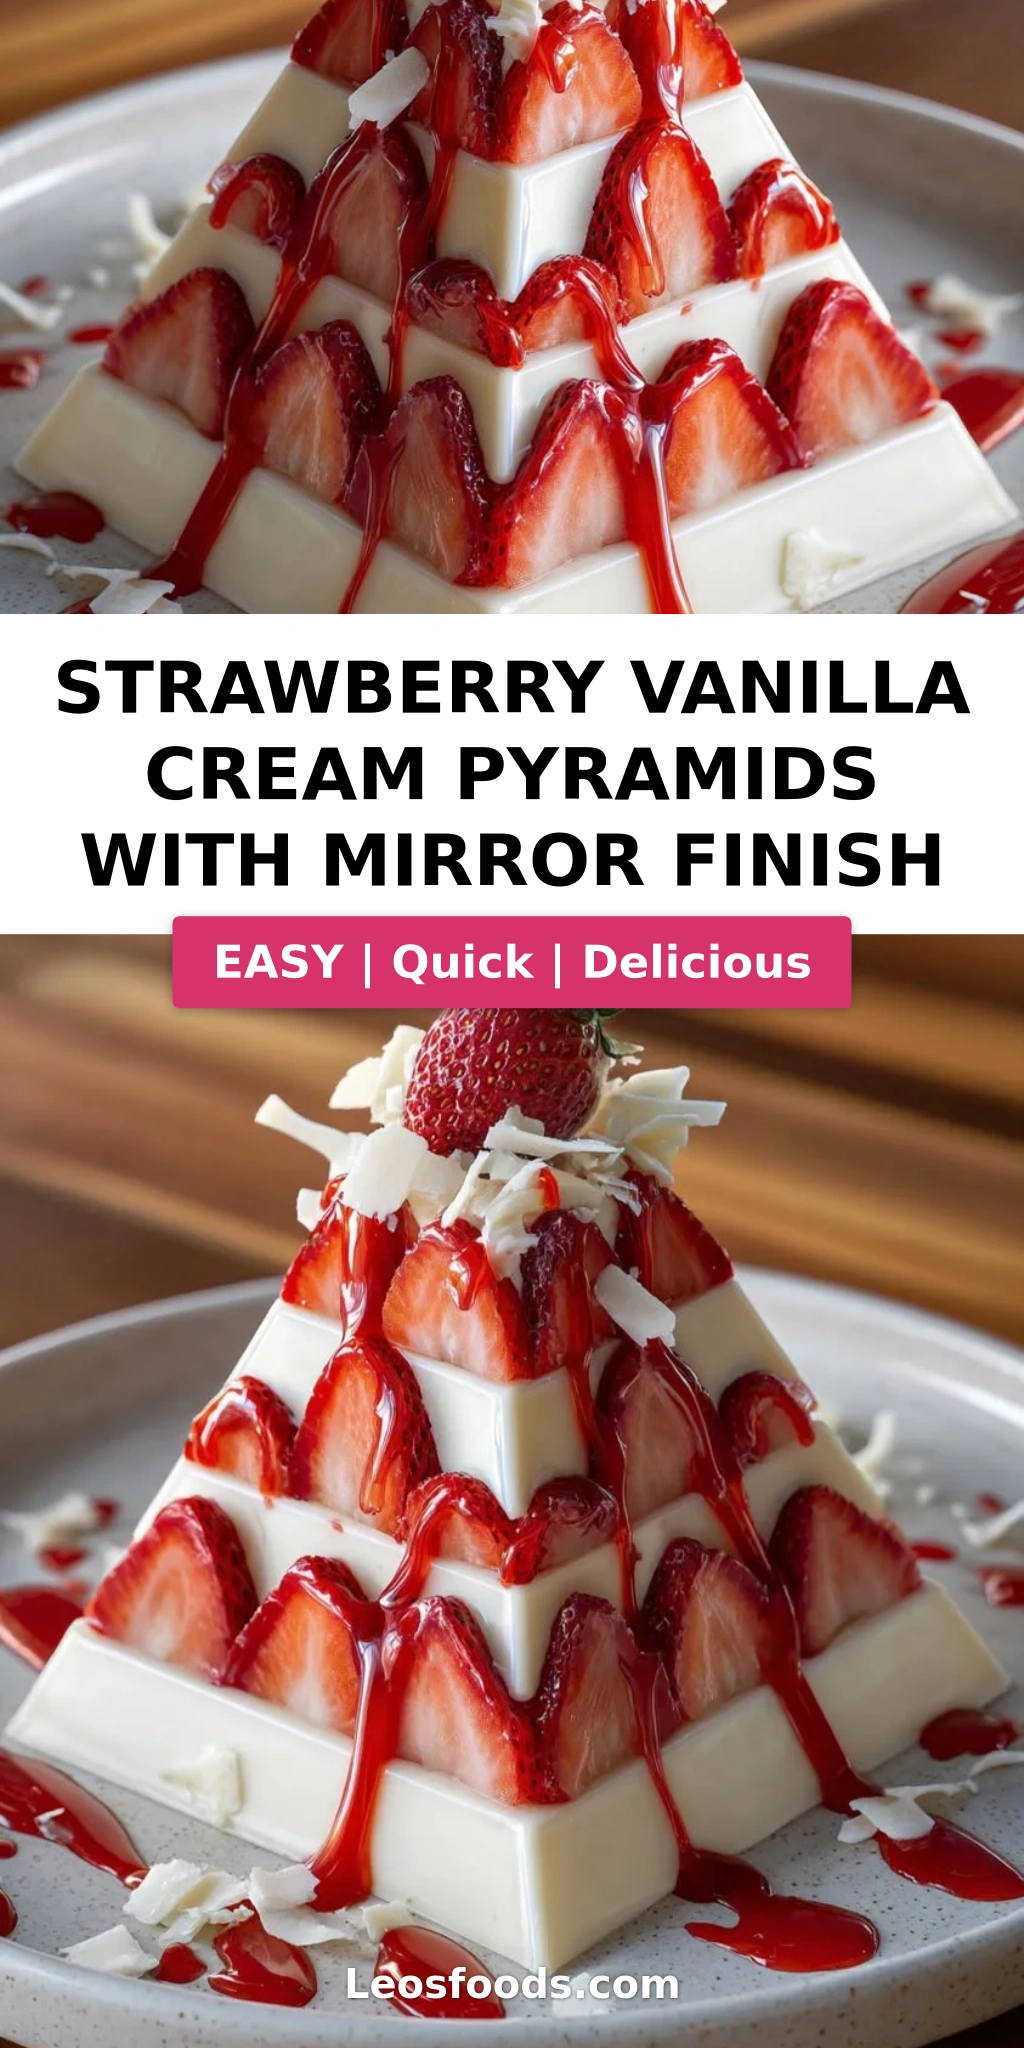
Strawberry Vanilla Cream Pyramids with Mirror Glaze
“`html
Table of Contents
Strawberry Vanilla Cream Pyramids with Mirror Finish – A Stunning Frozen Dessert with a Glossy White Chocolate Mirror Glaze
I still remember the first time I saw a mirror glaze in pastry school in Paris. It was 2005, and our chef instructor poured a shimmering cascade of color over a frozen entremet, and the whole classroom gasped. That glossy, reflective surface looked like polished gemstone — impossibly smooth, almost liquid light. Back then, I dreamed of bringing that same kind of magic to my own recipes, fusing it with the bright, sun-warmed flavors I grew up with in my mother’s kitchen in Morocco. These Strawberry Vanilla Cream Pyramids with Mirror Finish are that dream realized: a frozen cream cheese dessert with a hidden strawberry heart, wrapped in a gleaming white chocolate mirror glaze that catches the light like a jewel.
The very first bite is a study in contrasts — the silky, chilled vanilla cream gives way to a burst of honey-sweetened strawberries, all under that thin, glossy shell of white chocolate that shatters ever so slightly as you cut into it. I add a whisper of vanilla bean paste to the cream layer, the same kind I used to scrape from pods my mother would bring back from her trips to France. The aroma is delicate and floral, wrapping around the bright tang of the strawberries like a warm embrace. It tastes like a perfect spring afternoon in New York’s Union Square Greenmarket, captured and frozen in time.
What makes my version different? After years of testing mirror glazes in my tiny NYC apartment kitchen, I’ve perfected a technique that gives you that flawless, glossy finish every time — without the stress. The secret lies in the temperature of the glaze and the timing of the pour. I’ll walk you through every detail, including the most common mistake home bakers make that turns mirror glaze into a dull mess. Whether you’re making these for a special occasion or just because you want to impress someone (including yourself), this recipe is designed to deliver show-stopping results with a foolproof process.
Why This Strawberry Vanilla Cream Pyramids Recipe Is the Best
The flavor secret is in the double-layered filling. Most frozen cream desserts rely on a single flavor, but I’ve layered a honey-kissed strawberry compote inside a light, tangy vanilla cream cheese base. It’s a technique I borrowed from the French entremets I learned in Paris, but I’ve simplified it so you don’t need a pastry degree to pull it off. The cream cheese adds a subtle tang that cuts through the sweetness of the white chocolate glaze, creating a balanced dessert that never feels cloying.
Perfected texture is everything here. The cream cheese mixture is whipped with heavy cream to soft peaks, then folded together for a light, mousse-like consistency that freezes beautifully without becoming icy. I’ve tested this with different cream cheese brands and fat contents, and I can tell you that full-fat cream cheese at room temperature is non-negotiable — it gives you that velvety smoothness that low-fat versions just can’t match. The mirror glaze itself is thin enough to coat without running off, but thick enough to set into that signature glossy shell.
This recipe is also surprisingly foolproof for beginners. The steps are straightforward, the ingredients are all available at any US grocery store, and I’ve included detailed visual cues so you know exactly what to look for at every stage. Plus, the frozen nature of the dessert means you can make it days in advance — perfect for stress-free entertaining. I’ve taught this technique to dozens of home cooks in my NYC cooking workshops, and the biggest smile is always when they unmold their first perfect pyramid.
Strawberry Vanilla Cream Pyramids with Mirror Finish Ingredients
I source most of my ingredients from the Union Square Greenmarket and my local Whole Foods in Chelsea. For the strawberries, I wait for peak season — June through August in New York — but good-quality frozen berries work beautifully in the compote when fresh aren’t available. The white chocolate for the mirror glaze should be a good brand you’d actually eat; cheap white chocolate chips often contain stabilizers that prevent smooth melting. Let me walk you through exactly what you’ll need.
Ingredients List
For the Strawberry Center:
- 2 cups strawberries, finely diced
- 2 tbsp honey
- 1 tsp lemon juice
- 1 tsp cornstarch
- 2 tbsp water
For the Vanilla Cream Layer:
- 8 oz (225 g) cream cheese, softened
- 1/2 cup heavy cream
- 1/3 cup powdered sugar
- 1 tsp vanilla bean paste
- 1/4 tsp salt
For the Mirror Glaze:
- 1 cup white chocolate, finely chopped
- 1/2 cup sweetened condensed milk
- 1 tbsp coconut oil
- 1 tbsp water
For Garnish (optional):
- Fresh strawberry slices
- White chocolate curls
Ingredient Spotlight
White Chocolate: The star of the mirror glaze. Choose a high-quality white chocolate bar (like Ghirardelli or Valrhona) rather than white chocolate chips, which often contain palm oil and anti-caking agents that prevent smooth melting. For a dairy-free version, use a good-quality dairy-free white chocolate — the texture will be slightly softer but still glossy.
Cream Cheese: Use full-fat block cream cheese (like Philadelphia), not the spreadable kind in a tub. It must be softened to room temperature for a smooth, lump-free cream layer. I’ve tested this with Neufchâtel (lower fat) and it works, but the texture is slightly less rich and the pyramids are a bit softer after freezing.
Strawberries: Fresh, ripe strawberries give the best flavor. If using frozen, thaw them first and drain excess liquid, otherwise the compote will be too watery. I love using organic strawberries from the Greenmarket when they’re in season — the sweetness is unmatched.
Vanilla Bean Paste: This is my secret weapon. It gives you those beautiful vanilla specks and a deeper, more complex flavor than extract. If you don’t have it, use 2 teaspoons of pure vanilla extract instead — the flavor will be slightly less floral but still lovely.
Coconut Oil: A small amount in the mirror glaze gives it that flawless shine and helps it set with a smooth, even finish. Use refined coconut oil (no coconut flavor) for a neutral taste. You can substitute with cocoa butter if you have it — it’s what professional pastry chefs use.
| Original Ingredient | Best Substitution | Flavor / Texture Impact |
|---|---|---|
| White chocolate | Dairy-free white chocolate | Slightly softer set, still glossy |
| Cream cheese | Neufchâtel | Less rich, slightly softer after freezing |
| Vanilla bean paste | 2 tsp pure vanilla extract | Less floral, no vanilla specks |
| Coconut oil | Cocoa butter | More professional finish, similar gloss |
| Honey | Maple syrup or agave | Slightly different sweetness profile |
How to Make Strawberry Vanilla Cream Pyramids — Step-by-Step
Making these mirror glaze pyramids is a labor of love, but every step is rewarding. I’ve broken it down into clear stages so you can work through it with confidence. The key is to take your time with the freezing step — a fully frozen pyramid unmolds perfectly and gives you that clean, sharp shape that makes the final presentation so stunning.
Step 1: Cook the Strawberry Filling
Combine the finely diced strawberries, honey, lemon juice, cornstarch, and water in a small saucepan. Stir everything together until the cornstarch is completely dissolved. Place over medium heat and bring to a gentle simmer, stirring frequently. Cook for 4–5 minutes until the mixture thickens and becomes glossy, like a loose jam. You’ll see it pull away from the sides of the pan slightly. Remove from heat and let it cool completely to room temperature, then refrigerate until needed.
💡 Stella’s Pro Tip: For a smoother texture, you can blitz the strawberry filling in a food processor after cooking. I prefer it a little chunky for texture, but either way works beautifully.
Step 2: Make the Vanilla Cream Layer
In a large mixing bowl, beat the softened cream cheese with an electric hand mixer until it’s completely smooth and fluffy — about 1 minute. Add the powdered sugar, vanilla bean paste, and salt, and beat until fully incorporated, scraping down the sides of the bowl. In a separate bowl, whip the heavy cream to soft peaks — when you lift the whisk, the cream should hold a gentle ribbon that slowly folds back into itself. Fold the whipped cream into the cream cheese mixture in three additions, using a rubber spatula with gentle, sweeping motions. Be careful not to overmix; you want a light, airy texture.
⚠️ Common Mistake to Avoid: Over-whipping the cream or over-folding the mixture will make the cream layer dense and heavy instead of light and mousse-like. Fold just until no white streaks remain.
Step 3: Fill the Pyramid Molds
Spoon the vanilla cream mixture into a piping bag or a sturdy zip-top bag with the corner snipped off. Pipe a layer of cream into each pyramid mold, filling it about halfway. Tap the mold gently on the counter to remove any air bubbles. Add a generous teaspoonful of the cooled strawberry filling into the center of each mold — don’t let it touch the edges. Pipe the remaining vanilla cream over the strawberry filling, filling the mold to the top. Smooth the tops with an offset spatula so they’re flush with the rim of the mold.
💡 Stella’s Pro Tip: If you don’t have pyramid molds, you can use silicone ice cube trays in fun shapes, or even small paper cups. Just adjust the fill amount accordingly — the key is the shape needs to be able to unmold cleanly.
Step 4: Freeze the Pyramids
Place the filled molds on a small baking sheet or flat tray and transfer to the freezer. Freeze for at least 4 hours, preferably overnight. The pyramids need to be completely solid — if they’re soft in the center, they’ll lose their shape when you unmold them. I usually make these a day ahead and let them freeze overnight for best results.
⚠️ Common Mistake to Avoid: Rushing the freezing step. If the pyramids aren’t fully frozen, they may collapse or crack when you unmold them. Be patient — solid freezing gives you that perfect sharp edge.
Step 5: Make the Mirror Glaze
Place the finely chopped white chocolate in a medium heatproof bowl. In a small saucepan, gently warm the sweetened condensed milk, coconut oil, and water over low heat until the coconut oil is melted and the mixture is warm to the touch (about 100°F — it should feel warm but not hot). Pour the warm mixture over the chopped white chocolate and let it sit undisturbed for 1 minute. Gently stir until the chocolate is completely melted and the glaze is smooth, shiny, and uniform in color. If you see any lumps, strain the glaze through a fine-mesh sieve.
💡 Stella’s Pro Tip: The ideal temperature for pouring the glaze is 85–90°F. If it’s too hot, it will melt the surface of the frozen pyramids and become cloudy. If too cool, it will be too thick to flow evenly. Use an instant-read thermometer to dial it in perfectly.
Step 6: Unmold and Glaze
Remove the frozen pyramids from the freezer. Gently flex the silicone molds to release each pyramid — they should pop out cleanly. Place the pyramids on a wire rack set over a baking sheet (to catch the drips). Working one at a time, slowly pour the mirror glaze over each pyramid, starting from the top and letting it cascade down the sides. Make sure you cover the entire surface. Let the excess drip off for a few seconds, then use a small offset spatula to clean the bottom edge of any drips.
⚠️ Common Mistake to Avoid: Pouring the glaze too quickly or from too high up can create air bubbles that ruin the mirror finish. Pour in a steady, slow stream close to the surface of the pyramid.
Step 7: Let the Glaze Set
Place the glazed pyramids back on the wire rack. The glaze will begin to set almost immediately as it hits the frozen surface. Let them sit at room temperature for 5–7 minutes to allow the glaze to fully set and firm up. You’ll see the surface become smooth and glossy — that’s your mirror finish. If desired, garnish with fresh strawberry slices and white chocolate curls while the glaze is still slightly tacky so they stick.
💡 Stella’s Pro Tip: For an extra mirror-like shine, you can use a kitchen torch very briefly — pass the flame about 6 inches above the surface in a sweeping motion to warm the glaze slightly. This helps eliminate any small imperfections and enhances the gloss.
| Step | Action | Duration | Key Visual Cue |
|---|---|---|---|
| 1 | Cook strawberry filling | 4–5 minutes | Thick, glossy, pulls away from pan sides |
| 2 | Make cream layer | 5 minutes | Soft peaks in cream; smooth, fluffy cream cheese |
| 3 | Fill molds | 5 minutes | Layers visible, tops smooth |
| 4 | Freeze | 4+ hours | Completely solid, firm to the touch |
| 5 | Make mirror glaze | 5 minutes | Smooth, shiny, no lumps |
| 6 | Unmold and glaze | 2 minutes per pyramid | Glaze coats evenly, glossy surface |
| 7 | Let set and garnish | 5–7 minutes | Glaze firms into mirror finish |
Serving & Presentation
These strawberry vanilla cream pyramids are a showstopper on any dessert table. I love serving them on a simple white plate with a few fresh strawberry slices and a tiny edible flower for contrast. The mirror glaze catches the light beautifully, so keep the plating clean and minimal — you want all eyes on that glossy pyramid. For a dinner party, I’ll arrange them on a marble slab or a mirrored tray and let guests help themselves.
In my mother’s kitchen in Morocco, we would have served something like this with a side of mint tea and a plate of fresh dates. Here in New York, I pair them with a crisp sparkling wine or a light Prosecco — the bubbles cut through the richness of the cream and the sweetness of the glaze. For a non-alcoholic option, a sparkling water with a splash of pomegranate juice works beautifully. If you’re serving these after a heavy meal, keep the portions small — they’re rich and satisfying.
One of my favorite ways to present these is on a bed of crushed pistachios or coconut flakes, which adds a lovely green or white contrast against the glossy glaze. You can also drizzle a little extra strawberry sauce around the plate — just warm up the leftover strawberry filling with a splash of water and spoon it alongside the pyramid. The combination of the cold, creamy pyramid with the room-temperature sauce is absolutely divine.
| Pairing Type | Suggestions | Why It Works |
|---|---|---|
| Side Dish | Fresh berries, mint leaves, edible flowers | Adds freshness and color contrast |
| Sauce / Dip | Warm strawberry sauce, chocolate sauce, caramel | Temperature contrast enhances flavor |
| Beverage | Prosecco, sparkling wine, mint tea, espresso | Bubbles cut richness; tea adds aromatic balance |
| Garnish | Crushed pistachios, coconut flakes, white chocolate curls | Adds texture and visual appeal |
Make-Ahead, Storage & Reheating
One of the best things about this frozen dessert is how well it works for make-ahead entertaining. I often prepare the pyramids fully (glazed and all) up to 3 days before a dinner party. The key is to store them properly so the glaze stays intact and the texture remains creamy. Here’s my tried-and-true storage system from years of NYC dinner parties where timing is everything.
| Method | Container | Duration | Reheating Tip |
|---|---|---|---|
| Refrigerator | Airtight container, parchment between layers | 3–4 days | Not recommended — serve frozen or chilled |
| Freezer | Freezer-safe container, wax paper between layers | Up to 2 months | Thaw at room temp 5–7 minutes before serving |
| Make-Ahead | Unmolded, unglazed, frozen on baking sheet, then wrapped | Up to 1 week | Glaze fresh on serving day for best shine |
If you’re making these for a party, I recommend glazing them the day you plan to serve them for the most brilliant mirror finish. You can freeze the unglazed pyramids up to a week ahead, then simply thaw the glaze components, whip up a fresh batch of mirror glaze, and pour. The glaze itself takes only 5 minutes to make. If you have leftovers (which rarely happens in my house), store them in an airtight container in the freezer with a layer of parchment between each pyramid to prevent the glaze from sticking. Let them sit at room temperature for about 7 minutes before serving to let the cream soften slightly for the perfect texture.
Variations & Easy Swaps
Over the years, I’ve played with countless variations on these frozen pyramids — some inspired by my Moroccan roots, others by the seasonal bounty of New York farmers markets. Here are a few of my favorite twists, each tested and perfected in my own kitchen.
| Variation | Key Change | Best For | Difficulty Impact |
|---|---|---|---|
| Raspberry Rose Pyramids | Substitute raspberries for strawberries, add 1 tsp rose water to the cream | Romantic occasions, Valentine’s Day | Same difficulty |
| Dairy-Free Coconut Pyramids | Use dairy-free cream cheese, coconut cream instead of heavy cream, and dairy-free white chocolate | Dairy-free, vegan-friendly diet | Slightly higher — texture is softer |
| Mango Passion Fruit Pyramids | Substitute mango puree + passion fruit pulp for strawberry filling | Summer entertaining, tropical theme | Same difficulty |
Raspberry Rose Pyramids
This variation feels straight out of a Parisian patisserie. Swap the strawberries for raspberries (fresh or frozen) and cook them down with honey and lemon just like the original. Add 1 teaspoon of food-grade rose water to the vanilla cream layer — the floral notes pair beautifully with the tart raspberries. I like to garnish these with dried rose petals and a few fresh raspberries on the plate. The rose water is a subtle nod to the Middle Eastern flavors I grew up with in Morocco, where rose water is used in everything from pastries to tea.
Dairy-Free Coconut Pyramids
I developed this version for my friend who’s dairy-free, and it turned out so good that I now make it regularly. Use a high-quality dairy-free cream cheese (I like Kite Hill or Miyoko’s) and replace the heavy cream with full-fat coconut cream — the one from a can, chilled and whipped to soft peaks. The coconut oil in the glaze is already dairy-free, so just use a dairy-free white chocolate. The texture is slightly softer than the original, so freeze for a full 6 hours minimum. The coconut adds a lovely tropical undertone that pairs wonderfully with the strawberry filling.
Mango Passion Fruit Pyramids
When I find gorgeous ripe mangoes at the Greenmarket in July, this is my go-to. Replace the strawberry filling with a quick mango-passion fruit compote: dice one large ripe mango and cook it with 1 tablespoon honey, 1 teaspoon lime juice, and the pulp of 2 passion fruits (about 2 tablespoons). Thicken with cornstarch as you would the strawberry version. The passion fruit seeds add a delightful crunch, and the tartness of the passion fruit cuts through the sweet cream and glaze perfectly. This variation is sunshine on a plate.
Frequently Asked Questions
How do you get a smooth mirror finish on strawberry vanilla cream pyramids?
The key to a flawless mirror finish is all about temperature. Your mirror glaze should be between 85°F and 90°F when you pour it — warm enough to flow smoothly, but not hot enough to melt the frozen pyramid. Use an instant-read thermometer to check. Also, make sure your white chocolate is finely chopped so it melts evenly, and strain the glaze through a fine-mesh sieve if you see any lumps. Pour the glaze in a slow, steady stream close to the surface of the frozen pyramid, allowing it to cascade evenly over the sides. If you get air bubbles, you can gently tap the pyramid on the counter to release them, or use a kitchen torch to quickly pass over the surface to pop them.
What is the best way to shape cream pyramids without them falling apart?
The secret is in the freezing — your pyramids need to be completely solid before you attempt to unmold them. Freeze for at least 4 hours, but overnight is even better. Use flexible silicone pyramid molds; they release much more cleanly than rigid plastic or metal molds. When you’re ready to unmold, gently flex the silicone from the bottom and sides, pressing lightly to release the pyramid. If it doesn’t pop out easily, let it sit at room temperature for 30 seconds and try again. Never use a knife or tool to pry them out — that will damage the shape. Also, make sure your cream layer is not too thin; the cream cheese and whipped cream ratio I’ve given creates a stable frozen structure that holds its shape beautifully.
Can I use frozen strawberries for the vanilla cream pyramid filling?
Absolutely! Frozen strawberries work wonderfully in the compote, especially when fresh berries aren’t in season. The key is to thaw them first and drain off any excess liquid before dicing and cooking. If you skip the draining step, the compote may end up too watery and won’t thicken properly. I sometimes add an extra teaspoon of cornstarch if the frozen berries seem particularly juicy. Frozen strawberries are actually more consistent in flavor year-round, and they’re often flash-frozen at peak ripeness, so they can be even sweeter than out-of-season fresh berries. Just don’t use frozen strawberries straight from the bag — thaw, drain, and proceed as directed.
How far in advance can I make strawberry vanilla cream pyramids with mirror glaze?
You can make the unglazed pyramids up to 1 week ahead of time — simply freeze them solid, then wrap each one individually in plastic wrap and store them in an airtight container in the freezer. The mirror glaze is best made fresh on the day you plan to serve, as it loses some of its brilliant shine after a day or two in the freezer. However, if you need to glaze them a day ahead, you can — just store the glazed pyramids in a single layer in an airtight container in the freezer with parchment paper between them. Let them sit at room temperature for 7–10 minutes before serving to soften slightly. I recommend glazing no more than 24 hours ahead for the most stunning mirror finish.
Can I use a different fruit instead of strawberries?
Yes, and I encourage it! This recipe is a fantastic template for any fruit-based filling. Raspberries, blueberries, diced mango, pitted cherries, or sliced peaches all work beautifully. The general rule is: for every 2 cups of fruit, use 2 tablespoons of honey (adjust to taste), 1 teaspoon of lemon juice, and 1 teaspoon of cornstarch dissolved in 2 tablespoons of water. Cook until thickened and glossy. Some fruits, like very juicy peaches, may need an extra teaspoon of cornstarch. I’ve also made a fig and honey version in the fall that was absolutely stunning — the figs’ natural sweetness pairs beautifully with the vanilla cream.
What if my mirror glaze is too thick or too thin?
If your mirror glaze is too thick, it won’t flow smoothly over the pyramid and will leave thick, uneven patches. To thin it, add warm water 1 teaspoon at a time, stirring gently until it reaches a pourable consistency (like warm honey). If it’s too thin, it will run off the pyramid and leave a dull, patchy finish. To thicken it, let it sit at room temperature for a few minutes, stirring occasionally — it will naturally thicken as it cools. The ideal consistency is when the glaze coats the back of a spoon and slowly drips off in a steady ribbon. Temperature is everything, so aim for that 85–90°F sweet spot for best results.
Can I make these pyramids without a pyramid mold?
Absolutely! While pyramid molds give you that dramatic geometric look, you can use any small silicone mold — try hemisphere molds for dome-shaped desserts, small loaf pans for mini rectangular cakes, or even silicone ice cube trays in fun shapes like diamonds or stars. You can also use small paper cups (like 4-ounce bathroom cups), though the shape will be more rounded. The key is to use silicone for easy unmolding. If using paper cups, you’ll need to peel the cup away carefully after freezing. Just adjust the fill amount to fit your chosen mold, and keep in mind that the serving size will vary depending on the size of your mold.
How do I store leftover strawberry vanilla cream pyramids?
Leftover pyramids (if you have any!) should be stored in an airtight container in the freezer, with a layer of parchment or wax paper between each pyramid to prevent the glaze from sticking. They’ll keep well for up to 2 months in the freezer, though the mirror glaze may lose some of its brilliance over time. To serve, let them sit at room temperature for 7–10 minutes to soften the cream slightly. I don’t recommend storing them in the refrigerator, as the texture can become icy and the glaze may become tacky. Always keep them frozen until just before serving for the best texture and appearance.
Can I use milk chocolate instead of white chocolate for the mirror glaze?
Yes, you can substitute milk chocolate for white chocolate in the mirror glaze, but be aware that the color will be a warm brown instead of the bright white of the original. The flavor will also be richer and more chocolate-forward, which pairs beautifully with the strawberry filling. Use the same amount (1 cup finely chopped milk chocolate) and follow the same method. Keep in mind that milk chocolate has a different fat content than white chocolate, so the glaze may be slightly thinner — if it seems too runny, let it cool for a minute longer before pouring. Dark chocolate also works but will result in a much darker, more bitter glaze that might overpower the delicate strawberry-vanilla filling.
Why did my mirror glaze crack or not stick properly?
Cracking or peeling mirror glaze is usually a temperature issue. If your frozen pyramids are too cold (straight from a deep freeze at 0°F), the glaze can seize on contact and crack as it contracts. Let the pyramids sit at room temperature for 2–3 minutes before glazing so the surface is cold but not arctic. If the glaze is too hot (above 95°F), it can melt the surface of the pyramid, creating a watery layer that prevents the glaze from adhering. Always aim for that 85–90°F glaze temperature. Also, make sure your pyramids are fully frozen and dry — any ice crystals or condensation on the surface will prevent the glaze from sticking and cause patchy spots.
Share Your Version!
I’d love to see how your Strawberry Vanilla Cream Pyramids with Mirror Finish turn out! Drop a star rating below, leave a comment with your experience, and tell me which variation you tried — or if you came up with your own twist. Did you use raspberries? Go dairy-free? Try a different glaze color? I read every single comment and I’m always inspired by your creativity.
Snap a photo of your glossy pyramids and share it on Instagram or Pinterest — tag me @leosfoods so I can see your masterpiece. I share my favorites in my stories every week. And if you have a question about the recipe that I didn’t cover above, just ask in the comments. I’m here to help you get that perfect mirror finish on your first try.
From my NYC kitchen to yours — I hope this recipe brings as much warmth to your table as it does to mine. — Stella 🧡
Love This Recipe? Save It to Pinterest!
If you enjoyed this Strawberry Vanilla Cream Pyramids with Mirror Finish recipe, don’t let it get lost in your browser tabs! 😄 Pin it now so you can find it again anytime — and explore hundreds more tried-and-tested recipes waiting for you on my Pinterest boards.
👉 Follow Stella on Pinterest @stellarecipeblog
📌 Pin this recipe · 🔁 Re-pin your favorites · 💬 Tag me when you make it — I love seeing your creations!
“`
Print
Strawberry Vanilla Cream Pyramids with Mirror Finish
- Yield: 8 1x
Ingredients
- For the Strawberry Center:
- 2 cups strawberries, finely diced
- 2 tbsp honey
- 1 tsp lemon juice
- 1 tsp cornstarch
- 2 tbsp water
- For the Vanilla Cream Layer:
- 8 oz (225 g) cream cheese, softened
- 1/2 cup heavy cream
- 1/3 cup powdered sugar
- 1 tsp vanilla bean paste
- 1/4 tsp salt
- For the Mirror Glaze:
- 1 cup white chocolate, finely chopped
- 1/2 cup sweetened condensed milk
- 1 tbsp coconut oil
- 1 tbsp water
- For Garnish (optional):
- Fresh strawberry slices
- White chocolate curls
Instructions
- Combine strawberries, honey, lemon juice, cornstarch, and water in a saucepan.
- Cook over medium heat until thick and glossy. Cool completely.
- Beat cream cheese, powdered sugar, vanilla bean paste, and salt until smooth.
- Whip heavy cream to soft peaks and fold into the cream cheese mixture.
- Fill pyramid molds halfway with vanilla cream.
- Add a spoonful of strawberry filling to the center of each mold.
- Cover with remaining vanilla cream and smooth the tops.
- Freeze for at least 4 hours until completely firm.
- Melt white chocolate with sweetened condensed milk, coconut oil, and water until smooth and shiny.
- Allow the glaze to cool slightly while remaining pourable.
- Unmold the frozen pyramids and place on a wire rack.
- Pour the mirror glaze evenly over each pyramid.
- Let the glaze set completely before serving.
- Garnish with strawberry slices and white chocolate curls.
Nutrition
- Calories: 315
- Sugar: 21 g
- Fat: 23 g
- Carbohydrates: 24 g
- Protein: 4 g
Tried This Recipe? Leave a Comment!
Did you make this recipe? I’d love to hear how it turned out! Please leave a comment and a rating below. Your feedback helps other home cooks and supports cheerychop.com!
For more delicious inspiration, follow me on Pinterest!