Tropical Coconut Lime Dream Bombs with Mirror Glaze
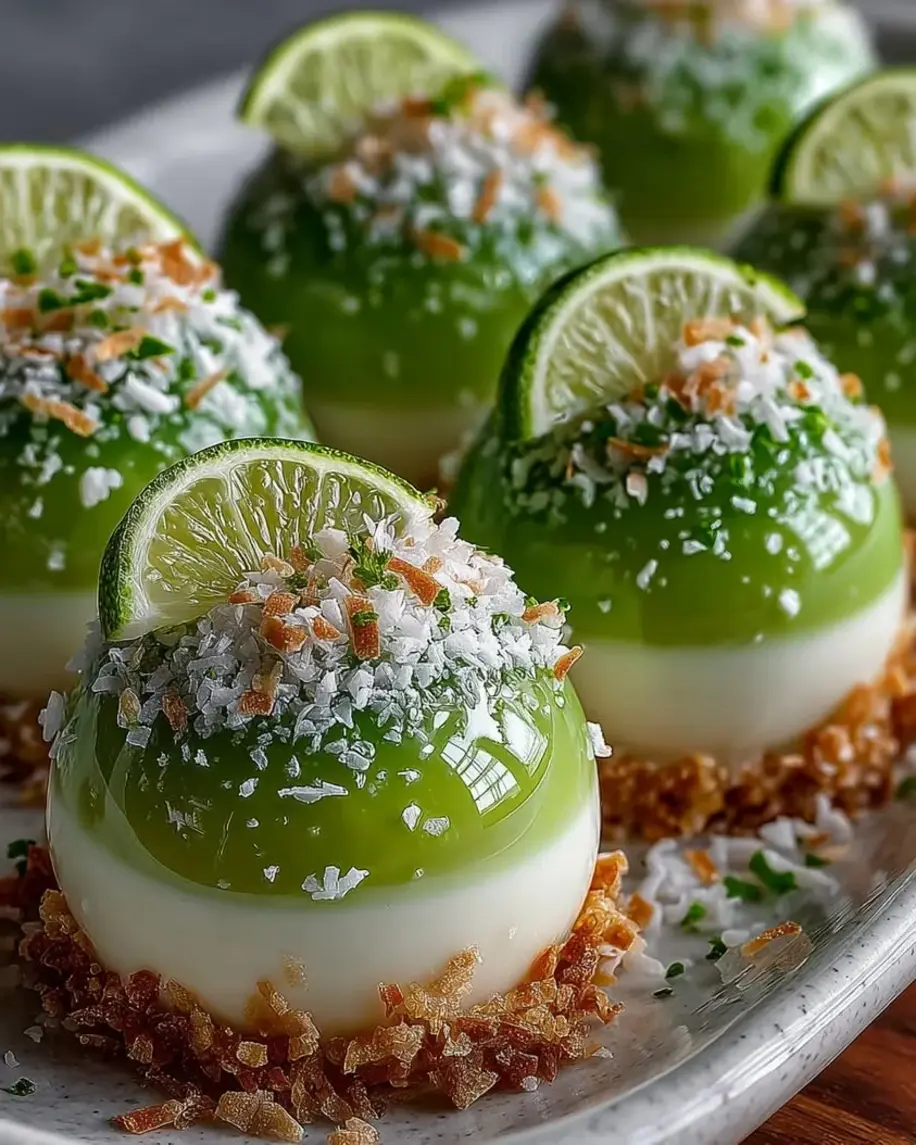
Table of Contents
Tropical Coconut Lime Dream Bombs with Gloss Mirror Finish – The Ultimate Tropical Dessert
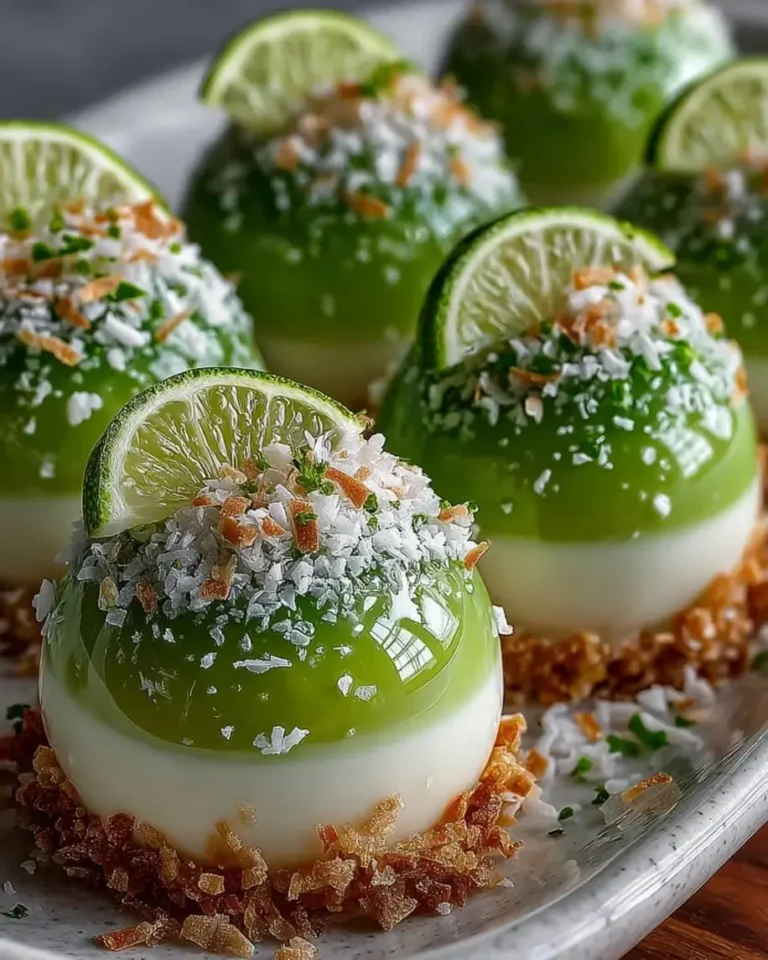
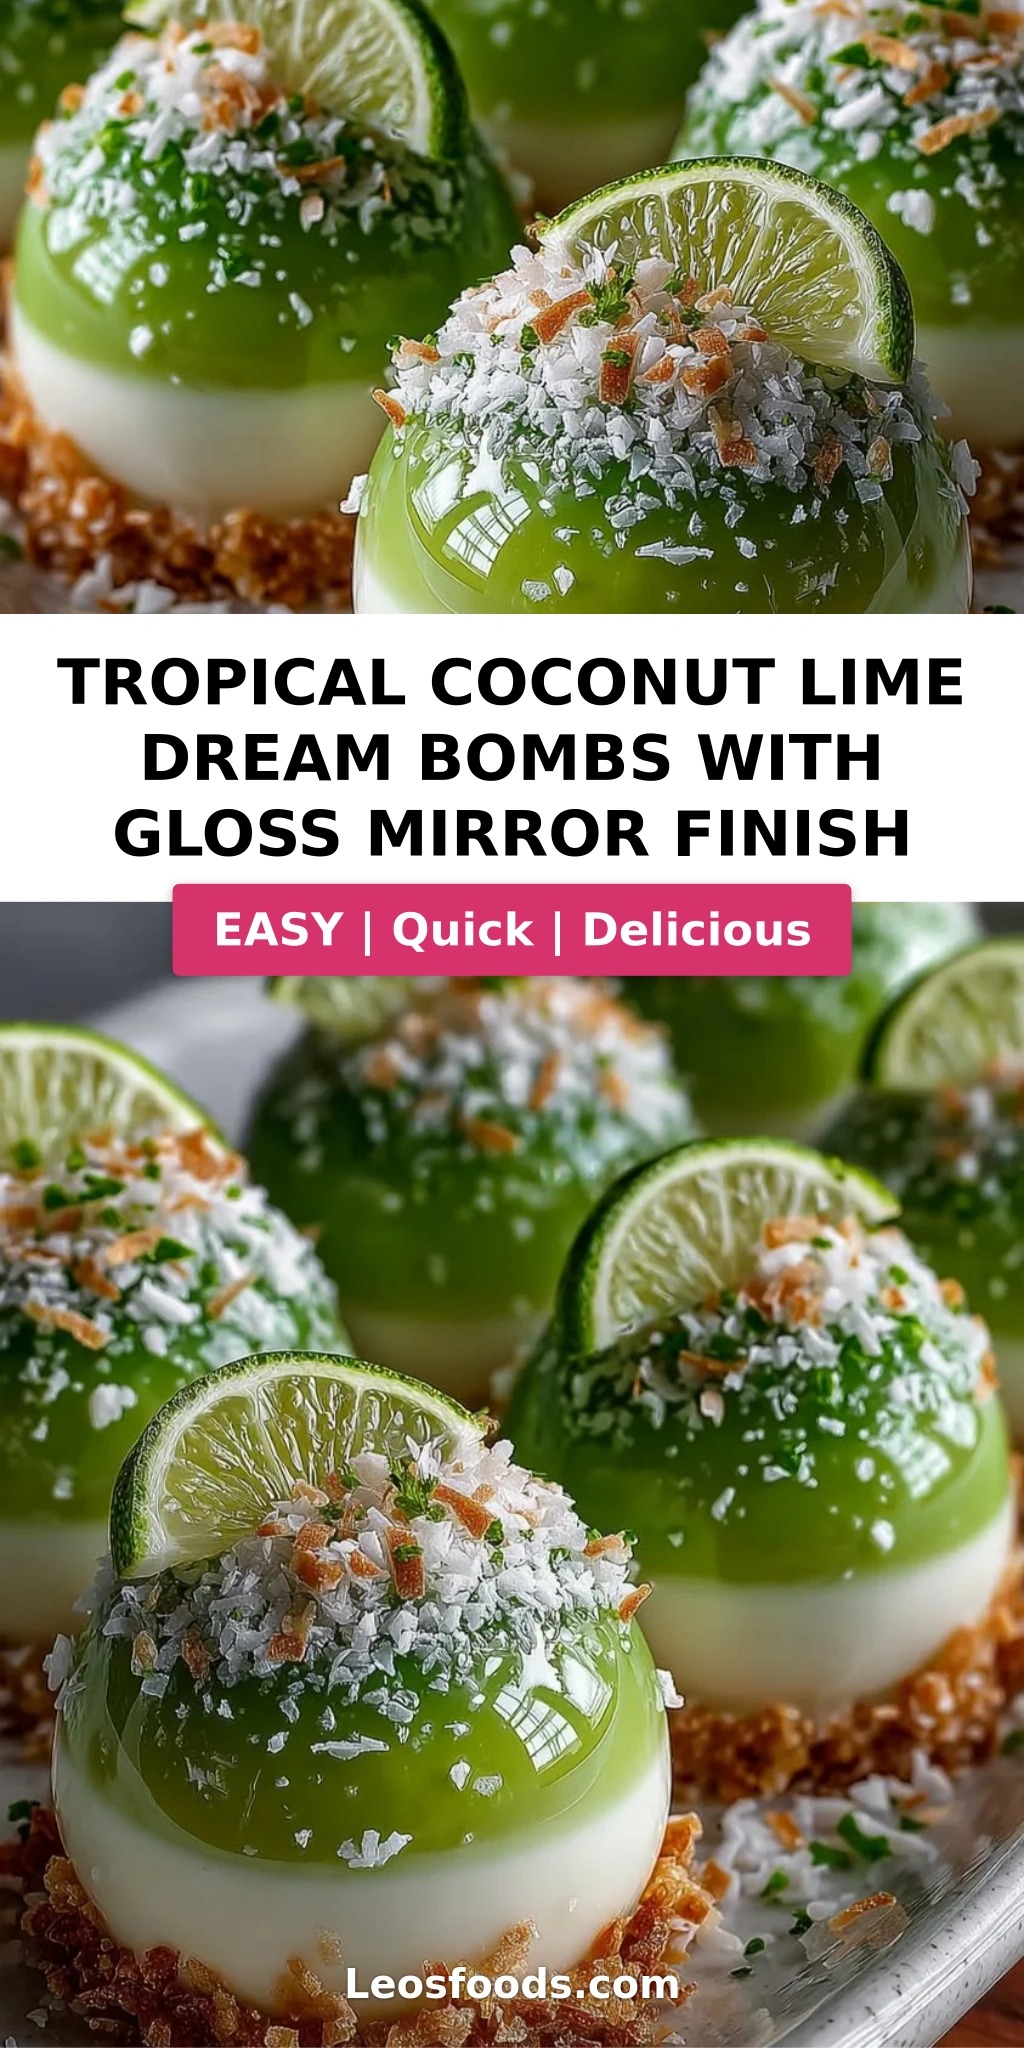
I still remember the first time I made these coconut lime dessert bombs — it was a sweltering July afternoon in my tiny NYC kitchen, and I was craving something that tasted like the Moroccan citrus groves of my childhood but looked like the polished pastry shop windows I passed every day on my way to culinary school in Paris. These tropical mirror glaze dessert bites are the love child of those two worlds: the bright, sunny flavor of lime and coconut, wrapped in a glossy mirror finish dessert coating that shimmers like a tropical lagoon at sunset. The homemade bombe recipe I’m sharing today gives you that breathtaking mirror effect without a pastry degree — I promise.
The first bite cracks through that jewel-toned mirror shell into a silky coconut lime cream, then lands on a cloud of mascarpone filling that tastes like the dreamiest key lime pie you’ve ever had — only cooler, creamier, and more elegant. There’s the pop of fresh lime zest, the whisper of vanilla, and that unmistakable tropical richness from full-fat coconut milk that reminds me of the sweet coconut sweets my mother would make for Eid celebrations back in Marrakech. Every spoonful delivers a coconut lime sweet treat experience that’s refreshing, indulgent, and absolutely show-stopping on a dessert table.
What makes my version different from other coconut lime dessert bombs? I spent months testing the glossy mirror finish dessert technique in my French pastry training, learning exactly how to get that streak-free, glass-like surface without any special equipment. I’ll walk you through every degree of temperature, every stir, every cooling minute — plus I’ll share the one common mistake that ruins mirror glazes 90% of the time, so you can avoid it completely. By the end of this post, you’ll be turning out tropical mirror glaze dessert bombs that look like they belong in a Manhattan patisserie window.
Why This Tropical Coconut Lime Dream Bombs Recipe Is the Best
The flavor secret here is the double dose of lime — both juice and zest in the coconut shell, plus a bright, clean finish from the zest in the filling. In my mother’s Moroccan kitchen, we used preserved lemons and fresh citrus in almost everything, and that taught me how to balance acidity so it sings rather than bites. The coconut milk isn’t just a background flavor either: I use full-fat canned coconut milk (never the carton stuff) because its natural emulsifiers help create a smoother, creamier shell that freezes beautifully and releases cleanly from the mold. That’s a trick I picked up working pastry stations in Paris — fat carries flavor and structure both.
The texture is where this homemade bombe recipe really shines. The frozen coconut lime shell stays firm enough to hold its shape under the warm mirror glaze, but softens to a silky, almost mousse-like consistency after about 5 minutes at room temperature. The mascarpone filling stays luxuriously creamy without freezing rock-hard because of its high butterfat content — another French technique I rely on. And the mirror finish itself? It sets to a thin, snappy shell that shatters when you tap it with a spoon, contrasting beautifully with the soft interior. Getting that contrast right took me about 12 test batches — but I’ve simplified every variable so you nail it on your first try.
This recipe is also surprisingly foolproof for beginners. Yes, it looks fancy — that glossy mirror finish dessert surface scares a lot of home cooks — but if you can bloom gelatin and stir ingredients in a bowl, you can make these bombs. The only precision required is temperature: the glaze needs to be between 90°F and 95°F when you pour it. I’ll show you exactly how to test that without a thermometer (though I recommend one). Plus, every component can be made ahead, which means you can spread the work across two days and assemble right before serving. That’s how I do it when I’m hosting dinner parties in my tiny NYC apartment — no stress, all impress.
Coconut Lime Dessert Bombs Ingredients
I source my coconut milk from the Asian grocery stores on Mott Street in NYC — they carry brands with the highest fat content, which makes all the difference for the shell texture. The limes I grab from the farmers market at Union Square when they’re in season, but any supermarket Persian lime works beautifully. Here’s everything you’ll need to make these tropical mirror glaze dessert bombs at home.
Ingredients List
- For the Coconut Lime Shells:
- 1 1/2 cups coconut milk (full-fat, canned)
- 1/2 cup heavy cream
- 1/3 cup granulated sugar
- 2 tsp gelatin powder
- 2 tbsp cold water (for blooming gelatin)
- 2 tbsp lime juice (freshly squeezed)
- 1 tsp lime zest (freshly grated)
- Pinch of salt
- For the Cream Filling:
- 1 cup mascarpone cheese (room temperature)
- 1/2 cup heavy whipping cream (cold)
- 3 tbsp powdered sugar
- 1 tsp vanilla extract
- 1 tsp coconut extract
- For the Gloss Mirror Finish:
- 1 cup white chocolate, finely chopped
- 1/2 cup sweetened condensed milk
- 1/4 cup water
- 1 tbsp gelatin powder
- 3 tbsp cold water (for blooming gelatin)
- 1 tsp coconut oil
- A few drops green food coloring
- For Garnish (optional):
- 2 tbsp toasted coconut flakes
- 1 tbsp lime zest
- White chocolate curls
Ingredient Spotlight
Coconut Milk: Full-fat canned coconut milk is non-negotiable here. The fat content (usually 17-19% in good brands) creates a silky shell that freezes without iciness. Light coconut milk will give you a watery, icy texture that won’t hold the mirror glaze properly. Look for brands like Chaokoh or Aroy-D — they have the thickest cream separation, which means richer flavor and better structure.
Lime Juice and Zest: Always use fresh lime juice — bottled juice has a flat, metallic taste that ruins the bright top note of these coconut lime dessert bombs. I zest the limes before juicing them (so much easier), and I recommend using a microplane for the finest zest. One large lime gives you about 2 tablespoons of juice and a generous teaspoon of zest. If you can find key limes, their floral acidity is stunning here.
Mascarpone: This Italian cream cheese is the secret to the filling’s cloud-like texture. Its high butterfat content (about 44%) means it won’t freeze into a hard block — it stays spoonable even straight from the freezer. If you can’t find mascarpone, full-fat cream cheese blended with 2 tablespoons of heavy cream works, but the texture will be slightly denser and tangier.
White Chocolate for the Mirror Glaze: Use a high-quality white chocolate like Valrhona Ivoire or Callebaut — the kind that contains real cocoa butter. White coating chips (almond bark or candy melts) contain palm oil instead of cocoa butter and will give you a cloudy, streaky glaze rather than that brilliant glossy mirror finish dessert look. Chop it finely so it melts evenly when you pour the hot condensed milk mixture over it.
Gelatin: Powdered gelatin is what gives both the shell structure and the mirror glaze that fluid-yet-set quality. I use Knox brand because it’s consistent and widely available. The blooming step — letting the gelatin absorb cold water for 5 minutes — is crucial. If you skip this, the gelatin won’t dissolve evenly and you’ll get lumps in your glaze or a rubbery shell texture.
| Original Ingredient | Best Substitution | Flavor / Texture Impact |
|---|---|---|
| Coconut milk (full-fat) | Coconut cream (like Coco Lopez) diluted with 1/4 cup water | Richer, sweeter shell; slightly denser texture |
| Mascarpone | Full-fat cream cheese + 2 tbsp heavy cream, blended until smooth | Slightly tangier filling; a bit firmer when frozen |
| White chocolate (cocoa butter based) | High-quality white chocolate chips (Guittard, Ghirardelli) | Slightly less shiny mirror; still works well if chopped finely |
| Gelatin powder | Agar-agar powder (1 tsp, bloomed in water, boiled for 2 mins) | Firmer, less melt-in-mouth texture; sets at room temperature |
| Green food coloring | Matcha powder (1/2 tsp, sifted, dissolved in 1 tsp warm water) | Earthy undertone; natural green color; slightly matte finish |
How to Make Tropical Coconut Lime Dream Bombs — Step-by-Step
I’ve broken this homemade bombe recipe into clear, manageable steps so you can work through it without any stress. The key is to read each step fully before starting — especially the mirror glaze temperatures. Let’s make some magic.
Step 1: Bloom Gelatin and Prepare Coconut Lime Base
In a small bowl, sprinkle 2 teaspoons of gelatin powder over 2 tablespoons of cold water. Let it sit for 5 minutes undisturbed — this is called blooming and it hydrates the gelatin so it dissolves evenly later. In a small saucepan over medium heat, combine 1 1/2 cups coconut milk, 1/2 cup heavy cream, 1/3 cup sugar, and a pinch of salt. Stir frequently until the sugar dissolves and the mixture is warm but not boiling (about 140°F — you should see gentle steam but no bubbles). Remove from heat, stir in the bloomed gelatin until completely dissolved, then add 2 tablespoons lime juice and 1 teaspoon lime zest. Stir gently — you don’t want to incorporate air bubbles.
💡 Stella’s Pro Tip: If you see any tiny bubbles on the surface, let the mixture sit for 2 minutes and then gently skim them off with a spoon. Bubbles in the shell mixture will create holes in your frozen bombs that the mirror glaze can seep into — and that ruins the clean finish.
Step 2: Make the Coconut Lime Shells
Pour a thin layer of the coconut lime mixture into your silicone molds — about 1/8 inch thick. Use the back of a small spoon to spread it up the sides of each mold cavity, coating evenly. You want a complete seal with no thin spots. Place the filled molds in the refrigerator for 20-25 minutes, until the mixture is partially set and feels firm to the touch but still slightly tacky. It should hold its shape when you press gently. If it slides around, give it another 5 minutes.
⚠️ Common Mistake to Avoid: Don’t pour the shell mixture too thick — more than 1/4 inch and the shells will be heavy and icy rather than delicate and silky. Think of a thin chocolate shell, not a thick pudding cup.
Step 3: Prepare the Cream Filling
While the shells chill, make the filling. In a large bowl, combine 1 cup mascarpone cheese (at room temperature for easiest mixing), 1/2 cup cold heavy whipping cream, 3 tablespoons powdered sugar, 1 teaspoon vanilla extract, and 1 teaspoon coconut extract. Using a hand mixer or stand mixer with the whisk attachment, whip on medium speed until the mixture is light, fluffy, and holds soft peaks — about 2 to 3 minutes. Be careful not to overwhip; you want it smooth and creamy, not grainy. If it starts to look curdled, you’ve gone too far — add 1 tablespoon of cold cream and fold gently to bring it back.
💡 Stella’s Pro Tip: For the fluffiest filling, make sure your mascarpone is at room temperature but your heavy cream is straight from the fridge. The temperature contrast helps the mixture emulsify properly and gives you that cloud-like texture that makes these coconut lime sweet treat bombs so irresistible.
Step 4: Fill and Assemble the Bombs
Spoon or pipe the cream filling into the center of each partially set shell, filling it to about 3/4 full. Leave a small border (about 1/4 inch) around the edges so the top layer of coconut lime mixture can seal the filling inside. Gently spoon the remaining coconut lime mixture over the filling, spreading it to the edges to completely encase the cream. Tap the mold gently on the counter to release any air pockets. Place the filled molds in the freezer for at least 4 hours, or until completely solid. The bombs should be firm to the touch and release easily from the silicone when you flex the mold.
⚠️ Common Mistake to Avoid: If you overfill the molds or don’t leave enough border, the top seal will be too thin and the cream filling might peek through when you unmold. This creates uneven surfaces that the mirror glaze won’t coat smoothly. Less is more here — you can always add a little extra top layer if needed.
Step 5: Prepare the Mirror Glaze
In a small bowl, bloom 1 tablespoon of gelatin powder in 3 tablespoons of cold water for 5 minutes. In a small saucepan, heat 1/2 cup sweetened condensed milk and 1/4 cup water over medium heat until steaming (about 160°F) — do not let it boil. Remove from heat, add the bloomed gelatin, and stir until completely dissolved. Place 1 cup finely chopped white chocolate in a heatproof bowl. Pour the hot condensed milk mixture over the chocolate and let it sit for 1 minute without stirring — this allows the heat to melt the chocolate gently. Then stir slowly in one direction until the mixture is completely smooth and glossy. Add 1 teaspoon coconut oil and a few drops of green food coloring, stirring until the color is uniform and the glaze is fluid.
💡 Stella’s Pro Tip: The temperature of the glaze when you pour it is everything. Let it cool to 90-95°F — it should feel warm to the touch but not hot. If it’s too hot, it will melt the frozen bombs and create a dull, rippled surface. If it’s too cool, it will thicken and clump instead of draping smoothly. I use an instant-read thermometer, but you can test by dipping a clean finger: it should feel like warm bath water, not hot coffee.
Step 6: Glaze the Bombs
Line a baking sheet with parchment paper and set a wire rack on top. Remove the frozen bombs from the molds and place them on the wire rack, spaced at least 2 inches apart. Working quickly, pour the mirror glaze over each bomb in a steady stream, starting from the top center and letting it flow naturally down the sides. The glaze should cover the entire surface in one smooth layer. Allow the excess to drip onto the parchment-lined sheet below. Let the glazed bombs sit on the rack for 5-7 minutes until the glaze is set to the touch — it should be firm but not tacky. Use a thin spatula to transfer each bomb to a serving plate.
⚠️ Common Mistake to Avoid: Never pour the glaze over a cold plate or surface — as soon as the glaze touches something cold, it will thicken and you’ll lose that beautiful glossy mirror finish dessert effect. The bombs themselves should be frozen solid, but the rack and surrounding area should be at room temperature.
Step 7: Garnish and Serve
Before the glaze fully sets (within 2 minutes of pouring), sprinkle toasted coconut flakes, fresh lime zest, and white chocolate curls over each bomb. The glaze will still be slightly tacky, so the garnishes will stick naturally. Transfer the finished bombs to serving plates and refrigerate for at least 30 minutes before serving to allow the interior to soften slightly. Serve chilled, and watch everyone’s face light up when they crack through that mirror shell.
💡 Stella’s Pro Tip: For the cleanest slices, use a sharp knife dipped in hot water and wiped dry before each cut. This gives you that perfect cross-section where you can see the glossy shell, the creamy coconut lime layer, and the cloud-like mascarpone filling. It’s the money shot for your dinner party!
| Step | Action | Duration | Key Visual Cue |
|---|---|---|---|
| 1 | Bloom gelatin & heat coconut lime base | 10 mins | Gelatin is spongy; mixture steams but doesn’t boil |
| 2 | Coat silicone molds with shell mixture | 5 mins + 20 mins chill | Shell is firm but tacky to touch |
| 3 | Whip mascarpone cream filling | 3 mins | Soft peaks; light and fluffy texture |
| 4 | Fill molds and seal with top layer | 10 mins + 4 hrs freeze | Bombs are solid and release cleanly from mold |
| 5 | Prepare mirror glaze | 10 mins + cooling | Glaze is smooth, glossy, 90-95°F |
| 6 | Pour glaze over frozen bombs | 5 mins + 5 mins set | Glaze coats evenly; no bare spots |
| 7 | Garnish and refrigerate before serving | 5 mins + 30 mins rest | Garnishes stick; interior softens slightly |
Serving & Presentation
These coconut lime dessert bombs are at their absolute best when served chilled but not rock-hard — I recommend pulling them from the refrigerator about 5 minutes before serving. Place each bomb on a chilled dessert plate with a small dollop of coconut whipped cream or a drizzle of passion fruit coulis for a gorgeous color contrast. The bright green mirror finish against a white plate is pure art, and a tiny sprinkle of toasted coconut and lime zest on the plate completes the look. For dinner parties, I sometimes set them on a bed of crushed ice with edible orchids — it reminds me of the beautiful dessert displays I saw in Parisian patisseries like Pierre Hermé.
The way I love to serve these most, though, is with a simple story at the table. I tell my guests how the lime in this recipe comes from my love of Moroccan preserved lemons, and how the mirror glaze technique was perfected during my pastry training in Paris. Then I watch them take that first spoonful — the crack of the mirror shell, the surprise of the creamy layers — and I know I’ve shared a little piece of my culinary journey. In my NYC apartment, these bombs have become my signature dessert for birthdays, anniversaries, and any night that calls for something extraordinary.
If you’re serving a crowd, these tropical mirror glaze dessert bombs also pair beautifully with a tropical fruit salad of mango, papaya, and kiwi — the fresh fruit cuts through the richness and echoes the lime notes. For a beverage pairing, a chilled coconut-water latte or a grassy Sauvignon Blanc works wonders. And if you’re feeling extra festive, a drizzle of warm dark chocolate sauce over the top creates a stunning green-and-black marbled effect that’s pure drama.
| Pairing Type | Suggestions | Why It Works |
|---|---|---|
| Side Dish | Tropical fruit salad, mango sorbet, fresh papaya slices | Bright acidity and natural sweetness complement the creamy coconut lime flavors |
| Sauce / Dip | Passion fruit coulis, dark chocolate ganache, coconut caramel drizzle | Adds contrasting tartness or richness to balance the sweet mirror glaze |
| Beverage | Sauvignon Blanc, coconut water latte, iced jasmine green tea | Clean, crisp flavors cut through the creamy dessert without overpowering it |
| Garnish | Toasted coconut flakes, lime zest curls, white chocolate shards, edible flowers | Adds texture, visual contrast, and reinforces the tropical theme |
Make-Ahead, Storage & Reheating
One of the best things about this homemade bombe recipe is how beautifully it works for make-ahead entertaining. I almost never make these bombs in one day — I spread the work across two days so I can enjoy my own dinner party instead of stressing in the kitchen. Here’s exactly how I store everything, based on years of testing in my own NYC kitchen.
| Method | Container | Duration | Reheating Tip |
|---|---|---|---|
| Refrigerator | Airtight container, single layer on parchment | Up to 3 days | Serve straight from fridge; do not microwave |
| Freezer | Freezer-safe container, parchment between layers | Up to 1 month | Thaw in fridge 2 hours; glaze may soften slightly |
| Make-Ahead | Frozen bombs in mold, then glaze day-of | Up to 2 days in advance | Glaze the day you serve for best shine |
For make-ahead success, I recommend freezing the unglazed bombs solid in their silicone molds, then popping them out and storing them in a freezer bag for up to 2 weeks. The day you want to serve, make the mirror glaze fresh and pour it over the frozen bombs. The glaze sets within minutes, and the bombs can be refrigerated for up to 6 hours before serving — the mirror finish stays shiny and intact. I’ve tested this timing extensively for my own dinner parties, and it’s completely foolproof. Just never, ever microwave these bombs to soften them — the mirror glaze will melt into a sticky puddle and the shell will become rubbery. If they’re too frozen, let them sit at room temperature for 10 minutes instead.
One more storage tip from my years of recipe testing: if you’re storing glazed bombs in the refrigerator, place them in a single layer on a parchment-lined tray and cover loosely with plastic wrap — don’t stack them, and don’t use a tight-sealing lid. Condensation is the enemy of that glossy mirror finish dessert look, and airflow helps prevent moisture from dulling the surface. If you notice any condensation when you open the container, gently blot the tops with a paper towel before serving — it won’t damage the glaze, just restore its shine.
Variations & Easy Swaps
Over the years, I’ve played with countless variations of this coconut lime dessert bombs recipe — some inspired by my Moroccan roots, others by what I find at the Union Square farmers market, and a few that came from happy accidents when I ran out of an ingredient. Here are my three favorite ways to switch things up, each tested and tweaked until it was just right.
| Variation | Key Change | Best For | Difficulty Impact |
|---|---|---|---|
| Moroccan Orange Blossom & Coconut | Replace lime with orange juice + 1 tbsp orange blossom water | Elegant dinner parties, North African flavor profiles | Same difficulty; orange blossom water can curdle if overheated |
| Vegan Coconut Mango Bombs | Use full-fat coconut cream + 1/2 cup mango purée; sub gelatin with agar-agar | Dairy-free and plant-based diets | Slightly harder; agar sets differently than gelatin |
| Spiced Chai Coconut Bombs | Add 1 tsp chai spice blend to shell; replace lime with lemon | Fall and winter dessert tables, holiday gatherings | Same difficulty; spices may slightly speckle the shell |
Moroccan Orange Blossom & Coconut Bombs
This variation is deeply personal to me — it takes me straight back to my mother’s kitchen in Marrakech, where orange blossom water was used in everything from cookies to tagines. Replace the lime juice with fresh orange juice (use 3 tablespoons) and add 1 tablespoon of orange blossom water to the coconut lime shell mixture. Reduce the lime zest to 1/2 teaspoon and add 1 teaspoon of orange zest instead. The orange blossom adds a delicate floral perfume that pairs beautifully with the coconut. For the mirror glaze, use a drop of orange food coloring instead of green, and garnish with candied orange peel and pistachios. This version is a showstopper at dinner parties and always gets the most compliments.
Vegan Coconut Mango Bombs
For my dairy-free friends, this version uses full-fat coconut cream in place of the heavy cream and mascarpone. The filling becomes a coconut-mango mousse: blend 1 cup coconut cream (chilled overnight), 1/2 cup mango purée, 3 tablespoons powdered sugar, and 1 teaspoon vanilla extract until thick and fluffy. For the shell, replace the gelatin with agar-agar powder (1 teaspoon bloomed in 2 tablespoons water, then boiled for 2 minutes). The agar sets more firmly than gelatin, so the shell will be slightly snappier — which actually works beautifully with the soft mango filling. Use a yellow-orange mirror glaze with mango purée replacing some of the condensed milk. This version is refreshing, tropical, and completely plant-based.
Spiced Chai Coconut Bombs
When fall hits New York and I’m craving something warming, this is my go-to variation. Add 1 teaspoon of chai spice blend (cinnamon, cardamom, ginger, cloves, and black pepper) to the coconut milk mixture when you heat it. Replace the lime juice with lemon juice (2 tablespoons) and use lemon zest instead of lime. The spices infuse the shell with a cozy warmth, and the lemon keeps it bright. For the mirror glaze, use a warm amber color with a tiny pinch of cinnamon stirred in. Garnish with candied ginger and a dusting of cinnamon. This version tastes like a chai latte turned into a dessert bomb — perfect for holiday entertaining.
Share Your Version!
I absolutely love seeing how you make these coconut lime dessert bombs your own. Leave a star rating and a comment below — tell me which variation you tried, or share your own twist. Did you go with the orange blossom version that reminds me of my Moroccan roots? Did you make the vegan mango bombs for a friend with dietary restrictions? Or did you create something completely new? Your feedback helps other home cooks know what works, and I read every single comment — sometimes I even feature my favorites on my Instagram stories!
If you share a photo on Instagram or Pinterest, tag me @leosfoods so I can see your beautiful creations. I love reposting reader versions — especially the first time someone nails a glossy mirror finish dessert and sends me that photo of the mirror shine. And here’s a question I’d love you to answer in the comments: what’s one dessert technique you’ve always been intimidated by, but this homemade bombe recipe made you feel ready to tackle? Your answer might inspire my next recipe post. From my NYC kitchen to yours — I hope this recipe brings as much warmth to your table as it does to mine. — Stella 🧡
Love This Recipe? Save It to Pinterest!
If you enjoyed this Tropical Coconut Lime Dream Bombs recipe, don’t let it get lost in your browser tabs! 😄 Pin it now so you can find it again anytime — and explore hundreds more tried-and-tested recipes waiting for you on my Pinterest boards.
👉 Follow Stella on Pinterest @stellarecipeblog
📌 Pin this recipe · 🔁 Re-pin your favorites · 💬 Tag me when you make it — I love seeing your creations!
How do you make a glossy mirror finish for coconut lime dessert bombs without any streaks?
The key to a streak-free glossy mirror finish for these coconut lime dessert bombs is all about temperature and straining. First, make sure your glaze is at exactly 90-95°F when you pour — too hot and it melts the frozen bomb, too cold and it thickens unevenly. Always strain the glaze through a fine-mesh sieve before pouring to catch any undissolved gelatin or chocolate bits that could cause streaks. Pour the glaze in one steady stream from the top center of each bomb, letting gravity do the work — don’t spread it with a spoon or brush. And crucially, your bombs must be frozen solid and completely smooth on the surface; any imperfection in the frozen shell will show through the glaze. If you see a streak forming as the glaze sets, resist the urge to fix it — touching the glaze while it sets always makes things worse.
What is the best substitute for gelatin in the mirror glaze for this tropical recipe?
The best substitute for gelatin in this tropical mirror glaze recipe is agar-agar powder, a plant-based setting agent derived from seaweed. Use 1 teaspoon of agar-agar powder bloomed in 2 tablespoons of cold water for 5 minutes, then bring it to a full boil for 2 minutes (gelatin should never be boiled, but agar needs heat to activate). The texture will be slightly firmer and less melt-in-mouth than gelatin, and the glaze will set at room temperature rather than needing refrigeration — which can actually be helpful if you’re serving these bombs at a party where they’ll sit out. One important note: agar-agar doesn’t re-melt like gelatin, so if your glaze cools and thickens, you can’t gently reheat it — you’ll need to make a fresh batch. For a gelatin-free version that’s closer to the original, you can try a combination of 1/2 teaspoon agar-agar plus 1/2 teaspoon xanthan gum, but I’ve found straight agar works best for beginners.
Can I prepare the tropical coconut lime dream bombs a day ahead and still keep the mirror finish shiny?
Yes, you can absolutely prepare these tropical coconut lime dream bombs a day ahead, and the mirror finish will stay shiny if you store them properly. The best method is to freeze the unglazed bombs up to 2 days in advance, then make the mirror glaze fresh on the day you plan to serve. If you need to glaze them a day ahead, place the glazed bombs on a parchment-lined tray, cover loosely with plastic wrap (don’t seal tightly — condensation is the enemy of shine), and refrigerate. Before serving, let them sit at room temperature for 5 minutes, then gently blot any moisture off the surface with a paper towel — the shine will return. I don’t recommend freezing glazed bombs because the mirror finish can crack and dull during thawing. In my experience, the glaze is at its most brilliant within the first 12 hours, so day-of glazing is ideal for that wow factor.
How long should I chill the coconut lime filling before coating it with the mirror glaze?
The coconut lime filling and shell must be frozen completely solid — not just chilled — before you coat it with the mirror glaze. I recommend freezing the filled bombs for at least 4 hours, and ideally overnight. The reason is that the mirror glaze is warm (90-95°F), and if the bombs aren’t frozen solid, the heat from the glaze will partially melt the shell, creating a rough, uneven surface and causing the glaze to slide off instead of coating smoothly. You’ll know the bombs are ready when they release cleanly from the silicone mold and feel rock-hard to the touch — no give at all when you press them. If you’re in a hurry, you can freeze them for 2 hours in a deep freezer set to -10°F, but for home freezers (usually 0°F), stick to the 4-hour minimum. Remember: the frozen bombs are what make the glaze set instantly into that brilliant glossy mirror finish dessert surface.
Why did my mirror glaze become cloudy or dull instead of shiny?
A cloudy or dull mirror glaze on your coconut lime dessert bombs usually comes down to three culprits. First, the temperature was off — if your glaze was above 100°F when poured, the heat caused the cocoa butter in the white chocolate to separate and bloom, creating a cloudy finish. Always let it cool to 90-95°F. Second, condensation is a major issue: if your frozen bombs had frost on them (from sitting too long in the freezer or being uncovered), that layer of ice melts on contact with the glaze and creates a dull, water-spotted surface. Pat the bombs dry with a paper towel just before glazing. Third, low-quality white chocolate that uses palm oil instead of cocoa butter won’t set to a proper shine — always use real cocoa butter white chocolate like Valrhona or Callebaut. If your glaze has already gone cloudy, you can sometimes salvage it by gently reheating it to 95°F, adding 1 teaspoon of coconut oil, and stirring very slowly — then strain and re-pour immediately.
Can I use store-bought lime juice instead of fresh for these coconut lime dessert bombs?
I strongly recommend using fresh lime juice for these coconut lime dessert bombs — the flavor difference is genuinely night and day. Bottled lime juice contains preservatives and has a flat, metallic taste that completely dulls the bright, zesty top note that makes these bombs so special. Fresh lime juice also has a different acidity level (bottled juice is often more acidic due to concentration), which can affect how the gelatin sets in the shell mixture. That said, if you’re in a pinch and only have bottled juice on hand, look for a brand that contains no added preservatives or sulfites — Santa Cruz and Lakewood are decent options — and use 1 1/2 tablespoons instead of 2 to account for the higher acidity. But honestly, fresh limes are available in every grocery store, and zesting before juicing takes just 2 minutes. For the best tropical mirror glaze dessert experience, fresh is always worth it.
What type of silicone mold works best for this homemade bombe recipe?
For this homemade bombe recipe, I recommend using hemisphere or dome-shaped silicone molds that are at least 2.5 inches in diameter with a 3-ounce capacity — this gives you that classic bombe shape and enough room for both the shell and filling. Look for molds made from 100% platinum silicone, which is non-stick and food-safe at both high and low temperatures. Avoid rigid plastic molds or metal pans because the frozen bombs won’t release cleanly and you’ll risk tearing the delicate shell. My personal favorites are the Silikomart brand (I’ve used mine for years in my NYC kitchen) or the affordable ones from Wilton — both release beautifully. If you don’t have dome molds, you can use a standard muffin tin lined with plastic wrap, but the shape won’t be as round. One tip: lightly spray the molds with coconut oil spray before pouring the shell mixture if you’re worried about sticking, though I’ve found that high-quality silicone releases perfectly without any spray.
How do I get the mirror glaze to drip perfectly down the sides of my coconut lime dessert bombs?
Getting that beautiful drip effect on your coconut lime dessert bombs is all about glaze thickness and pouring technique. The glaze should be at 90-95°F and have the consistency of warm honey — if it’s too thick, it won’t flow; if it’s too thin, it will run off completely. To test, dip a spoon into the glaze: it should coat the back of the spoon evenly and drip off in a smooth, continuous ribbon. When you pour, hold the measuring cup about 4 inches above the bomb and pour in a steady, circular motion starting from the top center. The glaze will naturally flow down the sides and create those elegant drips. For longer drips, let the glaze be slightly warmer (95°F) and pour more slowly. For shorter, more controlled drips, let it cool closer to 90°F. If a drip doesn’t look right, you can gently guide it with a toothpick within the first 10 seconds — after that, don’t touch it or you’ll leave fingerprints in the glossy mirror finish dessert surface.
Can I make these tropical coconut lime dream bombs without a thermometer?
Yes, you can make these tropical coconut lime dream bombs without a thermometer, though I recommend using one for the mirror glaze especially. For the coconut lime shell mixture, you just need to heat it until it’s warm to the touch and steaming gently — about 140°F — which you can gauge by dipping a clean finger: it should feel comfortably hot but not burning. For the mirror glaze, the temperature is more critical because it needs to be between 90-95°F for that perfect glossy mirror finish dessert coating. Without a thermometer, test the glaze by dipping a clean finger: it should feel like warm bath water — noticeably warm but not hot, and definitely not cool. Another test: dip a spoon into the glaze, then hold it horizontally — the glaze should coat the spoon in a thin, even layer and drip off in a steady ribbon. If it pools on the spoon, it’s too cool; if it runs off instantly, it’s too hot. I always recommend spending $10 on an instant-read thermometer — it takes the guesswork out and ensures your first batch is a success.
What can I use instead of green food coloring for the mirror glaze on these coconut lime bombs?
If you want to avoid artificial green food coloring for your coconut lime dessert bombs, I have several tested alternatives. My favorite natural option is matcha green tea powder: sift 1/2 teaspoon of matcha through a fine-mesh sieve, whisk it with 1 teaspoon of warm water to form a smooth paste, then stir it into the mirror glaze after you’ve added the condensed milk mixture. Matcha gives a beautiful muted green tone with subtle earthy notes that complement the coconut beautifully. Another option is spinach powder (1 teaspoon, mixed the same way) — it creates a deeper, more forest-green hue with no flavor impact. For a brighter green, try a combination of 1/4 teaspoon turmeric (for yellow) and 1/2 teaspoon matcha (for green) — this gives a vibrant lime-green shade. If you’re open to changing the color entirely, you can use butterfly pea flower powder for a stunning blue-teal, or freeze-dried raspberry powder for a pink mirror glaze that contrasts beautifully with the lime filling. Each natural option creates a slightly different flavor profile, but all are delicious.
🌟 Made this recipe? I’d love to hear from you!
Please leave a star rating ⭐⭐⭐⭐⭐ and a comment below — tell me which variation you tried, or share your own twist! Your feedback helps other home cooks succeed, and I personally read every single message.
📸 Tag me on Instagram @leosfoods when you share your photo — I can’t wait to see your glossy mirror finish creations!
Tropical Coconut Lime Dream Bombs with Gloss Mirror Finish
- Yield: 6 1x
Ingredients
- For the Coconut Lime Shells:
- 1 1/2 cups coconut milk
- 1/2 cup heavy cream
- 1/3 cup granulated sugar
- 2 tsp gelatin powder
- 2 tbsp cold water
- 2 tbsp lime juice
- 1 tsp lime zest
- Pinch of salt
- For the Cream Filling:
- 1 cup mascarpone cheese
- 1/2 cup heavy whipping cream
- 3 tbsp powdered sugar
- 1 tsp vanilla extract
- 1 tsp coconut extract
- For the Gloss Mirror Finish:
- 1 cup white chocolate, finely chopped
- 1/2 cup sweetened condensed milk
- 1/4 cup water
- 1 tbsp gelatin powder
- 3 tbsp cold water
- 1 tsp coconut oil
- A few drops green food coloring
- For Garnish (optional):
- 2 tbsp toasted coconut flakes
- 1 tbsp lime zest
- White chocolate curls
Instructions
- Bloom gelatin in cold water for 5 minutes.
- Heat coconut milk, heavy cream, sugar, salt, lime juice, and lime zest until warm and smooth. Remove from heat and stir in bloomed gelatin until fully dissolved.
- Pour a thin layer of the coconut lime mixture into silicone molds, coating the sides evenly. Chill until partially set.
- Whip mascarpone, heavy cream, powdered sugar, vanilla extract, and coconut extract until light and fluffy.
- Fill the center of each shell with the cream filling, leaving a small border around the edges.
- Cover with remaining coconut lime mixture and freeze for at least 4 hours until fully firm.
- For the mirror finish, bloom gelatin in cold water for 5 minutes.
- Heat sweetened condensed milk and water until steaming. Remove from heat and stir in gelatin until dissolved.
- Pour over white chocolate and mix until smooth. Add coconut oil and green food coloring until glossy and vibrant.
- Allow glaze to cool until thick but pourable.
- Unmold frozen bombs and place on a wire rack. Pour mirror finish evenly over each bomb, letting it drip naturally.
- Let set before transferring to serving plates.
- Finish with toasted coconut flakes, lime zest, and white chocolate curls.
- Serve chilled.
Nutrition
- Calories: 395
- Sugar: 28g
- Fat: 26g
- Carbohydrates: 34g
- Protein: 5g
Tried This Recipe? Leave a Comment!
Did you make this recipe? I’d love to hear how it turned out! Please leave a comment and a rating below. Your feedback helps other home cooks and supports cheerychop.com!
For more delicious inspiration, follow me on Pinterest!