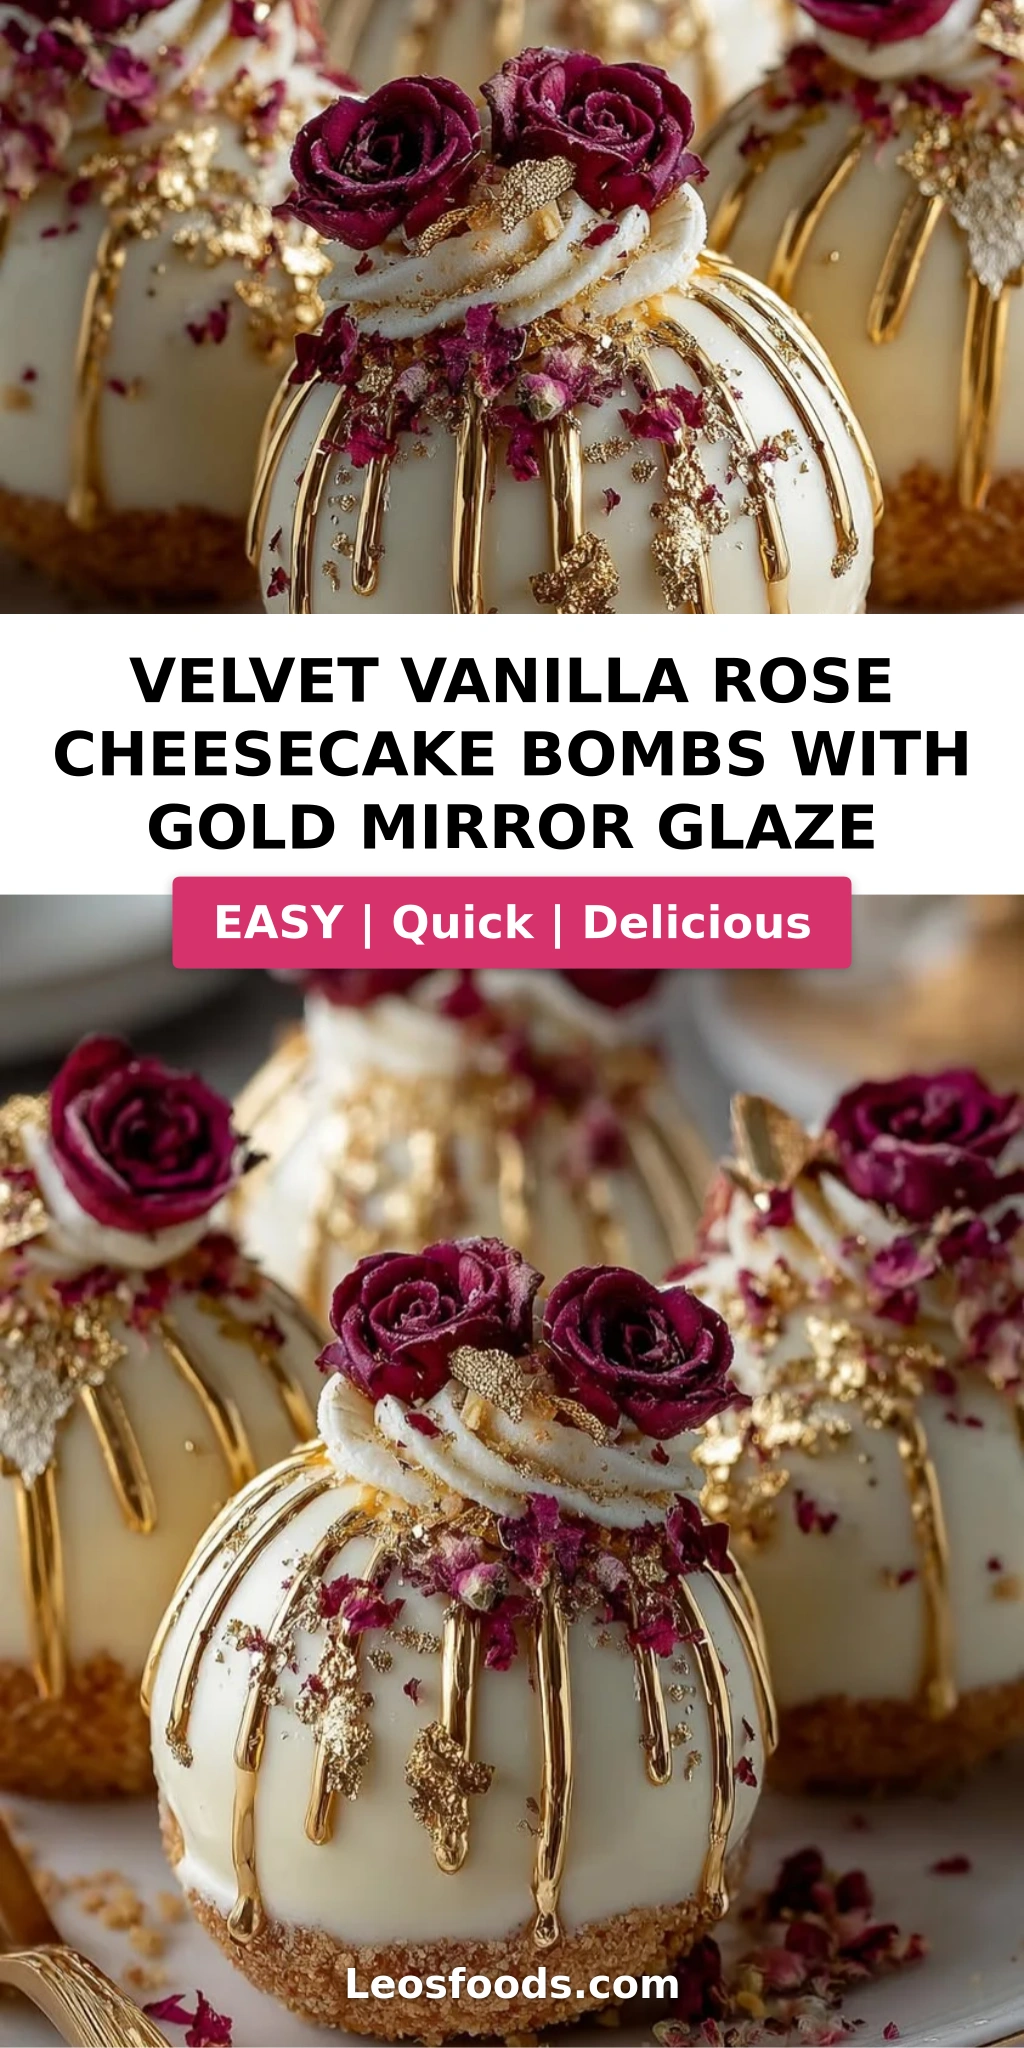
Velvet Vanilla Rose Cheesecake Bombs with Gold Mirror Glaze
“`html
Table of Contents
Velvet Vanilla Rose Cheesecake Bombs with Gold Mirror Glaze – A Showstopping Dessert
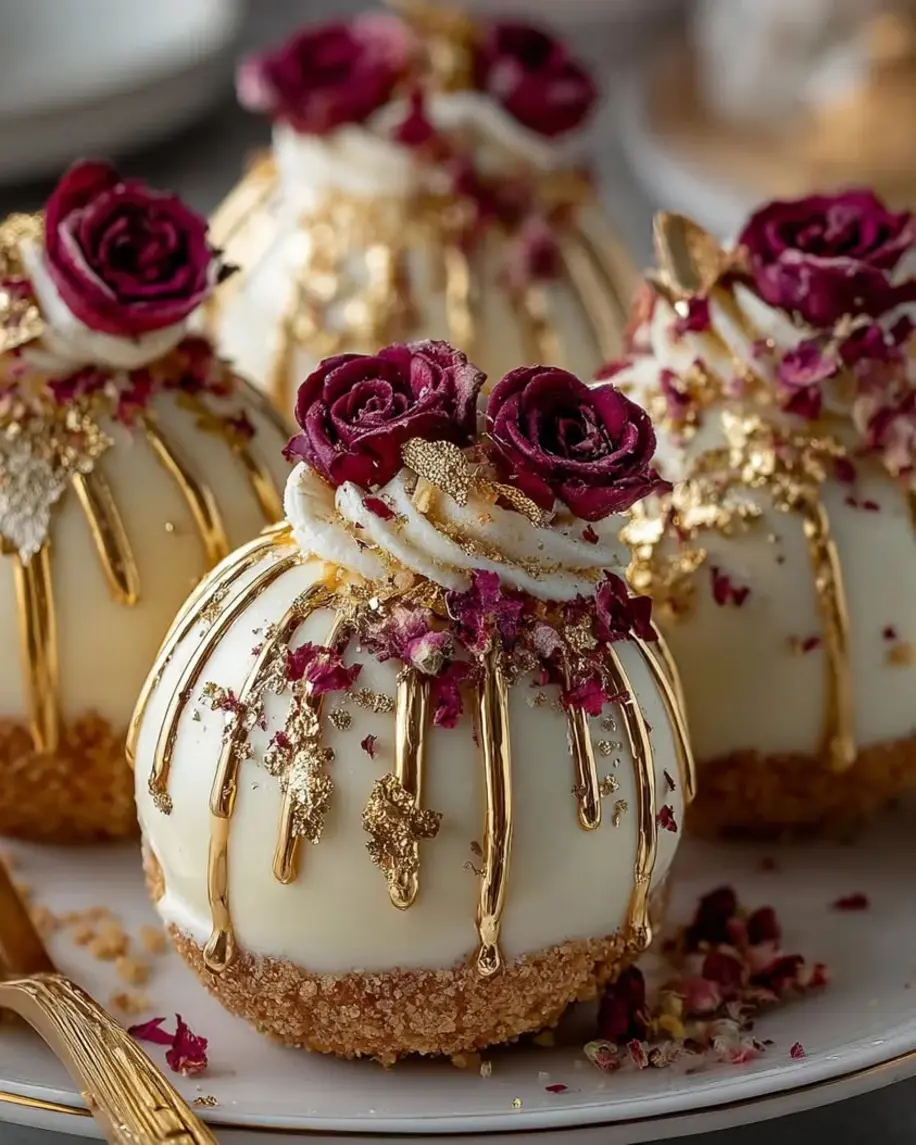
When I was growing up in my mother’s kitchen in Morocco, she would infuse everything with rose water — from tagines to pastries. That floral perfume, so delicate and romantic, always felt like edible poetry. Years later, after training at Le Cordon Bleu in Paris and now cooking in my NYC kitchen, I knew I had to create a dessert that captured that same magic. These velvet vanilla rose cheesecake bombs are the result: a creamy rose cheesecake mousse encasing a hidden vanilla rose center, all resting on a vanilla cookie base and crowned with a dazzling gold mirror glaze cheesecake finish. It’s a dessert that looks like it belongs in a museum but tastes like pure comfort.
The first bite reveals a silky, cloud-like mousse that melts on your tongue — the rose water is subtle, never soapy, and the vanilla bean paste adds those tiny black specks that tell you this is the real deal. Then you hit the frozen vanilla rose core, which is like a secret treasure waiting to be discovered. And that glaze? It’s not just pretty. The gold mirror glaze cheesecake technique I learned in Paris gives you a perfectly reflective, glossy surface that shatters when you tap it with a spoon. Edible rose petals and gold leaf take it over the top. This is the kind of dessert you make when you want to hear that collective gasp at the dinner table.
What makes my version different? I’ve spent years perfecting the balance of rose cheesecake recipe flavors so the floral notes sing without overwhelming. I also cracked the code on the gold mirror glaze — getting it to pour like liquid gold without cracking or wrinkling. In the steps below, I’ll share my exact technique and one common mistake that can ruin your mirror glaze dessert. Whether you’re a confident home baker or just starting out, this recipe is broken down into manageable steps. Trust me — when you slice into one of these bombs and reveal that hidden rose center, you’ll feel like a pastry chef.
Why This Velvet Vanilla Rose Cheesecake Bombs Recipe Is the Best
The Flavor Secret: I use a double dose of rose — once in the mousse and once in the frozen core — so the flavor builds as you eat. But I also add a touch of vanilla bean paste and mascarpone to round out the edges. This is a trick I picked up in Paris: when using floral flavors, always balance them with a rich dairy base so they feel luxurious, not perfumey. My mother taught me that rose water should whisper, not shout, and this recipe respects that.
Perfected Texture: The mousse is light because I whip the cream cheese and mascarpone until they’re fluffy before folding in the whipped cream. The frozen core stays firm while the mousse stays creamy, creating a beautiful contrast. And the gold mirror glaze cheesecake finish? It’s all about temperature control — I’ll show you exactly when to pour so you get that flawless shine. No more dull, streaky glazes.
Foolproof & Fast: Despite the elegant look, this vanilla rose cheesecake bombs recipe is surprisingly forgiving. You can prep the components over two days — make the cores and mousse one day, glaze the next. I’ve tested this with home bakers of all levels, and the biggest challenges are easily avoidable with my pro tips. Plus, the ingredients are all available at your local grocery store or online. No fancy equipment needed — just a silicone dome mold and a willingness to create something beautiful.
Velvet Vanilla Rose Cheesecake Bombs Ingredients
I love sourcing my ingredients at the Union Square Greenmarket in NYC — the honey there is incredible — but everything here is easy to find. The rose water I buy from a Middle Eastern grocer in Brooklyn, and the edible gold luster dust I order online. Let me walk you through what you’ll need for this rose cheesecake recipe.
Ingredients List
- For the Velvet Rose Cheesecake Mousse:
- 8 oz cream cheese, softened
- 1/2 cup mascarpone cheese
- 1/2 cup heavy whipping cream
- 1/4 cup powdered sugar
- 1 tsp vanilla bean paste
- 1 tsp rose water
- 1 tbsp whole milk
- For the Vanilla Rose Core:
- 1/2 cup mascarpone cheese
- 2 tbsp sweetened condensed milk
- 1/2 tsp vanilla extract
- 1/2 tsp rose water
- For the Vanilla Cookie Base:
- 3/4 cup crushed vanilla wafer cookies
- 3 tbsp melted butter
- For the Gold Mirror Glaze:
- 1/2 cup sweetened condensed milk
- 1/3 cup white chocolate, finely chopped
- 2 tbsp heavy cream
- 1 tbsp honey
- 1 tsp vanilla extract
- Edible gold luster dust
- For Garnish (optional):
- Edible rose petals
- White chocolate curls
- Gold leaf flakes
- Edible pearl dust
- Micro mint leaves
Ingredient Spotlight
Rose Water: This is the heart of the recipe. Look for a brand that lists only rose petals and water — no additives or artificial flavors. I use Cortas or Sadaf, both available at Middle Eastern grocers or online. A good substitute is 1/2 tsp rose extract, though it’s more concentrated, so start with 1/4 tsp. Never use imitation rose flavoring — it tastes like cough syrup.
Mascarpone Cheese: This Italian cream cheese adds a rich, velvety texture that regular cream cheese alone can’t match. It’s less tangy and more buttery. You can substitute equal parts cream cheese, but the texture will be slightly denser. I buy BelGioioso mascarpone at Whole Foods — it’s consistently excellent.
Vanilla Bean Paste: The tiny black specks in the paste tell your guests you used real vanilla. It’s more concentrated than extract and adds a deeper flavor. If you only have extract, use 1 1/2 tsp. I prefer Nielsen-Massey vanilla bean paste — it’s worth the splurge for this mirror glaze dessert.
Edible Gold Luster Dust: This is what gives the glaze its mirror shine. Make sure you buy “edible” gold dust — not the craft variety. I use the brand Color Mill or The Sugar Art. If you can’t find it, you can omit it and the glaze will still be shiny, just not gold. Alternatively, use a pinch of turmeric for a golden hue (though it won’t shimmer).
| Original Ingredient | Best Substitution | Flavor / Texture Impact |
|---|---|---|
| Rose water | 1/4 tsp rose extract (start small) | More concentrated; add gradually |
| Mascarpone cheese | Equal parts cream cheese + 1 tbsp heavy cream | Slightly less rich, still creamy |
| Vanilla bean paste | 1 1/2 tsp vanilla extract | Lacks specks, slightly less intense |
| Edible gold luster dust | Omit or use pinch turmeric for color | Glaze stays shiny but not gold |
How to Make Velvet Vanilla Rose Cheesecake Bombs — Step-by-Step
I’m going to walk you through every step of this velvet vanilla rose cheesecake bombs recipe so you feel confident. The key is to read through everything first, then work through the components in order. You’ve got this!
Step 1: Make the Vanilla Rose Core
In a small bowl, combine 1/2 cup mascarpone cheese, 2 tbsp sweetened condensed milk, 1/2 tsp vanilla extract, and 1/2 tsp rose water. Stir until smooth and well blended. Spoon this mixture into small silicone half-sphere molds (about 1-inch diameter) or into a small lined dish to freeze. Freeze for at least 2 hours, until completely firm. These cores are the hidden surprise inside each bomb.
💡 Stella’s Pro Tip: Use a teaspoon or a small piping bag to fill the molds evenly. Tap the molds gently on the counter to release any air bubbles — this ensures a smooth, solid core.
Step 2: Make the Vanilla Cookie Base
Crush 3/4 cup vanilla wafer cookies into fine crumbs — you can do this in a food processor or by placing them in a zip-top bag and rolling with a rolling pin. Mix the crumbs with 3 tbsp melted butter until all the crumbs are moistened. Press a small amount of the mixture into 6 small rounds, about 1.5 inches in diameter, on a parchment-lined tray. These will become the bases of your cheesecake bombs. Chill in the refrigerator for at least 20 minutes, until firm.
⚠️ Common Mistake to Avoid: Don’t press the crumbs too thin — they need to be thick enough to support the mousse. Aim for about 1/4 inch thickness.
Step 3: Make the Velvet Rose Cheesecake Mousse
In a large bowl, beat 8 oz softened cream cheese and 1/2 cup mascarpone cheese together until smooth and fluffy. Add 1/4 cup powdered sugar, 1 tsp vanilla bean paste, 1 tsp rose water, and 1 tbsp whole milk. Beat until combined. In a separate bowl, whip 1/2 cup heavy whipping cream to soft peaks. Gently fold the whipped cream into the cream cheese mixture until the mousse is light, airy, and fully combined. Be careful not to overmix — you want to keep that airy texture.
💡 Stella’s Pro Tip: If the mousse seems too soft, chill it in the fridge for 15 minutes before piping. This makes it easier to fill the molds without deflating.
Step 4: Assemble the Cheesecake Bombs
Fill half-sphere silicone molds (about 2.5-inch diameter) halfway with the rose cheesecake mousse. Place a frozen vanilla rose core in the center of each mold. Cover the core with the remaining mousse, filling the mold almost to the top. Press a chilled cookie base onto the top of each mold, sealing the mousse inside. Freeze for at least 6 hours or overnight — the bombs must be completely frozen solid before glazing.
⚠️ Common Mistake to Avoid: If the mold isn’t filled enough, the core won’t be centered. Make sure the mousse fully encases the core — no gaps.
Step 5: Make the Gold Mirror Glaze
In a small saucepan over low heat, combine 1/2 cup sweetened condensed milk, 1/3 cup finely chopped white chocolate, 2 tbsp heavy cream, 1 tbsp honey, and 1 tsp vanilla extract. Stir constantly until the white chocolate is fully melted and the mixture is smooth. Remove from heat and stir in edible gold luster dust until the glaze is shimmering and evenly golden. Let the glaze cool to about 90°F — it should be slightly thickened but still pourable. If it gets too thick, gently reheat it.
💡 Stella’s Pro Tip: The ideal pouring temperature is 88–92°F. Too hot and the glaze will be thin and runny; too cool and it will thicken and crack. Use a digital thermometer for accuracy.
Step 6: Glaze the Bombs
Unmold the frozen cheesecake bombs and place them on a wire rack set over a baking sheet to catch drips. Pour the gold mirror glaze evenly over each bomb, working quickly to cover the entire surface. Let the excess drip off for a few seconds, then use a small offset spatula to clean the bottom edge. Transfer the glazed bombs to a serving plate and refrigerate for 20–30 minutes to set the glaze slightly before serving.
⚠️ Common Mistake to Avoid: Don’t tilt the bombs while the glaze is still wet — the glaze will pool unevenly. Let them sit flat on the rack until set.
Step 7: Garnish and Serve
Garnish each bomb with edible rose petals, white chocolate curls, gold leaf flakes, edible pearl dust, and a few micro mint leaves. The garnishes should be applied while the glaze is still slightly tacky so they stick. Serve chilled and slice through the silky rose cheesecake to reveal the luxurious vanilla rose center hidden inside. This vanilla rose cheesecake bombs recipe is best enjoyed the same day.
💡 Stella’s Pro Tip: For the most dramatic reveal, serve on a dark plate — the gold glaze and white chocolate curls will pop against a black or navy background.
| Step | Action | Duration | Key Visual Cue |
|---|---|---|---|
| 1 | Make core | 2 hrs freeze | Firm to touch |
| 2 | Make cookie base | 20 min chill | Firm, holds shape |
| 3 | Make mousse | 10 min | Light and fluffy |
| 4 | Assemble bombs | 10 min + 6 hrs freeze | Frozen solid |
| 5 | Make glaze | 10 min + cool | Smooth, glossy, 90°F |
| 6 | Glaze bombs | 5 min + 20 min set | Flawless reflective finish |
| 7 | Garnish and serve | 5 min | Beautifully decorated |
Serving & Presentation
These velvet vanilla rose cheesecake bombs are meant to be the star of the show. I love serving them on individual dessert plates with a small dollop of whipped cream and a few extra edible rose petals scattered around. The gold mirror glaze catches the light beautifully, so consider using a dark or mirrored surface for maximum drama. In my NYC apartment, I serve these at dinner parties and watch guests’ faces light up when they cut into the bomb and see the hidden vanilla rose core.
For a Moroccan-inspired twist, I sometimes drizzle a little honey mixed with orange blossom water around the plate — it echoes the floral notes and adds a lovely North African touch. If you’re serving these for a special occasion like Valentine’s Day or an anniversary, add a few gold leaf flakes on top for that extra wow factor. The contrast of the shiny gold glaze, white chocolate curls, and delicate rose petals is absolutely stunning.
In Paris, we were taught to always consider the full plate — not just the dessert. A few fresh raspberries or sliced strawberries on the side add a pop of color and a touch of acidity that balances the sweetness. And if you’re feeling extra festive, a dusting of edible pearl dust over the entire plate makes it look like a jewel box. Serve with a fork and a small spoon — your guests will want to savor every last drop of that glaze.
| Pairing Type | Suggestions | Why It Works |
|---|---|---|
| Side Dish | Fresh raspberries, sliced strawberries, honey-drizzled figs | Acidity and freshness balance the richness |
| Sauce / Dip | Warm honey, rose-scented whipped cream, chocolate ganache | Enhances the floral and vanilla notes |
| Beverage | Earl Grey tea, champagne, Moroccan mint tea | Floral and citrus notes complement without overpowering |
| Garnish | Edible rose petals, white chocolate curls, gold leaf, micro mint | Adds texture, color, and luxury |
Make-Ahead, Storage & Reheating
As a busy NYC home cook, I’m all about make-ahead desserts. These cheesecake bombs are perfect for prepping in stages. You can make the cores and cookie bases up to 2 days in advance, and the mousse can be made a day ahead. Assemble the bombs and freeze them up to 1 month before glazing. Then, on the day of serving, just make the glaze and pour — it takes only 15 minutes to finish. This is the ultimate stress-free entertaining dessert.
| Method | Container | Duration | Reheating Tip |
|---|---|---|---|
| Refrigerator | Airtight container | Up to 2 days | Serve cold directly |
| Freezer (unglazed) | Wrap individually in plastic, then foil | Up to 1 month | Thaw 20 min at room temp before glazing |
| Make-Ahead | Assemble in molds, freeze | Up to 1 month | Glaze on serving day |
Once glazed, these bombs are best eaten within a few hours. The glaze will stay shiny for up to 4 hours in the refrigerator, but after that it may begin to dull slightly. If you have leftovers (unlikely!), store them in an airtight container in the fridge for up to 2 days. The glaze might lose some of its mirror finish, but the flavor will still be incredible. I don’t recommend freezing glazed bombs — the glaze can crack as it thaws.
Variations & Easy Swaps
One of the things I love about this gold mirror glaze cheesecake recipe is how adaptable it is. Here are a few of my favorite variations — each one tested in my NYC kitchen. Whether you’re accommodating dietary needs or just want to try something new, these swaps will keep the magic alive.
| Variation | Key Change | Best For | Difficulty Impact |
|---|---|---|---|
| Orange Blossom & Honey | Replace rose water with orange blossom water | North African flavor lovers | Same |
| Gluten-Free Version | Use gluten-free vanilla wafer cookies | Celiac or gluten-sensitive guests | Same |
| Berry Rose Bomb | Add 1 tbsp freeze-dried raspberry powder to mousse | A fruity twist | Same |
Orange Blossom & Honey Version
This variation is a nod to my Moroccan roots. Replace the rose water in both the mousse and core with orange blossom water. Add 1 tbsp honey to the mousse for extra sweetness. The result is a lighter, more citrusy floral flavor that pairs beautifully with the gold glaze. I often serve this version during Ramadan or spring celebrations. The orange blossom water is available at Middle Eastern grocers or online — just make sure it’s food-grade.
Gluten-Free Version
Making this recipe gluten-free is incredibly simple. Use certified gluten-free vanilla wafer cookies for the base — brands like Kinnikinnick or Pamela’s work beautifully. The rest of the ingredients are naturally gluten-free. The texture of the base will be slightly different — gluten-free cookies tend to be a bit more crumbly — but the flavor is just as delicious. Press the base firmly into the molds to ensure it holds together.
Berry Rose Bomb
For a fruity twist, fold 1 tbsp of freeze-dried raspberry powder into the mousse before filling the molds. The raspberry adds a tangy, tart note that cuts through the richness and complements the rose beautifully. I love this version in the summer when I find gorgeous raspberries at the farmers market. You can also use strawberry powder, but raspberry has a more intense flavor that stands up to the rose. This variation adds a beautiful pink hue to the mousse — so pretty against the gold glaze.
What is a good substitute for rose water in velvet vanilla rose cheesecake bombs?
If you don’t have rose water, the best substitute is 1/4 teaspoon rose extract per teaspoon of rose water called for in the recipe. Rose extract is more concentrated, so start with less and taste as you go. Another option is to use orange blossom water for a different floral note — it’s milder and more citrusy. You can also simply omit the rose water and double the vanilla in both the mousse and core for a classic vanilla-only cheesecake bomb. Keep in mind that artificial rose flavoring (often sold as “rose syrup”) may contain added sugar and coloring, which can affect the texture and color of your mousse and glaze.
How do you make a gold mirror glaze that stays shiny and smooth?
The secret to a flawless gold mirror glaze is temperature control and proper straining. First, make sure your white chocolate is finely chopped so it melts evenly. Heat the glaze gently over low heat, stirring constantly, until it reaches 90°F — use a digital thermometer for accuracy. If it gets too hot, the glaze will be thin and may not set properly; if it’s too cool, it will be thick and may crack when poured. Strain the glaze through a fine-mesh sieve to remove any undissolved bits for a perfectly smooth finish. Also, make sure your cheesecake bombs are frozen solid before glazing — the cold surface helps the glaze set quickly into that coveted mirror-like shine. Always pour over a wire rack so excess glaze drips away cleanly.
Can velvet vanilla rose cheesecake bombs be made ahead of time and frozen?
Absolutely! These cheesecake bombs are ideal for make-ahead entertaining. You can assemble the bombs completely (without the glaze) and freeze them for up to 1 month. Wrap each bomb individually in plastic wrap, then place them in an airtight container or freezer bag. On the day you plan to serve them, remove the bombs from the freezer, unwrap them, and place them on a wire rack over a tray. Make the gold mirror glaze fresh and pour it over the frozen bombs — the glaze will set beautifully as it hits the cold surface. Allow the glazed bombs to rest in the refrigerator for 20–30 minutes before serving. I recommend not glazing them more than 4 hours ahead, as the glaze may start to dull over time.
What is the best way to pipe cheesecake filling into bomb shells without breaking them?
The best way to pipe the cheesecake mousse into silicone dome molds without damaging them is to use a piping bag with a large round tip (about 1/2 inch wide). Fill the piping bag with the mousse and snip the tip to create an opening. Hold the bag vertically over the mold and squeeze gently, starting from the bottom and filling upward to avoid air pockets. Don’t overfill — leave a small gap at the top for the core and base. If you don’t have a piping bag, you can use a zip-top bag with a corner snipped off. The key is to work slowly and gently, letting the mousse settle naturally. Silicone molds are flexible, so they won’t break easily, but avoid using metal tools to spread the mousse — a small offset spatula or spoon works best.
Can I use a different type of chocolate for the gold mirror glaze?
White chocolate is essential for achieving that translucent, mirror-like finish in a gold mirror glaze. Dark or milk chocolate will produce an opaque, darker glaze that won’t have the same reflective quality. If you want a different color, you can use white chocolate as the base and add food coloring — gel-based colors work best. For a pink or rose-colored glaze, add a tiny drop of pink gel food coloring. For a champagne or pearl effect, add a pinch of edible pearl dust. The key is to keep the white chocolate base for the right texture and shine. Always use high-quality white chocolate that contains cocoa butter — not white “melting wafers” or compound chocolate, which may not set as smoothly.
How do I prevent the gold mirror glaze from cracking or wrinkling?
Cracking and wrinkling in a mirror glaze usually happen for two reasons: temperature shock or too-thick glaze. First, make sure your cheesecake bombs are frozen solid but not straight from the deep freezer — if they’re too cold, the glaze will seize and crack. Let them sit at room temperature for 1–2 minutes after unmolding before glazing. Second, ensure your glaze is at the right temperature (88–92°F) and thin enough to pour. If the glaze is too thick, it will wrinkle as it sets. You can thin it with a few drops of warm milk or cream. Third, always pour the glaze in one smooth motion over the center of the bomb — don’t pour in stages or touch it while it’s setting. Let the excess drip off naturally.
Can I make these cheesecake bombs without a silicone dome mold?
Yes, you can still make this recipe without a dome mold, though the shape will be different. You can use a standard muffin tin lined with plastic wrap or paper liners — press the cookie base into the bottom, fill with mousse and core, and freeze. The resulting shape will be more like a tall cupcake rather than a dome. Alternatively, use small glass bowls or ramekins lined with plastic wrap. After freezing, you can unmold and glaze them. The presentation won’t be as perfectly spherical, but the flavors and textures will still be incredible. Just make sure whatever mold you use is freezer-safe and wide enough to accommodate the core in the center.
How long do I need to freeze the cheesecake bombs before glazing?
The cheesecake bombs must be completely frozen solid before you apply the gold mirror glaze — this is non-negotiable for a successful finish. Freeze the assembled bombs for a minimum of 6 hours, but overnight (12 hours) is even better. The colder the bombs are, the faster the glaze will set, creating that flawless mirror surface. If the bombs are only partially frozen, the glaze will absorb into the mousse, leaving you with a dull, streaky finish instead of a glossy shine. To test if they’re ready, touch the top of a bomb — it should feel rock hard and not yield at all to pressure. You can also check the center with a toothpick; it should come out clean and frozen.
What other flavors can I pair with the rose in this recipe?
Rose pairs beautifully with a wide range of flavors. In this recipe, I’ve paired it with vanilla, which is a classic combination. Other excellent pairings include: pistachio (add finely ground pistachios to the cookie base), raspberry (add a thin layer of raspberry jam under the cookie base), lychee (use lychee juice in place of milk in the mousse), cardamom (add 1/4 tsp ground cardamom to the mousse), and white chocolate (already in the glaze, but you can also fold white chocolate chips into the mousse). For a more unusual twist, try a pinch of saffron steeped in warm milk — it adds a floral, honey-like note that complements the rose beautifully. These variations are all inspired by the flavors I grew up with in Morocco and studied in Paris.
Is this recipe suitable for beginners, or is it more advanced?
I would rate this recipe as advanced, mainly because there are multiple components and the gold mirror glaze requires some practice to perfect. That said, I’ve designed the instructions to be as clear as possible, and each component is simple on its own. If you’re a beginner, I recommend reading the entire recipe through first, watching a few video tutorials on mirror glazes, and giving yourself two days to complete the process. Start by making the cores and base one day, then assemble and freeze overnight, and finish with the glaze the next day. The most challenging part is the glaze, but with a thermometer and a little patience, you can absolutely nail it. And the wow factor is so worth the effort!
Share Your Version!
I absolutely love seeing how you bring my recipes to life in your own kitchens. If you make these velvet vanilla rose cheesecake bombs, please leave a star rating and a comment below — tell me what occasion you’re serving them for, or how the glaze turned out. Did you try one of the variations? Did your guests gasp when they sliced into that hidden vanilla rose center? I want to hear every detail!
Share your photos on Instagram or Pinterest and tag @leosfoods — I feature my favorites in my stories. If you have a question I didn’t cover in the FAQ, drop it in the comments and I’ll answer personally. This recipe is one of my proudest creations, and I can’t wait to see your beautiful gold mirror glaze cheesecake creations. Happy baking, friends!
From my NYC kitchen to yours — I hope this recipe brings as much warmth to your table as it does to mine. — Stella 🧡
Love This Recipe? Save It to Pinterest!
If you enjoyed this Velvet Vanilla Rose Cheesecake Bombs with Gold Mirror Glaze recipe, don’t let it get lost in your browser tabs! 😄 Pin it now so you can find it again anytime — and explore hundreds more tried-and-tested recipes waiting for you on my Pinterest boards.
👉 Follow Stella on Pinterest @stellarecipeblog
📌 Pin this recipe · 🔁 Re-pin your favorites · 💬 Tag me when you make it — I love seeing your creations!
What’s the most special occasion you’d serve these rose cheesecake bombs for?
Drop a comment below — I’d love to know! And don’t forget to tag @leosfoods if you make them. 🌹✨
“`
Print

Velvet Vanilla Rose Cheesecake Bombs with Gold Mirror Glaze
Velvet Vanilla Rose Cheesecake Bombs with Gold Mirror Glaze are an elegant dessert with a creamy rose cheesecake mousse, a vanilla rose center, a vanilla cookie base, and a stunning gold mirror glaze, garnished with edible flowers and gold leaf.
- Yield: 6 1x
Ingredients
- For the Velvet Rose Cheesecake Mousse:
- 8 oz cream cheese, softened
- 1/2 cup mascarpone cheese
- 1/2 cup heavy whipping cream
- 1/4 cup powdered sugar
- 1 tsp vanilla bean paste
- 1 tsp rose water
- 1 tbsp whole milk
- For the Vanilla Rose Core:
- 1/2 cup mascarpone cheese
- 2 tbsp sweetened condensed milk
- 1/2 tsp vanilla extract
- 1/2 tsp rose water
- For the Vanilla Cookie Base:
- 3/4 cup crushed vanilla wafer cookies
- 3 tbsp melted butter
- For the Gold Mirror Glaze:
- 1/2 cup sweetened condensed milk
- 1/3 cup white chocolate, finely chopped
- 2 tbsp heavy cream
- 1 tbsp honey
- 1 tsp vanilla extract
- Edible gold luster dust
- For Garnish (optional):
- Edible rose petals
- White chocolate curls
- Gold leaf flakes
- Edible pearl dust
- Micro mint leaves
Instructions
- Combine mascarpone cheese, sweetened condensed milk, vanilla extract, and rose water. Spoon into small silicone molds and freeze until firm to create the creamy center.
- Mix crushed vanilla wafer cookies with melted butter and press into small rounds sized to fit the base of the dome molds. Chill until firm.
- Whip cream cheese, mascarpone cheese, heavy whipping cream, powdered sugar, vanilla bean paste, rose water, and milk until smooth, light, and mousse-like.
- Fill sphere-shaped silicone molds halfway with the rose cheesecake mousse. Place a frozen vanilla rose core in the center of each mold and cover with the remaining mousse. Seal with a chilled cookie base. Freeze for at least 6 hours or until completely firm.
- For the mirror glaze, gently warm sweetened condensed milk, white chocolate, heavy cream, honey, vanilla extract, and edible gold luster dust until smooth, glossy, and shimmering. Allow to cool until slightly thickened but still pourable.
- Unmold the frozen cheesecake bombs and place them on a wire rack over a tray. Pour the gold mirror glaze evenly over each bomb, creating a flawless reflective finish.
- Transfer to serving plates and refrigerate for 20–30 minutes before serving.
- Garnish with edible rose petals, white chocolate curls, gold leaf flakes, pearl dust, and micro mint leaves.
- Serve chilled and slice through the silky rose cheesecake to reveal the luxurious vanilla rose center hidden inside.
Nutrition
- Calories: 395
- Sugar: 25g
- Fat: 27g
- Carbohydrates: 33g
- Protein: 5g
Tried This Recipe? Leave a Comment!
Did you make this recipe? I’d love to hear how it turned out! Please leave a comment and a rating below. Your feedback helps other home cooks and supports cheerychop.com!
For more delicious inspiration, follow me on Pinterest!