Velvet Vanilla Rose Cheesecake Bombs with Gold Mirror Glaze
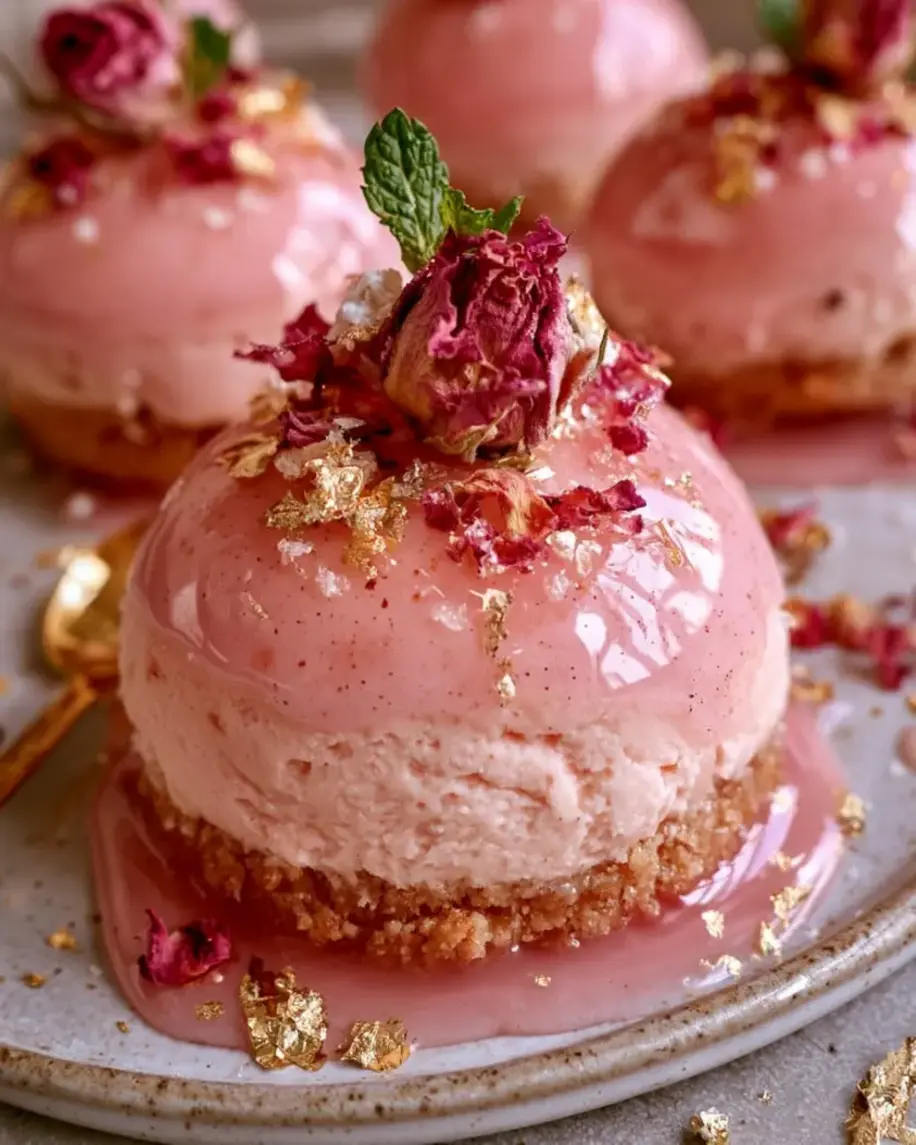
Table of Contents
Velvet Vanilla Rose Cheesecake Bombs with Gold Mirror Glaze – A Stunning French-Meets-Moroccan Dessert
I still remember standing beside my mother in our small kitchen in Morocco, watching her sprinkle rose water into a bowl of cream as if it were the most natural thing in the world. That scent — floral, delicate, utterly magical — is one of my fondest childhood memories. Years later, as a pastry student in Paris, I learned how to transform that simple memory into a refined, elegant dessert. And now, in my New York City kitchen, I’m thrilled to share the result with you: these velvet vanilla rose cheesecake bombs with gold mirror glaze. This rose cheesecake dessert blends everything I love — my Moroccan roots, my French pastry training, and the bold, dazzling energy of this city I now call home.
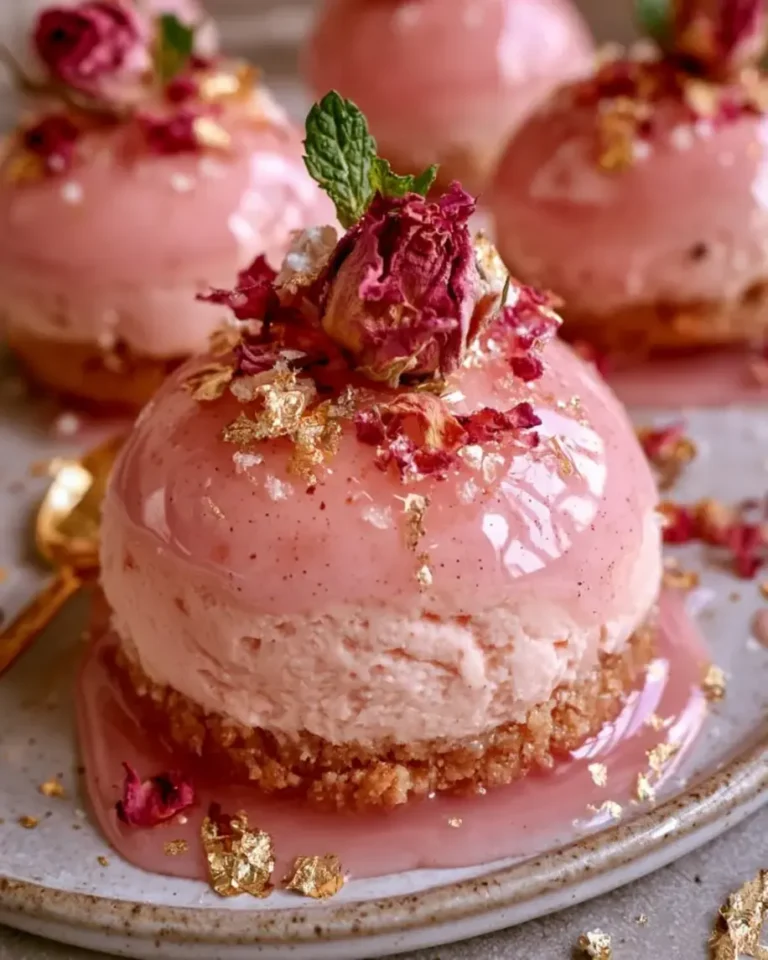
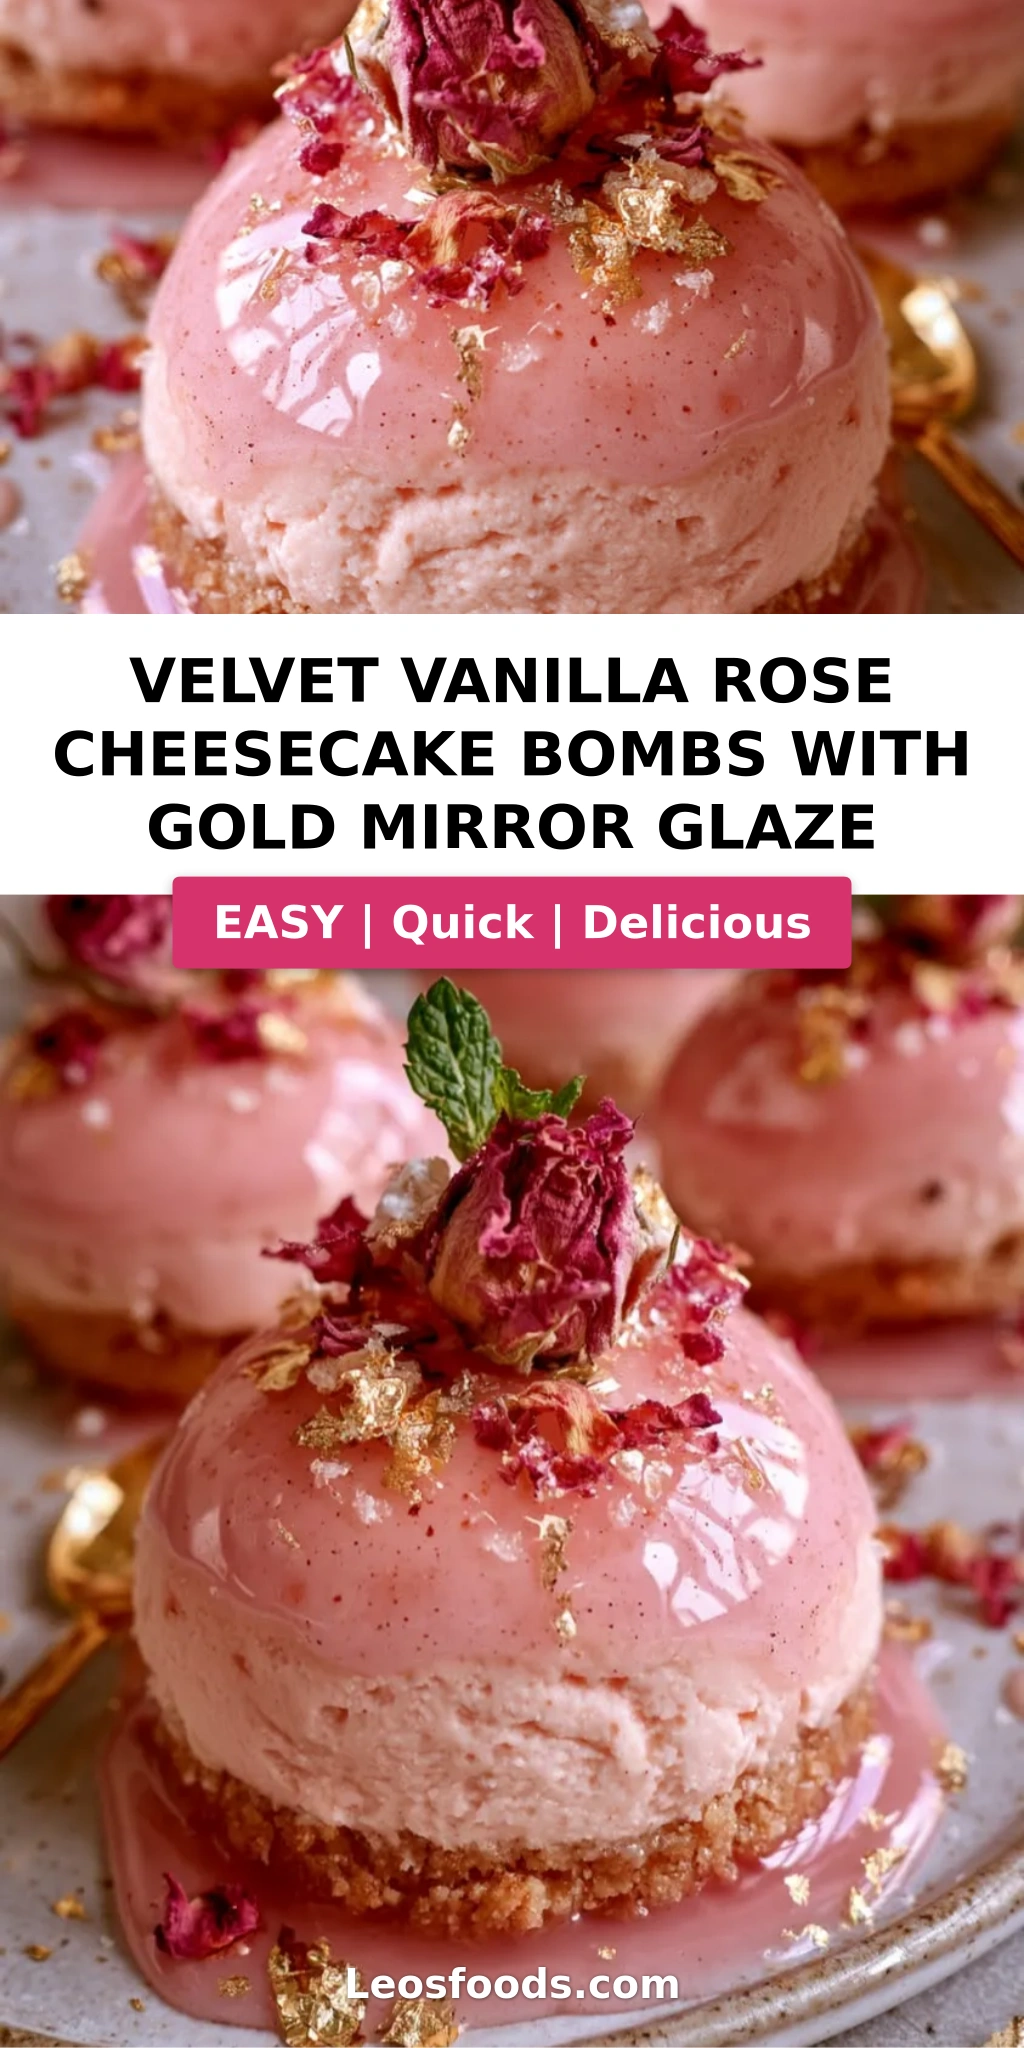
Picture this: you break through a perfectly smooth, golden mirror glaze that shines like liquid jewelry. Beneath it lies a cloud-soft cheesecake filling — luxuriously velvet, subtly floral, and kissed with the warmth of vanilla bean. The buttery vanilla cookie crust adds just the right amount of crunch, while a whisper of lemon brightens every single bite. The rose water isn’t overwhelming; it’s that soft, romantic note that lingers on your palate like a memory. And the edible gold leaf? It catches the light and makes each bomb feel like a tiny, edible treasure. This is a mirror glaze dessert recipe that looks intimidating but is actually made with simple, accessible techniques.
I’ve tested this velvet vanilla rose cheesecake bombs recipe over and over in my own kitchen, adjusting temperatures, tweaking proportions, and testing substitutes until everything was just right. The two most important secrets? First, folding freshly whipped cream into the cream cheese mixture creates that light, mousse-like velvet texture. Second, the gold mirror glaze must be poured at exactly the right temperature — about 90°F. The most common mistake I see is pouring the glaze too hot, which causes it to run off and lose its shine. Don’t worry — I’ll guide you through every step so you can pull off this showstopper with confidence.
Why This Velvet Vanilla Rose Cheesecake Bombs Recipe Is the Best
The Flavor Secret. This isn’t just another cheesecake bite. The combination of rose water and vanilla bean paste is a pairing I grew up with in Morocco and later refined in French pastry kitchens. Rose water can be tricky — too much and it tastes like perfume. I’ve calibrated the exact amount so you get a delicate floral note that enhances, rather than overwhelms, the rich cream cheese and buttery crust. Add a tiny pinch of lemon juice to brighten everything up, and you have an edible gold leaf cheesecake with a flavor profile that’s elegant, unexpected, and utterly addictive.
Perfected Texture. Let’s talk about that velvet texture. Traditional cheesecake can be dense and heavy, but these bombs are light as a cloud. The French technique here is simple but transformative: fold softly whipped heavy cream into the cream cheese mixture instead of adding eggs and baking. That gentle incorporation of air is the recipe’s secret. I’ll walk you through exactly how to fold without deflating the cream, which is the difference between a silky, mousse-like texture and a flat, dense one. This is what makes them genuinely velvety — the name isn’t just for show.
Foolproof & Fast. Don’t let the gold mirror glaze intimidate you. I’ve taught this technique to home bakers who were terrified of mirror glazes, and they’ve all succeeded on their first try. The secret is all about temperature — I’ll give you the exact number (90°F) and visual cues so you know exactly when to pour. The recipe itself is no-bake, which means no water baths, no cracked cheesecakes, no fuss. You just need a little patience while the bombs freeze solid. If you can wait, you’ll be rewarded with one of the most gorgeous desserts you’ve ever made.
Velvet Vanilla Rose Cheesecake Bombs Ingredients
Most of these ingredients are easy to find at any well-stocked US grocery store. Fresher rose water is available at Middle Eastern grocers, and I love picking mine up at the spice market in Brooklyn that I’ve been visiting for years. If you can’t find rose water at your local store, you can order it online — just make sure it’s food-grade and labeled for culinary use. For the white chocolate, grab a good-quality brand with cocoa butter (not just palm oil), because that will directly affect how smooth your gold mirror glaze turns out.
Ingredients List
- For the Cheesecake Filling:
- 16 oz (450 g) cream cheese, softened
- 1/2 cup powdered sugar
- 1 tsp vanilla bean paste
- 1 tsp rose water
- 1/2 cup heavy cream, whipped to soft peaks
- 1 tsp lemon juice
- For the Cookie Crust:
- 1 1/2 cups vanilla cookie crumbs
- 5 tbsp unsalted butter, melted
- Pinch of sea salt
- For the Gold Mirror Glaze:
- 1/2 cup sweetened condensed milk
- 1/4 cup water
- 2 tsp unflavored gelatin
- 2 tbsp cold water
- 1 cup white chocolate, finely chopped
- Gold edible food coloring, as needed
- 1 tsp light corn syrup
- For Garnish (optional):
- Dried edible rose petals
- Edible gold leaf
- Tiny fresh mint leaves
Ingredient Spotlight
Rose Water. This is the soul of the recipe. Look for a bottle that lists only rose extract and water — no artificial flavors or additives. A few drops go a long way, which is why the recipe calls for just 1 teaspoon. If you love floral desserts, you can bump it to 1 1/2 teaspoons, but never go beyond that or it will taste like soap.
Cream Cheese. Use full-fat brick cream cheese, not the whipped spreadable kind in a tub. The full-fat version has the right amount of richness and structure to create that dense-but-light velvet filling. Make sure it’s genuinely softened to room temperature before mixing — that one detail prevents lumps more than anything else.
White Chocolate. This is the backbone of the gold mirror glaze, so don’t skimp. A premium bar like Valrhona Ivoire or even a good supermarket brand with real cocoa butter will melt into a silky, glossy glaze. Chips work in a pinch, but they contain less cocoa butter and can make the glaze slightly thicker and less mirror-like.
Unflavored Gelatin. The unsung hero of the mirror glaze! Powdered unflavored gelatin (look for Knox in most US grocery stores) stabilizes the glaze and gives it that glass-smooth, high-shine finish. Blooming it in cold water is essential before melting it into the warm liquid — I’ll show you exactly how in the steps below.
| Original Ingredient | Best Substitution | Flavor / Texture Impact |
|---|---|---|
| Rose water | Orange blossom water | Sweeter, more perfumed floral note; Moroccan twist |
| Cream cheese | Mascarpone | Lighter, less tangy, richer mouthfeel |
| White chocolate bar | White chocolate chips | Slightly less smooth glaze; still very workable |
| Unflavored gelatin | Agar agar | Needs different blooming and heating; firmer set |
| Vanilla bean paste | 1 vanilla bean (seeds scraped) | Same speckled look; slightly more intense vanilla |
How to Make Velvet Vanilla Rose Cheesecake Bombs — Step-by-Step
Set aside about an hour of active prep time plus 6 hours of freezing, and you’ll be rewarded with the most gorgeous cheesecake bombs you’ve ever made. Here’s how to do it, step by step.
Step 1: Make the Cookie Crust
Combine the vanilla cookie crumbs, melted butter, and sea salt in a medium bowl. Use a fork or your fingers to work the butter evenly through the crumbs until every crumb is lightly coated. The mixture should hold together when you press a small handful in your palm — if it feels too dry, add a teaspoon more melted butter.
💡 Stella’s Pro Tip: Use a food processor to blitz vanilla cookies into fine crumbs, or simply buy a box of vanilla wafer crumbs from the baking aisle. Refrigerated cookies are easier to crush and yield a cleaner, more even texture.
Step 2: Press the Crust into the Molds
Press the crumb mixture firmly into the bottoms of your silicone half-sphere molds. You want a thin, even layer — about 1/4 inch thick — that covers the bottom curve completely. Use your thumb or the back of a small spoon to press it down firmly so it holds together when frozen. Chill the molds in the refrigerator for 15 minutes while you make the filling.
⚠️ Common Mistake to Avoid: Don’t press the crust too thick! If the crust layer is heavy, the bombs become hard to unmold and the filling-to-crust ratio feels off. A thin, even coating is all you need.
Step 3: Make the Cream Cheese Filling
In a large bowl, beat the softened cream cheese, powdered sugar, vanilla bean paste, rose water, and lemon juice with an electric mixer on medium speed until completely smooth. This should take 2 to 3 minutes. Stop and scrape down the sides of the bowl once or twice with a spatula to make sure everything is evenly combined.
💡 Stella’s Pro Tip: Make sure your cream cheese is truly at room temperature. Cold cream cheese beats into a lumpy mess, and nobody wants a lumpy velvet cheesecake. Take it out of the fridge 1–2 hours before you begin.
Step 4: Fold in the Whipped Cream
In a separate bowl, whip the heavy cream until soft peaks form — the peaks should gently curl over when you lift the whisk. Now switch to a spatula and gently fold the whipped cream into the cream cheese mixture. Use a light, cutting motion from the bottom to the top, rotating the bowl as you go.
⚠️ Common Mistake to Avoid: Be super gentle when folding! If you stir the whipped cream too vigorously, you’ll deflate it and lose that airy velvet texture. Stop as soon as you see no more white streaks.
Step 5: Fill the Molds and Freeze
Spoon or pipe the cheesecake filling into the chilled molds, filling them completely and smoothing the tops with an offset spatula. The mixture should be flush with the top edge. If you’re using half-sphere molds that need to be sealed shut, leave a tiny gap for any expansion. Freeze for at least 6 hours, or overnight, until completely solid.
💡 Stella’s Pro Tip: Freeze the cheesecake bombs overnight if you can. The longer they freeze, the easier they are to unmold and the more beautiful the gold mirror glaze application will be. A 6-hour minimum is fine, but 12 hours is even better.
Step 6: Bloom the Gelatin
Pour the 2 tablespoons of cold water into a small bowl and sprinkle the gelatin over the top in an even layer. Let it sit for 5 minutes. It will look like a translucent, jelly-like disc — that’s a good thing. This process, called “blooming,” is essential for ensuring the gelatin dissolves smoothly into the glaze.
⚠️ Common Mistake to Avoid: Never add gelatin directly to a hot liquid without blooming first. It will clump up and you’ll get lumps in your mirror glaze — and a lumpy mirror glaze is a sad glaze indeed.
Step 7: Heat the Condensed Milk and Water
In a small saucepan, warm the condensed milk and 1/4 cup of water over medium heat until it’s warm to the touch but not boiling. Stir in the bloomed gelatin until it has completely dissolved. The mixture should be smooth, with no gelatin specks remaining.
💡 Stella’s Pro Tip: Warm the liquid until it’s hot enough that you can barely hold your finger in it (about 120°F). That’s the sweet spot for dissolving gelatin without breaking down the condensed milk.
Step 8: Make the Mirror Glaze
Place the finely chopped white chocolate in a heat-safe bowl. Pour the hot condensed milk-gelatin mixture over the top and let it stand for 1 minute. Then stir gently until the chocolate is completely melted and the mixture is smooth. Mix in the corn syrup and gold edible food coloring — add the color drop by drop until you reach your desired gold tone. Cool the glaze to about 90°F (32°C) before using.
⚠️ Common Mistake to Avoid: Resist the urge to pour the glaze when it’s too warm! If it’s hotter than 95°F, it will be too thin and run off the cheesecake bombs completely. If it cools past 85°F, it will start to set before you pour. Aim for 90°F exactly.
Step 9: Unmold the Cheesecake Bombs
Remove the frozen cheesecake bombs from the molds. If they resist, dip the silicone mold in warm water for about 5 seconds, then gently push from the bottom. Place them on a wire rack set over a tray to catch the glaze drips.
💡 Stella’s Pro Tip: Sometimes a quick blast of warm water on the back of the silicone mold is all you need. Just make sure you dry the bombs thoroughly with a paper towel before glazing, or the moisture will affect the glaze finish.
Step 10: Pour the Gold Mirror Glaze
Give the cooled glaze one gentle stir, then pour it evenly over each cheesecake bomb. Start at the top and let the glaze flow down and around the sides, coating every surface. The excess will drip onto the tray below. Allow the glaze to set for 2 to 3 minutes, then scrape the drips back into a bowl, warm them slightly, and reuse if needed.
⚠️ Common Mistake to Avoid: Don’t stir the glaze aggressively right before pouring, or you’ll create air bubbles that show up on the finished surface. One gentle stir with the spatula is enough.
Step 11: Transfer and Garnish
Carefully lift each glazed cheesecake bomb with an offset spatula and transfer it to its serving plate. While the glaze is still slightly soft, garnish with dried edible rose petals, small shards of edible gold leaf, and a tiny fresh mint leaf on top. These finishing touches elevate the dessert from beautiful to show-stopping.
💡 Stella’s Pro Tip: Edible gold leaf is a little tricky to handle — it’s paper-thin and static-prone. Use a pair of tweezers or a clean, dry brush to lift it and press it onto the glaze. Work gently; a little bit goes a long way.
Step 12: Refrigerate Before Serving
Refrigerate the finished cheesecake bombs for about 20 to 30 minutes before serving. This allows the mirror glaze to set fully into that beautiful, glossy shell while keeping the cheesecake filling cold and creamy. Serve chilled.
⚠️ Common Mistake to Avoid: Don’t refrigerate for more than a few hours once glazed, as the moisture from the refrigerator can dull that gorgeous mirror finish. If you’re serving later, glaze closer to serving time and keep the bombs in the fridge for a maximum of 24 hours.
| Step | Action | Duration | Key Visual Cue |
|---|---|---|---|
| 1 | Make cookie crust | 5 mins | Crumbs hold together when squeezed |
| 2 | Press into molds & chill | 15 mins | Crust firm in molds |
| 3 | Beat cream cheese filling | 2–3 mins | Smooth, no lumps |
| 4 | Fold in whipped cream | 2–3 mins | Light, fluffy, no white streaks |
| 5 | Fill molds & freeze | 6 hrs (min) | Completely solid |
| 6 | Bloom gelatin | 5 mins | Jelly-like surface |
| 7 | Heat condensed milk & water | 2–3 mins | Warm, gelatin dissolved |
| 8 | Mix glaze & cool | 10–15 mins | 90°F (32°C) |
| 9 | Unmold bombs | 1–2 mins | Clean release from molds |
| 10 | Pour glaze | 2–3 mins per bomb | Smooth golden coverage |
| 11 | Garnish | 5 mins | Rose petals & gold leaf in place |
| 12 | Refrigerate before serving | 20–30 mins | Glaze is set, glossy |
Serving & Presentation
This edible gold leaf cheesecake is all about the wow factor. Serve each velvet vanilla rose cheesecake bomb on its own small plate or in a decorative dessert cup. I love placing them on white or gold-rimmed plates, which makes the mirror glaze look even more dramatic. If you’re serving a crowd, arrange them on a large marble or mirrored tray — the reflection makes the gold gleam twice as brightly.
These rose cheesecake dessert bombs pair beautifully with a cup of Moroccan mint tea, which echoes the mint garnish and brings my North African heritage full circle. For coffee lovers, a small espresso or cappuccino balances the sweetness beautifully. And if you’re serving this at a celebration, consider a glass of champagne or a light sparkling rosé — the bubbles cut through the creamy richness perfectly. That pairing is something I learned to appreciate during my time in Paris, where dessert and wine are never far apart.
For a truly elegant presentation, dust the plate with a tiny swirl of powdered sugar and place a single rose petal next to each bomb. The visual contrast of the pale pink petal against the golden dome is simply stunning — it’s the kind of detail that makes guests think you spent hours plating, when in reality it took you less than a minute.
| Pairing Type | Suggestions | Why It Works |
|---|---|---|
| Side Dish | Moroccan mint tea, lemon sorbet, fresh raspberries | Mint refreshes the palate; berries add bright acidity |
| Sauce / Dip | Raspberry coulis, salted caramel, chocolate drizzle | Tart and salty counterpoint to the sweet floral cheesecake |
| Beverage | Espresso, Champagne, sweet dessert wine | Coffee cuts richness; bubbles lift the cream; wine echoes vanilla |
| Garnish | Fresh rose petals, crushed pistachios, gold dust | Flowers echo the rose flavor; pistachios add color and crunch |
Make-Ahead, Storage & Reheating
These cheesecake bombs are actually a perfect make-ahead dessert — one of the reasons I love them for my busy New York City schedule. You can prepare and freeze the bombs up to a week in advance, then make the glaze and finish them just before your event. The glaze itself can also be made 1 day ahead and stored in the refrigerator in an airtight container. Just warm it gently to 90°F and give it a stir before using.
| Method | Container | Duration | Reheating / Finishing Tip |
|---|---|---|---|
| Refrigerator | Airtight container, single layer | Up to 3 days | Serve chilled; no reheating needed |
| Freezer | Airtight container, parchment between layers | Up to 2 months | Thaw in fridge 30–60 mins before glazing |
| Make-Ahead | Freeze unglazed bombs; glaze up to 24 hrs before | 1 week in advance | Glaze at 90°F for best shine |
If you’re storing glazed bombs in the refrigerator, be aware that over time the mirror glaze may absorb moisture from the fridge and lose some of its shine. That’s why I recommend glazing no more than 24 hours before serving. If you need to prepare further ahead, freeze the unglazed cheesecake bombs and complete the glazing step on the day you plan to serve.
To thaw frozen unglazed cheesecake bombs, transfer them from the freezer to the refrigerator about 1 hour before glazing. They should still be very cold but not rock-hard, which helps the glaze set properly and prevents cracking. If you’re in a rush, you can glaze them directly from the freezer — just make sure the surface is completely dry and the glaze is at exactly 90°F.
Variations & Easy Swaps
| Variation | Key Change | Best For | Difficulty Impact |
|---|---|---|---|
| Orange Blossom & Honey | Swap rose water for orange blossom water; add honey | Moroccan-inspired gatherings | Same difficulty |
| Gluten-Free | Use gluten-free vanilla cookie crumbs | Gluten-sensitive guests | No change |
| Dark Chocolate Mirror | Swap white chocolate for dark; no food coloring needed | Chocolate lovers | Slightly easier |
Variation 1: Orange Blossom & Honey
In Morocco, orange blossom water is just as beloved as rose water. Swap the rose water in the filling for 1 teaspoon of orange blossom water, and add 1 tablespoon of honey — preferably orange blossom honey — to the cream cheese mixture for extra depth. The honey adds a rich, floral sweetness that pairs beautifully with the orange blossom. Finish the bombs with a light dusting of crushed pistachios alongside the rose petals. This variation feels distinctly North African and is one of my mother’s favorites — it’s like a dessert straight from the souks of Marrakech.
Variation 2: Gluten-Free
Use your favorite gluten-free vanilla sandwich cookies or gluten-free graham cracker crumbs for the crust. I’ve tested this with several brands, and the texture holds up perfectly — the crust stays crisp and buttery, and no one at the table will notice the difference. Just make sure your vanilla bean paste, rose water, and white chocolate are all certified gluten-free if that’s a strict requirement for your household. This swap is one of the easiest gluten-free transformations I know, because the recipe is already naturally flourless aside from the crust.
Variation 3: Dark Chocolate Mirror Glaze
For a richer, more dramatic look, substitute dark chocolate (around 60% cacao) for the white chocolate in the gold mirror glaze. You’ll want less food coloring or none at all — dark chocolate naturally has a beautiful deep brown shine, and you can add a touch of bronze or copper edible luster dust for extra flair. The flavor becomes more bittersweet and less sweet, which is a lovely contrast to the floral filling. I like to add a pinch of espresso powder to the glaze to intensify the chocolate notes. This version is slightly easier, because dark chocolate is more forgiving when melting.
What is the best way to create a smooth velvet texture for vanilla cheesecake bombs?
The velvet texture comes from two key techniques. First, make sure your cream cheese is completely softened at room temperature before beating it with the powdered sugar — cold cream cheese creates lumps that you simply can’t beat out. Second, and most importantly, fold softly whipped heavy cream into the cheesecake mixture using a gentle spatula. The process is called folding, not stirring: you cut down through the mixture, scrape along the bottom, and lift upward, rotating the bowl as you go. This incorporates air without deflating the whipped cream, resulting in a light, mousse-like texture that feels like velvet on your tongue.
Can I use a different type of glaze if I don’t have gold mirror glaze ingredients?
Absolutely. If you don’t have the ingredients for a gold mirror glaze, you can dip the frozen cheesecake bombs in melted white chocolate or dark chocolate mixed with a teaspoon of coconut oil for a smooth, shiny finish. Another option is a simple chocolate ganache made by pouring hot heavy cream over chopped chocolate and stirring until glossy. For a completely different look, you can coat the bombs in cocoa powder or powdered sugar just before serving. The mirror glaze is gorgeous, but these alternatives are delicious, simpler, and require far fewer specialty ingredients.
How long do you need to freeze the cheesecake filling before dipping it in the glaze?
You need to freeze the cheesecake bombs for at least 6 hours, though I strongly recommend overnight. The filling must be completely solid before you unmold it and pour the glaze over the top. If the filling is even slightly soft in the center, the weight of the glaze can push it down and misshape the bombs. Freezing overnight also makes unmolding easier and ensures the cheesecake bombs hold their beautiful half-sphere shape when you pour the 90°F mirror glaze over them. This patience is the secret to that picture-perfect result.
What can I use to decorate these cheesecake bombs instead of rose petals for a similar elegant look?
If you don’t have dried edible rose petals, there are plenty of equally elegant alternatives. Candied violets or pansies are just as romantic and widely available at specialty baking stores. A fine dusting of crushed pistachios provides a lovely green contrast against the gold glaze. You can also use silver or gold dragees — those small metallic sugar pearls — or simply add more edible gold leaf for extra shimmer. Fresh lavender buds are another beautiful option, though they have a stronger flavor, so use them sparingly. Each of these will give your dessert that high-end patisserie look.
Can I make velvet vanilla rose cheesecake bombs without a silicone half-sphere mold?
Yes, you can adapt this recipe without a half-sphere mold. The easiest approach is to use a muffin tin lined with plastic wrap. Press the cookie crust into the bottom of each liner, then fill with the cheesecake mixture and freeze. Once solid, pull the plastic wrap out and shape the rounded tops with your hands — the mixture is soft enough to mold into a dome shape immediately after freezing. Alternatively, you can roll the frozen filling into balls with your hands, then press a flat bottom onto the cookie crust to create the same half-sphere silhouette. Both methods work beautifully.
Why did my gold mirror glaze crack or turn dull while setting?
Cracking and dullness are almost always caused by temperature issues. If the glaze is too cold — below 85°F — when poured, it will set too quickly and can crack as the frozen cheesecake bomb adjusts in temperature. If the glaze is too warm — above 95°F — it will be too thin and puddle, losing its gloss as it sits. Aim for exactly 90°F (32°C) when you pour. Also, avoid refrigerating the glazed bombs for too long, because the moisture in the refrigerator can dull the mirror finish. Glaze no more than 24 hours before serving, and always keep the bombs as cold and dry as possible before glazing.
Can I substitute regular vanilla extract for vanilla bean paste in this rose cheesecake dessert?
Yes, you can substitute 2 teaspoons of pure vanilla extract for the 1 teaspoon of vanilla bean paste. The main difference is visual: vanilla bean paste has those gorgeous little black specks that make baked goods look artisanal and professional. If you use extract, the flavor will be slightly less intense and you’ll miss the specks entirely. If you want to keep the speckled look, use one whole vanilla bean — split it lengthwise and scrape out the seeds with the back of a knife, adding them directly to the cream cheese mixture. The result will be even more fragrant than the paste.
Can the cheesecake bombs be made dairy-free?
You can make a dairy-free version, but the texture will be slightly different. Use a dairy-free cream cheese alternative — a plant-based cream cheese works best — and a dairy-free condensed milk substitute, like coconut condensed milk (or chilled coconut cream mixed with sugar). The biggest challenge is the heavy cream: use full-fat coconut cream, whipped to soft peaks, which produces a lightly coconut-flavored result. The filling will be a bit denser but still delicious. For the glaze, dairy-free white chocolate generally sets more slowly, so keep the bombs well chilled and consider a slightly cooler glaze around 88°F.
How far in advance can I prepare these cheesecake bombs for a party?
You can prepare the unglazed cheesecake bombs up to one week in advance and keep them in the freezer in an airtight container. When you’re ready to serve, make the gold mirror glaze fresh and glaze them the day of your event, or at most 24 hours before. The glaze itself can be prepared up to 24 hours ahead and stored in the refrigerator — just warm it gently back to 90°F before pouring. This flexibility makes the recipe incredibly convenient for entertaining. My advice is to spread the work across two days: freeze on day one, glaze and garnish on day two.
Is edible gold leaf necessary for this edible gold leaf cheesecake recipe?
No, edible gold leaf is completely optional, though it does add that luxurious finishing touch. If you don’t have it, you can skip it entirely and still have a stunning, glossy golden dessert. Alternatively, you can dust the glazed bombs with a tiny pinch of edible gold luster dust, which is easier to apply and more affordable than gold leaf sheets. Gold sprinkles or gold dragees work wonderfully too. The beauty of this recipe is that it’s already show-stopping thanks to the gold mirror glaze — the gold leaf is simply an extra sparkle that takes it over the top.
Share Your Version!
Have you tried these velvet vanilla rose cheesecake bombs with gold mirror glaze? I’d absolutely love to know how they turned out for you! If you give them a star rating below and leave a comment, you’ll make my day. And if you share a photo on Instagram or Pinterest, be sure to tag @leosfoods so I can see your beautiful creations — there’s nothing I love more than seeing one of my recipes come to life in your kitchens.
What’s your favorite way to put a personal twist on this rose cheesecake dessert? Maybe you swapped the rose water for orange blossom, or you tried the dark chocolate mirror glaze variation. Drop your ideas and questions in the comments — I read every single one, and you might just inspire my next recipe!
From my NYC kitchen to yours — I hope this recipe brings as much warmth to your table as it does to mine. — Stella 🧡
Love This Recipe? Save It to Pinterest!
If you enjoyed this Velvet Vanilla Rose Cheesecake Bombs recipe, don’t let it get lost in your browser tabs! 😄 Pin it now so you can find it again anytime — and explore hundreds more tried-and-tested recipes waiting for you on my Pinterest boards.
👉 Follow Stella on Pinterest @stellarecipeblog
📌 Pin this recipe · 🔁 Re-pin your favorites · 💬 Tag me when you make it — I love seeing your creations!
💬 Tried this recipe? Rate it ★★★★★, share your twist in the comments below, or tag me in your photos on Pinterest — I read every single message! 🧡
Velvet Vanilla Rose Cheesecake Bombs with Gold Mirror Glaze
- Yield: 8 1x
Ingredients
- For the Cheesecake Filling:
- 16 oz (450 g) cream cheese, softened
- 1/2 cup powdered sugar
- 1 tsp vanilla bean paste
- 1 tsp rose water
- 1/2 cup heavy cream, whipped to soft peaks
- 1 tsp lemon juice
- For the Cookie Crust:
- 1 1/2 cups vanilla cookie crumbs
- 5 tbsp unsalted butter, melted
- Pinch of sea salt
- For the Gold Mirror Glaze:
- 1/2 cup sweetened condensed milk
- 1/4 cup water
- 2 tsp unflavored gelatin
- 2 tbsp cold water
- 1 cup white chocolate, finely chopped
- Gold edible food coloring, as needed
- 1 tsp light corn syrup
- For Garnish (optional):
- Dried edible rose petals
- Edible gold leaf
- Tiny fresh mint leaves
Instructions
- 1. Combine the vanilla cookie crumbs, melted butter, and sea salt until evenly moistened.
- 2. Press the crumb mixture into the bottoms of silicone half-sphere molds to form a thin crust. Chill for 15 minutes.
- 3. Beat the cream cheese, powdered sugar, vanilla bean paste, rose water, and lemon juice until smooth.
- 4. Fold the whipped cream gently into the cheesecake mixture until light and fluffy.
- 5. Fill the molds with the cheesecake mixture, smoothing the tops. Freeze for at least 6 hours or until completely firm.
- 6. Bloom the gelatin in the cold water for 5 minutes.
- 7. Heat the condensed milk and water until warm, then stir in the bloomed gelatin until dissolved.
- 8. Pour the hot mixture over the white chocolate and let stand for 1 minute. Stir until smooth, then mix in the corn syrup and gold edible food coloring. Cool the glaze to about 90°F (32°C).
- 9. Remove the frozen cheesecake bombs from the molds and place them on a wire rack over a tray.
- 10. Pour the gold mirror glaze evenly over each cheesecake bomb, allowing the excess to drip away.
- 11. Transfer to serving plates and garnish with edible rose petals, edible gold leaf, and tiny mint leaves.
- 12. Refrigerate for 20–30 minutes before serving for the best texture.
Nutrition
- Calories: 390
- Sugar: 24 g
- Fat: 28 g
- Carbohydrates: 31 g
- Protein: 6 g
Tried This Recipe? Leave a Comment!
Did you make this recipe? I’d love to hear how it turned out! Please leave a comment and a rating below. Your feedback helps other home cooks and supports cheerychop.com!
For more delicious inspiration, follow me on Pinterest!