Foolproof Velvet Vanilla Rose Dream Domes with Gold Glaze
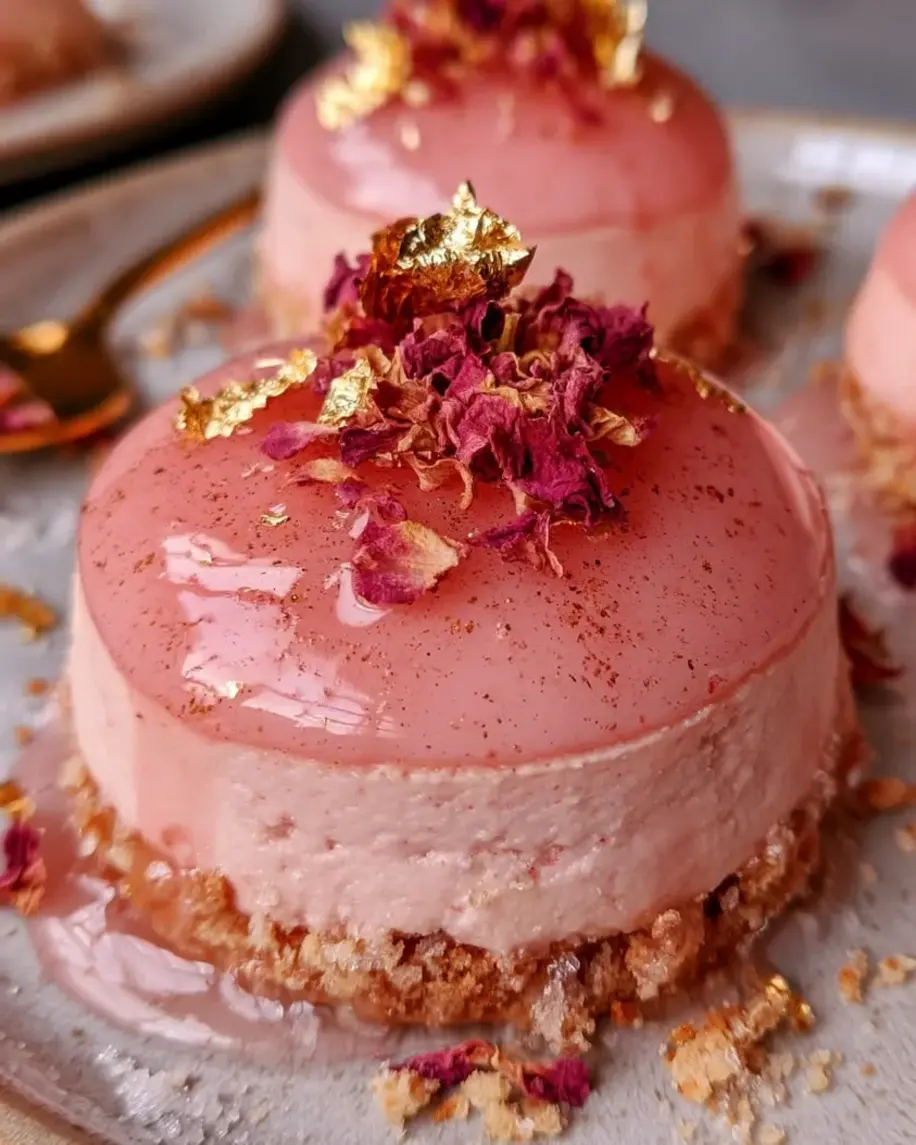
Table of Contents
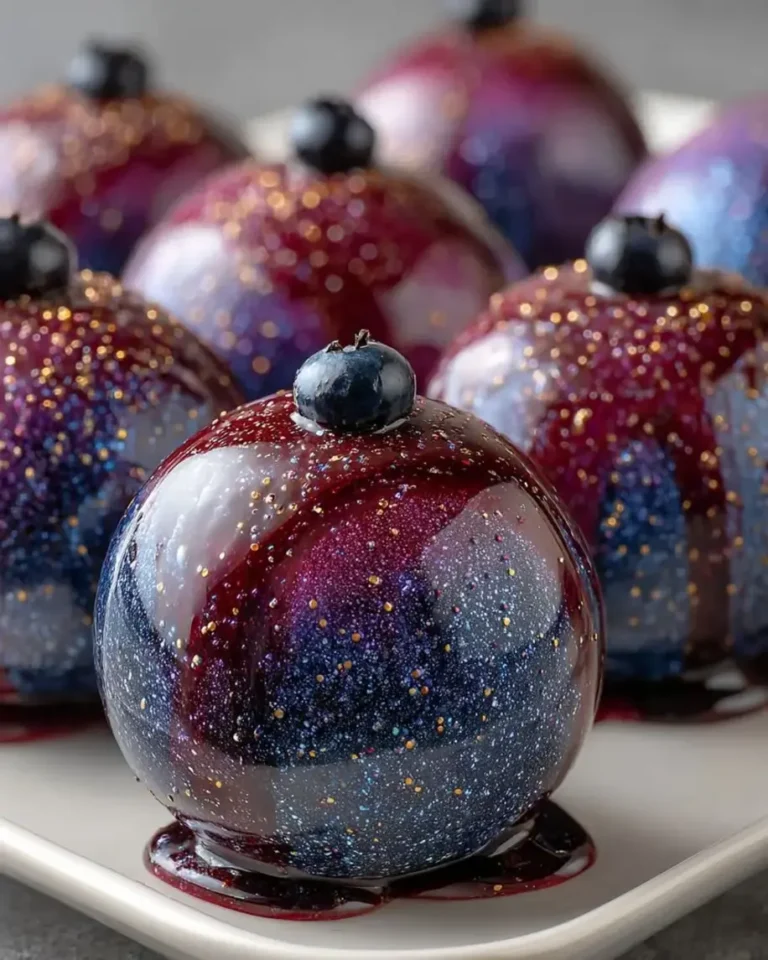
Velvet Vanilla Rose Dream Domes with Gold Glaze — A Stunning Rose Cheesecake Dome Dessert with a French-Meets-Moroccan Twist
I still remember the afternoon I first made these velvet vanilla rose dream domes with gold glaze. I was standing in my mother’s kitchen in Morocco, but the technique in my hands was pure Paris — the same mirror glaze I’d practiced for months at culinary school, the same patience she taught me with a pot of mint tea on the stove. I wanted to create something that felt like a celebration on a plate: a rose cheesecake dome dipped in liquid gold, creamy and light, with just a whisper of floral perfume. That dessert became an instant family favorite, and now it’s one of the most requested recipes on my blog. This is that recipe — refined, tested, and made for home bakers.
Take a bite and you’ll understand the name. The gold glaze shatters ever so slightly before melting into a silky, rose-scented vanilla cheesecake mousse. Underneath, the vanilla biscuit base gives a quiet, buttery crunch that balances the airy filling. The rose water doesn’t shout — it whispers, like a garden after summer rain — while the vanilla bean paste adds a deep, honeyed warmth. And the gold? It catches the light, turning each dome into a little jewel. In Morocco, we say beauty hides in the details; in Paris, I learned that flavor must match the elegance. These elegant dome cake desserts deliver both, with every spoonful as smooth as silk.
I’ve tested this recipe more times than I can count — for birthday dinners in my tiny NYC apartment, for friends’ baby showers, even for a wedding tasting. The version I’m sharing today is the one that works: it uses a foolproof gold mirror glaze that flows like liquid gold, a no-bake cheesecake mousse that sets firm but stays cloud-soft, and a simple biscuit base that needs no oven. Along the way, I’ll show you my best mirror-glaze tricks, including the exact temperature to pour (90°F, not higher!) and the one mistake that makes glaze turn dull. From my kitchen to yours — this is elegance made easy.
Why This Velvet Vanilla Rose Dream Domes Recipe Is the Best
The flavor secret lives in the balance between rose and vanilla. Rose water can easily turn a dessert into perfume, but when it’s just one teaspoon against a whole block of cream cheese and a full cup of whipped cream, it becomes something refined. I learned this balance in Morocco, where my mother scented simple custards with a few drops of rose water. In Paris, I refined it with French technique. The result is a rose cheesecake dome that tastes floral without feeling soapy — elegant, like an expensive patisserie dessert, but made entirely in your own home.
Texture is where these golden domes truly shine. The mousse is airy enough to feel decadent, but stable enough to hold a perfect dome shape. The trick is technique: bloomed gelatin folded into softly whipped cream, with cream cheese beaten silky-smooth. My French pastry training taught me to treat each element with care — never rush the folding, never skip the six-hour freeze. The payoff is a filling that cuts cleanly, melts gently on your tongue, and leaves just a trace of vanilla-cream sweetness behind.
Don’t let the mirror glaze intimidate you. This was the first gold mirror glaze dessert recipe I taught in my NYC workshops, and it’s designed for home kitchens. You don’t need a fancy chef’s torch or a commercial freezer — just a silicone mold, a thermometer, and a little patience. The glaze uses simple ingredients like sweetened condensed milk, white chocolate, and gold food coloring, and it comes together in about ten minutes. If it’s too thick, a quick warm in the microwave fixes it; if it’s too thin, a few minutes of cooling does the trick. Beginners tell me all the time: if you can make pudding, you can make these gorgeous domes.
Velvet Vanilla Rose Dream Domes with Gold Glaze — Ingredients
Every Saturday, I walk through the Union Square Greenmarket in New York, and in the spring I always linger at the flower stalls, hunting for edible rose petals. For me, rose water is the soul of this vanilla rose dessert recipe — it ties my Moroccan childhood to the French pâtisserie tradition I love. Most of the ingredients below are pantry staples; the rose water and edible gold leaf you can find online or at specialty baking stores.
Ingredients List
- For the Vanilla Rose Cheesecake Filling:
- 16 oz (450 g) cream cheese, softened
- 1/2 cup powdered sugar
- 1 tsp vanilla bean paste
- 1 tsp rose water
- 1 tbsp fresh lemon juice
- 1 cup heavy cream, whipped to soft peaks
- 2 tsp unflavored gelatin
- 2 tbsp cold water
- For the Vanilla Biscuit Base:
- 1 1/2 cups vanilla biscuit crumbs
- 5 tbsp unsalted butter, melted
- 1 tbsp granulated sugar
- Pinch of sea salt
- For the Gold Mirror Glaze:
- 1/2 cup sweetened condensed milk
- 1/4 cup water
- 2 tsp unflavored gelatin
- 2 tbsp cold water
- 7 oz (200 g) white chocolate, finely chopped
- 1 tsp light corn syrup
- Gold edible food coloring, as needed
- 1 tsp vanilla extract
- For Garnish (optional):
- Dried edible rose petals
- Edible gold leaf
- Vanilla bean seeds
Ingredient Spotlight
Rose water is the heart of this recipe. Look for food-grade rose water in the international or baking aisle, or order it online — never use a rose-scented body product! My favorites are Moroccan brands like Cortas and Al Wadi, which are clean and fragrant without artificial perfume. If you can only find rose extract, use 1/4 teaspoon and dilute it in the lemon juice before adding. You want a floral whisper, not a perfume blast.
Use full-fat block cream cheese, not the whipped tub, at true room temperature. This is non-negotiable for a smooth cheesecake mousse. Cold cream cheese leaves tiny lumps that break the silky texture. Philadelphia is my go-to in the US, but any full-fat block works beautifully. If you’re dairy-free, a high-quality plant-based cream cheese like Miyoko’s or Violife will work, though the texture will be slightly softer — freeze the domes a little longer to compensate.
For the gold mirror glaze, you need white chocolate that melts smoothly. Brands with real cocoa butter — like Callebaut, Valrhona, or even Ghirardelli — give a glossy, fluid glaze. Avoid cheap white chips that contain palm oil; they can turn the glaze grainy and dull. Chop it finely before pouring the hot condensed milk mixture over it, and let it stand for a full minute before stirring — this gentle heat creates a flawless emulsion.
I use both gold gel food coloring (like AmeriColor Gold) mixed into the glaze, plus real edible gold leaf for garnish. For the leaf, buy genuine edible gold leaf — not the craft-store kind. It comes in thin sheets between tissue paper; use tweezers to gently press a small piece onto the set glaze. Starting with the colored glaze underneath ensures you get that full golden dome effect even where the leaf doesn’t cover.
| Original Ingredient | Best Substitution | Flavor / Texture Impact |
|---|---|---|
| Rose water | Orange blossom water (1 tsp) or 1/2 tsp almond extract | Floral but nuttier/citrusy; slightly different perfume |
| Cream cheese | Mascarpone, softened | Richer and less tangy; mousse slightly denser |
| White chocolate | High-quality white chocolate chips with cocoa butter | Smooth fluid glaze; avoid palm-oil chips |
| Gelatin | Agar-agar powder (1 tsp mousse / 2 tsp glaze) | Plant-based; sets firmer, so reduce liquids slightly |
| Heavy cream | Full-fat coconut cream, chilled | Dairy-free; adds a light coconut note |
How to Make Velvet Vanilla Rose Dream Domes with Gold Glaze — Step-by-Step
Grab your silicone dome mold, clear a shelf in your freezer, and let’s build these beauties one layer at a time. The process is easier than it looks — just follow the steps in order, and you’ll be pouring liquid gold like a pro.
Step 1: Prepare the Vanilla Biscuit Base
In a medium mixing bowl, combine 1 1/2 cups vanilla biscuit crumbs, 5 tablespoons melted unsalted butter, 1 tablespoon granulated sugar, and a pinch of sea salt. Stir with a fork or spatula until every crumb is evenly coated and the mixture looks like damp sand. It should hold its shape when you press it between your fingers, but not feel greasy. If it feels dry, add a little more melted butter one teaspoon at a time.
💡 Stella’s Pro Tip: Use a food processor to crush vanilla wafers or shortbread cookies for perfectly even crumbs. If you only have graham crackers, add an extra tablespoon of sugar — they’re less sweet.
Step 2: Press the Crust Into the Dome Molds
Divide the crumb mixture among your silicone dome molds — about 3 tablespoons each, depending on your mold size. Using your fingers or the flat side of a small measuring cup, press the crumbs firmly into the rounded bottom of each mold to create a thin, even base about 1/4 inch thick. Chill the molds in the refrigerator for 15 minutes to set the butter.
⚠️ Common Mistake to Avoid: Don’t press the crust up too high on the sides — you only want a base layer. If the crust climbs the walls, the cheesecake filling won’t be visible and the dome shape will be lost.
Step 3: Bloom the Gelatin
To bloom the gelatin for the filling, sprinkle 2 teaspoons of unflavored gelatin powder evenly over 2 tablespoons of cold water in a small heat-safe bowl. Let it sit for 5 minutes without stirring. The granules will absorb the water and swell into a spongy, translucent paste. This step “wakes up” the gelatin so it dissolves cleanly when warmed.
💡 Stella’s Pro Tip: Always use cold water to bloom gelatin — hot water makes the granules clump into stubborn lumps that never dissolve smoothly.
Step 4: Beat the Cheesecake Filling
In a large bowl, beat the softened 16 oz cream cheese with 1/2 cup powdered sugar until completely smooth and fluffy, about 2 minutes. Add 1 teaspoon vanilla bean paste, 1 teaspoon rose water, and 1 tablespoon fresh lemon juice. Beat again for 1 minute, scraping down the sides and bottom of the bowl with a spatula. The mixture should be creamy, glossy, and completely lump-free.
⚠️ Common Mistake to Avoid: If your cream cheese is cold, you’ll get lumps no matter how long you beat it. Leave it on the counter for 1–2 hours before starting, or soften it in short microwave bursts at 20% power.
Step 5: Temper the Gelatin Into the Filling
Scoop about 2 tablespoons of the cheesecake mixture into a small microwave-safe bowl. Warm it in the microwave for 10–15 seconds, just until it’s warm to the touch, then add the bloomed gelatin paste and stir until completely melted. Immediately pour this warm mixture back into the main bowl while beating on low speed. This tempering step prevents the gelatin from seizing into hard threads when it hits cold cream cheese.
💡 Stella’s Pro Tip: No microwave? Warm the 2 tablespoons of mixture and the bloomed gelatin in a small saucepan over very low heat, stirring constantly, until the gelatin dissolves.
Step 6: Fold in the Whipped Cream
Make sure your 1 cup of heavy cream is whipped to soft peaks — the cream should hold a gentle shape that flops over when you lift the whisk. Using a large rubber spatula, fold the whipped cream into the cheesecake mixture in three stages. Cut straight down to the bottom of the bowl, sweep across, and lift; rotate the bowl a quarter turn and repeat. Fold just until no white streaks remain — about 20 gentle folds.
⚠️ Common Mistake to Avoid: Do not whisk or stir the cream in — you’ll deflate all the air that makes the mousse light and cloud-like. Fold slowly and stop as soon as the color is uniform.
Step 7: Fill the Molds and Freeze
Spoon or pipe the rose cheesecake mousse into the chilled dome molds, filling them nearly to the top but leaving a 1/4 inch of space. Tap each mold gently against the counter to release any air bubbles. Smooth the tops with an offset spatula so they’re flush and flat — these will be the flat bottoms of your domes. Freeze for at least 6 hours, or overnight, until completely solid to the touch.
💡 Stella’s Pro Tip: For the smoothest domes, use a piping bag to fill the molds. If you haven’t got one, a zip-top bag with a corner snipped off works perfectly.
Step 8: Bloom the Gelatin for the Glaze
While the domes freeze, make the mirror glaze. In a small bowl, sprinkle 2 teaspoons of unflavored gelatin over 2 tablespoons of cold water and let it bloom for 5 minutes. This separate gel will thicken the gold glaze to that perfect pourable consistency.
⚠️ Common Mistake to Avoid: Don’t confuse the two gelatin mixtures — the filling gelatin and the glaze gelatin look identical. Label the bowls or keep them in separate areas of the counter to avoid mixing them up.
Step 9: Heat the Condensed Milk Mixture
In a small saucepan, combine 1/2 cup sweetened condensed milk and 1/4 cup water. Warm over medium heat, stirring often, until the mixture is steaming but not boiling — about 2 minutes. Remove from the heat and stir in the bloomed gelatin until it’s completely dissolved. The mixture should be smooth and slightly thickened.
💡 Stella’s Pro Tip: If you see tiny bubbles forming at the edges, it’s hot enough. Don’t let it come to a rolling boil, or the glaze may become slightly dull.
Step 10: Make the White Chocolate Glaze
Place 7 oz of finely chopped white chocolate in a heat-safe bowl. Pour the hot condensed milk mixture over the chocolate, then let it stand for a full minute without touching. After that minute, begin stirring gently in the center with a spatula, working outward until everything is melted, smooth, and glossy. Stir in 1 teaspoon light corn syrup, 1 teaspoon vanilla extract, and gold edible food coloring — start with 2–3 drops and add more until you reach your desired shade. Let the glaze cool to 90°F (32°C), which takes about 10–15 minutes at room temperature.
⚠️ Common Mistake to Avoid: Don’t use a whisk to stir the glaze — you’ll beat in tiny air bubbles that show up as speckles on the finished domes. A gentle spatula is your best friend.
Step 11: Unmold the Frozen Domes
Once the domes are completely firm, remove them from the silicone molds. Gently press the bottom of each mold or flex the silicone to release the dome — it should pop out cleanly. Place each frozen dome flat-side down on a wire rack set over a baking tray to catch the dripping glaze.
💡 Stella’s Pro Tip: If a dome resists, dip the bottom of the mold in warm water for exactly 3 seconds — never longer, or the mousse will start to melt.
Step 12: Glaze the Domes
Check that your gold glaze has reached 90°F, then pour it evenly over each frozen dome. Start at the top of the dome and let the glaze cascade down the sides, covering every inch. Work quickly but calmly — the cold dome sets the glaze instantly. If you see any bare spots, a quick second pour will fix them.
⚠️ Common Mistake to Avoid: If the glaze is warmer than 95°F, it will slide right off the frozen dome into a pool on your tray. Be patient and let it cool to the right temperature.
Step 13: Transfer to Serving Plates
Using a small offset spatula, carefully lift each glazed dome from the wire rack and transfer it to a serving plate or cake stand. Slide the spatula under the base of the dome, supporting it with your other hand if needed. Place each dome flat-side down so the smooth rounded shape faces up.
💡 Stella’s Pro Tip: A bench scraper is even better than a spatula for lifting glazed domes — the thin blade slides underneath without disturbing the glaze.
Step 14: Garnish and Chill
While the glaze is still slightly tacky, garnish each dome with a sprinkle of dried edible rose petals, tiny pinches of edible gold leaf, and a few vanilla bean seeds. The tackiness helps the garnishes stick. Refrigerate the finished domes for 20–30 minutes to let the glaze set completely before serving. They should be chilled, not frozen, when served.
⚠️ Common Mistake to Avoid: Don’t skip the final refrigerated rest. If you serve the domes straight from the freezer, the mousse will be rock-hard and the glaze may crack.
| Step | Action | Duration | Key Visual Cue |
|---|---|---|---|
| 1 | Mix biscuit crumbs with melted butter | 5 mins | Damp sand texture |
| 2 | Press into silicone dome molds | 10 mins | Thin, even 1/4-inch base |
| 3 | Bloom gelatin in cold water | 5 mins | Spongy paste, water absorbed |
| 4 | Beat cream cheese with sugar and flavorings | 3 mins | Smooth, glossy, lump-free |
| 5 | Temper gelatin into warm filling mixture | 2 mins | Glossy ribbons; no streaks |
| 6 | Fold in soft-peak whipped cream | 2 mins | Light, uniform, no white streaks |
| 7 | Fill molds and freeze | 6–8 hrs | Completely firm to the touch |
| 8 | Bloom gelatin for glaze | 5 mins | Spongy paste |
| 9 | Heat condensed milk and water | 2 mins | Steaming, not boiling |
| 10 | Stir chocolate, corn syrup, coloring; cool | 10–15 mins | Smooth, glossy glaze at 90°F |
| 11 | Unmold frozen domes | 2 mins | Clean, sharp dome edges |
| 12 | Pour glaze over domes | 5 mins | Fully coated, mirror shine |
| 13 | Lift to serving plates | 1 min | Domes intact, glaze smooth |
| 14 | Garnish and refrigerate | 30 mins | Glaze set, garnishes adhere |
Serving & Presentation
These gold mirror glaze dessert domes are showstoppers on their own, but a little styling makes them unforgettable. On a white marble cake stand, they look like something from a Parisian pâtisserie window — which is exactly the vibe I love. For a dinner party, I place each dome on a small dessert plate with a swoosh of fresh whipped cream and a single rose petal. In the fall, I dust them with a little cinnamon and serve with warm Moroccan mint tea; in the summer, I keep them chilled and pair them with fresh raspberries.
Keep the pairings simple. The rose-vanilla flavor is delicate, so choose companions that complement rather than overpower: pistachios, raspberries, lychee, white chocolate, and citrus all work beautifully. If you’re in New York, a light espresso with a touch of almond milk is my favorite coffee pairing. In Morocco, we’d serve these domes with mint tea in colored glasses — the contrast of hot tea and a cold golden dome is pure magic.
| Pairing Type | Suggestions | Why It Works |
|---|---|---|
| Side Dish | Fresh raspberries, crushed pistachios, almond tuiles | Tart berries cut through the richness; nuts add crunch and color |
| Sauce / Dip | Raspberry coulis, white chocolate ganache, honey | Cold sauce complements the silky mousse; white chocolate echoes the vanilla |
| Beverage | Mint tea, espresso, Prosecco or rosé | Tea and coffee balance the sweetness; floral wine highlights the rose notes |
| Garnish | Edible gold leaf, dried rose petals, vanilla bean seeds, candied rose | Adds elegance and reinforces the gold-and-rose theme |
Make-Ahead, Storage & Reheating
Sunday baking for Friday’s birthday? You’re in good company. I’m famous among my friends for making these domes a week in advance and stashing them in my freezer until the big day. The mousse domes freeze beautifully, and the glaze can be prepared up to three days ahead — which means the actual day-of party prep is just pouring and garnishing.
| Method | Container | Duration | Reheating Tip |
|---|---|---|---|
| Refrigerator | Airtight container, single layer | Up to 3 days | Serve cold; let stand 10 min to take off the chill |
| Freezer | Airtight container + parchment between layers | Up to 2 months | Glaze straight from frozen, then refrigerate 30 min before serving |
| Make-Ahead | Covered serving plate or cake box | Assemble 1 day ahead; don’t freeze after glazing | Remove from fridge 10 min before serving; never microwave |
Here’s the trick I’ve learned from years of testing: the unglazed, frozen mousse domes are your best friend. You can freeze them for up to two months, then make a fresh batch of gold mirror glaze on the day you plan to serve. The glaze is best within a few hours of being made — after 24 hours in the fridge, it sets into a gel-like texture that can be re-warmed gently in a double boiler.
If you’ve already glazed the domes and have leftovers, put them back in the refrigerator in a single layer — do not cover them tightly, or the glaze will weep condensation. They’ll stay beautiful for a day or two. Most importantly, never reheat a finished dome in the microwave — you’ll melt the glaze and ruin the sleek finish. These are meant to be eaten cold, straight from the fridge, just like the best French desserts.
Variations & Easy Swaps
Once you’ve mastered the classic recipe, try one of these twists. Each one was tested in my own New York kitchen — and they all disappeared within minutes.
| Variation | Key Change | Best For | Difficulty Impact |
|---|---|---|---|
| Orange Blossom & Honey Domes | Swap rose water for orange blossom water; add 2 tbsp honey to the filling | Moroccan-inspired evenings; spring gatherings | Easy — no technique change |
| Gluten-Free & Dairy-Free Domes | GF biscuit crumbs, plant-based cream cheese, coconut cream, dairy-free white chocolate | Guests with allergies; vegan-friendly parties | Medium — freeze for 8 hrs |
| Raspberry-Rose Pink Domes | Swirl raspberry coulis into the mousse; use raspberry puree in the pink glaze | Valentine’s Day; summer birthdays | Medium — extra puree step |
Variation 1: Orange Blossom & Honey Domes
For a taste of my Moroccan childhood, swap the rose water for 1 teaspoon of orange blossom water and fold 2 tablespoons of good honey into the cheesecake filling. The floral orange notes pair beautifully with honey, and together they taste like a fragrant Moroccan dessert straight from my mother’s table. Garnish with crushed pistachios and skip the gold leaf — a thin drizzle of honey over the glazed dome is striking on its own and just as beautiful.
Variation 2: Gluten-Free & Dairy-Free Domes
To make these domes allergy-friendly, use gluten-free vanilla sandwich cookies or gluten-free shortbread for the base — they hold together just as well with the same amount of melted butter. For the filling, swap the cream cheese for a plant-based cream cheese and replace the heavy cream with full-fat coconut cream. For the glaze, choose a dairy-free white chocolate made with rice or coconut milk; I’ve had beautiful results with the Miyoko’s brand. The texture is slightly softer, so freeze the domes for at least 8 hours before glazing.
Variation 3: Raspberry-Rose Pink Domes
In late summer, I love turning these into pink domes. Blend 1/2 cup fresh raspberries with 1 tablespoon sugar, strain out the seeds, and swirl a teaspoon of the coulis into each dome before freezing. For the glaze, leave out the gold coloring and use 1/4 cup raspberry puree plus 1/4 cup water in place of the plain water — you’ll get the most gorgeous glowing pink mirror glaze. It’s a Valentine’s Day favorite and tastes like summer in Manhattan.
Frequently Asked Questions
What is the best way to achieve a smooth and glossy gold glaze for dessert domes?
The gold mirror glaze is all about temperature and technique. First, always stir the glaze gently with a spatula instead of a whisk to avoid air bubbles. Second, cool the glaze to exactly 90°F before pouring; if it’s warmer, it slides off the dome, and if it’s cooler, it becomes thick and dull. Third, your domes must be completely frozen before glazing. Finally, use white chocolate with real cocoa butter and warm the condensed milk to steaming, not boiling. Follow these steps and you’ll get that mirror-perfect shine every single time.
Can I use a different type of extract or flavoring instead of rose water in this recipe?
Absolutely. The classic swap is orange blossom water, which is in the same floral family and gives a Moroccan-inspired flavor — use just 1 teaspoon, the same as the rose water. If you prefer something nuttier and more dessert-like, try 1/2 teaspoon of almond extract plus 1 extra teaspoon of vanilla. For a citrusy twist, a teaspoon of good lemon or bergamot extract works beautifully. Keep in mind that floral extracts are concentrated — start small and taste your filling before adding more, because you can always add but never take away.
How far in advance can I prepare the vanilla rose mousse domes before serving?
The unglazed frozen domes can be made up to two months in advance — just store them in an airtight container with parchment paper between each layer to protect their shape. The gold mirror glaze is best made the same day you plan to serve because it sets into a thick gel after 24 hours in the fridge. However, you can prepare the glaze up to three days ahead and re-warm it in a double boiler or in short microwave bursts at 50% power until it reaches 90°F. If you want a fully finished dessert, glazed domes will keep beautifully for 1–2 days in the refrigerator.
What is the ideal setting time for the mousse domes in the freezer before unmolding?
I recommend freezing the filled molds for at least 6 hours, but 8–12 hours is even better. The cheesecake mousse is rich in cream and gelatin, and it needs to be completely solid before you attempt to unmold it — otherwise the dome will lose its shape, crack, or stick to the silicone. If you’re making the domes ahead, freezing them overnight solves this problem entirely. For the most professional results, give yourself a full day: mix, fill, and freeze today; glaze and serve tomorrow.
Can I make these gold mirror glaze dessert domes without gelatin?
Yes, if you want a plant-based version. For the cheesecake mousse, use agar-agar powder: whisk 1 teaspoon agar into the heavy cream, then bring the cream to a simmer for 2 minutes so the agar fully dissolves. Cool it until slightly thickened, then fold it into the cream cheese mixture. For the mirror glaze, use 2 teaspoons of agar in place of gelatin, dissolved in the cold water for 5 minutes, then bring the entire glaze mixture to a gentle boil for 30 seconds to activate it. Agar sets faster and firmer, so work quickly and pour the glaze at 100°F instead of 90°F.
Why did my gold mirror glaze turn out thick or lumpy instead of smooth?
There are three common culprits, and I’ve hit all of them at some point. First, the white chocolate may not be high quality — chips made with palm oil don’t emulsify properly and leave a grainy texture. Second, the gelatin may have been added to liquid that was too hot, which breaks down its setting power and causes curdling. Third, air bubbles from an over-enthusiastic whisk set into the glaze as it cools. The fix: use quality white chocolate, heat the condensed milk only until steaming, and stir gently with a spatula. If your glaze is already lumpy, strain it through a fine-mesh sieve and re-warm gently until smooth.
Can I use a regular cake pan if I don’t have silicone dome molds?
You can, but the look changes completely. Use a standard muffin tin lined with plastic wrap or a 9-inch springform pan and make one large “dream cake” instead of individual domes. For mini domes without a mold, use a muffin tin with a small round of parchment at the bottom — the top will have a flat disc, not a smooth dome, but it tastes just as wonderful. To get the classic dome shape, I highly recommend investing in a silicone half-sphere mold; they’re inexpensive, endlessly reusable, and make unmolding a dream. I use mine weekly in my New York kitchen.
How do I get the edible gold leaf to stick to the glazed domes?
Timing is everything. If you apply the gold leaf while the glaze is still just slightly tacky — about 1–2 minutes after glazing — it will cling beautifully. If you wait until the glaze fully sets, it’s too smooth and the leaf slides or floats right off. In that case, you can brush a tiny bit of light corn syrup or clear edible glaze on the spot where you want the leaf, then press it on gently with a clean fingertip or soft brush. Always use tweezers to handle the gold leaf, because it’s incredibly delicate and lifts with the slightest breath of air. And remember: less is more — a few strategic flecks look far more luxurious than a heavy coating.
Share Your Version!
I love hearing how this recipe turns out in your kitchen! Have you made these velvet vanilla rose dream domes with gold glaze? Leave a star rating and a comment below — it helps my blog more than you know, and it tells me exactly which recipes to create next. If you post a photo on Instagram or Pinterest, tag @leosfoods so I can see your gorgeous gold domes. There’s nothing that makes me happier than seeing one of my recipes on your table.
One last thing: don’t be afraid to make this your own. Whether it’s a sprinkle of pistachios, an extra drop of rose water, or a cheeky splash of raspberry coulis, the best desserts are the ones you make with love. From my NYC kitchen to yours — I hope this recipe brings as much warmth to your table as it does to mine. — Stella 🧡
Love This Recipe? Save It to Pinterest!
If you enjoyed this Velvet Vanilla Rose Dream Domes with Gold Glaze recipe, don’t let it get lost in your browser tabs! 😄 Pin it now so you can find it again anytime — and explore hundreds more tried-and-tested recipes waiting for you on my Pinterest boards.
👉 Follow Stella on Pinterest @stellarecipeblog
📌 Pin this recipe · 🔁 Re-pin your favorites · 💬 Tag me when you make it — I love seeing your creations!
💬 Ready to try these gold mirror glaze domes? I’d love to hear from you!
What’s the most elegant dessert you’ve ever made? Share your experience in the comments below, tag me in your photos, and let’s make something beautiful together! ⭐ If you bake these domes, come back and leave a star rating — it truly keeps my blog alive. — Stella 🧡
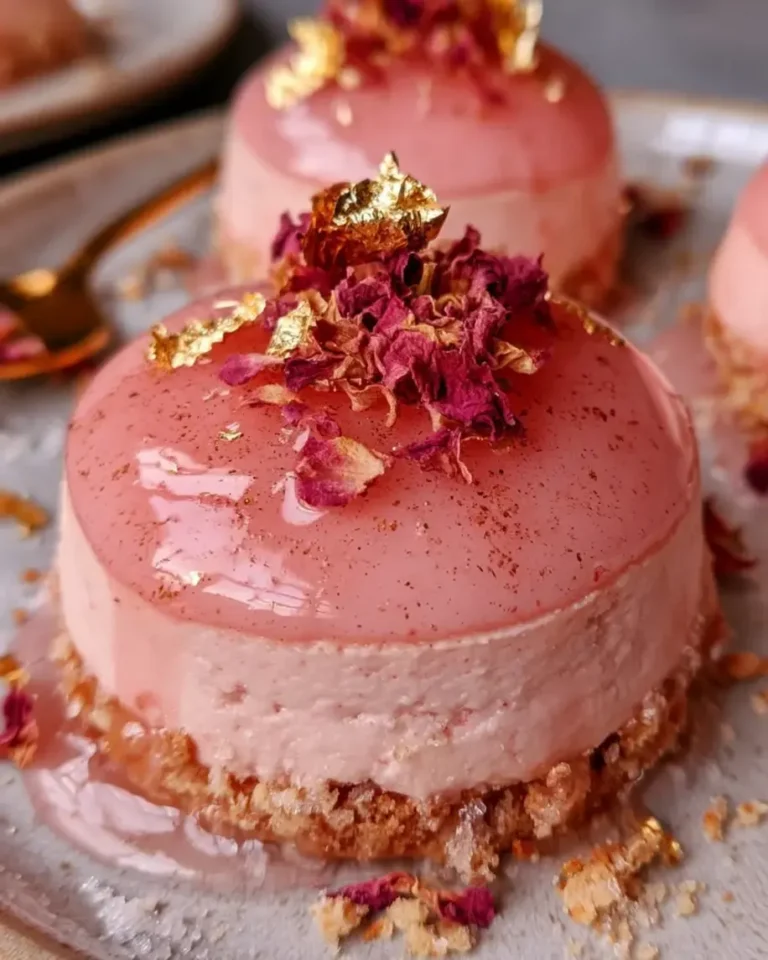
Velvet Vanilla Rose Dream Domes with Gold Glaze
- Yield: 8 1x
Ingredients
- For the Vanilla Rose Cheesecake Filling:
- 16 oz (450 g) cream cheese, softened
- 1/2 cup powdered sugar
- 1 tsp vanilla bean paste
- 1 tsp rose water
- 1 tbsp fresh lemon juice
- 1 cup heavy cream, whipped to soft peaks
- 2 tsp unflavored gelatin
- 2 tbsp cold water
- For the Vanilla Biscuit Base:
- 1 1/2 cups vanilla biscuit crumbs
- 5 tbsp unsalted butter, melted
- 1 tbsp granulated sugar
- Pinch of sea salt
- For the Gold Mirror Glaze:
- 1/2 cup sweetened condensed milk
- 1/4 cup water
- 2 tsp unflavored gelatin
- 2 tbsp cold water
- 7 oz (200 g) white chocolate, finely chopped
- 1 tsp light corn syrup
- Gold edible food coloring, as needed
- 1 tsp vanilla extract
- For Garnish (optional):
- Dried edible rose petals
- Edible gold leaf
- Vanilla bean seeds
Instructions
- Combine the vanilla biscuit crumbs, melted butter, sugar, and sea salt until evenly moistened.
- Press the crumb mixture into the bottoms of silicone dome molds to create a thin base. Chill for 15 minutes.
- Bloom the gelatin for the filling in the cold water for 5 minutes.
- Beat the cream cheese, powdered sugar, vanilla bean paste, rose water, and lemon juice until smooth.
- Warm 2 tablespoons of the cheesecake mixture and dissolve the bloomed gelatin into it. Stir back into the remaining filling.
- Gently fold the whipped cream into the cheesecake mixture until light and airy.
- Fill the molds, smooth the tops, and freeze for at least 6 hours or until completely firm.
- Bloom the gelatin for the mirror glaze in the cold water.
- Heat the condensed milk and water until steaming, then stir in the gelatin until dissolved.
- Pour the hot mixture over the white chocolate. Let stand for 1 minute, then stir until smooth. Mix in the corn syrup, vanilla extract, and gold edible food coloring. Cool the glaze to about 90°F (32°C).
- Remove the frozen domes from the molds and place them on a wire rack over a baking tray.
- Pour the gold mirror glaze evenly over each dome until fully coated.
- Transfer the glazed domes to serving plates.
- Garnish with dried rose petals, edible gold leaf, and vanilla bean seeds. Refrigerate for 20–30 minutes before serving.
Nutrition
- Calories: 390
- Sugar: 24 g
- Fat: 29 g
- Carbohydrates: 31 g
- Protein: 6 g
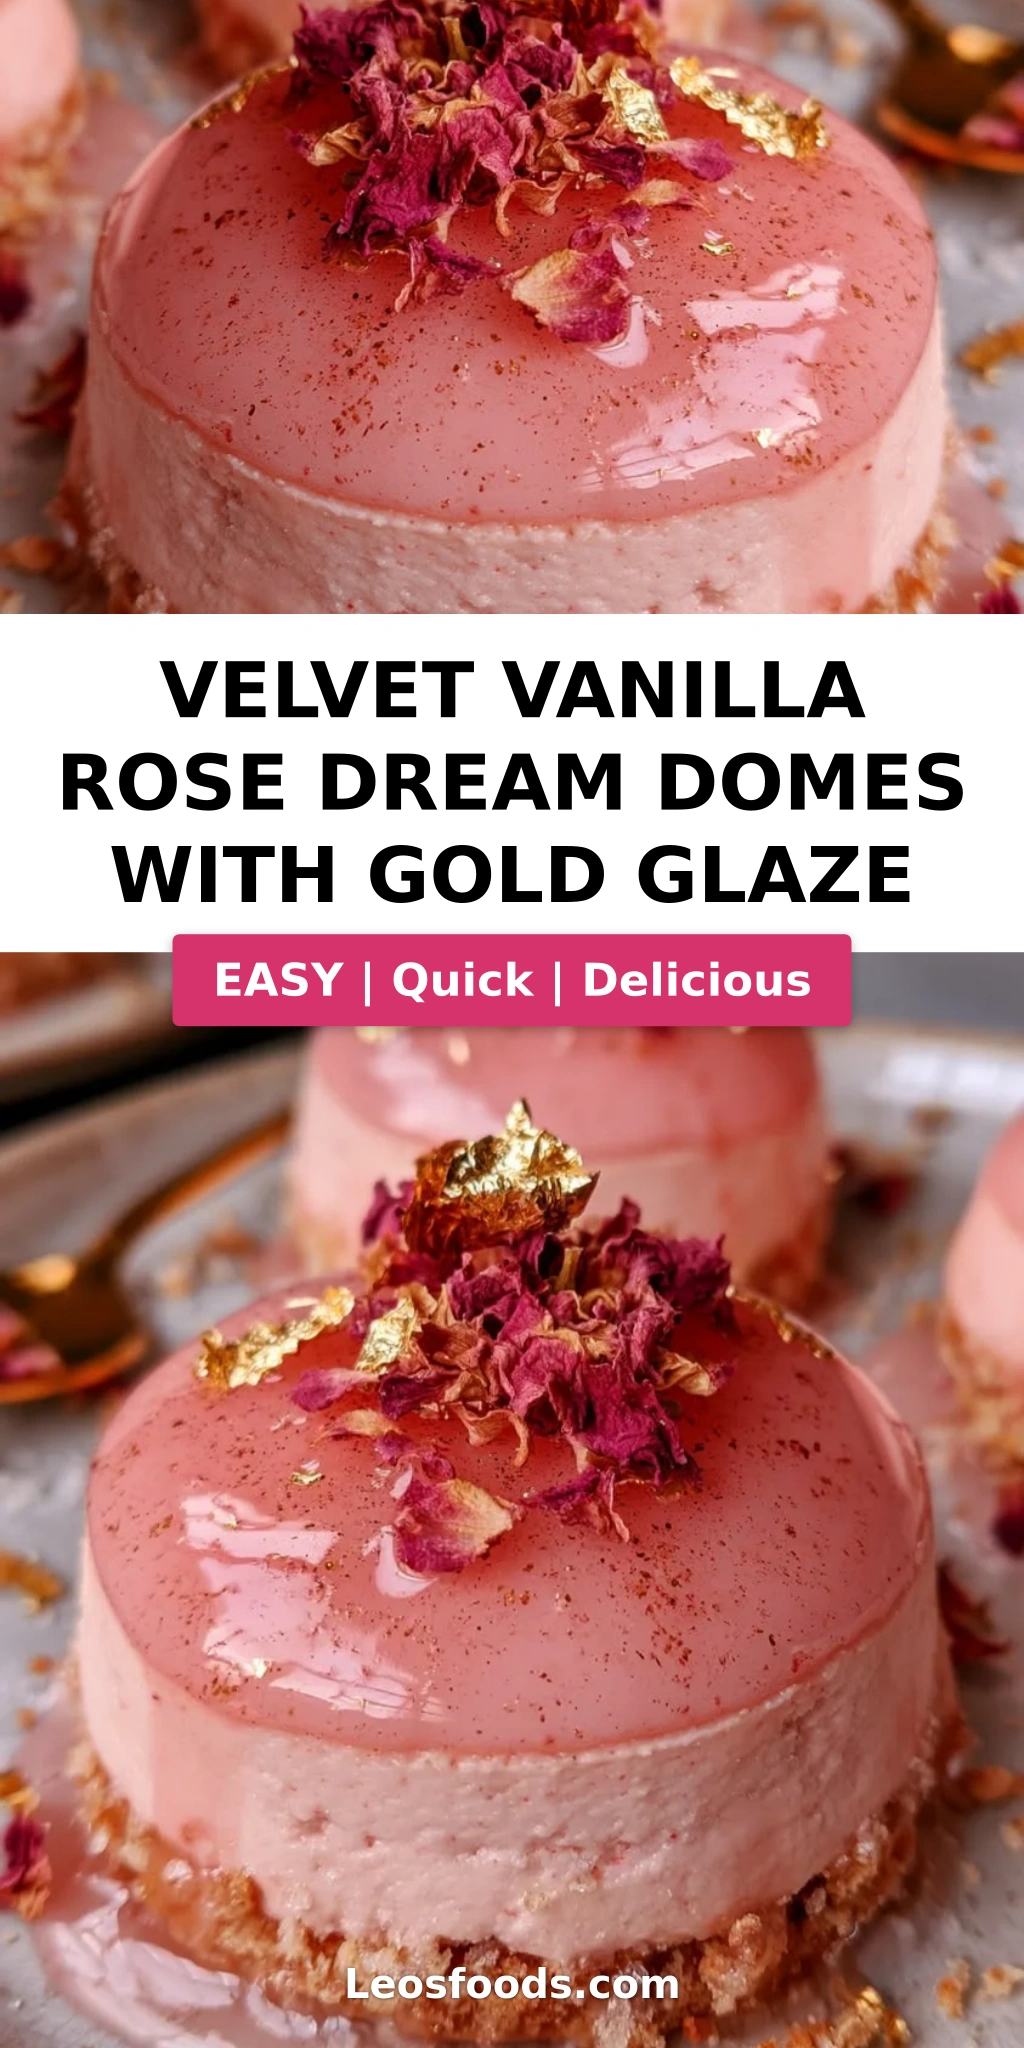
Tried This Recipe? Leave a Comment!
Did you make this recipe? I’d love to hear how it turned out! Please leave a comment and a rating below. Your feedback helps other home cooks and supports cheerychop.com!
For more delicious inspiration, follow me on Pinterest!