Velvet Vanilla Rose Dream Domes with Creamy Center
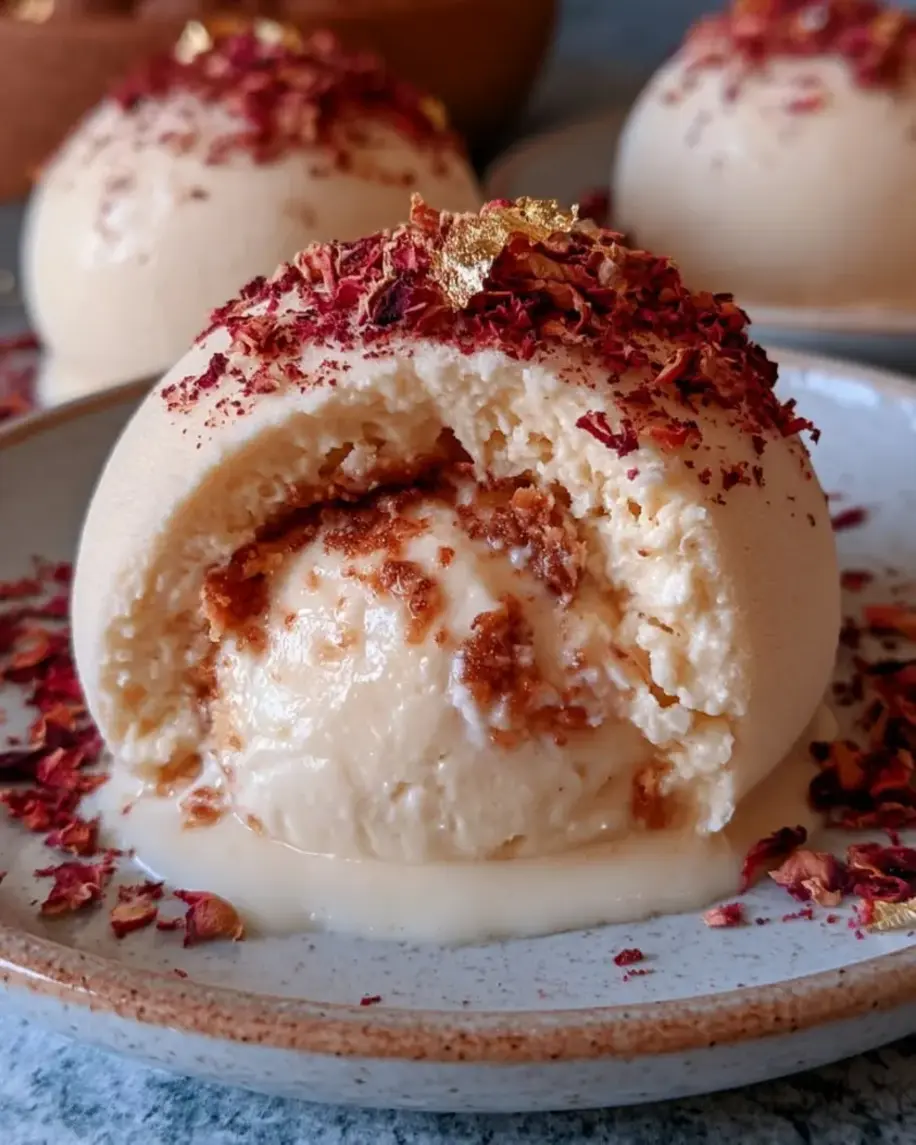
Table of Contents
Velvet Vanilla Rose Dream Domes with Creamy Center — A No-Bake Rose Cheesecake Dome Recipe with a Hidden Silky Heart
Every time I make these Velvet Vanilla Rose Dream Domes with Creamy Center, I’m carried straight back to my grandmother’s courtyard in Marrakech, where rose petals dried on linen cloths and the afternoon air was heavy with orange blossom. Years later, while studying pastry in Paris, I learned how to turn that childhood memory into something truly elegant — a rose cheesecake domes recipe that marries Moroccan floral perfume with classic French technique. The unique twist? A hidden creamy mascarpone center that stays soft and luxurious inside a frozen cloud of vanilla rose cheesecake. It’s the kind of dessert that makes guests lean in and ask, “How did you do that?”
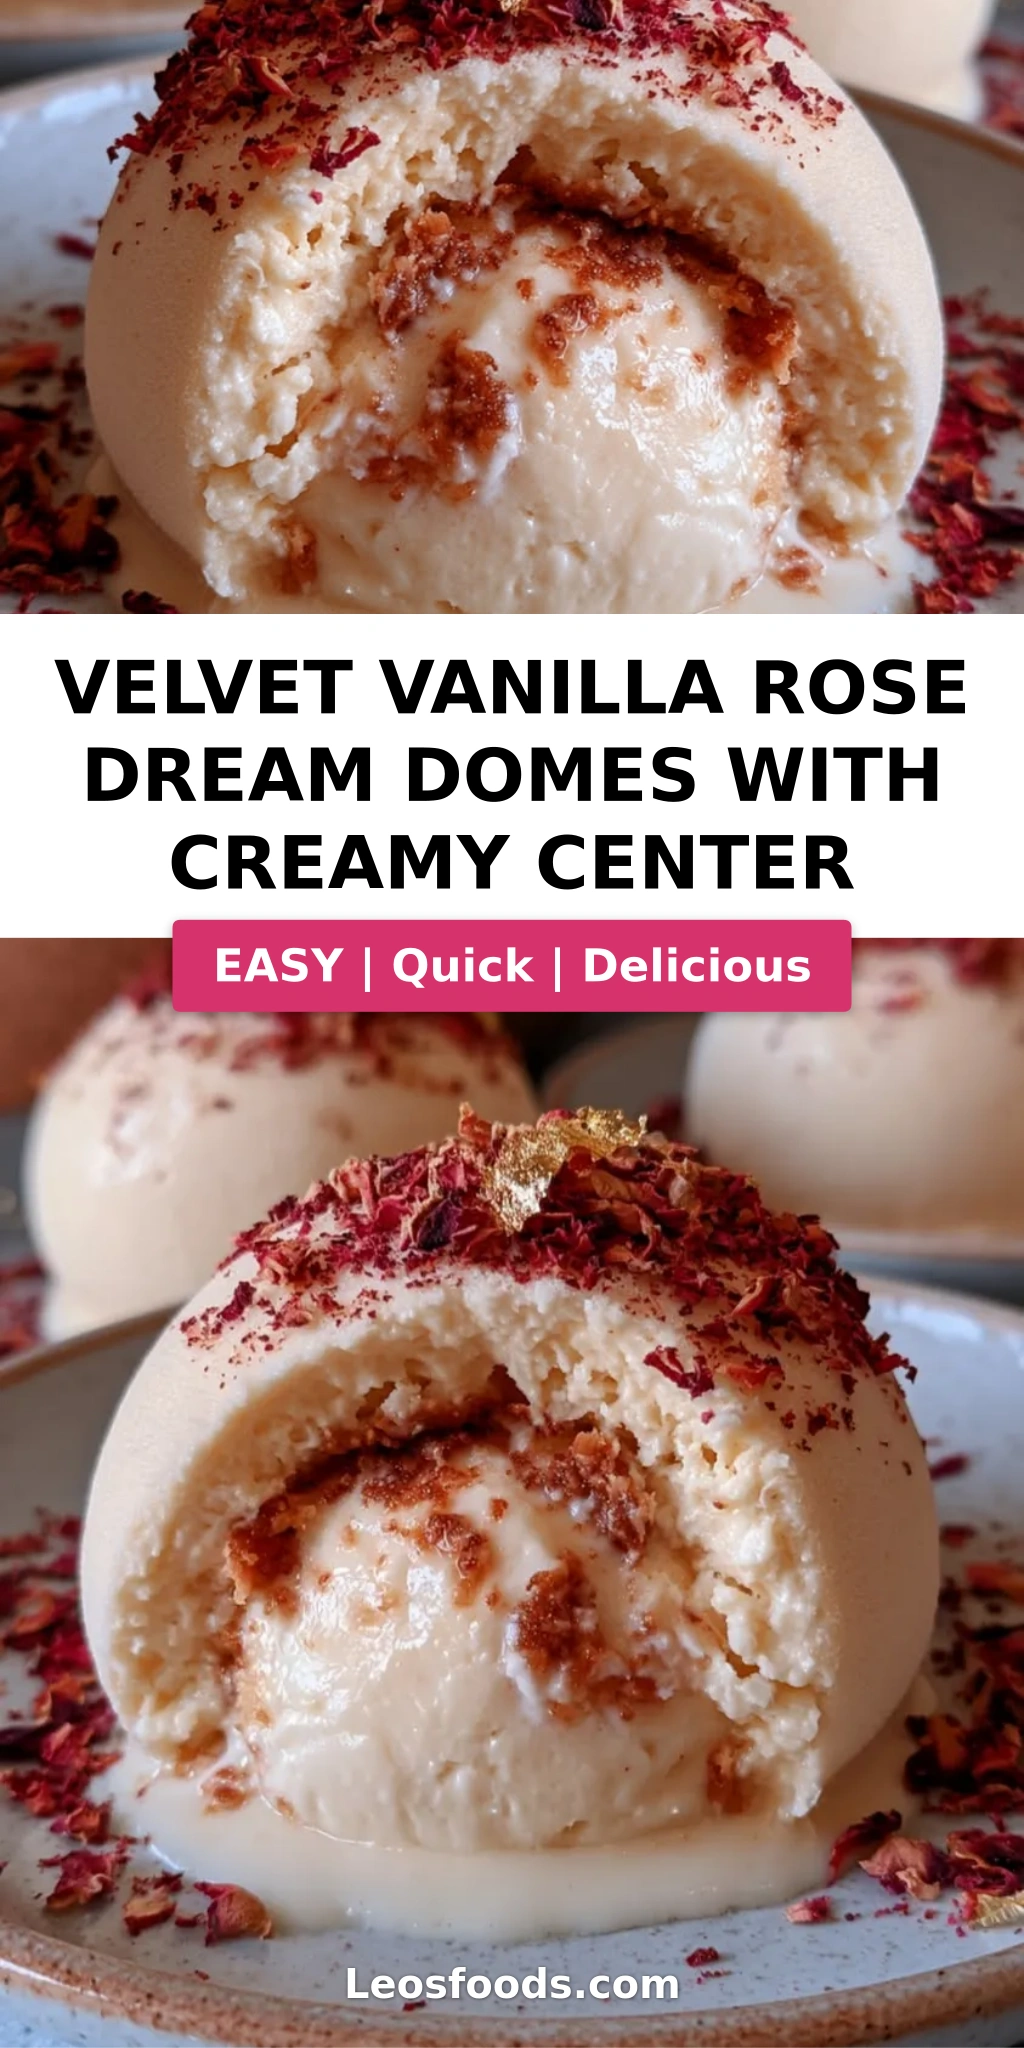
Let me describe the experience: your spoon cracks through a gossamer-thin shell of white chocolate velvet, then sinks into a mousse-like vanilla rose cheesecake that tastes like cold silk. Just when you think it can’t get better, you reach the center — a pillow of mascarpone cream that whispers of vanilla and clouds. The rose water doesn’t shout; it hums, the way my mother taught me to use floral flavors in Morocco. A squeeze of fresh lemon keeps everything bright, while the vanilla bean paste leaves those gorgeous little black specks that promise real flavor, not imitation. Every bite feels like a private moment in a Parisian pâtisserie, yet it all comes together in your own freezer.
I’ve tested this white chocolate dessert domes recipe eleven times in my tiny New York City apartment (much to my neighbors’ delight), and I’ve learned exactly where things go wrong: the gelatin can seize, the coating can crack, and the centers can freeze into solid ice cubes. So I’m sharing everything I know — the one technique that guarantees a velvet-smooth coating, the pro tip that keeps your creamy center dessert domes soft even after six hours in the freezer, and the common mistake that turns glossy domes into dull, cracked puddles. No oven required. Let’s freeze something beautiful — from my NYC kitchen to yours.
Why This Velvet Vanilla Rose Dream Domes Recipe Is the Best: The Hidden Creamy Center & Velvet Coating
The flavor secret is in the layering. Rose water is a notoriously shy ingredient — too much and it tastes like soap, too little and you might as well skip it. I use exactly one teaspoon of high-quality rose water, balanced by vanilla bean paste and a whisper of lemon juice. The lemon doesn’t taste like lemon; it simply wakes up the rose and keeps the cream cheese from feeling heavy. This is the same balance my mother used when making rose-scented sweets in Morocco, and it’s what makes this rose water dessert recipe taste genuinely refined rather than perfumey.
From a chef’s perspective, texture is what separates good desserts from unforgettable ones. The cheesecake dome is aerated with softly whipped cream, so it stays light and mousse-like even when frozen. The creamy center relies on mascarpone’s high butterfat content, which resists freezing into ice crystals — that’s the trick. And the coating combines white chocolate with cocoa butter and pearl luster dust, which keeps it thin, glossy, and crack-resistant. Every layer has a job, and every layer delivers.
Despite looking like something from a high-end French patisserie, these velvet vanilla rose dream domes come together without an oven, without a thermometer, and without any fancy equipment beyond a silicone mold and a whisk. The freezer does most of the heavy lifting. If you can beat cream cheese and fold whipped cream, you can make these creamy center dessert domes on a Tuesday night and serve them to guests on Wednesday. They’re elegant enough for a dinner party and simple enough for a beginner who wants to feel like a pastry chef.
Velvet Vanilla Rose Dream Domes Ingredients
Shopping for these ingredients in New York is one of my favorite rituals. I grab cream cheese and mascarpone from my local market, rose water from a Middle Eastern grocer on Atlantic Avenue, and white chocolate couverture from a specialty baking shop. In Morocco, my mother would have used freshly distilled rose water from the souk — that’s the gold standard. For this recipe, however, a good bottled rose water works beautifully, as long as it’s food-grade and contains just rose water and water.
Ingredients List
- For the Vanilla Rose Cheesecake Dome:
- 16 oz (450 g) cream cheese, softened
- 1/2 cup powdered sugar
- 1 tsp vanilla bean paste
- 1 tsp rose water
- 1 tbsp fresh lemon juice
- 1 cup heavy cream, whipped to soft peaks
- 2 tsp unflavored gelatin
- 2 tbsp cold water
- For the Creamy Center:
- 1/2 cup mascarpone cheese
- 1/4 cup heavy cream
- 2 tbsp powdered sugar
- 1/2 tsp vanilla extract
- For the White Velvet Coating:
- 7 oz (200 g) white chocolate, finely chopped
- 2 tbsp cocoa butter, melted
- White oil-based food coloring
- 1/2 tsp edible pearl luster dust
- For Garnish (optional):
- Dried edible rose petals
- White chocolate curls
- Edible gold leaf
Ingredient Spotlight
Rose Water: Rose water is the soul of this dish. Look for a bottle that lists only “rose water” or “rose hydrosol” as the ingredient. In the US, you’ll often find it in Middle Eastern markets or the international aisle of well-stocked grocery stores. The flavor should be fragrant but not harsh. If you only have rose extract or rose essence, use just 1/8 teaspoon — it’s far more concentrated, and you can always add more.
White Chocolate: For the coating, quality matters. Use white chocolate couverture or a premium white chocolate bar with at least 30% cocoa butter. White chocolate chips often contain stabilizers that make the coating thick and streaky. If you’re in the US, brands like Valrhona Ivoire or Callebaut are fantastic, but even a good supermarket bar without palm oil works. My tested substitution: white chocolate chips yield a thicker coat, so add an extra tablespoon of cocoa butter to keep it fluid.
Mascarpone: Mascarpone is the creamy center’s best friend. It’s a triple-cream Italian cheese with a high butterfat content, which is why it stays soft even when frozen. At US grocery stores, it’s usually sold in small tubs near the ricotta and mozzarella. If you can’t find it, you can substitute cream cheese whipped with a splash of heavy cream — it won’t be quite as luxurious, but it will still be delicious.
Gelatin: Unflavored gelatin is the structural glue that holds these rose cheesecake domes together. I use powdered gelatin (Knox is widely available in the US) and always bloom it in cold water before melting. The golden rule: never add bloomed gelatin to a hot mixture directly; temper it with a few spoonfuls of your cheesecake base first. For a vegetarian option, agar agar works, but the texture is slightly firmer and less silky.
Vanilla Bean Paste: Vanilla bean paste gives you those beautiful black specks and a deep, round vanilla flavor. It’s a splurge, but one bottle lasts forever. In this recipe, you can swap in an equal amount of pure vanilla extract, though you’ll lose the visual appeal of the specks. My favorite US brands are Nielsen-Massey and Heilala.
| Original Ingredient | Best Substitution | Flavor / Texture Impact |
|---|---|---|
| Rose water | 1/8 tsp rose extract; or 1 tsp orange blossom water | More intense floral; orange blossom adds a warm, honeyed aromatic instead |
| White chocolate couverture | White chocolate chips + 1 tbsp extra cocoa butter | Coat will be slightly thicker; still glossy if poured quickly |
| Mascarpone | 4 oz cream cheese whipped with 2 tbsp heavy cream | Richer and tangier; center will be slightly firmer |
| Unflavored powdered gelatin | 3 sheets leaf gelatin; or 1 tsp agar agar | Leaf gelatin: same result; agar: vegan, firmer, needs boiling to activate |
| Vanilla bean paste | 1 tsp pure vanilla extract | Loses black specks; flavor is equally warm and aromatic |
How to Make Velvet Vanilla Rose Dream Domes — Step-by-Step
Don’t let the elegant result intimidate you! Just follow these steps in order, keep your ingredients cold, and trust the freezer. In about seven hours you’ll have a dessert that looks like it came from a Michelin-starred kitchen.
Step 1: Make the Creamy Center
Whisk together 1/2 cup mascarpone cheese, 1/4 cup heavy cream, 2 tablespoons powdered sugar, and 1/2 teaspoon vanilla extract in a medium bowl until the mixture is smooth and holds a soft ribbon when you lift the whisk. Spoon the mixture into small silicone molds — I use a hemisphere mold with 1-inch cavities — and freeze until completely firm, about 2 to 3 hours. These little discs become the hidden treasure inside each dome.
💡 Stella’s Pro Tip: Spoon the mascarpone mixture into a piping bag first. That way you can fill the small molds neatly without air bubbles, and the centers come out perfectly round. If you only have one dome mold, you can use an ice cube tray lined with plastic wrap as a substitute — just make sure it goes in the freezer flat.
Step 2: Bloom the Gelatin
Sprinkle 2 teaspoons of unflavored gelatin over 2 tablespoons of cold water in a small heatproof bowl. Let it sit for 5 minutes until the granules absorb the water and look like a thick, translucent paste. This is called blooming — it ensures the gelatin dissolves evenly later when you add it to the cheesecake base.
⚠️ Common Mistake to Avoid: Don’t rush this step or use hot water. If you add bloomed gelatin straight into a cold mixture or into boiling liquid, it can become lumpy and never set properly. Cold water, five minutes of patience, and you’re golden.
Step 3: Beat the Cheesecake Base
In a large bowl, beat 16 oz (450 g) softened cream cheese, 1/2 cup powdered sugar, 1 teaspoon vanilla bean paste, 1 teaspoon rose water, and 1 tablespoon fresh lemon juice on medium speed until silky smooth with no lumps. Scrape the bottom and sides of the bowl at least once — cream cheese loves to hide there.
💡 Stella’s Pro Tip: Use room-temperature cream cheese! In a rush? Cut it into cubes and give it 20 minutes on the counter. A cold cream cheese mixture will be lumpy and never give you that velvety mousse texture.
Step 4: Dissolve the Gelatin into the Filling
Warm 2 tablespoons of the cheesecake mixture in a small saucepan or microwave-safe bowl until it’s just lukewarm — not hot. Add the bloomed gelatin to this warm mixture and stir until completely dissolved. Then fold the gelatin mixture back into the remaining cheesecake base, stirring continuously to distribute it evenly.
⚠️ Common Mistake to Avoid: If the gelatin hits a cold mixture directly, it will seize into jelly-like strings that ruin the texture. Always temper it with a small amount of the base first. And if you microwave, do it in 5-second bursts at 50% power to avoid scrambling the cream cheese.
Step 5: Fold in the Whipped Cream
In a separate bowl, whip 1 cup of cold heavy cream to soft peaks — the cream should just hold its shape when you lift the whisk, with slightly drooping peaks. Using a rubber spatula, gently fold the whipped cream into the rose cheesecake base in three additions. Fold slowly with a scoop-and-turn motion, rotating the bowl, until no white streaks remain.
💡 Stella’s Pro Tip: Soft peaks are the secret. If you over-whip the cream to stiff peaks, it’s harder to fold in and the mixture can deflate, giving you a dense dome instead of that airborne cloud texture.
Step 6: Fill the Dome Molds
Spoon or pipe the cheesecake mixture into your dome molds, filling each cavity halfway. Press a frozen creamy center into the middle — it should sink slightly below the surface. Cover with more cheesecake mixture, smoothing the tops with an offset spatula until they’re flat. Tap the mold gently on the counter to release air bubbles, then freeze for at least 6 hours or until completely solid.
⚠️ Common Mistake to Avoid: Make sure the frozen center is sitting in the middle, not touching the edges. If it touches the mold wall, you’ll end up with a domino of color in the coating at the end. And don’t skip the tapping — air bubbles at the edge of the mold create pockets that make the coating crack.
Step 7: Make the White Velvet Coating
Melt 7 oz (200 g) finely chopped white chocolate with 2 tablespoons melted cocoa butter in a heatproof bowl over a pot of barely simmering water (or in the microwave in 20-second bursts). Stir gently until smooth. Add a drop of white oil-based food coloring to intensify the whiteness, then stir in 1/2 teaspoon edible pearl luster dust for that shimmering velvet effect.
💡 Stella’s Pro Tip: White chocolate hates heat — don’t let it go above 110°F or it will seize into a dull, grainy paste. If you don’t have cocoa butter, you can use refined coconut oil, which keeps the coating fluid and gives it that beautiful click when you crack into it.
Step 8: Unmold the Frozen Domes
Once the domes are completely frozen, take the mold out of the freezer and flex the silicone gently. Pop each dome out with clean fingers, handling only the edges. You can use a small offset spatula to help release stubborn ones, but avoid touching the surface too much — your body heat can start melting the dome and leave fingerprints.
⚠️ Common Mistake to Avoid: Never use a knife to pry domes out of a silicone mold — you’ll gouge the surface and ruin the coating. If the mold is being stubborn, give it 2 minutes at room temperature, but no longer. The domes must stay rock-hard before coating.
Step 9: Coat the Domes
Set a wire rack over a baking tray lined with parchment paper. Working quickly, place a frozen dome upside down on the rack and pour the white velvet coating evenly over the top, letting it cascade down the sides. Use a small offset spatula to nudge the coating up the sides if needed, then gently lift the dome with the spatula and return it to the tray. Repeat with all domes.
💡 Stella’s Pro Tip: The coating should be around 75°F — warm but not hot. If it’s too hot, it will melt the dome; if it’s too cold, it will be too thick and goopy. You want a thin, even coat that sets in about 20 seconds. Any coating that drips onto the tray can be scraped up, remelted, and reused.
Step 10: Rest Before Serving
Transfer the coated domes to serving plates or a parchment-lined platter, then refrigerate for 20–30 minutes. This allows the coating to fully set and the interior to soften just slightly to a mousse-like texture. Don’t skip this step — the domes need those few minutes to reach the perfect temperature contrast between the crisp shell and the creamy center.
⚠️ Common Mistake to Avoid: If you leave them in the fridge for more than an hour, the coating can begin to sweat and the dome shape can slump. 20–30 minutes is the sweet spot. Straight from the freezer, on the other hand, they’ll be too firm and the flavor will be muted.
Step 11: Garnish and Serve
Just before serving, garnish each dome with crushed dried edible rose petals, white chocolate curls, and a small piece of edible gold leaf if you’re feeling fancy. Serve immediately with espresso, tea, or a glass of chilled dessert wine.
💡 Stella’s Pro Tip: Garnish at the very last moment! Rose petals and gold leaf look beautiful, but they’ll soften or tarnish if they sit on the glossy coating for too long. I like to garnish each plate individually before serving — it makes everyone feel extra special.
| Step | Action | Duration | Key Visual Cue |
|---|---|---|---|
| 1 | Make creamy center | 5 mins + 2–3 hrs freeze | Mascarpone mixture holds a soft ribbon |
| 2 | Bloom gelatin | 5 mins | Gelatin looks like thick translucent paste |
| 3 | Beat cheesecake base | 3–4 mins | Silky smooth, no lumps, pale cream color |
| 4 | Dissolve gelatin into filling | 2 mins | No granules remain; mixture is smooth |
| 5 | Fold in whipped cream | 3–5 mins | No white streaks; mixture is light and airy |
| 6 | Fill dome molds | 10 mins | Centers are fully covered; tops are smooth |
| 7 | Make white velvet coating | 5–7 mins | Coating is glossy and drips slowly from a spoon |
| 8 | Unmold frozen domes | 2–3 mins | Domes are rock-hard and release cleanly |
| 9 | Coat domes | 5–8 mins | Thin, even shell; coating sets in ~20 seconds |
| 10 | Rest in fridge | 20–30 mins | Coating is glossy; interior slightly softens |
| 11 | Garnish & serve | 2 mins | Petals and curls cling to the coating |
Serving & Presentation
These Velvet Vanilla Rose Dream Domes are the showstoppers of any dessert table. I love serving them on white ceramic plates with a few extra dried rose petals scattered around the edge like confetti. The contrast between the pure white dome, the pink petals, and the gold leaf is absolutely stunning — worthy of a Parisian pâtisserie window.
For a more casual gathering, serve them on a marble board with a bowl of fresh raspberries on the side. The slight tartness of the raspberries cuts through the richness beautifully. In my family’s Moroccan tradition, we’d serve these with mint tea poured from a height into small glasses — that theatrical flourish never fails to bring joy. If you’re in New York and want to impress without fuss, just add a sprig of fresh mint and a dusting of powdered sugar.
| Pairing Type | Suggestions | Why It Works |
|---|---|---|
| Side Dish | Fresh raspberries, lychee, or strawberries | Tart, bright fruit offsets the rich, creamy domes |
| Sauce / Dip | Raspberry coulis, salted caramel, white chocolate ganache | Sauces complement the velvet coating and rose notes |
| Beverage | Moroccan mint tea, jasmine tea, espresso, dessert wine | Fragrant tea or strong coffee balances the sweetness |
| Garnish | Dried rose petals, white chocolate curls, edible gold leaf, pistachio crumble | Adds color, texture contrast, and a professional finish |
Make-Ahead, Storage & Reheating
Life in New York moves fast, so I’m all about make-ahead desserts for dinner parties. You can prepare these rose cheesecake domes up to three days in advance and keep them in the freezer until the big moment. Just coat, rest, garnish, and serve. This is my favorite trick when I’m hosting a dinner party after a long day at work — the heavy lifting is already done.
| Method | Container | Duration | Reheating Tip |
|---|---|---|---|
| Refrigerator | Airtight container | 1–2 days | Let sit at room temp for 5 mins; garnish at the last minute |
| Freezer | Airtight container, parchment between layers | Up to 1 month | Remove from freezer, refrigerate 20–30 mins before serving; never microwave |
| Make-Ahead | Freeze uncoated domes | Up to 1 month | Coat the day of serving — coating over frozen domes gives the shiniest finish |
A word of caution from my own kitchen — once coated, these domes don’t love being frozen for more than 2–3 days, as the coating can absorb condensation and dull. If you’re storing them, freeze uncoated and coat the day you plan to serve. And never, ever microwave a dome to speed things up; use the fridge’s gentle chill instead. These white chocolate dessert domes are delicate, but treat them with kindness and they’ll reward you.
Variations & Easy Swaps
One of the things I love about this rose water dessert recipe is how easily it adapts to different moods, seasons, and dietary needs. Here are three of my favorite variations — each one tested in my NYC apartment and loved by my taste testers.
| Variation | Key Change | Best For | Difficulty Impact |
|---|---|---|---|
| Moroccan Orange Blossom Domes | Swap rose water for orange blossom water | A richer, warmer floral flavor | Same |
| Dairy-Free / Vegan Version | Vegan cream cheese, coconut cream, agar agar | Dairy-free guests | Slightly harder |
| Raspberry Rose Domes | Add raspberry coulis core or swirl | Berry lovers, summer gatherings | Same |
Variation 1: Moroccan Orange Blossom Domes
In Morocco, orange blossom water is as common as vanilla extract in the US. Swap the rose water with orange blossom water and you’ll get a deeper, honeyed floral note that’s absolutely gorgeous. Keep the vanilla bean paste — it plays beautifully with orange blossom. If you want to go full Moroccan, sprinkle crushed roasted almonds on top before serving. This variation reminds me of the pastries my mother used to make on warm Friday afternoons, and it pairs wonderfully with mint tea.
Variation 2: Dairy-Free / Vegan Version
For my dairy-free friends: use a high-quality vegan cream cheese (I like Miyoko’s or Violife), replace heavy cream with full-fat coconut cream, and swap the mascarpone center for a thick coconut cream-based pastry cream. Replace the gelatin with agar agar — dissolve 1 teaspoon agar agar in the warm base and bring it to a boil, then cool completely before folding in the coconut whipped cream. The texture is slightly firmer, but the creamy center dessert domes are still luscious and full of flavor. I’ve served this version at a friend’s birthday party and nobody noticed it was vegan until I told them.
Variation 3: Raspberry Rose Domes
Raspberries and rose are a classic pairing in French pastry for good reason. Make a quick raspberry coulis by simmering 1/2 cup raspberries with 2 tablespoons sugar until thick, then freeze the coulis in small discs and sandwich one between the cheesecake base and the creamy center. In the summer, I get beautiful raspberries at the Union Square Greenmarket and fold whole berries into the center for a burst of fresh, tart juice. The bright pink against the white velvet coating is simply stunning.
Frequently Asked Questions
What is the best way to make vanilla rose domes without a silicone mold?
If you don’t have a silicone dome mold, use a regular muffin tin lined with plastic wrap, a chocolate bonbon mold, or even a sturdy paper cupcake liner supported in a muffin tin. For larger domes, you can use a glass or stainless steel bowl. The key is to press the plastic wrap very snugly so there are no wrinkles, and to freeze the mixture until it’s opaque and rock-hard. For the creamy centers, an ice cube tray works perfectly. Just make sure the plastic wrap comes well above the edges so you can lift the domes out easily. A metal mold without flexible sides will be difficult, so if that’s all you have, freeze the mixture in a flat pan and cut rounds with a biscuit cutter.
Can I substitute the creamy center with a dairy-free or vegan alternative?
Yes, absolutely. Use full-fat coconut cream for the heavy cream and vegan cream cheese or extra-firm silken tofu blended until smooth for the mascarpone. For the sweetener, use powdered sugar — most commercial powdered sugar in the US contains cornstarch and is naturally vegan. The center will be a bit icier because coconut cream has lower butterfat than mascarpone, so for best results add 1 tablespoon of coconut oil or a teaspoon of agar agar to the center mixture. Freeze the centers solid, then assemble as directed. I’ve tested this vegan version for friends and it still disappeared in minutes.
How long do Velvet Vanilla Rose Dream Domes need to set in the freezer before serving?
The filled dome molds need at least 6 hours in the freezer to be completely solid. If you can, freeze them overnight for best results. The creamy centers alone need 2 to 3 hours to become firm enough to handle. Once coated, the domes should rest in the fridge for 20 to 30 minutes before serving to soften. So the total timeline depends on your schedule: make the centers in the morning, fill the domes at lunchtime, and by dinner the next day they’re ready. I usually say: morning centers, afternoon assembly, overnight freeze, and they’re perfect for the next day. The key is patience, but the payoff is a perfect creamy center dessert dome.
What can I use instead of rose water if I don’t have it on hand?
The closest substitute is orange blossom water, which is also floral and fragrant but has a warmer, honeyed note — use the same amount. If you don’t have orange blossom water, steep 1 teaspoon of dried culinary lavender in 2 tablespoons of warm cream for 10 minutes, strain, and use that in place of the rose water. Another option is 1/8 teaspoon rose extract mixed with 1 teaspoon of water, but taste carefully because rose extract is far more concentrated. Or simply skip the floral note entirely and increase the vanilla bean paste to 1 1/2 teaspoons for a classic vanilla cheesecake dome. Any of these swaps will still give you a gorgeous dessert with a creamy center.
Can I make these rose cheesecake domes ahead of time?
Yes, they’re perfect for make-ahead entertaining. You can assemble and freeze the domes up to 3 days in advance. The best strategy is to keep them uncoated in the freezer and apply the white velvet coating on the day you plan to serve — this guarantees the shiniest, glossiest finish. Once coated, the domes can rest in the refrigerator for 20–30 minutes before serving. If you’ve already coated them and need to store leftovers, put them in an airtight container in the fridge for up to 2 days (the coating may lose some gloss) or in the freezer for up to 2 weeks, packed between layers of parchment. I often prep the centers and cheesecake base the night before and assemble the next morning.
Why did my white chocolate coating crack?
Cracking in the coating is almost always caused by a temperature imbalance — either the coating was too thick and hot when poured, or the dome was too warm and soft. Your coating should be warm (about 75°F) but still fluid, much like warm maple syrup. If it’s too thick, add a bit more melted cocoa butter to thin it. Also, make sure the domes are completely frozen before coating and use quick, even pours. Touching the dome surface with your fingers causes melting, which creates a soft spot that the coating adheres to, then cracks. When in doubt, keep the domes on the wire rack and work in batches, returning unused domes to the freezer as you go.
Can I use regular vanilla extract instead of vanilla bean paste?
Yes, you can substitute 1 teaspoon of pure vanilla extract for the 1 teaspoon of vanilla bean paste without changing the flavor significantly. You will lose the beautiful black specks that make the filling look artisanal, but the vanilla flavor will be just as warm and aromatic. If you want the specks but only have vanilla extract, there’s a simple trick: split a vanilla bean, scrape the seeds, and stir them into the cream cheese base along with the extract. In the US, pure vanilla extract is widely available and affordable, especially at warehouse stores like Costco, which is where I get mine for everyday baking.
What is the difference between rose water and rose extract?
Rose water is a gentle floral liquid made by distilling rose petals in water — it’s aromatic but light, which makes it perfect for recipes like this one where the rose should whisper, not shout. Rose extract or rose essence is highly concentrated, often alcohol-based, and much stronger. If you use rose extract in place of rose water at a 1:1 ratio, your dessert will taste like soap. For this recipe, use 1 teaspoon of rose water or just 1/8 teaspoon of rose extract. I always buy rose water from a Middle Eastern market in Brooklyn, but you can also find it in the international aisle of most US grocery stores.
Can I make the creamy center with cream cheese instead of mascarpone?
Yes, you can, and the dessert will still be delicious. Use the same amount of full-fat cream cheese, but warm it to room temperature and add an extra 2 tablespoons of heavy cream to loosen it, since cream cheese is firmer and more tangy than mascarpone. The center will be slightly more cheesecake-like and a touch tangier, which pairs nicely with the rose and vanilla. Keep the powdered sugar at 2 tablespoons to avoid making it too sweet. My mascarpone-based center is richer and softer, but the cream cheese version is a great budget-friendly alternative for white chocolate dessert domes.
How do I get the domes out of the silicone mold without breaking them?
Patience and cold temperatures are your friends here. Don’t even try to unmold until the domes have been in the freezer for at least 6 hours, ideally overnight. Remove the mold from the freezer, set it on the counter for exactly 1–2 minutes, then gently flex the silicone toward you from the edges, pressing the bottom of each cavity outward. The dome should release with a soft pop. If a dome seems stuck, push up from the bottom through the fill hole — that almost always releases it. Handle each dome as little as possible and wear cloth gloves if necessary, because body heat will quickly soften the surface and leave fingerprints.
Share Your Version!
Now it’s your turn! These Velvet Vanilla Rose Dream Domes with Creamy Center are one of those desserts that looks impossibly fancy but is secretly quite forgiving. If you make them, I’d love to hear how they turned out. Leave a star rating below, tag @leosfoods in your Instagram photos, or share a picture on Pinterest with your notes. Your feedback helps me test and refine every recipe I publish, and I read each and every comment personally. Did the hidden creamy center work its magic? Did you try one of the variations?
Tell me: what’s your favorite memory of a dessert that looked too good to eat? I’m curious — is it a rose-scented pastry from childhood, a Parisian patisserie beauty, or something you discovered here in New York? Drop a comment below and let’s get the conversation started!
From my NYC kitchen to yours — I hope this recipe brings as much warmth to your table as it does to mine. — Stella 🧡
Love This Recipe? Save It to Pinterest!
If you enjoyed this Velvet Vanilla Rose Dream Domes with Creamy Center recipe, don’t let it get lost in your browser tabs! 😄 Pin it now so you can find it again anytime — and explore hundreds more tried-and-tested recipes waiting for you on my Pinterest boards.
👉 Follow Stella on Pinterest @stellarecipeblog
📌 Pin this recipe · 🔁 Re-pin your favorites · 💬 Tag me when you make it — I love seeing your creations!
💬 Have you ever made a dessert dome before? Whether it’s your first time or your fiftieth, I’d love to hear how these Velvet Vanilla Rose Dream Domes with Creamy Center turned out for you. Leave a comment below, rate the recipe, and share your photos with me on Pinterest!
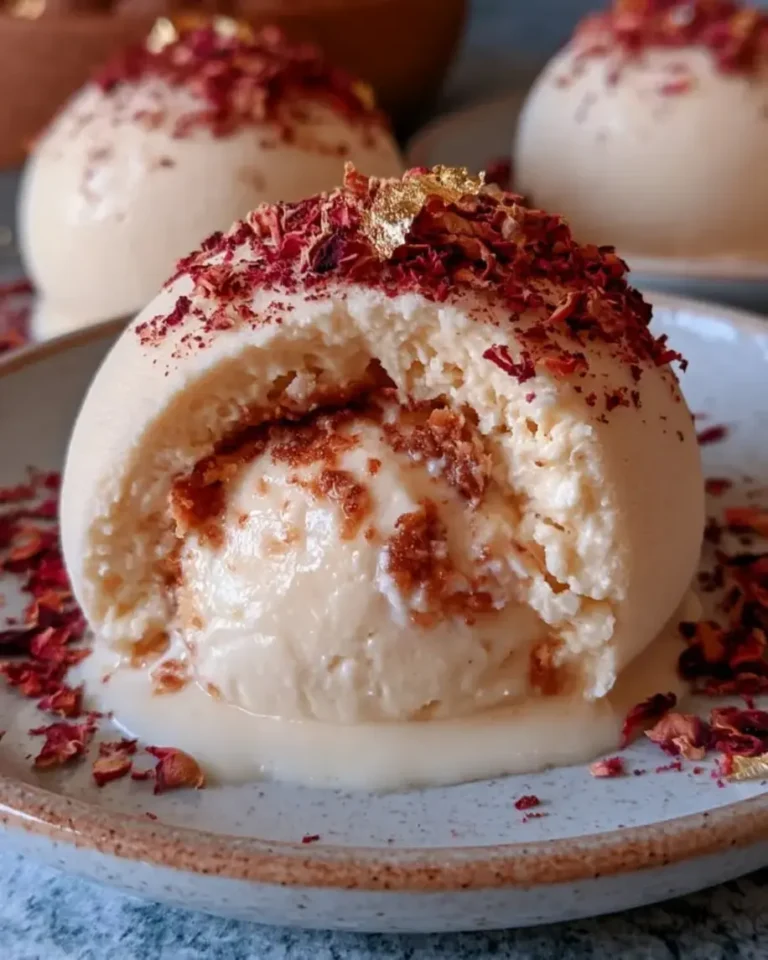
Velvet Vanilla Rose Dream Domes with Creamy Center
Velvet Vanilla Rose Dream Domes with Creamy Center
- Yield: 8 1x
Ingredients
- For the Vanilla Rose Cheesecake Dome:
- 16 oz (450 g) cream cheese, softened
- 1/2 cup powdered sugar
- 1 tsp vanilla bean paste
- 1 tsp rose water
- 1 tbsp fresh lemon juice
- 1 cup heavy cream, whipped to soft peaks
- 2 tsp unflavored gelatin
- 2 tbsp cold water
- For the Creamy Center:
- 1/2 cup mascarpone cheese
- 1/4 cup heavy cream
- 2 tbsp powdered sugar
- 1/2 tsp vanilla extract
- For the White Velvet Coating:
- 7 oz (200 g) white chocolate, finely chopped
- 2 tbsp cocoa butter, melted
- White oil-based food coloring
- 1/2 tsp edible pearl luster dust
- For Garnish (optional):
- Dried edible rose petals
- White chocolate curls
- Edible gold leaf
Instructions
- 1. Whisk together the mascarpone, heavy cream, powdered sugar, and vanilla extract until smooth. Spoon into small silicone molds and freeze until firm.
- 2. Bloom the gelatin for the cheesecake filling in the cold water for 5 minutes.
- 3. Beat the cream cheese, powdered sugar, vanilla bean paste, rose water, and lemon juice until silky smooth.
- 4. Warm 2 tablespoons of the cheesecake mixture and dissolve the bloomed gelatin into it. Stir back into the remaining filling.
- 5. Fold the whipped cream gently into the cheesecake mixture until light and airy.
- 6. Fill each dome mold halfway with the cheesecake mixture. Place a frozen creamy center in the middle and cover with the remaining filling. Smooth the tops and freeze for at least 6 hours or until completely solid.
- 7. Melt the white chocolate with the cocoa butter until smooth. Stir in the white food coloring and edible pearl luster dust.
- 8. Remove the frozen domes from the molds and place them on a wire rack over a baking tray.
- 9. Pour or spray the white velvet coating evenly over each frozen dome until fully covered.
- 10. Transfer the domes to serving plates and refrigerate for 20–30 minutes before serving.
- 11. Garnish with dried rose petals, white chocolate curls, and edible gold leaf.
Nutrition
- Calories: 415
- Sugar: 21 g
- Fat: 32 g
- Carbohydrates: 27 g
- Protein: 6 g
Tried This Recipe? Leave a Comment!
Did you make this recipe? I’d love to hear how it turned out! Please leave a comment and a rating below. Your feedback helps other home cooks and supports cheerychop.com!
For more delicious inspiration, follow me on Pinterest!