Stunning Diamond Strawberry Coconut Cheesecake Domes
“`html
Table of Contents
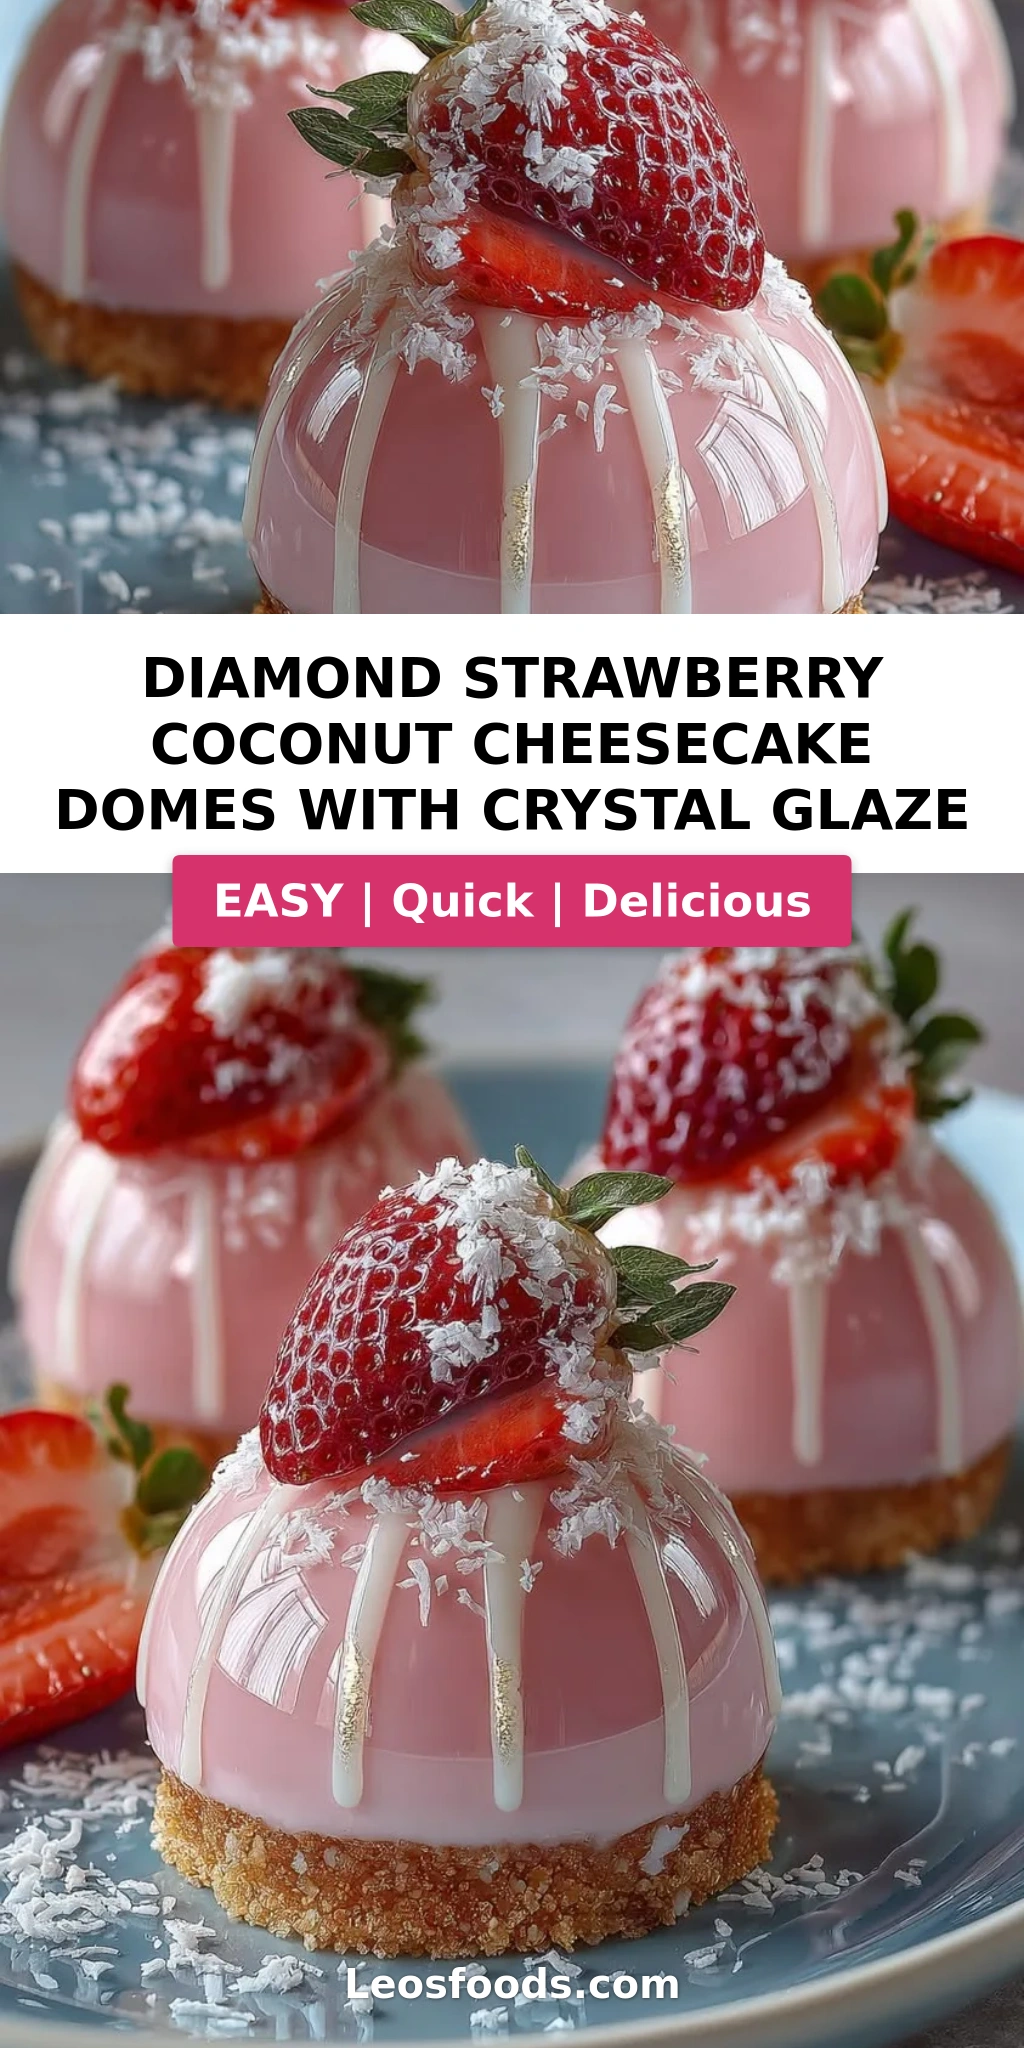
Diamond Strawberry Coconut Cheesecake Domes – A Gem of a Dessert
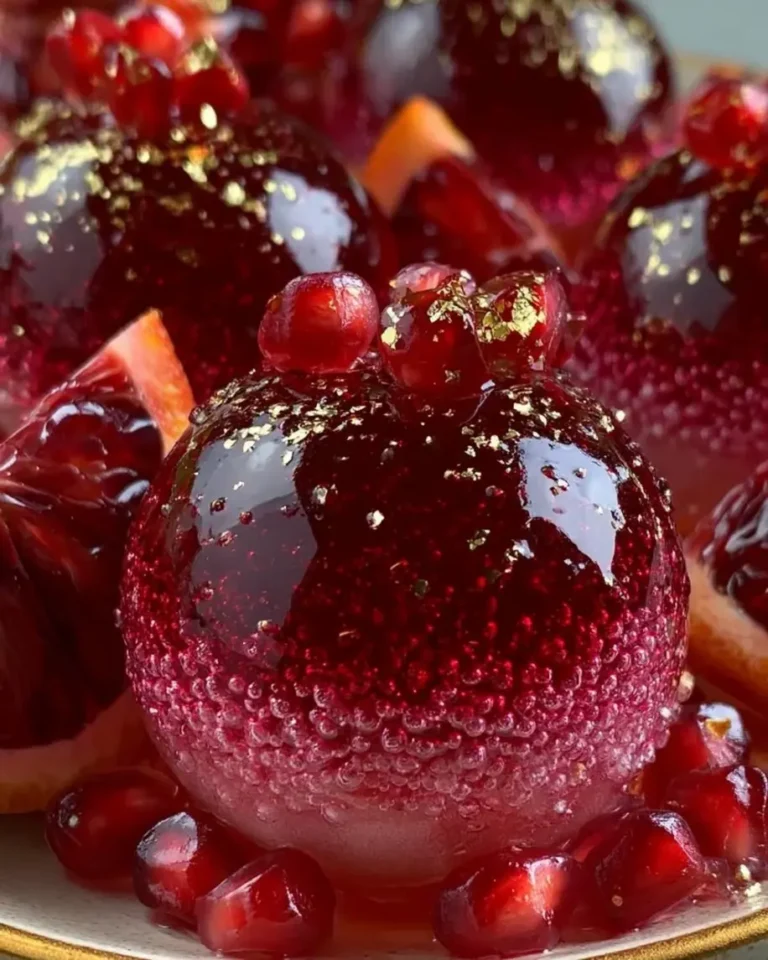
I still remember the first time I made these Diamond Strawberry Coconut Cheesecake Domes for a dinner party in my tiny Parisian kitchen. I was fresh out of culinary school, armed with more ambition than counter space, and I wanted to create something that looked like it belonged in a jewel box. The combination of a creamy coconut center hidden inside a strawberry cheesecake mousse, all draped in a shimmering crystal glaze, felt like the dessert equivalent of finding a diamond in the rough. That night, my guests didn’t just eat dessert — they gasped. And honestly? That sound never gets old.
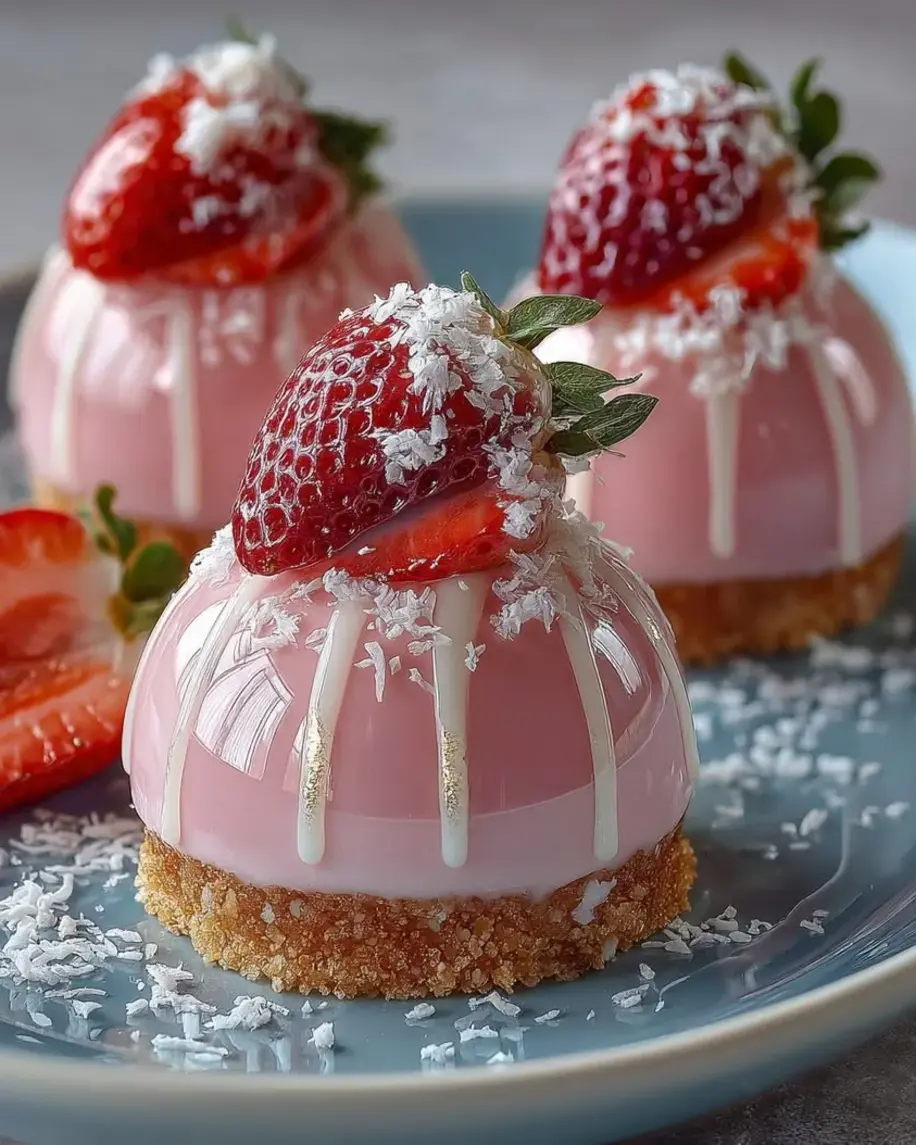
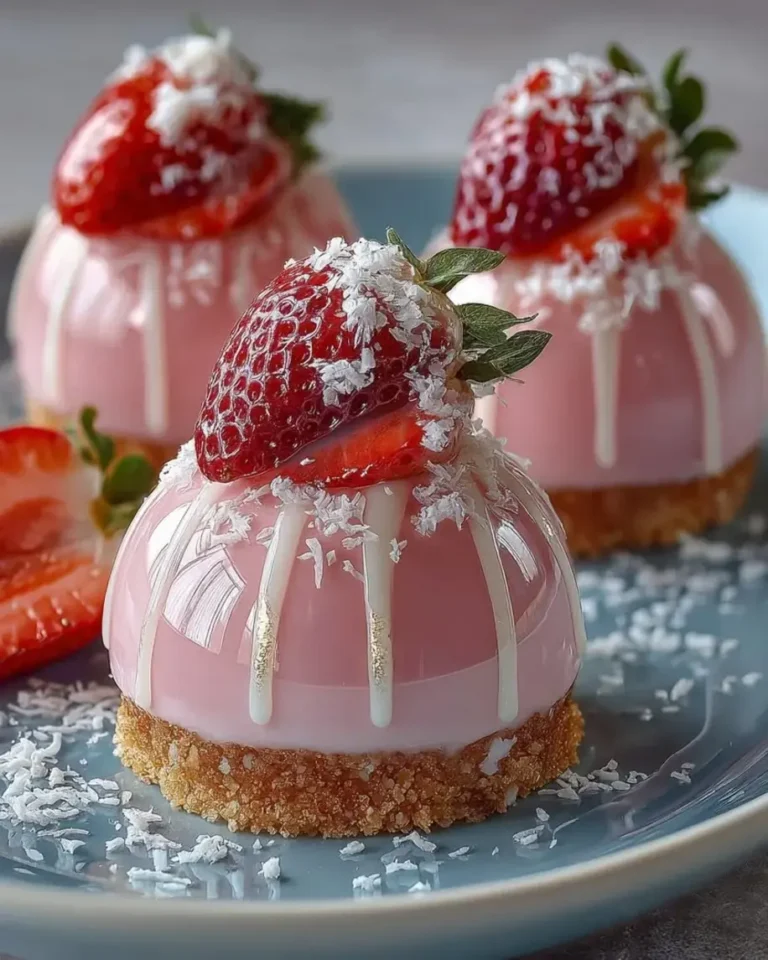
The first bite gives you that glossy, mirror-smooth crystal glaze that shatters ever so slightly against your teeth, then gives way to the lightest strawberry coconut mousse you’ve ever tasted. Hidden right in the center is a velvety coconut cheesecake heart — it’s like a little treasure waiting for you. The toasted coconut cookie base adds a nutty crunch that ties everything together. I’ve tested this recipe at least a dozen times to get that balance just right: sweet but not cloying, rich but still light enough that you’ll want a second one. The pearl shimmer dust in the glaze catches the light and makes every dome look like a gemstone on your plate.
What sets my version apart is the double coconut technique — I use both shredded coconut in the mousse and a concentrated coconut cream in the center filling, which gives you two distinct coconut experiences in every bite. The crystal glaze is where my French pastry training really shines: it’s a stabilized white chocolate mirror glaze that stays glossy even after chilling, thanks to gelatin and a precise temperature window. One common mistake I see home bakers make is rushing the glaze — if it’s too warm, it runs right off the dome and leaves bare patches. I’ll show you exactly how to nail it. Whether you’re making these for a birthday, a bridal shower, or just because you want to impress yourself on a Tuesday night, these domes are a showstopper.
Why This Diamond Strawberry Coconut Cheesecake Domes Recipe Is the Best
The Flavor Secret — I learned early in my career that coconut and strawberry are a match made in dessert heaven, but most recipes treat coconut as an afterthought. Here, coconut is woven into every layer: shredded coconut in the mousse for texture, coconut cream in the center for richness, and a toasted coconut cookie base for crunch. The strawberry puree is reduced just enough to concentrate its sweetness without becoming jammy, so it stays bright and fresh against the creamy coconut. This isn’t just a strawberry cheesecake with a sprinkle of coconut — it’s a true partnership where both flavors shine equally.
Perfected Texture — The biggest challenge with frozen domes is that they can taste icy or dense. My solution comes straight from my Paris pastry training: I stabilize the mousse with bloomed gelatin and fold in softly whipped cream at just the right stage. This gives you a mousse that’s light as air but still sliceable and creamy straight from the freezer. The coconut cheesecake center is frozen separately first, so it stays distinct and doesn’t blend into the mousse. The crystal glaze sets up as a thin, shiny shell that cracks beautifully when you cut into it — it’s texture on texture on texture, and every layer has a job to do.
Foolproof & Fast — Even though these domes look like they belong in a pastry case in Manhattan, the technique is surprisingly forgiving. The components can be made over two days, which takes the pressure off. The glaze comes together in about 10 minutes and pours like a dream. I’ve had beginner bakers in my NYC cooking classes nail these on their first try because the recipe is built with clear visual cues: the mousse is ready when it holds a ribbon, the glaze is ready when it coats the back of a spoon. If you can make a boxed cheesecake, you can absolutely make these diamond strawberry coconut cheesecake domes.
Diamond Strawberry Coconut Cheesecake Domes Ingredients
When I shop for ingredients for these crystal glaze cheesecake domes, I head straight to my favorite NYC farmers market in Union Square for the freshest strawberries, then grab the rest at my local Italian market. The quality of your ingredients matters here — especially the white chocolate for the glaze and the coconut cream. I always use full-fat cream cheese and coconut cream for the best texture; low-fat versions won’t set properly and can make the mousse weep.
Ingredients List
- For the Strawberry Coconut Cheesecake Mousse:
- 1 cup strawberry puree (from fresh or frozen strawberries)
- 8 oz cream cheese, softened
- 1/2 cup powdered sugar
- 1 cup heavy cream
- 1/2 cup shredded coconut (sweetened or unsweetened)
- 1 tsp vanilla extract
- 1 tbsp gelatin powder
- 3 tbsp warm water
- For the Coconut Cheesecake Center:
- 4 oz cream cheese, softened
- 1/4 cup powdered sugar
- 1/4 cup coconut cream (from a can of full-fat coconut milk)
- 2 tbsp heavy cream
- 1/2 tsp vanilla extract
- For the Crystal Glaze:
- 1 cup white chocolate, finely chopped
- 1/2 cup sweetened condensed milk
- 1 tbsp gelatin powder
- 3 tbsp warm water
- Pink food coloring, as needed
- Pearl shimmer dust, as needed
- For the Cookie Base:
- 1 cup coconut cookie crumbs (about 10-12 cookies)
- 3 tbsp melted butter
- 1 tbsp granulated sugar
- Pinch of salt
- For Garnish (optional):
- Fresh strawberry slices
- Toasted coconut flakes
- White chocolate shards
Ingredient Spotlight
Strawberry Puree — This is the backbone of your mousse, so make it count. I use fresh strawberries when they’re in season (June through August here in New York), but frozen strawberries work beautifully year-round. To make the puree, simply blend hulled strawberries until smooth, then strain through a fine-mesh sieve to remove the seeds. If you’re using frozen strawberries, thaw them first and drain off any excess liquid before blending. A good strawberry puree should be thick enough to coat the back of a spoon — if it’s too watery, your mousse won’t set properly.
Coconut Cream — This is not the same as cream of coconut (which is sweetened and used in cocktails). Coconut cream is the thick, rich layer that rises to the top of a can of full-fat coconut milk. I recommend chilling the can overnight so the cream solidifies and separates cleanly from the water. Scoop off the solid cream and leave the watery liquid behind. Coco Lopez and Thai Kitchen are my go-to brands for consistent results. If you can’t find coconut cream, you can substitute an equal amount of full-fat coconut milk solids, but the center will be slightly less rich.
White Chocolate for the Glaze — The quality of your white chocolate directly affects how glossy and smooth your crystal glaze will be. I use Valrhona Ivoire or Callebaut — these have a high cocoa butter content (at least 30%) that melts into a silky, mirror-like finish. Avoid white chocolate chips or candy melts; they contain stabilizers that can make the glaze grainy or dull. Finely chop your chocolate so it melts evenly. If you’re on a budget, Ghirardelli white chocolate bars work well — just make sure they’re real white chocolate with cocoa butter.
Gelatin Powder — This is your secret weapon for both the mousse and the glaze. I use powdered gelatin (Knox is my go-to brand) because it’s easy to measure and blooms evenly. The key is to sprinkle the gelatin powder over cold or room-temperature water (not warm) and let it sit for 5 minutes until it becomes firm and spongy. Then you gently warm it to dissolve. If you rush this step or use water that’s too hot, the gelatin can become stringy and won’t incorporate smoothly. For a vegetarian option, you can use agar agar, but the texture will be slightly firmer and less silky.
| Original Ingredient | Best Substitution | Flavor / Texture Impact |
|---|---|---|
| Strawberry puree | Raspberry or mixed berry puree | Tarter, more intense berry flavor; similar texture |
| Coconut cream | Full-fat coconut milk solids (chilled can) | Slightly less rich, but still creamy |
| White chocolate (for glaze) | High-quality white chocolate bars (Ghirardelli) | Slightly less glossy, still good shine |
| Gelatin powder | Agar agar (vegetarian) | Firmer set, less silky mouthfeel |
| Coconut cookie crumbs | Graham cracker crumbs + 1/4 cup toasted coconut | Less coconut flavor, still crunchy |
How to Make Diamond Strawberry Coconut Cheesecake Domes — Step-by-Step
Don’t let the number of steps intimidate you — this recipe is designed to flow logically, and each component can be made ahead. I’ll walk you through every stage with the exact visual cues I use in my NYC kitchen. Ready? Let’s make some magic.
Step 1: Bloom the Gelatin
In two small bowls, sprinkle 1 tablespoon of gelatin powder over 3 tablespoons of warm water for the mousse, and 1 tablespoon of gelatin over 3 tablespoons of warm water for the glaze. Let each sit undisturbed for 5 minutes. The gelatin will absorb the water and turn into a firm, jiggly mass — that’s exactly what you want. Do not stir it; just let it bloom. If you’re using a different brand of gelatin, check the bloom ratio on the package.
💡 Stella’s Pro Tip: Use warm water (about 100°F — just warmer than body temperature) for blooming. If the water is too hot, the gelatin will lose its setting power. If it’s too cold, it won’t bloom fully. Think warm bath water, not hot tea.
Step 2: Make the Strawberry Coconut Mousse Base
In a large bowl, beat 8 oz of softened cream cheese and 1/2 cup of powdered sugar together until completely smooth — about 2 minutes with a hand mixer. Scrape down the sides of the bowl. Add 1 cup of strawberry puree, 1/2 cup of shredded coconut, and 1 teaspoon of vanilla extract, and beat until fully combined. The mixture will look a little loose at this point — that’s fine. In a separate bowl, whip 1 cup of heavy cream to soft peaks (the cream should hold a gentle curl when you lift the whisk). Gently fold the whipped cream into the strawberry mixture in three additions, using a rubber spatula. Fold just until no white streaks remain.
⚠️ Common Mistake to Avoid: Over-whipping the cream or over-folding it will deflate the mousse and make it dense. Fold gently and stop as soon as the mixture is uniform. You want a light, airy texture, not a thick paste.
Step 3: Dissolve and Add Gelatin
Gently warm the bloomed gelatin for the mousse by placing the bowl in a shallow pan of hot water (or microwave for 5-second bursts). Stir until it becomes a clear, runny liquid. It should be warm but not hot — test it on your wrist; it should feel neutral, not warm. Immediately pour the dissolved gelatin into the mousse mixture while stirring continuously. Fold it in thoroughly so no streaks remain. The mousse will firm up as it sits, so work quickly at this stage.
💡 Stella’s Pro Tip: If the gelatin seizes up or becomes stringy when you add it, the mousse is still salvageable. Place the whole bowl over a pan of warm water and stir gently until the gelatin re-dissolves, then refrigerate for 10 minutes to re-set. I’ve saved many a mousse this way!
Step 4: Make the Coconut Cheesecake Center
In a medium bowl, beat 4 oz of cream cheese and 1/4 cup of powdered sugar until smooth. Add 1/4 cup of coconut cream, 2 tablespoons of heavy cream, and 1/2 teaspoon of vanilla extract. Beat until the mixture is thick, creamy, and completely smooth — about 2 minutes. Transfer the mixture to a piping bag fitted with a small round tip (or a zip-top bag with a corner snipped off). Pipe the mixture into small diamond-shaped silicone molds, filling each cavity about three-quarters full. Tap the molds gently on the counter to release any air bubbles. Freeze for at least 2 hours, or until completely firm.
⚠️ Common Mistake to Avoid: If the coconut cream and heavy cream are too cold, the mixture can seize and become grainy. Let the cream cheese and coconut cream come to room temperature before you start. If the mixture looks curdled, warm the bowl slightly by placing it in a pan of warm water and re-beating.
Step 5: Assemble the Domes
Fill each diamond dome mold halfway with the strawberry coconut mousse. Use a small offset spatula or the back of a spoon to spread it evenly up the sides. Remove the frozen coconut cheesecake centers from their molds and gently press one into the center of each dome mold, pushing it down slightly so it’s surrounded by mousse. Cover with the remaining mousse, smoothing the top so it’s flush with the edge of the mold. Freeze for at least 4 hours, or overnight, until completely solid. The domes must be frozen solid before glazing — this is non-negotiable for a smooth crystal glaze.
💡 Stella’s Pro Tip: Place the dome molds on a baking sheet before filling them. This makes it easy to transfer them to the freezer without spilling. If you don’t have dome molds, you can use a silicone muffin pan or even well-greased custard cups — the shape won’t be as perfect, but the flavor will be the same.
Step 6: Make the Crystal Glaze
In a heatproof bowl, combine 1 cup of finely chopped white chocolate and 1/2 cup of sweetened condensed milk. Place the bowl over a saucepan of simmering water (double-boiler method) and stir gently until the chocolate is completely melted and smooth. Remove from heat. Gently warm the bloomed gelatin for the glaze until it becomes a clear liquid, then stir it into the white chocolate mixture. Add pink food coloring one drop at a time until you reach your desired shade — I like a soft, pale rose. Finally, stir in the pearl shimmer dust until the glaze is glossy and smooth. The glaze should be fluid but not watery — it should coat the back of a spoon and hold a line for a second before flowing back together.
⚠️ Common Mistake to Avoid: If the glaze is too hot, it will melt the frozen domes on contact and create a bumpy, uneven surface. Let the glaze cool to about 90°F (just slightly warm to the touch) before pouring. If it thickens too much, gently re-warm it over hot water.
Step 7: Glaze the Domes
Remove the frozen domes from the molds and place them on a wire rack set over a baking sheet. Working quickly, pour the crystal glaze evenly over each dome, letting the excess drip onto the baking sheet. Start at the top and let the glaze flow down the sides — do not spread it with a spatula or you’ll lose the mirror finish. For full coverage, you may need to spoon a little extra glaze over any bare spots. Let the domes sit on the rack for 5 minutes to allow the glaze to set, then carefully transfer them to a parchment-lined baking sheet.
💡 Stella’s Pro Tip: Use a small offset spatula or a palette knife to lift each glazed dome off the rack — it gives you more control than using your fingers and won’t smudge the glaze. If you see any fingerprints, gently dab them with a paper towel dipped in warm water.
Step 8: Make the Cookie Base
In a small bowl, combine 1 cup of coconut cookie crumbs, 3 tablespoons of melted butter, 1 tablespoon of granulated sugar, and a pinch of salt. Stir until the mixture resembles wet sand and holds together when pressed. Press the mixture firmly into diamond-shaped cookie cutters or small ring molds set on a parchment-lined baking sheet. You want a compact, even layer about 1/4-inch thick. Freeze for 15 minutes to firm up.
⚠️ Common Mistake to Avoid: If the cookie base is too crumbly and won’t hold together, add another teaspoon of melted butter. If it’s too greasy, add a tablespoon more cookie crumbs. The texture should be like a slightly damp sand that clumps when squeezed.
Step 9: Assemble and Garnish
Place each glazed dome onto a prepared cookie base, pressing gently so it adheres. Garnish with fresh strawberry slices, toasted coconut flakes, and white chocolate shards. The contrast of the glossy pink dome against the crunchy toasted coconut and bright strawberry is absolutely stunning. Chill the assembled domes for 15 minutes before serving — this allows the cookie base to soften slightly and the flavors to meld.
💡 Stella’s Pro Tip: For the prettiest presentation, arrange the garnishes in a small cluster near the base of the dome rather than covering the entire surface. You want the crystal glaze to be the star of the show — the garnishes are just the supporting cast.
| Step | Action | Duration | Key Visual Cue |
|---|---|---|---|
| 1 — Bloom gelatin | Sprinkle gelatin over warm water | 5 minutes | Firm, jiggly, sponge-like mass |
| 2 — Mousse base | Beat cream cheese, add puree, fold in cream | 10 minutes | Smooth, uniform pink, holds a ribbon |
| 3 — Add gelatin | Warm and fold into mousse | 2 minutes | No streaks, mousse thickens slightly |
| 4 — Coconut center | Beat and pipe into diamond molds | 10 mins + 2 hrs freeze | Firm to the touch, holds shape |
| 5 — Assemble domes | Fill molds, add center, cover with mousse | 15 mins + 4 hrs freeze | Solid, no give when pressed |
| 6 — Crystal glaze | Melt chocolate, add condensed milk, gelatin, color, shimmer | 10 minutes | Glossy, smooth, coats spoon, ~90°F |
| 7 — Glaze domes | Pour glaze over frozen domes | 5 minutes | Smooth, mirror finish, no bare spots |
| 8 — Cookie base | Mix crumbs, butter, sugar, press into shapes | 10 mins + 15 mins freeze | Holds together firmly, compact layer |
| 9 — Assemble & garnish | Place dome on base, add garnishes | 15 mins | Beautiful, jewel-like presentation |
Serving & Presentation
These Diamond Strawberry Coconut Cheesecake Domes are made to be the centerpiece of your dessert table. I like to serve them on a large white platter or individual mirror plates so the crystal glaze can really shine. For a dinner party, I place each dome on a small dessert plate with a few fresh strawberry slices fanned out to one side and a tiny pile of toasted coconut flakes on the other. The key is to let the dome be the hero — don’t overcrowd the plate.
In my NYC apartment, I often serve these with a side of lightly whipped cream (unsweetened, to balance the sweetness) and a small glass of cold rosé or a strawberry-rhubarb shrub cocktail. The acidity in the drink cuts through the richness of the cheesecake and coconut beautifully. If you’re serving these at a brunch, a pot of strong coffee or a London Fog latte is perfect. And if you’re feeling extra festive, drizzle a little extra crystal glaze over the plate and drag a toothpick through it to create a feathered design — it’s a classic French plating technique that never fails to impress.
One of my favorite ways to serve these is on a bed of edible flowers and fresh mint leaves — it reminds me of the garden parties my mother used to host in Morocco, where the dessert table was always the most colorful part of the spread. The domes can be made fully in advance and kept in the freezer, so you can pull them out and glaze them just before serving. Just remember to let them sit at room temperature for about 5 minutes after glazing so the cookie base softens slightly — it makes the first bite much easier to cut through.
| Pairing Type | Suggestions | Why It Works |
|---|---|---|
| Side Dish | Fresh berries, mint salad, coconut sorbet | Brightens the plate, adds freshness, echoes coconut |
| Sauce / Dip | Strawberry coulis, passion fruit sauce, caramel drizzle | Adds acidity or sweetness to balance richness |
| Beverage | Rosé, Champagne, strawberry shrub cocktail, coffee | Acidity cuts fat; coffee complements chocolate notes |
| Garnish | Edible flowers, mint sprigs, gold leaf, toasted coconut | Adds visual pop and textural contrast |
Make-Ahead, Storage & Reheating
One of the best things about these diamond strawberry coconut cheesecake domes is how well they work for make-ahead entertaining. I often prepare the components over two days in my NYC kitchen: I make the coconut centers and mousse on Friday, assemble the domes and freeze them overnight, then glaze and garnish on Saturday just before guests arrive. The domes can be stored in the freezer (unglazed) for up to two weeks, which makes this recipe a lifesaver for holiday parties and special occasions.
| Method | Container | Duration | Reheating Tip |
|---|---|---|---|
| Refrigerator | Covered container, parchment between layers | Up to 3 days (glazed) | Serve cold — no reheating needed |
| Freezer | Airtight container, wax paper between layers | Up to 2 weeks (unglazed) | Thaw in fridge 1 hr, then glaze and serve |
| Make-Ahead | Freeze domes unglazed on baking sheet, then wrap | Up to 5 days in advance (glaze day-of) | Glaze directly from frozen — no need to thaw |
If you’re storing glazed domes in the refrigerator, place them in a single layer in an airtight container with a piece of parchment paper between each dome. The glaze will stay glossy for up to three days, though the cookie base will soften slightly over time. To restore the crunch, you can carefully lift the dome off the base and toast the base separately in a 350°F oven for 3-4 minutes, then reattach. For frozen unglazed domes, simply remove them from the freezer, glaze them directly (the cold surface helps the glaze set quickly), and let them sit in the fridge for 15 minutes before serving. Never microwave these domes — the glaze will melt and the mousse will become watery.
Variations & Easy Swaps
| Variation | Key Change | Best For | Difficulty Impact |
|---|---|---|---|
| Moroccan Spice Twist | Add 1 tsp rose water + 1/4 tsp cinnamon to mousse | Exotic flavor, special occasions | No change |
| Vegan / Dairy-Free | Use cashew cream instead of cream cheese, coconut cream instead of heavy cream, and vegan white chocolate | Plant-based diets, dairy allergies | Medium — texture is slightly different |
| Mango-Passion Fruit | Replace strawberry puree with mango puree, add passion fruit pulp to glaze | Summer entertaining, tropical theme | No change |
Moroccan Spice Twist
This variation is my personal tribute to my mother’s kitchen in Morocco. Add 1 teaspoon of rose water and 1/4 teaspoon of ground cinnamon to the strawberry coconut mousse along with the vanilla extract. The rose water perfumes the mousse in a way that feels both exotic and familiar, while the cinnamon adds a warm, earthy note that complements the coconut beautifully. For the glaze, skip the pink food coloring and leave it white, then sprinkle a tiny pinch of edible gold dust on top — it’s like wearing a jewel from the medina. This version is always a hit at my holiday parties.
Vegan / Dairy-Free Version
For a fully plant-based version, substitute the cream cheese with a thick cashew cream (soak 1 cup of cashews overnight, blend with 1/4 cup of water, 1 tablespoon of lemon juice, and a pinch of salt until smooth). Replace the heavy cream with full-fat coconut cream (the solid part from a chilled can of coconut milk — use the same coconut cream for the center). Use vegan white chocolate for the glaze (many brands are now available at Whole Foods and specialty markets). The texture will be slightly less airy and a touch denser, but the flavor is still incredible. I’ve tested this version for my dairy-free friends in NYC and it gets rave reviews every time.
Mango-Passion Fruit Twist
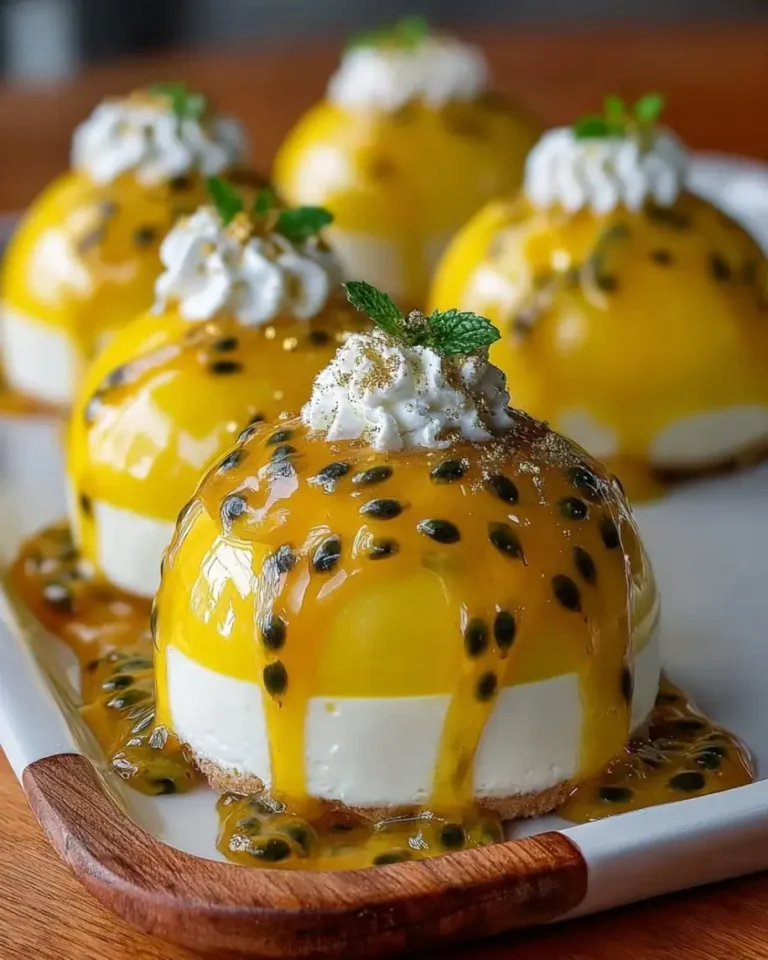
When strawberries aren’t in season, I turn to mangoes and passion fruit — a combination that reminds me of the tropical fruit markets I used to visit in Paris. Replace the strawberry puree with mango puree (from fresh or frozen mangoes, blended and strained). For the crystal glaze, reduce the pink food coloring and add 2 tablespoons of passion fruit pulp (seeds and all) along with the condensed milk. The tangy passion fruit cuts through the sweetness of the white chocolate and creates a stunning orange-gold glaze with visible black seeds that look like edible confetti. This version is perfect for bridal showers and summer garden parties.
What is the best way to achieve a glossy crystal glaze for strawberry cheesecake domes?
The secret to a mirror-smooth crystal glaze lies in three things: temperature, straining, and patience. First, make sure your white chocolate is finely chopped and your gelatin is fully bloomed — this ensures smooth melting. After combining the glaze ingredients, strain it through a fine-mesh sieve into a clean bowl to remove any lumps. The glaze should be at exactly 90°F when you pour it — too hot and it will melt the dome, too cold and it will thicken and lump up. Use an instant-read thermometer to check. Pour the glaze over the frozen dome in one steady stream, starting at the top and letting it flow naturally down the sides. Don’t touch it with a spatula. The frozen surface will cause the glaze to set instantly, creating that mirror finish. If you see any bubbles, gently pop them with a toothpick before the glaze sets.
Can I use frozen strawberries in the filling for diamond strawberry coconut cheesecake domes?
Absolutely — frozen strawberries work wonderfully in this recipe, especially when fresh strawberries aren’t in season. The key is to thaw them completely first, then drain off any excess liquid before blending. Frozen strawberries tend to release more water than fresh, so after blending the puree, you may need to simmer it in a small saucepan over medium heat for 5-7 minutes to reduce and concentrate the flavor. Let the reduced puree cool completely before adding it to the cream cheese mixture. If you skip the reduction step, your mousse could end up too watery and won’t set properly. I actually prefer frozen strawberries in the winter months — they’re picked at peak ripeness and often have more flavor than the pale, out-of-season fresh berries you find in grocery stores.
How do you make the diamond-shaped decoration on strawberry coconut cheesecake domes?
The diamond shape comes from using diamond-shaped silicone molds for both the coconut cheesecake center and the outer dome. I use a set of diamond-shaped ice cube molds (available at most kitchen supply stores or online) for the centers, and larger diamond-shaped dome molds for the outer layer. If you don’t have diamond molds, you can still create the look by using round dome molds and then cutting the glazed domes into diamond shapes with a warm, sharp knife after they’re frozen. Another option is to press a diamond-shaped cookie cutter into the top of each dome after glazing to create an impression. For the most professional result, invest in a set of diamond silicone molds — they’re reusable and give you that perfect faceted look every time.
How far in advance can I prepare strawberry coconut cheesecake domes before serving?
You can prepare these domes up to two weeks in advance if you store them unglazed in the freezer. Here’s my recommended timeline: Make the coconut cheesecake centers and freeze them in their molds (2 days ahead). Assemble the domes with the mousse and freeze them solid (up to 2 days ahead). On the day you plan to serve them, make the crystal glaze, pour it over the frozen domes, attach the cookie bases, and garnish. The glazed domes can be refrigerated for up to 3 days after glazing, but the glaze is most glossy and dramatic within the first 24 hours. For the absolute best presentation, I recommend glazing no more than 6 hours before serving. The cookie bases should be made fresh on the day of serving for maximum crunch.
Can I make these domes without a silicone mold?
Yes, you can still make these domes without specialized silicone molds, though the shape will be slightly different. For the dome shape, you can use a standard 12-cup muffin tin — just grease the cups well with nonstick spray or line them with plastic wrap for easier removal. Fill each cup with the mousse and a frozen coconut center, then freeze as directed. The resulting shape will be more of a rounded muffin top than a perfect dome, but the flavor will be identical. For the diamond-shaped decoration, you can create a stencil using cardstock and sprinkle powdered sugar or cocoa powder over the top after glazing. Or simply top each dome with a diamond-shaped white chocolate shard made by spreading melted white chocolate on a parchment-lined baking sheet and cutting it into diamonds once set.
Why did my crystal glaze turn out cloudy instead of glossy?
A cloudy crystal glaze is usually caused by one of three issues: temperature, humidity, or undissolved gelatin. If the glaze was too cold when poured (below 85°F), the fats in the white chocolate can seize and create a dull, streaky finish. Always use a thermometer and aim for exactly 90°F. If the room is very humid (above 70% humidity), the sugar in the glaze can absorb moisture from the air and bloom into a white, hazy layer — this is called “sugar bloom” and is common in summer kitchens. Try glazing on a dry day or run a dehumidifier in your kitchen. Finally, make sure your gelatin is fully dissolved before adding it to the glaze — any undissolved granules will scatter light and create a cloudy appearance. Strain the glaze through a fine-mesh sieve as a final safeguard.
Can I use regular cream cheese instead of full-fat for the mousse and center?
I strongly recommend using full-fat cream cheese for this recipe. The fat content is essential for creating a stable, creamy mousse that sets properly and doesn’t become watery as it thaws. Low-fat or Neufchâtel cream cheese has a higher water content, which can cause the mousse to weep or become grainy, especially after freezing and thawing. The coconut cheesecake center is particularly affected because it’s frozen directly and needs to hold its shape against the mousse. If you absolutely must use reduced-fat cream cheese, you’ll need to increase the gelatin by 1/2 teaspoon to compensate for the extra moisture. But honestly, for a special occasion dessert like this, I say go for the full-fat version — the texture and flavor are noticeably superior.
What can I use instead of coconut cookies for the base?
If you can’t find coconut cookies, you have several excellent options. My favorite substitute is a mixture of graham cracker crumbs and toasted shredded coconut — use 3/4 cup of graham cracker crumbs plus 1/4 cup of toasted coconut, and reduce the sugar to 2 teaspoons since graham crackers are already sweet. Another option is shortbread cookies (like Walkers) blended with a little coconut extract for flavor. For a nutty twist, use Biscoff cookies or speculoos — their caramelized flavor pairs beautifully with strawberry and coconut. If you’re gluten-free, use gluten-free graham crackers or gluten-free shortbread. Just adjust the butter as needed: the mixture should feel like wet sand that holds together when pressed. No matter which base you choose, toast the crumbs in a 350°F oven for 5-7 minutes first for deeper flavor.
How do I prevent the cookie base from getting soggy?
A soggy cookie base is usually caused by moisture migrating from the frozen dome into the crumb crust. To prevent this, I do two things. First, I brush the top of each cookie base with a thin layer of melted white chocolate before attaching the dome — this creates a waterproof barrier that seals the crumbs. Second, I make sure the domes are fully frozen (at least 4 hours) before placing them on the bases. If there’s any softness in the mousse, it will seep into the cookie base. Finally, I recommend assembling the domes onto their bases no more than 2 hours before serving. If you’re making them ahead, keep the domes and bases separate and assemble just before serving. A final 15-minute chill after assembly helps everything set without the base becoming soggy.
Can I use a different fruit instead of strawberry in this recipe?
Absolutely — this recipe is incredibly versatile and works beautifully with many fruits. Raspberry and mango are my top two alternatives. For raspberries, use 1 cup of raspberry puree (fresh or frozen, strained to remove seeds) and add 1 tablespoon of lemon juice to brighten the flavor. The tartness of raspberries contrasts beautifully with the sweet coconut. For mangoes, use 1 cup of mango puree (from fresh or frozen mangoes) and reduce the powdered sugar to 1/3 cup since mangoes are naturally very sweet. You can also try passion fruit (use 1/2 cup of passion fruit pulp plus 1/2 cup of mango puree for balance), or a mixed berry combination. Whatever fruit you choose, make sure the puree is thick and concentrated — if it’s too watery, simmer it down until it coats the back of a spoon before using.
Share Your Version!
I absolutely love seeing how you make these Diamond Strawberry Coconut Cheesecake Domes your own. Did you try the Moroccan spice twist with rose water and cinnamon? Or maybe you went all out with the mango-passion fruit variation? Drop a comment below and let me know how it turned out — your feedback helps me create better recipes for you, and it also helps other home bakers who are thinking about trying this recipe. If you’d like, rate the recipe with a star rating too — it only takes a second and it makes a huge difference in helping others find this post.
Snap a photo of your finished domes and share it on Instagram or Pinterest — tag me @leosfoods and use #StellasDiamondDomes so I can see your handiwork. I feature my favorites on my stories every month! And if you have a question about any step in the process, ask away in the comments. I read every single one and I’ll answer personally. From my NYC kitchen to yours — I hope this recipe brings as much warmth to your table as it does to mine. — Stella 🧡
Love This Recipe? Save It to Pinterest!
If you enjoyed this Diamond Strawberry Coconut Cheesecake Domes recipe, don’t let it get lost in your browser tabs! 😄 Pin it now so you can find it again anytime — and explore hundreds more tried-and-tested recipes waiting for you on my Pinterest boards.
👉 Follow Stella on Pinterest @stellarecipeblog
📌 Pin this recipe · 🔁 Re-pin your favorites · 💬 Tag me when you make it — I love seeing your creations!
💎 Did you make these Diamond Strawberry Coconut Cheesecake Domes?
I’d love to hear how they turned out! Drop a comment below with your star rating, your favorite variation, or any questions — I personally read and reply to every one. 🧡
“`
Print
Diamond Strawberry Coconut Cheesecake Domes with Crystal Glaze
An elegant and visually stunning dessert featuring strawberry coconut cheesecake mousse with a creamy coconut center, encased in a shimmering crystal glaze, served on a coconut cookie base.
- Yield: 8 1x
Ingredients
- For the Strawberry Coconut Cheesecake Mousse:
- 1 cup strawberry puree
- 8 oz cream cheese, softened
- 1/2 cup powdered sugar
- 1 cup heavy cream
- 1/2 cup shredded coconut
- 1 tsp vanilla extract
- 1 tbsp gelatin powder
- 3 tbsp warm water
- For the Coconut Cheesecake Center:
- 4 oz cream cheese, softened
- 1/4 cup powdered sugar
- 1/4 cup coconut cream
- 2 tbsp heavy cream
- 1/2 tsp vanilla extract
- For the Crystal Glaze:
- 1 cup white chocolate, finely chopped
- 1/2 cup sweetened condensed milk
- 1 tbsp gelatin powder
- 3 tbsp warm water
- Pink food coloring, as needed
- Pearl shimmer dust, as needed
- For the Cookie Base:
- 1 cup coconut cookie crumbs
- 3 tbsp melted butter
- 1 tbsp granulated sugar
- Pinch of salt
- For Garnish (optional):
- Fresh strawberry slices
- Toasted coconut flakes
- White chocolate shards
Instructions
- 1. Bloom gelatin in warm water and let stand for 5 minutes.
- 2. Beat cream cheese and powdered sugar until smooth.
- 3. Mix in strawberry puree, shredded coconut, and vanilla extract.
- 4. Whip heavy cream to soft peaks and fold into the strawberry mixture.
- 5. Stir in dissolved gelatin until fully incorporated.
- 6. In a separate bowl, beat cream cheese, powdered sugar, coconut cream, heavy cream, and vanilla until smooth.
- 7. Pipe the coconut cheesecake mixture into small diamond-shaped molds and freeze until firm.
- 8. Fill diamond dome molds halfway with the strawberry coconut mousse.
- 9. Place a frozen coconut cheesecake center into each mold.
- 10. Cover with remaining mousse and freeze until completely firm.
- 11. Combine white chocolate, condensed milk, dissolved gelatin, pink food coloring, and pearl shimmer dust until smooth and glossy.
- 12. Unmold the frozen domes and place on a wire rack.
- 13. Pour the crystal glaze evenly over each dome.
- 14. Mix cookie crumbs, melted butter, sugar, and salt, then press into diamond-shaped bases.
- 15. Place each glazed dome onto a prepared base.
- 16. Garnish with fresh strawberry slices, toasted coconut flakes, and white chocolate shards.
- 17. Chill for 15 minutes before serving.
Nutrition
- Calories: 440
- Sugar: 33 g
- Fat: 30 g
- Carbohydrates: 39 g
- Protein: 6 g
Tried This Recipe? Leave a Comment!
Did you make this recipe? I’d love to hear how it turned out! Please leave a comment and a rating below. Your feedback helps other home cooks and supports cheerychop.com!
For more delicious inspiration, follow me on Pinterest!