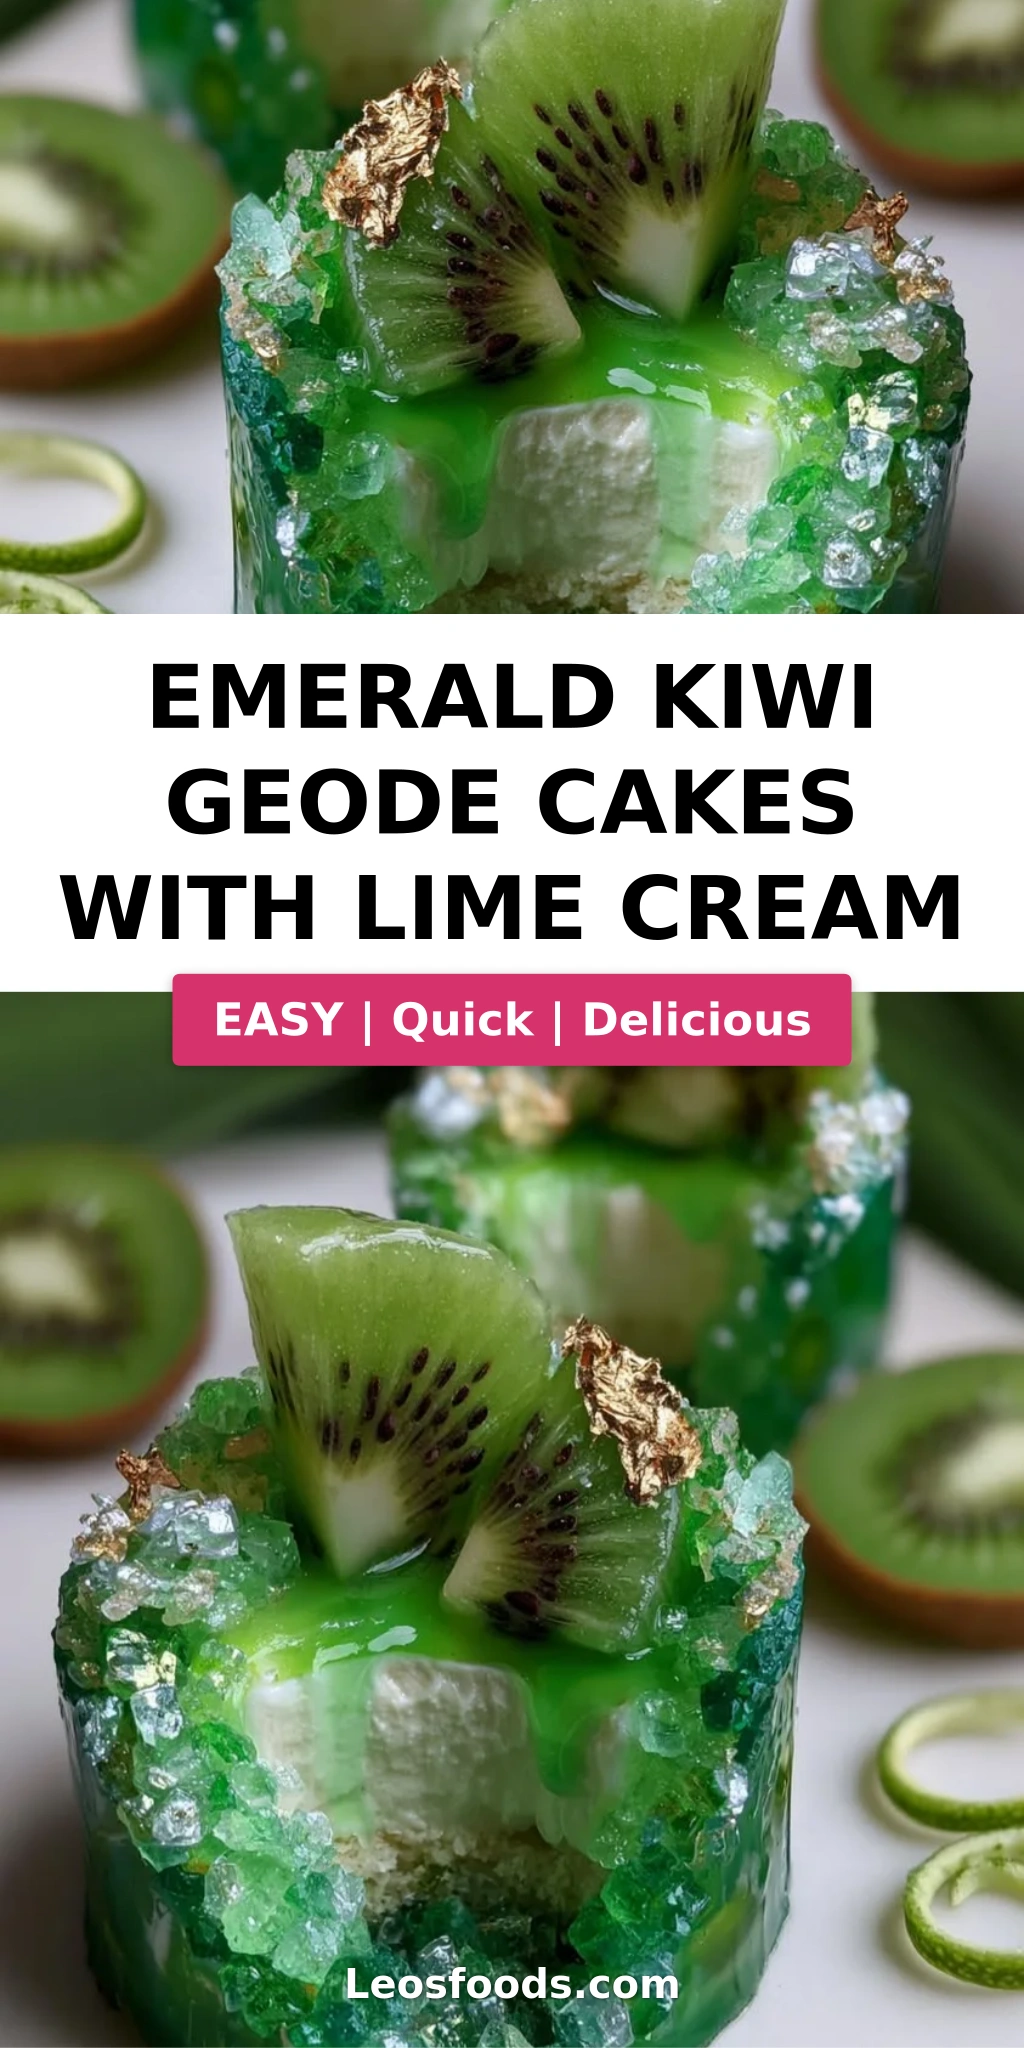
Gorgeous Emerald Kiwi Geode Cakes with Lime Cream Recipe
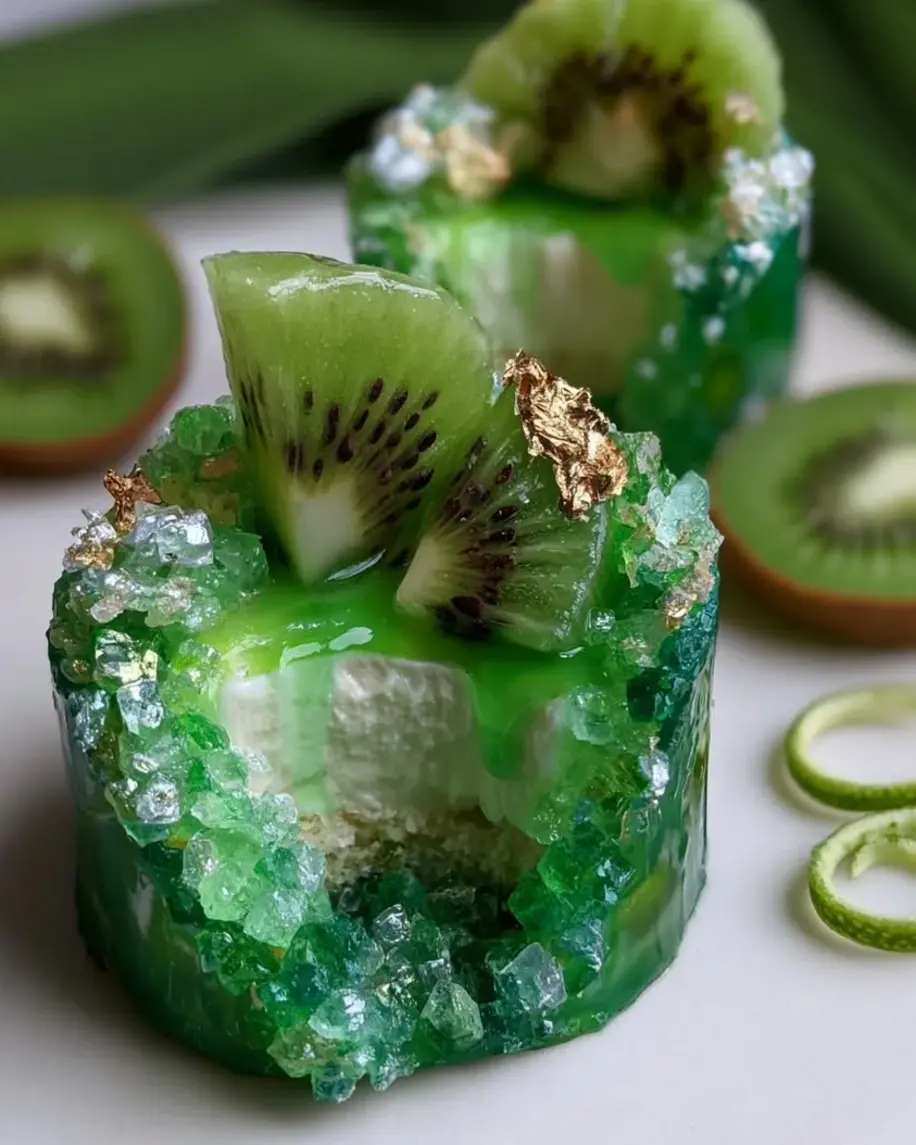
Table of Contents
Emerald Kiwi Geode Cakes with Lime Cream – A Stunning Geode-Inspired Dessert
Growing up in Morocco, my mother would pile our table with jewel-toned fruit salads and rose-scented pastries that glittered like stained glass. Those memories came rushing back the first time I made these Emerald Kiwi Geode Cakes with Lime Cream in my tiny NYC test kitchen. This kiwi geode cake recipe is my love letter to that North African beauty — a bright, tangy kiwi mousse wrapped around a lush lime cream center, all crowned with a glossy crystal glaze and edible shimmer. It looks like something from a fantasy novel, but I promise you can absolutely make it at home.
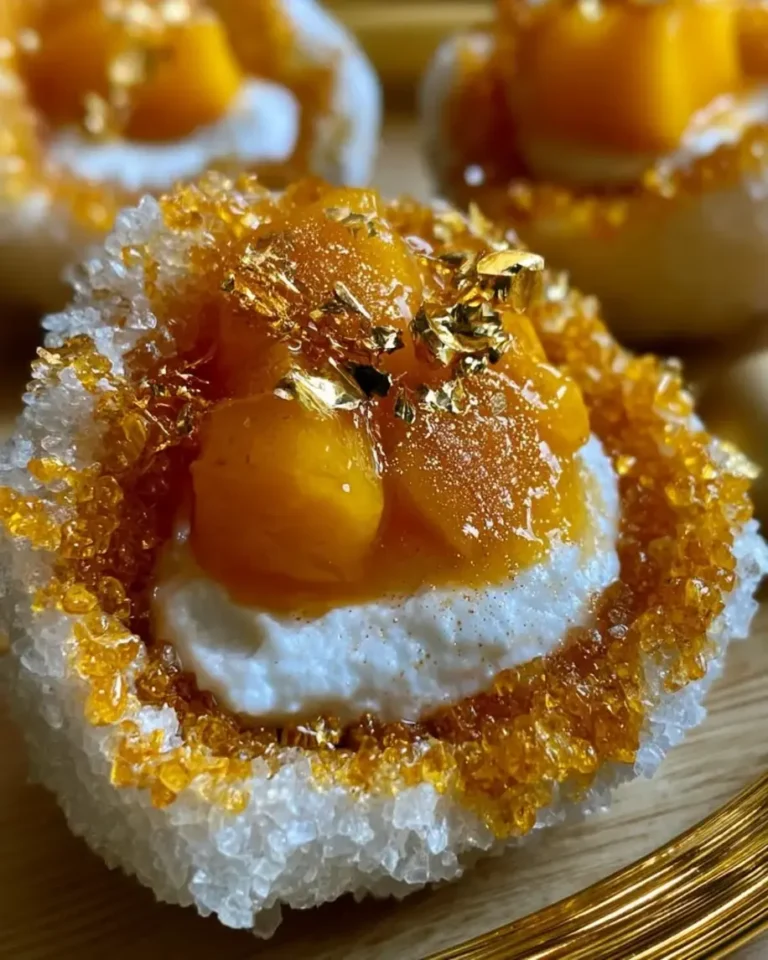
Imagine slicing into a dome of vibrant emerald green and finding a pale, silky lime heart inside. The first bite is cool and creamy, then a wave of citrus brightness hits your tongue, followed by the gentle crunch of edible crystal sugar along the edge. The white chocolate glaze gives it a mirror-like finish that catches the light like a real geode. I love how the kiwi puree keeps the mousse naturally fruity without being overly sweet — it’s refreshing in a way that most cakes aren’t, which makes it perfect for spring gatherings, bridal showers, or any occasion where you want to impress without turning on the oven.
What sets my version apart is that I studied pastry in Paris under chefs who drilled the importance of balance into me — every element in this geode cake tutorial is built to complement the others. The lime cream center is stabilized with mascarpone so it stays silky even after freezing. I’ll show you exactly how to bloom gelatin without lumps, how to fold the cream so your mousse stays airy, and the one mistake that makes the geode glaze crack (and how to fix it in 10 seconds). Whether you’re a confident baker or someone who’s never made a mousse before, I’ve got you covered.
Why This Emerald Kiwi Geode Cake Recipe Is the Best
The Flavor Secret. Most geode cakes lean hard on candy melts and artificial colors, but I wanted something you’d actually want to eat a whole slice of. The kiwi mousse gets its vibrant emerald hue from both the puree and a touch of green gel coloring — but the real magic is the lime juice and zest folded into the cream cheese base. That citrus lift cuts through the richness and makes each bite feel bright and clean. My Parisian chef instructor always said, “A dessert should make you close your eyes on the first bite,” and that’s exactly what this does.
Perfected Texture. The texture of a frozen mousse cake can be tricky — too icy and it tastes like a popsicle, too dense and it’s more like cheesecake. I spent weeks testing ratios of cream cheese to heavy cream to gelatin until I landed on the ideal balance. The gelatin provides just enough structure to hold the geode shape, while the whipped cream keeps the mousse airy and light. The lime cream center stays soft and spoonable even when frozen, thanks to the mascarpone acting as a stabilizer. It’s the same technique I used for my famous lemon mascarpone tarts at a Brooklyn pop-up last year.
Foolproof & Fast. I know the word “geode” sounds intimidating, but I’ve broken down every step so you can follow along without stress. The active prep time is about 45 minutes — most of the work is done while the cakes freeze. The glaze is a simple white chocolate and condensed milk mixture that sets to a mirror shine without any tempering. Even the emerald geode effect is just edible crystal sugar pressed onto one side after glazing. If you can make Jell-O and whip cream, you can absolutely nail this lime cream cake on your first try.
Emerald Kiwi Geode Cakes Ingredients
When I make these kiwi geode cake recipe cakes in my NYC kitchen, I source my kiwi from the greenmarket in Union Square — the ones that yield just slightly to pressure are perfect. For the cream cheese, I always use full-fat block cream cheese (not the spreadable tub) because it gives the mousse a firmer, more stable structure. The lime cream center benefits from mascarpone, which I pick up at Eataly when I’m feeling fancy, but you can find it at most well-stocked grocery stores now. Let’s walk through every component so you know exactly what to buy.
Ingredients List
- For the Emerald Kiwi Geode Cakes:
- 1 cup kiwi puree (from about 5–6 ripe kiwis, blended and strained)
- 8 oz cream cheese, softened
- 1 cup heavy cream
- 1/3 cup powdered sugar
- 2 tbsp fresh lime juice
- 1 tsp lime zest
- 1 tsp vanilla extract
- 2 tsp unflavored gelatin
- 2 tbsp cold water
- Green gel food coloring, as needed
- For the Lime Cream Center:
- 1/2 cup mascarpone cheese
- 2 tbsp heavy cream
- 1 tbsp powdered sugar
- 1 tbsp fresh lime juice
- For the Crystal Geode Glaze:
- 1 cup white chocolate, finely chopped
- 1/2 cup sweetened condensed milk
- 2 tsp unflavored gelatin
- 2 tbsp cold water
- 1/4 cup warm water
- 1 tsp edible pearl shimmer dust
- Green edible crystal sugar, for the geode effect
- For Garnish (optional):
- Kiwi slices, fresh
- Edible gold flakes
- Lime zest curls
Ingredient Spotlight
Kiwi Puree: This is the backbone of the mousse. You want ripe but not mushy kiwis — they should give slightly when pressed. Peel them, chop roughly, blend until smooth, then strain through a fine-mesh sieve to remove the seeds. One cup of puree usually takes about 5–6 kiwis. If you’re short on time, you can use store-bought kiwi puree (often found in the frozen section), but fresh gives a brighter, more vibrant flavor.
Cream Cheese: I know it’s tempting to use low-fat, but don’t. Full-fat block cream cheese is essential for the mousse structure. It needs to be fully softened to room temperature so it blends smoothly with the kiwi puree without lumps. If your cream cheese is cold, the mixture will be grainy and you’ll have a hard time folding in the whipped cream later.
White Chocolate for the Glaze: I use a high-quality white chocolate like Guittard or Valrhona — avoid white “melting wafers” or candy melts, which often contain palm oil and don’t set with the same mirror shine. The chocolate needs to be finely chopped so it melts evenly when you pour the hot condensed milk mixture over it. I chop mine on a cutting board with a serrated knife and it takes maybe two minutes.
Edible Pearl Shimmer Dust: This is what gives the glaze that ethereal, crystal-like sheen. You can find it at cake supply stores, Michael’s, or Amazon. A little goes a long way — one teaspoon is plenty for the full batch. Make sure you get “edible” shimmer dust, not the decorative kind meant for crafts. The difference is subtle but important for food safety.
Green Edible Crystal Sugar: This creates the geode effect on the side of the cake. I use a brand called “Sugared & Iced” that I order online, but you can also make your own by tinting coarse sanding sugar with green gel food coloring and a drop of vodka. Spread it on a baking sheet and let it dry for an hour before using.
| Original Ingredient | Best Substitution | Flavor / Texture Impact |
|---|---|---|
| Kiwi puree (fresh) | Frozen kiwi puree, thawed | Slightly less bright in color; still works well |
| Mascarpone cheese | Full-fat cream cheese + 1 tsp heavy cream | Slightly tangier, still creamy |
| White chocolate | High-quality white chocolate chips | May not melt as smoothly; use with care |
| Edible pearl shimmer dust | Lustre dust (edible) mixed with vodka | Slightly less shimmer; paint on after glazing |
| Green edible crystal sugar | Homemade tinted sanding sugar | Works great; allow extra drying time |
How to Make Emerald Kiwi Geode Cakes — Step-by-Step
I promise, if you follow each step in order, you will end up with gorgeous, glossy geode cakes that look like they came from a fancy pastry shop. The key is to read through the entire recipe once before you start, and set out all your ingredients. Let’s bake (well, no baking — just assemble!) together.
Step 1: Bloom the Gelatin
In a small bowl, sprinkle 2 teaspoons of unflavored gelatin over 2 tablespoons of cold water. Let it sit undisturbed for 5 minutes — this is called “blooming” and it hydrates the gelatin so it dissolves smoothly later. Do not stir; just let the gelatin absorb the water. It will look like a firm, wobbly disc when it’s ready.
💡 Stella’s Pro Tip: Use cold water, not warm. If the water is too warm, the gelatin will start to dissolve unevenly and can form lumps that are impossible to smooth out later.
Step 2: Make the Kiwi Mousse Base
In a large mixing bowl, beat the softened cream cheese with powdered sugar, kiwi puree, fresh lime juice, lime zest, and vanilla extract. Use an electric mixer on medium speed and beat for a full 2 minutes until the mixture is completely smooth and free of lumps. There should be no visible streaks of cream cheese. The color at this point will be a soft pale green — we’ll deepen it with food coloring in a moment.
⚠️ Common Mistake to Avoid: If your cream cheese is even slightly cold, it will form lumps in the kiwi puree. Microwave the cream cheese in 10-second bursts (unwrap it first!) until it’s very soft but not melted — about 20–30 seconds total.
Step 3: Whip and Fold the Cream
In a separate clean bowl, whip the heavy cream to soft peaks — you’re looking for creamy, cloud-like peaks that just hold their shape but are not stiff. This should take about 2–3 minutes with a hand mixer on medium-high. Now, gently fold the whipped cream into the kiwi mixture using a rubber spatula. Work in two additions, using a gentle under-and-over motion. Stop as soon as no streaks remain. Fold in a few drops of green gel food coloring if you want a more intense emerald shade.
💡 Stella’s Pro Tip: Fold, don’t stir! Stirring will deflate the whipped cream and your mousse will be dense instead of light. Imagine you’re wrapping the cream around the kiwi mixture — slow, gentle turns.
Step 4: Prepare the Lime Cream Center
In a small bowl, combine the mascarpone cheese, heavy cream, powdered sugar, and fresh lime juice. Stir with a spoon until smooth and creamy — this should only take about 30 seconds. Transfer the mixture to a piping bag or a small zip-top bag. Snip off the tip (or a corner of the bag) and pipe small dollops into mini sphere or half-sphere silicone molds. You want each center to be about the size of a large cherry — roughly 1 tablespoon each. Freeze these for at least 30 minutes until firm.
⚠️ Common Mistake to Avoid: Don’t skip the freezing step for the lime cream centers. If they’re not frozen solid when you place them into the mousse, they’ll sink and mix with the kiwi layer instead of staying as a distinct center.
Step 5: Assemble the Geode Cakes
Fill geode-shaped silicone molds (or dome-shaped molds) about halfway full with the kiwi mousse mixture. Tap the molds gently on the counter to release any air bubbles. Place one frozen lime cream center into the middle of each mold, pressing it down slightly so it’s fully encased. Cover with the remaining kiwi mousse, filling the molds all the way to the top. Smooth the tops with a small offset spatula or the back of a spoon.
💡 Stella’s Pro Tip: If you don’t have geode molds, you can use half-sphere silicone molds (2-inch size) or even a standard muffin tin lined with plastic wrap. The shape will still look stunning once glazed.
Step 6: Freeze and Unmold
Place the filled molds in the freezer for at least 5 hours, or preferably overnight. The cakes need to be completely frozen solid before you unmold them — if they’re even slightly soft in the center, they’ll lose their shape. When you’re ready to unmold, remove the molds from the freezer and let them sit at room temperature for 30 seconds. Gently flex the silicone and pop the cakes out. Place them on a wire rack set over a baking sheet (to catch drips) and return them to the freezer while you prepare the glaze.
⚠️ Common Mistake to Avoid: Don’t try to unmold the cakes while they’re still partially frozen. If they resist, wait another 2 minutes and try again. Forcing them out can crack the surface.
Step 7: Make the Crystal Geode Glaze
Bloom another 2 teaspoons of gelatin in 2 tablespoons cold water for 5 minutes. In a small saucepan, heat the sweetened condensed milk and 1/4 cup warm water over low heat until it’s warm to the touch but not simmering — about 90°F. Remove from heat and stir in the bloomed gelatin until fully dissolved. Pour this warm mixture over the finely chopped white chocolate in a heatproof bowl. Let it sit for 1 minute, then stir gently until the chocolate is completely melted and the glaze is smooth and glossy. Stir in the edible pearl shimmer dust until evenly dispersed. Allow the glaze to cool to 90–95°F (it should feel just barely warm on your wrist) before pouring.
💡 Stella’s Pro Tip: The temperature of the glaze is crucial. Too hot and it will melt the frozen cakes; too cool and it will thicken and lose its mirror shine. Use an instant-read thermometer if you have one — otherwise, test a small drip on the back of your hand.
Step 8: Glaze and Decorate
Remove the frozen cakes from the freezer. Working one at a time, hold a cake over the wire rack and pour the glaze evenly over the top, letting it cascade down the sides. Do not touch the cake with the spatula — let gravity do the work. Once the glaze has stopped dripping (about 30 seconds), immediately press green edible crystal sugar onto one side of the cake to create the geode effect. Transfer to a serving plate. Repeat with the remaining cakes. Garnish with fresh kiwi slices, a few edible gold flakes, and delicate lime zest curls. Serve immediately while still frozen (the cakes will soften as they sit — this is the perfect texture!).
⚠️ Common Mistake to Avoid: Don’t press the crystal sugar onto the cake after the glaze has fully set — it won’t stick. The glaze needs to be still tacky but not dripping. Work quickly and confidently.
| Step | Action | Duration | Key Visual Cue |
|---|---|---|---|
| 1 | Bloom gelatin | 5 min | Firm, wobbly disc |
| 2 | Make kiwi mousse base | 2 min | Smooth, no lumps |
| 3 | Whip cream to soft peaks | 2–3 min | Cloud-like, holds shape |
| 4 | Fold cream into mixture | 1–2 min | No streaks remain |
| 5 | Prepare lime cream center | 30 sec + 30 min freeze | Smooth, pipeable |
| 6 | Assemble and fill molds | 5 min | Center encased in mousse |
| 7 | Freeze cakes | 5+ hours | Completely firm, solid |
| 8 | Make crystal glaze | 10 min | Glossy, smooth, 90°F |
| 9 | Glaze and decorate | 2 min per cake | Mirror finish, sugar sticks |
Serving & Presentation
These emerald kiwi geode cakes are meant to be served frozen — or rather, just barely thawed. I like to take them out of the freezer about 5 minutes before serving, which softens the mousse to a creamy, spoonable consistency while the lime center remains cool and firm. Place each cake on a small dessert plate with a dollop of whipped cream or a drizzle of extra lime cream if you’re feeling indulgent. The contrast of the glossy glaze, the sparkly sugar edge, and the fresh kiwi slice on top makes for a truly show-stopping presentation.
In my NYC apartment, I often serve these at dinner parties with a Moroccan mint tea — the sweetness of the tea plays beautifully against the tart lime and kiwi. For a summer celebration, pair them with a light Prosecco or a citrusy Sauvignon Blanc. If you’re serving kids, a tall glass of cold milk or a strawberry lemonade works just as well. I also love placing them on a mirror or marble slab to amplify the shiny, geode-like effect — it makes the whole table look like a jewel box.
Don’t forget the garnishes! A thin slice of fresh kiwi fanned out on top, a few edible gold flakes scattered like treasure, and a curl of lime zest that you twist over the cake to release those essential oils before placing it on top. It takes an extra 30 seconds but makes the dessert look like it belongs in a bakery window on Bleecker Street.
| Pairing Type | Suggestions | Why It Works |
|---|---|---|
| Beverage | Moroccan mint tea, Prosecco, Sauvignon Blanc | The sweetness and citrus notes mirror the lime and kiwi |
| Side / Accompaniment | Whipped cream, fresh berries, shortbread cookies | Adds texture and contrasts the creamy mousse |
| Garnish | Kiwi slices, edible gold flakes, lime zest curls | Reinforces the color palette and adds elegance |
| Occasion | Bridal showers, spring brunch, St. Patrick’s Day, birthdays | The emerald color and geode look feel festive and special |
Make-Ahead, Storage & Reheating
One of the best things about this geode cake tutorial is that almost all the work can be done in advance — perfect for my busy NYC schedule when I need to prep for a party days ahead. The frozen cakes can be stored for up to two weeks, and the glaze can be made fresh on the day you plan to serve. Here’s exactly how to store every component so nothing goes to waste.
| Method | Container | Duration | Reheating / Serving Tip |
|---|---|---|---|
| Refrigerator (glazed cakes) | Airtight container, single layer | Up to 2 days | Serve chilled; glaze may weep slightly |
| Freezer (unglazed cakes) | Wrap individually in plastic wrap, then foil | Up to 2 weeks | Glaze directly from frozen; no thawing needed |
| Make-Ahead (lime cream centers) | Freeze in mini molds, then transfer to bag | Up to 1 month | Pop out of molds and use directly from frozen |
If you’re storing glazed cakes in the fridge, place them on a parchment-lined tray and cover loosely with plastic wrap — don’t seal them airtight or the condensation will dull the mirror shine. The cakes are best enjoyed within 2 days, though I’ve had them hold up beautifully for up to 4 days (the glaze gets a bit softer but still looks gorgeous).
For freezing unglazed cakes, the key is to wrap them tightly to prevent freezer burn. I use a double layer: first a tight wrap of plastic cling film directly against the cake’s surface, then a layer of aluminum foil. When you’re ready to serve, make the glaze fresh (it only takes about 10 minutes) and pour it over the still-frozen cakes. The contrast of the warm glaze hitting the frozen cake creates the most incredible mirror finish — it’s honestly my favorite part of the process.
Variations & Easy Swaps
One of the questions I get asked most often is whether you can swap the fruit in this kiwi geode cake recipe — and the answer is yes, absolutely! I’ve tested several variations in my own kitchen, and they all work beautifully. Below is a quick reference table, followed by detailed notes on my three favorite twists.
| Variation | Key Change | Best For | Difficulty Impact |
|---|---|---|---|
| Passion Fruit Geode | Replace kiwi puree with passion fruit pulp | Tropical-themed parties | Same — no change |
| Dairy-Free / Vegan | Use vegan cream cheese, coconut cream, and agar-agar | Dairy-sensitive guests | Medium — requires agar-agar technique |
| Berry Ruby Geode | Use raspberry or strawberry puree + red coloring | Valentine’s Day, romantic dinners | Same — no change |
Passion Fruit Geode Twist
Oh, this one is my personal favorite! Substitute the kiwi puree with 1 cup of passion fruit pulp (fresh or frozen, seeds strained out). The passion fruit is naturally more tart than kiwi, so increase the powdered sugar in the mousse base to 1/2 cup. The lime cream center works beautifully with passion fruit — the combination tastes like a tropical sunset. I like to use yellow food coloring and yellow crystal sugar for a golden geode effect. This variation reminds me of the passion fruit tarts I used to make at a patisserie in Paris during my externship.
Dairy-Free / Vegan Version
For a dairy-free version, use a high-quality vegan cream cheese (I like Miyoko’s or Tofutti), full-fat coconut cream in place of heavy cream, and a vegan mascarpone-style spread. The gelatin needs to be replaced with agar-agar powder — use 1 tablespoon of agar-agar bloomed in 2 tablespoons of water, then heated until fully dissolved before adding to the mousse. The texture will be slightly firmer and less creamy than the original, but still very delicious. For the glaze, use a dairy-free white chocolate (Pascha makes a good one) and full-fat coconut cream instead of condensed milk. I tested this version for a friend’s dairy-free wedding and it was a hit.
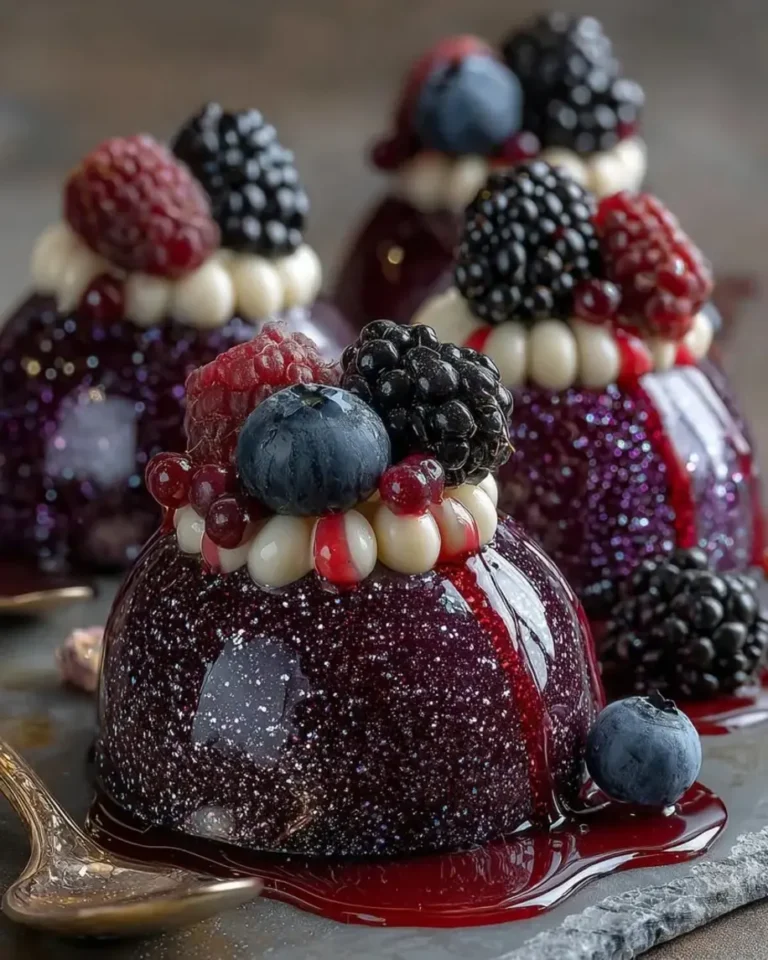
Berry Ruby Geode Cakes
For a Valentine’s Day stunner, replace the kiwi puree with 1 cup of raspberry or strawberry puree (strained to remove seeds). Use red gel food coloring instead of green, and red edible crystal sugar for the geode edge. The lime cream center works surprisingly well with berries — the citrus brightens the berry flavor. This variation is a bit more tart than the kiwi version, so I sometimes add an extra tablespoon of powdered sugar to the mousse base. Top with fresh raspberries and edible rose petals for a truly romantic presentation.
How do you make the emerald geode effect on kiwi cakes with lime cream?
To create the emerald geode effect, you press green edible crystal sugar onto one side of the cake immediately after glazing, while the glaze is still tacky. Start by making sure the glaze is at the right temperature (90–95°F) so it flows smoothly and stays sticky for about 20–30 seconds after pouring. Hold the glazed cake over a small bowl of green crystal sugar and gently press the side of the cake into the sugar, rotating slightly so the sugar adheres in an irregular, organic pattern — like a real geode edge. I like to leave some areas bare so the glossy green glaze shows through, which mimics the way crystals form naturally in rocks. You can also apply the sugar with a small spoon for more precision, but pressing directly into the sugar gives the most authentic, jagged geode look. The key is to work quickly before the glaze sets completely — once it hardens, the sugar won’t stick.
Can I use a different fruit instead of kiwi for the geode cake design?
Absolutely — the geode cake design is very flexible when it comes to fruit. I’ve tested this with passion fruit, raspberry, strawberry, mango, and even dragon fruit, and they all work beautifully. The key is to use fruit puree that has a similar consistency to kiwi puree — not too watery, not too thick. Fruits with high water content like watermelon or citrus segments may require a bit more gelatin to firm up properly. For passion fruit, use 1 cup of strained pulp and increase the powdered sugar to 1/2 cup since passion fruit is more tart. For berries, strain out the seeds and use the puree as-is. Just remember to adjust the food coloring to match your fruit — yellow for mango, red for berries, etc. The lime cream center pairs well with most tropical and citrus fruits, so feel free to experiment with whatever is in season at your local farmers market.
What is the best way to prevent the lime cream from curdling when making these cakes?
Curdling in the lime cream center usually happens if the mascarpone is too cold or if the lime juice is added too quickly. The best way to prevent it is to bring the mascarpone to room temperature before mixing — let it sit on the counter for about 20 minutes before you start. Also, use fresh lime juice (not bottled) and add it slowly while stirring gently, rather than dumping it all in at once. If you’re using cream cheese instead of mascarpone for the center, make sure it’s fully softened as well. Another trick I learned in pastry school is to mix the lime juice with the powdered sugar first until smooth, then fold that into the mascarpone — the sugar helps stabilize the dairy and prevents separation. If your mixture does look slightly curdled, don’t panic: add 1 teaspoon of cold heavy cream and stir gently — it usually comes back together.
How far in advance can I prepare the geode sugar crystals for these kiwi cakes?
You can prepare the geode sugar crystals up to 1 month in advance, which makes this a great project for planned parties. Simply combine coarse sanding sugar with a few drops of green gel food coloring and 1/2 teaspoon of vodka (the alcohol helps distribute the color evenly and evaporates quickly). Spread the tinted sugar in a thin layer on a parchment-lined baking sheet and let it dry at room temperature for 1–2 hours, stirring occasionally to break up any clumps. Once dry, store the sugar in an airtight container in a cool, dry place. I like to keep mine in a glass jar labeled with the date — it stays vibrant and ready to use for up to 4 weeks. If you’re using store-bought edible crystal sugar, check the package for storage instructions, but most brands recommend using within 6 months of opening.
Can I make these emerald geode cakes without gelatin?
Yes, you can substitute gelatin with agar-agar powder for a vegetarian-friendly version. Use 1 tablespoon of agar-agar powder bloomed in 2 tablespoons of cold water for each 2-teaspoon portion of gelatin. The agar-agar needs to be heated to boiling (212°F) to activate fully, whereas gelatin just needs to be warmed. Let the agar-agar mixture simmer for about 2 minutes while stirring continuously, then let it cool slightly before adding to the mousse base. Note that agar-agar sets much firmer than gelatin and at room temperature, so the texture of the mousse will be a bit more solid and less creamy. It also sets faster, so you’ll need to work quickly when filling the molds. I’ve tested this swap many times and it works well — just be aware that the mouthfeel is slightly different, more like a panna cotta texture than a mousse.
How do I get the mirror glaze to be perfectly smooth without bubbles?
The secret to a smooth, bubble-free mirror glaze is all in the technique. First, make sure your white chocolate is very finely chopped so it melts evenly without needing to stir too vigorously (which incorporates air). Second, when you pour the warm condensed milk mixture over the chocolate, let it sit undisturbed for a full minute before stirring — this allows the heat to melt the chocolate gently from the inside out. Third, stir slowly and in one direction only, using a rubber spatula and keeping it submerged to avoid whipping air into the mixture. If you do see small bubbles, tap the bowl on the counter a few times to bring them to the surface, then pop them with a toothpick or a quick pass of a kitchen torch (or even a lighter). Finally, strain the glaze through a fine-mesh sieve into a clean bowl before using — this catches any undissolved chocolate bits or tiny bubbles.
What size molds should I use for individual geode cakes?
For individual geode cakes, I recommend using 2-inch half-sphere silicone molds (also called dome molds or hemisphere molds). These give you a nice, generous single-serving cake that’s about 3–4 ounces each — perfect for plating with a garnish and some whipped cream. You can also use 2.5-inch molds for a more dramatic presentation, but keep in mind that the larger the cake, the more glaze you’ll need and the longer it will take to freeze solid. If you don’t have half-sphere molds, you can use mini Bundt molds, small bowl-shaped silicone molds, or even a standard muffin tin lined with plastic wrap (though the shape will be less defined). For a true geode look, I recommend investing in a set of silicone half-sphere molds — they’re inexpensive, reusable, and give you that professional, smooth dome shape that the glaze loves to flow over.
Can I use bottled lime juice instead of fresh for the lime cream center?
I strongly recommend using fresh lime juice for the lime cream center. Bottled lime juice often contains preservatives and has a flat, slightly metallic taste that can throw off the delicate balance of this dessert. Fresh lime juice has bright, floral notes and a natural acidity that cuts through the richness of the mascarpone and mousse in a way that bottled juice simply can’t replicate. The zest is also crucial — you can’t get that from a bottle. If you’re in a pinch and absolutely have to use bottled, look for a brand that doesn’t contain added sugar or preservatives (Santa Cruz Organic is one of the better options), and consider adding an extra pinch of fresh zest if you have any on hand. But honestly, squeezing 2–3 limes takes about 2 minutes and makes a world of difference in the final flavor.
How do I transport these geode cakes without damaging the glaze?
Transporting geode cakes safely requires a bit of planning, but it’s totally doable. The most important thing is to keep them frozen solid during transport — I place the glazed cakes in a single layer in a sturdy, flat container (like a cake carrier or a deep baking dish) and surround them with ice packs or frozen gel packs. If you’re stacking, place a layer of parchment or wax paper between each cake. The glaze is actually quite durable once fully set (after about 10 minutes in the freezer), but it can scratch if rubbed against something rough. I recommend transporting them in a cooler or insulated bag if you’re going more than 15 minutes. When you arrive, transfer the cakes to the freezer immediately and let them re-freeze for at least 30 minutes before serving. If a cake gets slightly smudged, you can touch it up with a tiny bit of extra glaze and a sprinkle of crystal sugar.
What can I do with leftover glaze and lime cream filling?
Leftover glaze can be stored in an airtight container in the refrigerator for up to 1 week. To reuse it, gently warm it in the microwave in 10-second bursts (stirring in between) until it’s smooth and pourable again, adding a teaspoon of warm water if it’s too thick. You can use it to glaze cupcakes, doughnuts, or even pour over ice cream for a quick dessert. The lime cream filling is also versatile — use it as a spread for scones, a filling for crepes, or a dip for fresh fruit. It will keep in the fridge for about 5 days in a sealed container. Honestly, I sometimes double the lime cream recipe on purpose just so I have extra to eat with berries and shortbread cookies while I’m working on the cakes. Waste not, want not — especially when it’s this delicious!
Share Your Version!
I absolutely love seeing how you make these Emerald Kiwi Geode Cakes with Lime Cream in your own kitchen! Did you try a different fruit? Did you add your own twist to the geode design? Drop a comment below with your star rating — it helps other bakers know what to expect and it makes my day to hear from you. If you share a photo on Instagram or Pinterest, tag me @stellarecipeblog so I can see your beautiful creations and maybe even feature them in my stories. I’m always curious: what’s your favorite way to make this kiwi geode cake recipe your own? Let me know in the comments!
From my NYC kitchen to yours — I hope this recipe brings as much warmth to your table as it does to mine. — Stella 🧡
Love This Recipe? Save It to Pinterest!
If you enjoyed this Emerald Kiwi Geode Cakes with Lime Cream recipe, don’t let it get lost in your browser tabs! 😄 Pin it now so you can find it again anytime — and explore hundreds more tried-and-tested recipes waiting for you on my Pinterest boards.
👉 Follow Stella on Pinterest @stellarecipeblog
📌 Pin this recipe · 🔁 Re-pin your favorites · 💬 Tag me when you make it — I love seeing your creations!

Emerald Kiwi Geode Cakes with Lime Cream
A stunning geode-inspired dessert featuring a bright kiwi mousse encasing a tangy lime cream center, finished with a glossy crystal glaze and edible shimmer.
- Yield: 8 1x
Ingredients
- For the Emerald Kiwi Geode Cakes:
- 1 cup kiwi puree
- 8 oz cream cheese, softened
- 1 cup heavy cream
- 1/3 cup powdered sugar
- 2 tbsp fresh lime juice
- 1 tsp lime zest
- 1 tsp vanilla extract
- 2 tsp unflavored gelatin
- 2 tbsp cold water
- Green gel food coloring, as needed
- For the Lime Cream Center:
- 1/2 cup mascarpone cheese
- 2 tbsp heavy cream
- 1 tbsp powdered sugar
- 1 tbsp fresh lime juice
- For the Crystal Geode Glaze:
- 1 cup white chocolate, finely chopped
- 1/2 cup sweetened condensed milk
- 2 tsp unflavored gelatin
- 2 tbsp cold water
- 1/4 cup warm water
- 1 tsp edible pearl shimmer dust
- Green edible crystal sugar
- For Garnish (optional):
- Kiwi slices
- Edible gold flakes
- Lime zest curls
Instructions
- 1. Mix gelatin and cold water in a small bowl and let bloom for 5 minutes.
- 2. Beat cream cheese, powdered sugar, kiwi puree, lime juice, lime zest, and vanilla extract until smooth.
- 3. Melt the bloomed gelatin and stir into the kiwi mixture.
- 4. Add a few drops of green gel food coloring for a vibrant emerald color.
- 5. Whip heavy cream to soft peaks and gently fold into the mixture.
- 6. Combine mascarpone cheese, heavy cream, powdered sugar, and lime juice until smooth.
- 7. Pipe small portions of the lime cream into mini molds and freeze until firm.
- 8. Fill geode-shaped molds halfway with the kiwi mixture.
- 9. Place a frozen lime cream center into each mold.
- 10. Cover with the remaining kiwi mixture and smooth the tops.
- 11. Freeze for at least 5 hours or until completely firm.
- 12. Bloom gelatin for the glaze.
- 13. Heat condensed milk and warm water, then stir in gelatin until dissolved.
- 14. Pour over white chocolate and mix until smooth and glossy.
- 15. Stir in pearl shimmer dust and allow the glaze to cool to a pourable consistency.
- 16. Unmold frozen cakes and place on a wire rack.
- 17. Pour the crystal glaze evenly over each cake.
- 18. Decorate one side with green edible crystal sugar to create a geode effect.
- 19. Garnish with kiwi slices, edible gold flakes, and lime zest curls.
- 20. Serve chilled.
Nutrition
- Calories: 345
- Sugar: 24 g
- Fat: 24 g
- Carbohydrates: 28 g
- Protein: 5 g
Tried This Recipe? Leave a Comment!
Did you make this recipe? I’d love to hear how it turned out! Please leave a comment and a rating below. Your feedback helps other home cooks and supports cheerychop.com!
For more delicious inspiration, follow me on Pinterest!