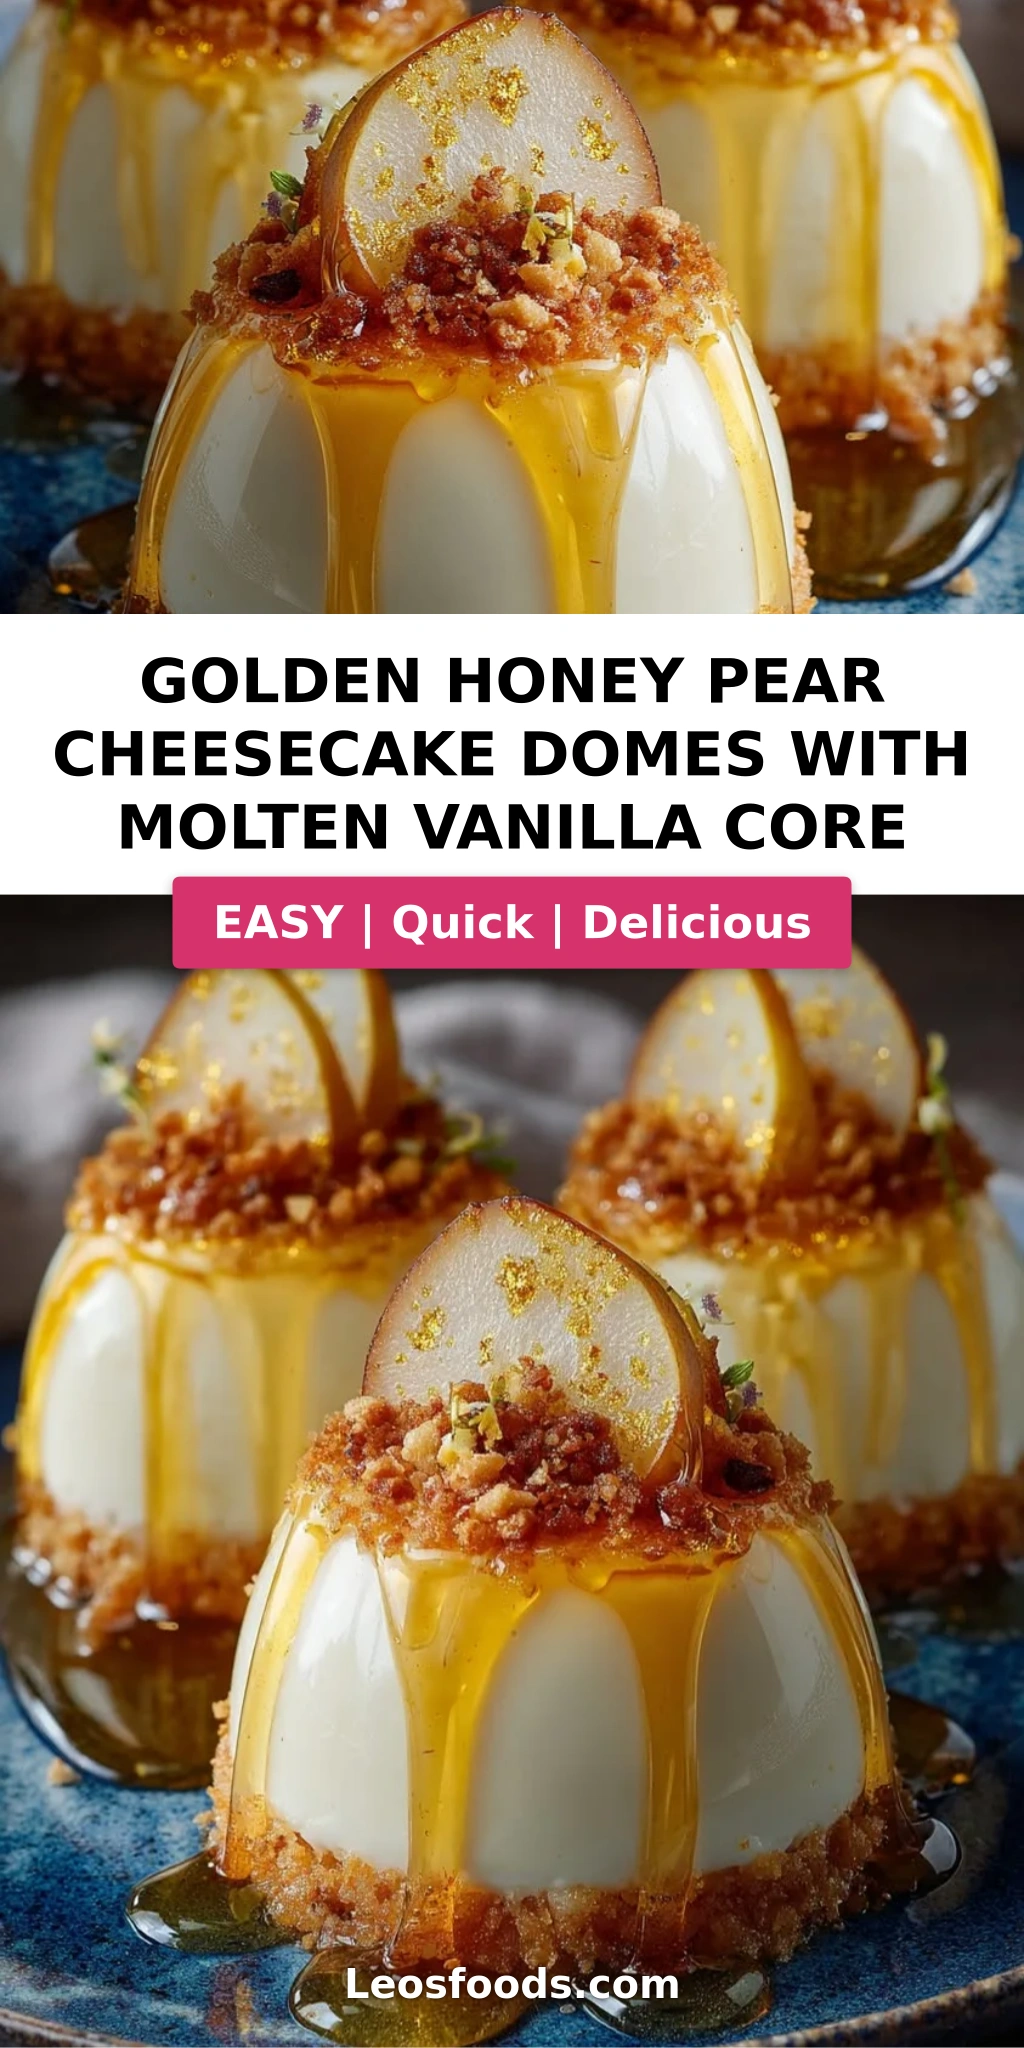
Golden Honey Pear Cheesecake Domes with Molten Vanilla Core
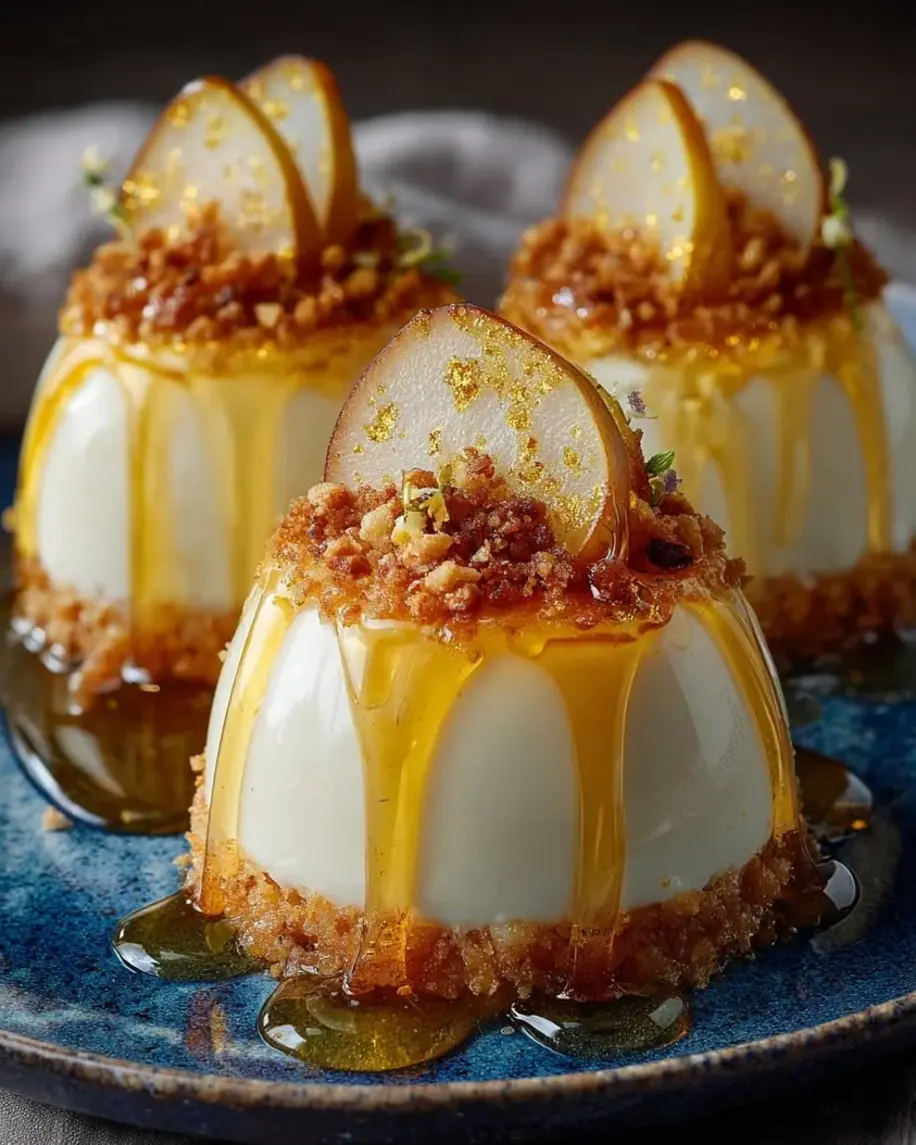
Table of Contents
Golden Honey Pear Cheesecake Domes with Molten Vanilla Core – A Stunning Gelatin-Free Crystal Dome Dessert
I still remember the first time I made these golden honey pear cheesecake domes. It was a rainy Saturday in my NYC kitchen, and I was feeling nostalgic for the pear orchards near my grandmother’s village in Morocco. She would simmer pears with wild honey and a pinch of saffron until they turned translucent and jewel-like. I wanted to capture that same golden glow — but give it a French pastry school makeover. The result? These show-stopping crystal-clear domes with a hidden molten vanilla core that literally spills open when you cut into them. This pear cheesecake domes recipe is my love letter to those two worlds — Moroccan warmth and Parisian precision — all wrapped up in a dessert that looks like it belongs in a fancy patisserie window.
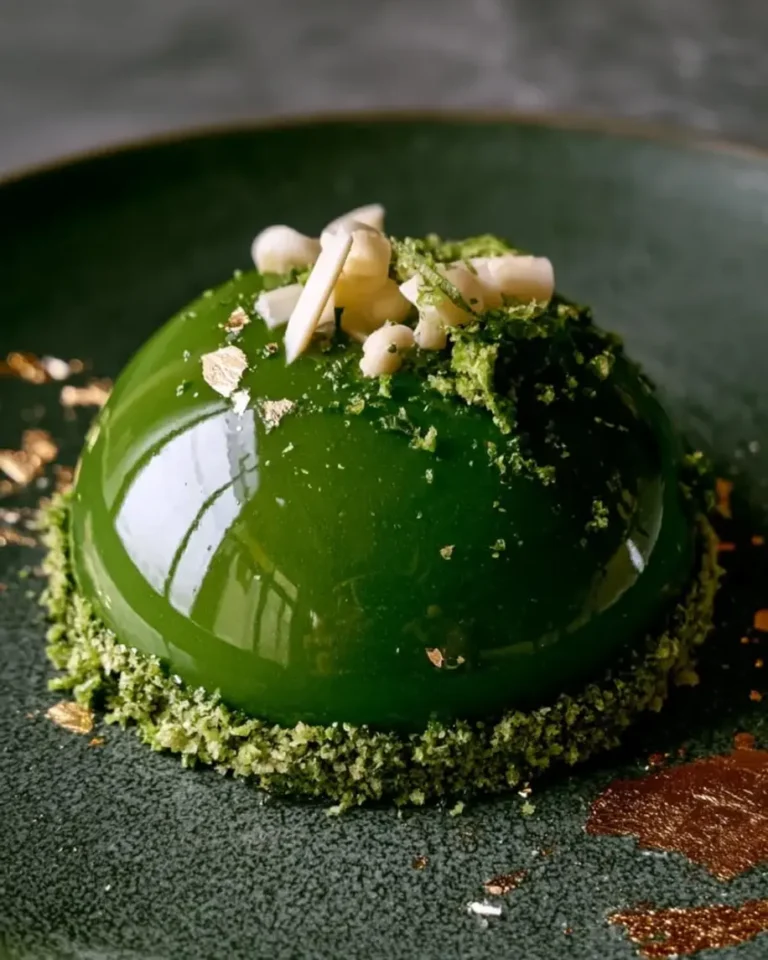
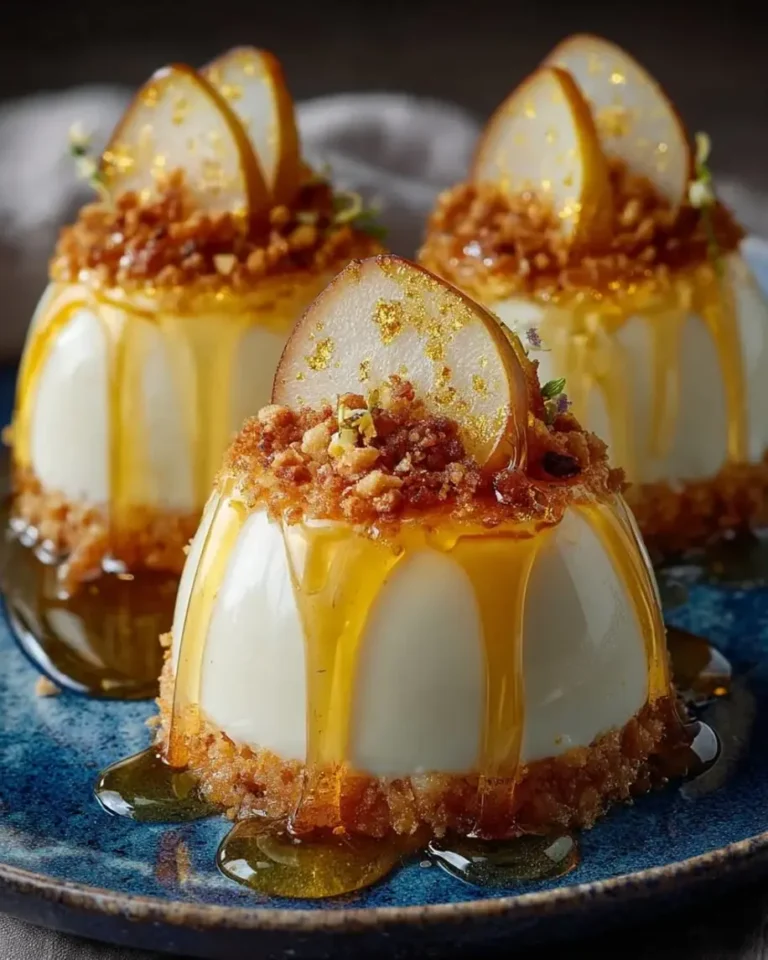
Imagine this: a perfectly smooth, glassy dome that catches the light like amber. The first tap of your spoon cracks through a delicate golden shell made from pear juice and honey, set firm with agar-agar. Beneath that lies a cloud-like pear cheesecake filling — creamy, tangy, and whisper-light. And right in the center, a warm ribbon of vanilla-infused molten core flows out like liquid gold. The combination of textures is pure magic: the firm, jelly-like dome, the mousse-like cheesecake, and that silky, pourable vanilla heart. It’s a honey pear dessert that tastes like autumn in Paris, with just a whisper of North African spice in the background.
I’ve tested this molten vanilla core dessert more times than I can count to get the technique just right. The key is using agar-agar instead of gelatin — it sets at room temperature, holds its shape beautifully, and gives that crystal-clear finish that gelatin never quite achieves. And the molten core? The trick is all in the chilling: you want it thick enough to hold its place during assembly, but still soft enough to flow when served. I’ll walk you through every single step so you can nail it on your first try. One common mistake I see is rushing the setting time — patience here is everything. But trust me, the first time you unmold one of these domes and see that golden sphere sitting perfectly on the plate, you’ll know it was worth every minute.
Why This Golden Honey Pear Cheesecake Domes Recipe Is the Best
The Flavor Secret. Most cheesecake dome recipes rely on heavy artificial flavors, but I build mine from real pear juice and pure pear puree — the same way I watched my mother cook fruit down to its essence in her Moroccan kitchen. The honey isn’t just a sweetener; it’s a flavor bridge that connects the floral notes of the pears with the creamy tang of the cheesecake. A touch of lemon juice brightens everything and keeps the pear flavor from feeling too heavy. This isn’t just a dessert — it’s a balance of acidity, sweetness, and creaminess that I spent years perfecting in Paris pastry kitchens.
Perfected Texture. The agar-agar technique is where my French training really shines. Unlike gelatin, which can turn cloudy or weep over time, agar-agar creates a stable, glass-clear gel that holds its shape at room temperature. That means you can assemble these domes ahead of time without worrying about them collapsing or turning soggy. The cheesecake filling is whipped to just the right consistency — firm enough to hold the molten core in place, but light enough to melt on your tongue. I’ve tested the ratios of cream cheese to heavy cream over a dozen times to get that perfect spoonable texture.
Foolproof & Fast. Despite the fancy presentation, this golden honey pear cheesecake domes recipe is built for home cooks. The steps are straightforward, the ingredients are all available at your regular grocery store (no specialty pastry shop runs required), and the entire active work time is under an hour. The rest is just chilling time, which means you can do other things while the fridge does the heavy lifting. I’ve even simplified the molding process so you don’t need any fancy equipment — just a basic dome-shaped silicone mold that you can find on Amazon or at any kitchen supply store.
Golden Honey Pear Cheesecake Domes Ingredients
I picked up most of these ingredients at the Union Square Greenmarket last weekend — the pears were from a farm upstate, the honey from a beekeeper in Brooklyn. There’s something special about using local fruit in a recipe that feels so elegant. The cream cheese is always Philadelphia brand for me — it’s the most consistent for cheesecake work. And the vanilla bean paste? I order it online from a small Vermont producer; it has those beautiful little specks that make the molten core look so gorgeous. Here’s everything you’ll need:
Ingredients List
- For the Golden Honey Pear Crystal Domes:
- 2 cups pear juice (100% pure, no sugar added)
- 1 cup pear puree, strained
- 1 ½ cups water
- ¾ cup honey
- 2 ½ tsp agar-agar powder
- 1 tbsp lemon juice
- ¼ tsp salt
- For the Pear Cheesecake Filling:
- 8 oz cream cheese, softened
- ½ cup heavy whipping cream
- ¼ cup powdered sugar
- 1 tsp vanilla bean paste
- 2 tbsp pear puree
- For the Molten Vanilla Core:
- ¼ cup sweetened condensed milk
- 2 tbsp heavy cream
- 1 tsp vanilla bean paste
- 1 tbsp honey
- For Garnish (optional):
- Thin pear slices
- Crushed honey-roasted almonds
- Edible gold dust
Ingredient Spotlight
Agar-Agar Powder: This is the star of the show for the crystal-clear dome. Unlike gelatin, which is animal-based and can turn cloudy, agar-agar is a plant-based seaweed extract that sets into a firm, glass-clear gel. It activates at a higher temperature (about 185°F) and sets at room temperature, which is why it’s perfect for these domes. Look for it in the baking aisle or the Asian grocery section. One important note: agar-agar is much more powerful than gelatin — you need about ¼ the amount. I use the Now Foods brand and it works perfectly every time.
Pear Juice and Puree: For the best flavor, use 100% pure pear juice with no added sugar or pear juice from concentrate. I prefer to buy fresh Bartlett pears when they’re in season (September through November), peel and core them, then juice them at home. For the puree, simply steam ripe pears until soft, then blend and strain through a fine-mesh sieve. If pears aren’t in season, store-bought organic pear juice works beautifully — just make sure the only ingredient is pears. The puree gives the cheesecake filling its delicate fruit flavor without making it watery.
Vanilla Bean Paste: This is my secret weapon for the molten core and the cheesecake filling. Vanilla bean paste gives you the intense flavor of real vanilla beans with those beautiful black specks, but in an easy-to-use paste form. It’s more concentrated than vanilla extract, so you use less, and it doesn’t have the alcohol taste that extract can leave behind. For the molten core specifically, the vanilla specks floating in that golden sauce are absolutely stunning. If you only have vanilla extract, use 1 ½ teaspoons and expect a slightly thinner texture.
| Original Ingredient | Best Substitution | Flavor / Texture Impact |
|---|---|---|
| Agar-Agar Powder | Powdered gelatin (use 2 tbsp, but expect cloudier set) | Less crystal-clear; softer set; not plant-based |
| Pear Juice | Apple juice or white grape juice | Sweeter, less floral; works well but flavor shifts |
| Honey | Maple syrup or agave nectar | Maple adds woody notes; agave is neutral but thinner |
| Cream Cheese | Neufchâtel or dairy-free cream cheese | Slightly less tangy; dairy-free versions may soften faster |
| Vanilla Bean Paste | 1 ½ tsp vanilla extract + scraped seeds from ½ vanilla bean | Slightly less intense vanilla flavor; fewer visible specks |
How to Make Golden Honey Pear Cheesecake Domes — Step-by-Step
Making these domes is like assembling a beautiful little gift — each layer gets added with care, and the reveal at the end is pure joy. Don’t be intimidated by the number of steps; I’ve broken everything down so clearly that even a beginner baker can follow along. Take your time, especially with the setting stages, and you’ll be rewarded with the most gorgeous dessert you’ve ever made at home.
Step 1: Prepare the Pear-Agar Mixture
Combine 2 cups pear juice, 1 cup strained pear puree, 1 ½ cups water, ¾ cup honey, 2 ½ tsp agar-agar powder, 1 tbsp lemon juice, and ¼ tsp salt in a medium saucepan. Whisk everything together until the agar-agar powder is fully dissolved — this is important because agar-agar can clump if not properly dispersed. Place the saucepan over medium heat and bring the mixture to a gentle simmer, stirring frequently. You’ll know it’s ready when you see small bubbles forming around the edges and the liquid has thickened slightly. Let it simmer for about 2 minutes, then remove from heat.
💡 Stella’s Pro Tip: Don’t let the mixture come to a full rolling boil — a gentle simmer is all you need. Boiling can break down the agar-agar’s setting power and create bubbles that will get trapped in your crystal-clear domes. I like to use a silicone spatula to stir, which lets me scrape the bottom and corners of the pan where agar-agar loves to hide.
Step 2: Partial-Set the Dome Shells
Pour the warm pear-agar mixture into dome-shaped silicone molds, filling each cavity only halfway. You want to leave room for the cheesecake filling and molten core later. Gently tap the molds on the counter a few times to release any air bubbles that might have formed. Transfer the molds to the refrigerator and chill for about 20-25 minutes, or until the mixture is partially set — it should feel firm to the touch but still have a slight give, like a medium-set Jell-O.
⚠️ Common Mistake to Avoid: Pouring the mixture too hot into the molds can cause condensation on the surface, which leads to cloudy domes. Let the mixture cool for about 5-7 minutes at room temperature before pouring. Also, make sure your silicone molds are completely dry — any water droplets will create cloudy spots in the finished dome.
Step 3: Make the Pear Cheesecake Filling
While the dome shells are setting, make the cheesecake filling. In a large mixing bowl, combine 8 oz softened cream cheese, ½ cup heavy whipping cream, ¼ cup powdered sugar, 1 tsp vanilla bean paste, and 2 tbsp pear puree. Using a hand mixer or stand mixer with the whisk attachment, beat on medium-high speed for about 3-4 minutes until the mixture is smooth, fluffy, and holds soft peaks. Be careful not to overwhip — you want it light and airy, not buttery. Transfer the filling to a piping bag fitted with a round tip and set aside in the refrigerator.
💡 Stella’s Pro Tip: Make sure your cream cheese is truly softened to room temperature — about 1 hour on the counter. Cold cream cheese will leave lumps in your filling that no amount of mixing will fix. For the fluffiest texture, chill your mixing bowl and whisk attachment in the freezer for 10 minutes before whipping the cream.
Step 4: Prepare the Molten Vanilla Core
In a small bowl, whisk together ¼ cup sweetened condensed milk, 2 tbsp heavy cream, 1 tsp vanilla bean paste, and 1 tbsp honey until smooth and well combined. The mixture should be thick but pourable, like a thin caramel sauce. Transfer to a small bowl or ramekin and place in the refrigerator for about 15 minutes to chill and slightly thicken. You want it to be thick enough that it won’t immediately run out when you spoon it into the cheesecake filling, but still soft enough to become molten when served.
⚠️ Common Mistake to Avoid: If the molten core is too thin when you try to add it to the domes, it will sink to the bottom and leak out. If this happens, don’t panic — just return it to the fridge for another 10-15 minutes to thicken further. The consistency should be similar to warm honey: thick and slow-moving but not solid.
Step 5: Assemble the Domes
Remove the partially set dome shells from the refrigerator. Pipe a layer of the pear cheesecake filling into the center of each cavity, filling it about halfway up the remaining space. Use a small spoon to create a shallow well in the center of the cheesecake filling. Carefully spoon about 1 ½ teaspoons of the chilled molten vanilla core into each well, then immediately pipe more cheesecake filling on top to cover it completely. The filling should reach the top edge of the mold but not overflow.
💡 Stella’s Pro Tip: When creating the well for the molten core, make sure the cheesecake filling is thick enough to hold its shape. If your filling seems too soft, pop it back in the fridge for 10 minutes to firm up. And when covering the core with the top layer of cheesecake filling, seal the edges carefully — any gaps will let the molten core escape during setting.
Step 6: Top with Remaining Pear Mixture
Gently rewarm the remaining pear-agar mixture over low heat, just until it becomes liquid again — about 2-3 minutes. Let it cool for 5 minutes until it’s warm but not hot. Carefully pour the mixture over the cheesecake filling in each mold, filling to the very top. The pear mixture should completely cover the cheesecake layer. Return the molds to the refrigerator and chill for at least 4 hours, or overnight, until fully set and crystal clear.
⚠️ Common Mistake to Avoid: Pouring the pear mixture while it’s too hot will melt the cheesecake filling and create a cloudy, messy layer. Always let it cool to warm (about 110°F) before pouring. I test by dabbing a drop on my wrist — it should feel warm but not hot, like a comfortable bath temperature.
Step 7: Unmold and Garnish
Once fully set, remove the domes from the refrigerator. Gently press around the edges of each silicone mold to release the dome, then carefully invert onto a chilled serving platter. The domes should release cleanly with a beautiful glossy surface. Garnish each dome with a thin pear slice, a sprinkle of crushed honey-roasted almonds, and a light dusting of edible gold dust. Serve immediately while thoroughly chilled.
💡 Stella’s Pro Tip: If a dome sticks to the mold, dip the bottom of the mold in warm water for about 5 seconds — this helps release the agar-agar without damaging the shape. And always chill your serving platter for 10 minutes before unmolding; the cold surface helps the domes hold their shape and keeps the molten core stable until serving.
| Step | Action | Duration | Key Visual Cue |
|---|---|---|---|
| 1 | Simmer pear-agar mixture | 5-7 mins | Small bubbles at edges, slight thickening |
| 2 | Partial-set dome shells | 20-25 mins | Firm to touch but slight give |
| 3 | Whip cheesecake filling | 3-4 mins | Soft peaks, smooth and fluffy |
| 4 | Chill molten vanilla core | 15 mins | Thick but pourable, like warm honey |
| 5 | Assemble layers in mold | 5-7 mins | Core fully enclosed in filling |
| 6 | Top with pear mixture | 5 mins + 4 hrs set | Crystal clear, firm to touch |
| 7 | Unmold and garnish | 5 mins | Glossy surface, clean release |
Serving & Presentation
Serving these golden honey pear cheesecake domes is an event in itself. I like to present them on a chilled white ceramic platter — the contrast between the golden domes and the white surface is absolutely stunning. For an extra touch, drizzle a little extra honey around the plate and scatter a few fresh pear slices and crushed honey-roasted almonds. The edible gold dust catches the light and makes each dome look like a precious jewel. When your guests crack into the dome with their spoon, that molten vanilla core will spill out in a golden ribbon — it’s the kind of moment that makes everyone at the table gasp.
In my NYC apartment, I often serve these after a dinner party when I want to end the meal with something truly memorable. They pair beautifully with a cup of Moroccan mint tea (my mother’s recipe, with fresh spearmint and a touch of honey) or a glass of late-harvest Riesling. I also love to serve them alongside a small dollop of crème fraîche or a scoop of vanilla bean ice cream for extra indulgence. The key is to keep everything chilled — the domes, the plates, even the serving spoons — so the contrast between the cool dome and the warm, flowing core is at its most dramatic.
For a truly show-stopping presentation, arrange the domes on a mirror or acrylic platter with a few tealights placed around the edges. The golden domes will reflect the candlelight and practically glow. And if you’re feeling extra fancy, you can even serve them under a glass cloche that you lift at the table — the reveal is pure theater. I learned that trick during my time working at a pastry shop in the 11th arrondissement in Paris, and it never fails to impress.
| Pairing Type | Suggestions | Why It Works |
|---|---|---|
| Side Dish | Crème fraîche, vanilla bean ice cream, whipped cream | Adds cool creaminess that balances the sweet pear gel |
| Sauce / Dip | Warm honey drizzle, caramel sauce, raspberry coulis | Enhances the honey-pear flavor; coulis adds tart contrast |
| Beverage | Moroccan mint tea, late-harvest Riesling, espresso | Tea complements honey notes; wine mirrors fruit sweetness |
| Garnish | Fresh pear fan, honey-roasted almonds, edible flowers | Adds crunch, color, and elevates the visual presentation |
Make-Ahead, Storage & Reheating
One of the best things about this pear cheesecake domes recipe is how well it works for make-ahead entertaining. I often prepare the domes up to two days before a dinner party — the flavors actually meld together and deepen over time, and the agar-agar set remains perfectly stable. For my busy NYC lifestyle, being able to prep dessert days in advance is a game-changer. Here’s everything you need to know about storing and reheating these beautiful domes:
| Method | Container | Duration | Reheating Tip |
|---|---|---|---|
| Refrigerator | Airtight container in single layer | Up to 3 days | Serve cold; no reheating needed — the core flows at cool temps |
| Freezer | Freezer-safe container, wax paper between layers | Up to 1 month | Thaw overnight in fridge; do not microwave |
| Make-Ahead | Keep in silicone molds in fridge | Up to 2 days before serving | Unmold just before serving for best texture |
💡 Stella’s Pro Tip: If you’re freezing the domes, do it in the silicone molds — this protects their shape and prevents freezer burn. To thaw, transfer the molds to the refrigerator overnight. Never microwave a frozen dome; the agar-agar will break down and the molten core will overheat. For the most dramatic molten effect, let the thawed domes sit at room temperature for exactly 8-10 minutes before serving — this slightly warms the outer shell and makes the core extra-flowy.
One thing I love about these domes is that they actually improve with a day of rest in the fridge. The pear flavor from the dome slowly infuses the cheesecake filling, creating a more harmonious flavor profile. The agar-agar set also becomes slightly more tender after 24 hours, giving the dome a more delicate, melt-in-your-mouth texture. If you’re serving these for a special occasion, I highly recommend making them the day before — your future self will thank you.
Variations & Easy Swaps
Over the years, I’ve played around with many versions of this honey pear dessert — some inspired by my Moroccan roots, others by my French training, and a few by whatever looked good at the Union Square market that week. Here are my favorite variations, each tested multiple times to make sure they work perfectly:
| Variation | Key Change | Best For | Difficulty Impact |
|---|---|---|---|
| Moroccan Spiced Pear | Add ½ tsp cinnamon, ¼ tsp cardamom, and pinch of saffron to the pear mixture | Fall gatherings, holiday tables | Same — just add spices |
| Dairy-Free / Vegan | Use vegan cream cheese, coconut cream instead of heavy cream, and dairy-free condensed milk | Dairy-free guests, plant-based diets | Slightly harder; coconut flavor may peek through |
| Apple-Pear Fusion | Replace 1 cup pear juice with apple cider and add ½ tsp ginger | Fall dessert tables, Thanksgiving | Same — easy swap |
Moroccan Spiced Pear Version
This is my personal favorite — a nod to the flavors I grew up with in Morocco. When you add cinnamon, cardamom, and a pinch of saffron to the pear-agar mixture, the domes take on a warm, aromatic depth that’s absolutely intoxicating. The saffron gives the liquid a deeper golden hue and a subtle floral earthiness that pairs beautifully with the honey. I like to garnish these with a few crushed pistachios and a tiny pinch of ground cinnamon on top. It’s like eating a Moroccan sunset — warm, spiced, and utterly comforting.
Dairy-Free / Vegan Version
I developed this version for a friend who’s dairy-free, and I was surprised at how well it works. Use a high-quality vegan cream cheese (I like the one from Miyoko’s Kitchen) and full-fat coconut cream instead of heavy whipping cream. For the molten core, look for a dairy-free sweetened condensed coconut milk — the brand Nature’s Charm makes an excellent one. The coconut flavor is subtle and actually complements the pear and honey beautifully. The texture is slightly less firm than the original, so I recommend chilling the domes for an extra hour before unmolding. The agar-agar in the dome is naturally vegan, so that part doesn’t need any changes.
Apple-Pear Fusion Version
When pears aren’t at their peak but apples are abundant, this version is a lifesaver. Replace 1 cup of the pear juice with fresh apple cider (not vinegar — the sweet, unfiltered kind you find at farmers markets in the fall). Add ½ teaspoon of ground ginger to the pear-agar mixture for a gentle warmth that echoes the apple-pie spice tradition. The apple cider adds a slightly tangy, fruity note that cuts through the sweetness of the honey. I garnish these with thin apple slices and a drizzle of warm caramel sauce. It’s like a deconstructed apple pie meets a French patisserie — and it’s absolutely divine.
How do you make a molten vanilla core inside a cheesecake dome without it leaking out during baking?
The key to a non-leaking molten vanilla core is that this recipe doesn’t involve any baking at all — it’s a no-bake dessert! The cheesecake filling is whipped and set in the refrigerator, not the oven. To keep the molten core from leaking out during assembly and setting, you need two things: first, chill the molten core mixture until it’s thick and slow-moving (about the consistency of warm honey), and second, make sure the cheesecake filling is firm enough to create a sealed pocket around it. I pipe a layer of cheesecake filling, create a well in the center with the back of a spoon, add the chilled core, then immediately cover it with more cheesecake filling, pressing gently to seal the edges. The cold temperature of the filling helps the core stay in place while the whole thing sets in the fridge for at least 4 hours.
What is the best way to prepare pears for a golden honey pear cheesecake dome?
For the best results, start with ripe but firm Bartlett or Bosc pears — they have the most aromatic flavor and hold up well to cooking. Peel, core, and roughly chop the pears, then steam them over simmering water for about 10-12 minutes until they’re soft enough to blend. For the pear juice, you can either juice fresh pears using a juicer or buy a high-quality 100% pure pear juice (make sure there’s no added sugar or other fruit juices). For the puree, blend the steamed pears until completely smooth, then pass through a fine-mesh strainer to remove any fibrous bits. This straining step is crucial for getting that crystal-clear dome — any pulp will make the agar-agar mixture cloudy. I always recommend straining twice for the most professional-looking results.
Can I use a different fruit instead of pears in this golden honey pear cheesecake dome recipe?
Absolutely! This recipe works beautifully with many other fruits. Apples are the most straightforward swap — use apple juice and apple puree in the same quantities, and the flavor profile stays similar. For a tropical twist, mango works wonderfully: use mango nectar and mango puree, and reduce the honey to ½ cup since mangoes are naturally sweeter. Berries like raspberries or strawberries also work, but you’ll need to strain the puree very thoroughly to remove seeds, and the color will be pink or red instead of golden. For any fruit swap, keep two things in mind: the liquid needs to be clear enough to achieve that glassy dome (so avoid pulpy juices), and the acidity level should be similar to pears — very acidic fruits like passion fruit may require a slight increase in honey to balance the flavor.
How long should you freeze cheesecake domes before serving them with a molten center?
For this recipe, I don’t recommend freezing the assembled domes if you want the best molten center experience. The agar-agar gel can become watery when frozen and thawed, and the molten core can separate. Instead, I recommend refrigerating the domes for at least 4 hours (or overnight) before serving. If you need to make them further ahead, you can freeze the domes while they’re still in the silicone molds for up to 1 month. To serve, thaw them overnight in the refrigerator — never at room temperature or in the microwave. After thawing, let the domes sit at room temperature for about 8-10 minutes before serving; this slightly warms the outer gel and allows the molten core to flow beautifully when you crack into the dome.
Can I use gelatin instead of agar-agar for the crystal dome?
Yes, you can substitute gelatin for agar-agar, but the results will be noticeably different. Use 2 tablespoons of powdered gelatin (about 4 packets) instead of the 2 ½ teaspoons of agar-agar. Bloom the gelatin in ½ cup of cold water for 5 minutes before dissolving it into the warm pear mixture. The main differences you’ll notice: gelatin sets into a softer, more jiggly texture that won’t hold its shape as firmly at room temperature, and it creates a cloudy rather than crystal-clear finish. Gelatin also requires refrigeration to stay set, whereas agar-agar sets at room temperature. If you’re serving the domes within a few hours and keeping them chilled, gelatin will work fine — but for that show-stopping glass-clear look and the ability to serve at room temperature, agar-agar is definitely the better choice.
Why is my agar-agar pear mixture not setting properly?
There are three common reasons why agar-agar mixtures fail to set properly. First, the agar-agar might not have been fully dissolved — it needs to reach at least 185°F (85°C) while stirring constantly to activate its gelling properties. I always whisk for a full 2 minutes after the mixture comes to a simmer to ensure complete dissolution. Second, acidic ingredients can weaken agar-agar’s setting power; this recipe includes lemon juice, which is acidic, so make sure you’re using the full 2 ½ teaspoons of agar-agar powder to compensate. Third, old or improperly stored agar-agar can lose its potency. Always check the expiration date and store your agar-agar in a cool, dry place. If your mixture still doesn’t set, you can gently reheat it, add ½ teaspoon more agar-agar, and try again.
Can I make these golden honey pear cheesecake domes without a silicone dome mold?
Yes, you can absolutely make this recipe without a specialized dome mold! The easiest alternative is to use 6-ounce glass or ceramic bowls — small ramekins or custard cups work perfectly. Simply line each bowl with plastic wrap, leaving enough overhang to cover the top, then proceed with the recipe as written. The plastic wrap makes it easy to lift the finished dome out of the bowl. Another option is to use a muffin tin lined with silicone muffin cups. The shape won’t be a perfect dome, but it will still look beautiful and taste the same. For a more creative presentation, you can also pour the pear-agar mixture into a shallow dish, let it set, then use a round cookie cutter to create disk shapes that you can stack with the cheesecake filling and molten core in layers.
How do I get the perfect crystal-clear finish on my cheesecake domes?
The secret to crystal-clear domes comes down to three things: straining, temperature control, and patience. First, always strain your pear puree through a fine-mesh sieve lined with cheesecloth — any fruit fibers will create cloudiness. Second, avoid creating bubbles when you pour the mixture into the molds; pour slowly and tap the molds gently on the counter to release any trapped air. Third, and most importantly, never pour the pear-agar mixture over the cheesecake filling while it’s still hot; let it cool to about 110°F (warm to the touch but not hot) before pouring. Hot liquid will melt the cheesecake filling and create a cloudy, messy layer. Finally, resist the urge to check on the domes while they’re setting — opening the refrigerator door repeatedly can cause condensation to form on the surface of the domes, which leads to a cloudy appearance.
What can I use instead of sweetened condensed milk for the molten vanilla core?
If you don’t have sweetened condensed milk, you can make a quick substitute by combining ¼ cup whole milk with 3 tablespoons of granulated sugar and simmering it gently until the sugar dissolves and the mixture reduces by about half. This takes about 8-10 minutes and gives you a similar sweetness and consistency. Another option is to use dulce de leche thinned with a tablespoon of warm water — it adds a deeper caramel flavor that pairs beautifully with the pear and honey. For a dairy-free version, use coconut cream sweetened with maple syrup (2 tablespoons coconut cream + 1 tablespoon maple syrup, whisked until smooth). Just keep in mind that any substitution will slightly change the flavor and thickness of the molten core, so you may need to adjust the chilling time accordingly.
How should I transport these cheesecake domes to a dinner party?
Transporting these delicate domes is easier than you might think! The best method is to keep them in their silicone molds during transport — place the filled molds in a shallow baking dish or on a baking sheet lined with a non-slip mat to prevent sliding. Cover the entire dish with plastic wrap and place it in a cooler or insulated bag with ice packs on the bottom (not on top of the domes). Once you arrive, simply pop them in the host’s refrigerator for at least 30 minutes before unmolding. If you need to transport them already unmolded, place each dome in a separate small cup or ramekin lined with a paper towel to prevent them from sliding around. Arrange them in a single layer in a sturdy box or container with a tight-fitting lid. I always recommend transporting in the molds for the safest journey — it’s foolproof and stress-free!
Share Your Version!
I absolutely love seeing how you make these golden honey pear cheesecake domes your own — whether you try the Moroccan spiced version, go dairy-free, or invent something completely new. Drop a comment below and let me know how they turned out, what substitutions you tried, and any creative twists you added. Your feedback helps me create better recipes for you, and I read every single comment that comes through.
If you share a photo on Instagram or Pinterest, make sure to tag me @leosfoods — I always save my favorite reader creations to my stories and Pinterest boards. And if you’re feeling generous, a 5-star rating on this post helps other home cooks discover the recipe too. The one question I get asked most about this recipe is whether the molten core really flows — so if you capture a video of that golden moment when the spoon cracks through the dome, send it my way. I may just feature you in my newsletter!
From my NYC kitchen to yours — I hope this recipe brings as much warmth to your table as it does to mine. — Stella 🧡
Love This Recipe? Save It to Pinterest!
If you enjoyed this Golden Honey Pear Cheesecake Domes with Molten Vanilla Core recipe, don’t let it get lost in your browser tabs! 😄 Pin it now so you can find it again anytime — and explore hundreds more tried-and-tested recipes waiting for you on my Pinterest boards.
👉 Follow Stella on Pinterest @stellarecipeblog
📌 Pin this recipe · 🔁 Re-pin your favorites · 💬 Tag me when you make it — I love seeing your creations!
⭐ Made this recipe? I’d love to hear from you!
📸 Tag @leosfoods on Instagram or Pinterest when you share your creation.
💬 Drop a comment below with your star rating and any twists you tried — your feedback helps me and fellow home cooks!
Golden Honey Pear Cheesecake Domes with Molten Vanilla Core
- Yield: 6 1x
Ingredients
- For the Golden Honey Pear Crystal Domes:
- 2 cups pear juice
- 1 cup pear puree, strained
- 1 1/2 cups water
- 3/4 cup honey
- 2 1/2 tsp agar-agar powder
- 1 tbsp lemon juice
- 1/4 tsp salt
- For the Pear Cheesecake Filling:
- 8 oz cream cheese, softened
- 1/2 cup heavy whipping cream
- 1/4 cup powdered sugar
- 1 tsp vanilla bean paste
- 2 tbsp pear puree
- For the Molten Vanilla Core:
- 1/4 cup sweetened condensed milk
- 2 tbsp heavy cream
- 1 tsp vanilla bean paste
- 1 tbsp honey
- For Garnish (optional):
- Thin pear slices
- Crushed honey-roasted almonds
- Edible gold dust
Instructions
- Combine pear juice, pear puree, water, honey, agar-agar powder, lemon juice, and salt in a saucepan. Heat while stirring until fully dissolved and bring to a gentle simmer.
- Pour the mixture into dome-shaped silicone molds, filling each cavity halfway. Refrigerate until partially set.
- Whip cream cheese, heavy whipping cream, powdered sugar, vanilla bean paste, and pear puree until smooth and fluffy. Transfer to a piping bag.
- Whisk together sweetened condensed milk, heavy cream, vanilla bean paste, and honey to create the molten vanilla core. Chill until slightly thickened.
- Pipe a layer of cheesecake filling into the center of each partially set dome. Add a small spoonful of the molten vanilla core, then cover with more cheesecake filling.
- Pour the remaining pear mixture over the filling and refrigerate until fully set and crystal clear.
- Carefully unmold the domes onto a chilled serving platter.
- Garnish with thin pear slices, crushed honey-roasted almonds, and a light dusting of edible gold dust. Serve thoroughly chilled.
Nutrition
- Calories: 300
- Sugar: 33g
- Fat: 16g
- Carbohydrates: 38g
- Protein: 4g
Tried This Recipe? Leave a Comment!
Did you make this recipe? I’d love to hear how it turned out! Please leave a comment and a rating below. Your feedback helps other home cooks and supports cheerychop.com!
For more delicious inspiration, follow me on Pinterest!