Aurora Lemon Blueberry Crystal Bombs with Cream Core
“`html
Table of Contents
Aurora Lemon Blueberry Crystal Bombs with Cream Core – A Dazzling Citrus-Berry Dessert
I still remember the first time I saw the Northern Lights — not in Norway, but in a photograph my mother kept tucked inside her spice cabinet in Marrakesh. She said the colors reminded her of the way sunlight hits the lemons in our garden after a spring rain. That image came rushing back to me the day I created these Aurora Lemon Blueberry Crystal Bombs with Cream Core. I wanted to capture that same luminous, shifting light — the way blue and violet melt into gold — inside a single bite. This recipe is my love letter to that memory, written with the precision I learned at Le Cordon Bleu in Paris and the warmth of my mother’s Moroccan kitchen.
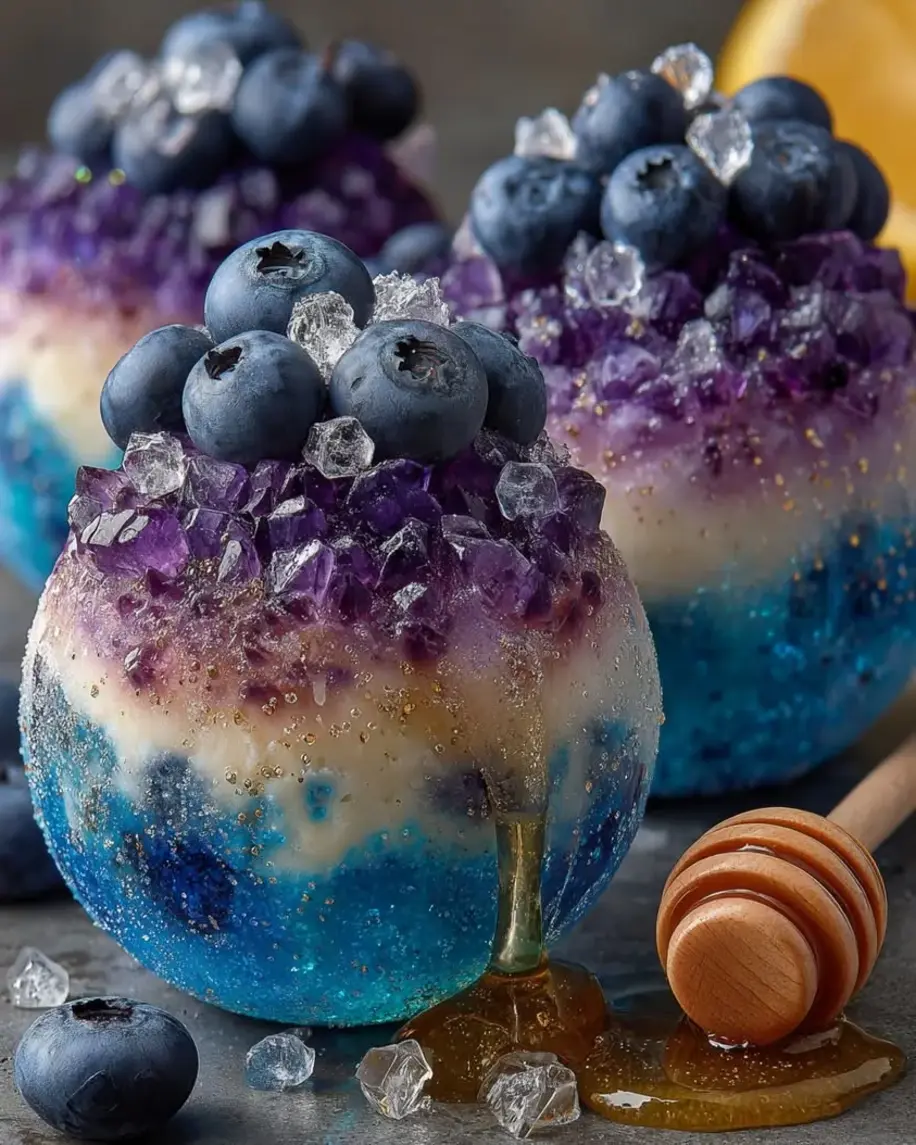
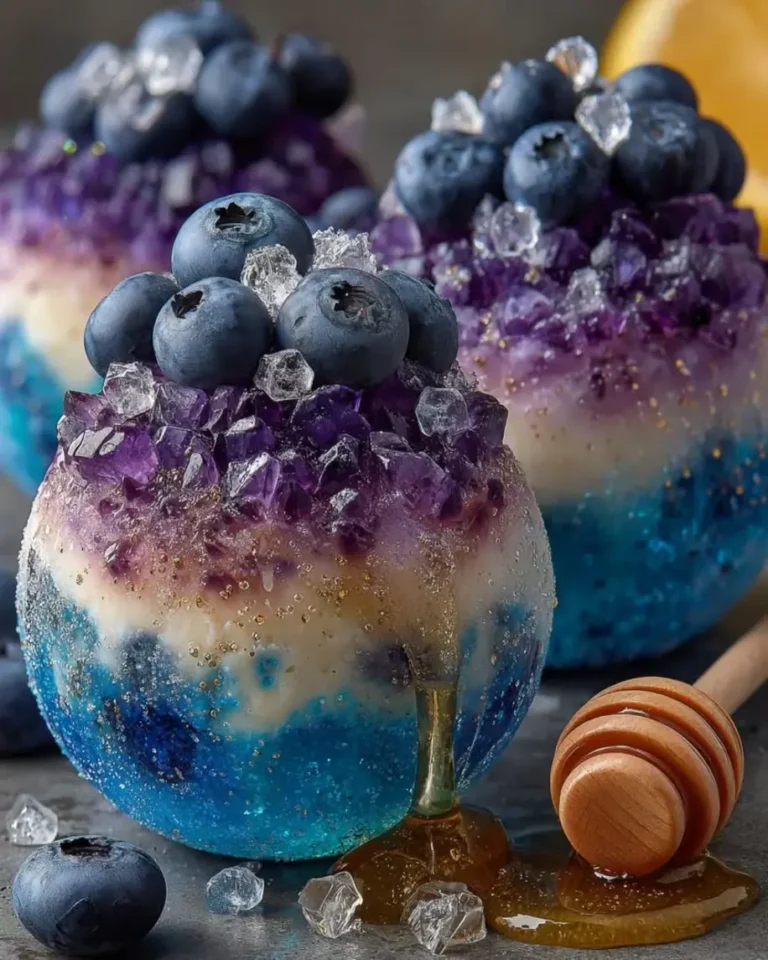
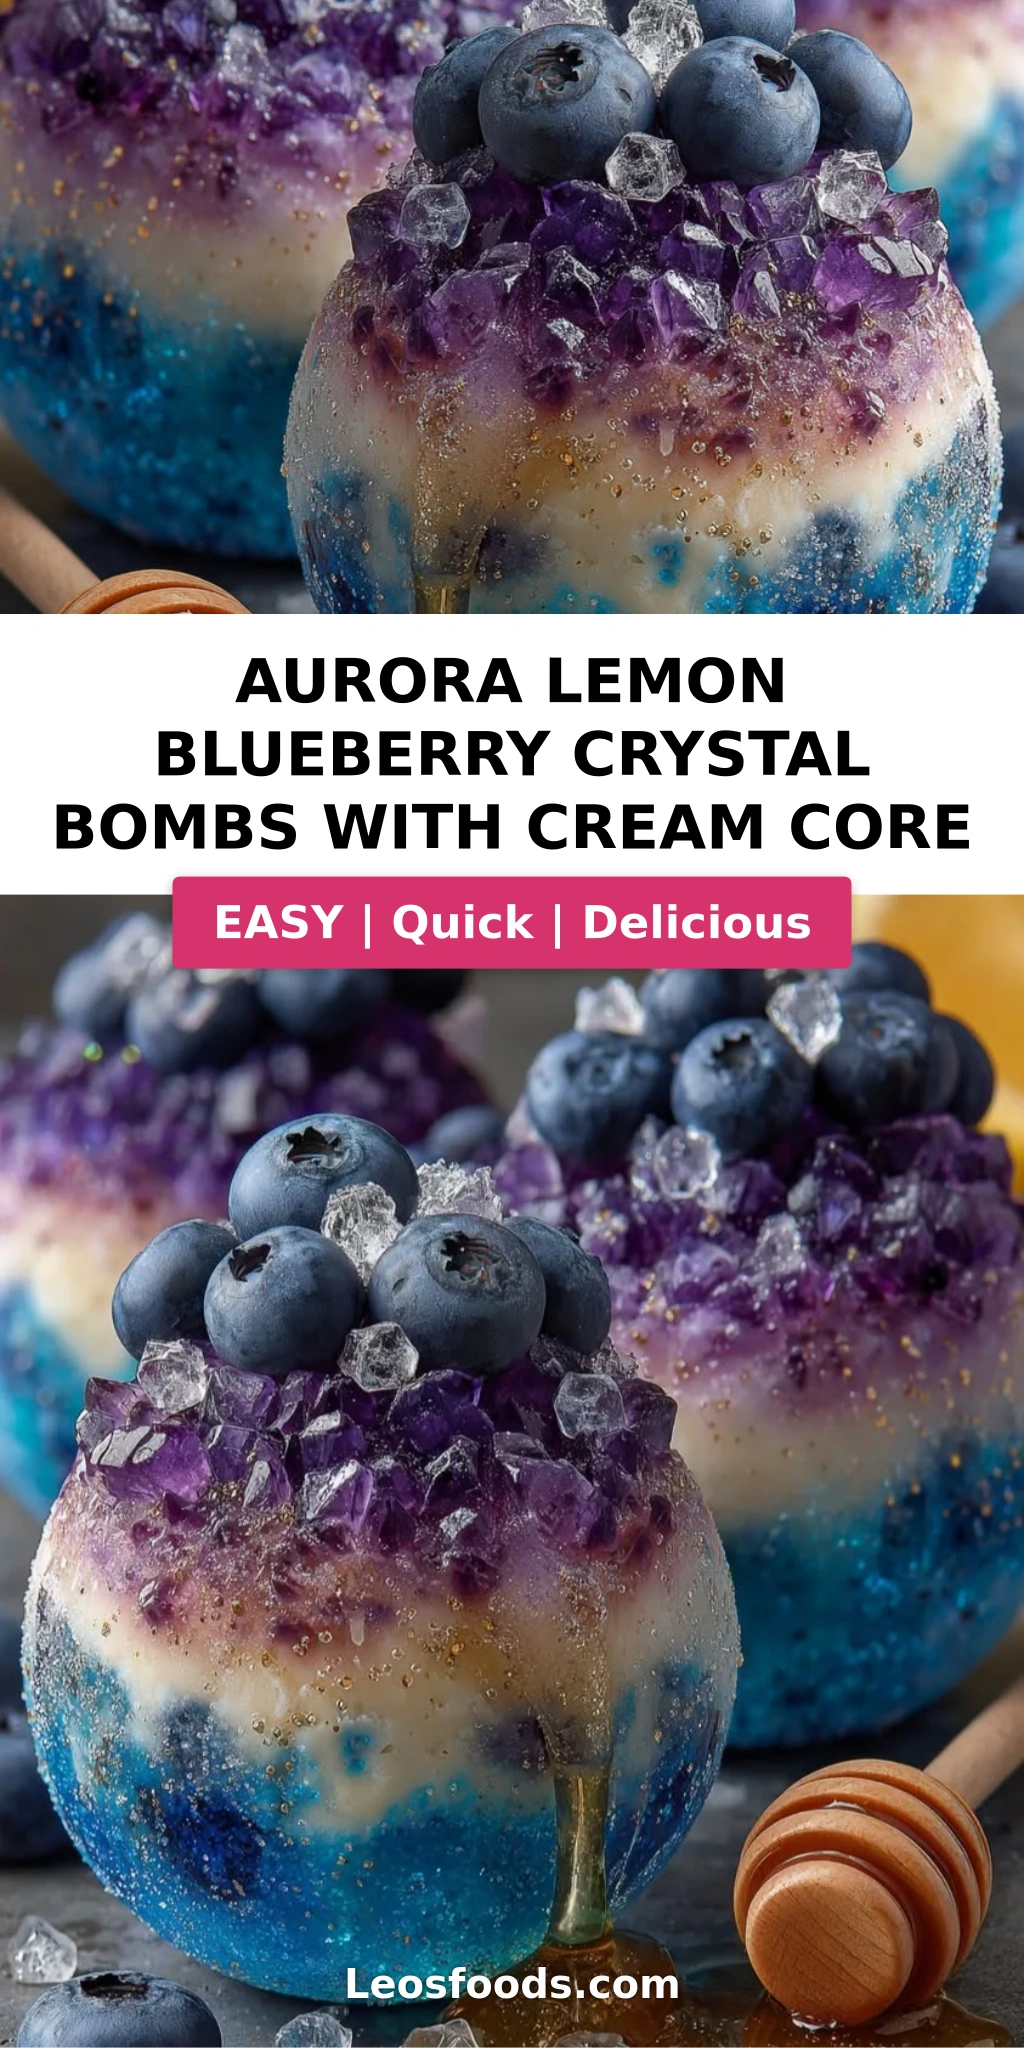
The first thing you’ll notice is the shell: a crystal-clear, jewel-toned dome made from blueberry and lemon juices set with agar-agar. It’s firm enough to hold its shape but shatters ever so slightly when you tap it with a spoon. Inside, a silky cream core made from mascarpone, lemon curd, and vanilla bean paste waits — cool, luscious, and just tangy enough to balance the sweetness of the glaze. The edible pearl dust and silver shimmer aren’t just garnish — they’re the aurora effect, catching the light from every angle. It’s a dessert that feels like magic on a plate, but I promise you, the technique is completely doable at home.
What sets my version apart? I spent months testing the agar-agar ratio to get that glass-like clarity without any cloudiness. I also swapped the usual heavy cream filling for a mascarpone-based cream core that’s lighter and more stable, so your bombs stay picture-perfect for hours. One tip I’ll share right now: always let your shell mixture cool slightly before pouring into the molds — pouring it too hot can create tiny air bubbles that dull the crystal effect. I’ll walk you through every step, including the one common mistake that can turn your bombs cloudy instead of crystal clear. Let’s make some magic.
Why This Aurora Lemon Blueberry Crystal Bombs Recipe Is the Best
The Flavor Secret: Most crystal dessert recipes rely on artificial flavors and colorings to achieve that translucent look. I took a different route — one that honors both my Moroccan roots and French training. By using real blueberry juice and fresh lemon juice as the base of the shell, you get a naturally vibrant color and a bright, authentic fruit flavor that cuts through the richness of the cream core. The lemon zest adds a fragrant citrus note that ties everything together, just like the preserved lemons my mother used to tuck into tagines.
Perfected Texture: The key to a crystal-clear shell that still has a pleasant bite is the agar-agar ratio. I tested this more times than I can count — too little agar and the shell is fragile and sticky; too much and it becomes rubbery. My tested ratio of 2½ teaspoons of agar-agar powder to 3½ cups of liquid gives you a shell that holds its shape beautifully, shatters with a delicate crunch, and melts smoothly on the tongue. The cream core, stabilized with mascarpone and a touch of lemon curd, stays firm enough to pipe but remains luxuriously silky.
Foolproof & Fast: I know working with agar-agar can feel intimidating, but this recipe is designed to build your confidence. The shell sets in stages, which means you have time to adjust, and the cream core comes together in under 10 minutes. I’ve included visual cues for every step — look for the glossy surface, the slight resistance when you tap the mold, and the way the glaze sheets off the back of a spoon. Even if you’ve never used agar-agar before, you’ll be able to pull off these bombs on your first try. The only hard part? Waiting for them to chill!
Aurora Lemon Blueberry Crystal Bombs with Cream Core Ingredients
I source my blueberry juice from the Union Square Greenmarket in the summer — there’s a farm from New Jersey that presses it fresh, and the color is almost black with ripeness. In the winter, I rely on bottled blueberry juice from the natural foods section of my local NYC market. For the lemons, I always choose organic because I use the zest. And the mascarpone? I find the best at Eataly downtown, but any good-quality supermarket brand works beautifully.
Ingredients List
- For the Aurora Crystal Shell:
- 1 cup blueberry juice
- 1 cup lemon juice (freshly squeezed)
- 1½ cups water
- ¾ cup granulated sugar
- 2½ tsp agar-agar powder
- 1 tsp lemon zest
- A few drops blue and violet food coloring (optional)
- ¼ tsp salt
- For the Cream Core:
- 8 oz mascarpone cheese
- ½ cup heavy whipping cream
- ¼ cup powdered sugar
- 1 tsp vanilla bean paste
- 1 tbsp lemon curd
- For the Blueberry-Lemon Glaze:
- ¼ cup blueberry preserves
- 2 tbsp honey
- 1 tbsp water
- 1 tbsp lemon juice
- For Garnish (optional):
- Fresh blueberries
- Candied lemon peel
- White chocolate curls
- Edible pearl dust
- Edible silver shimmer
Ingredient Spotlight
Blueberry Juice: This is the backbone of your shell’s color and flavor. Look for 100% pure blueberry juice with no added sugar or preservatives — the natural sweetness and deep purple hue are essential for that aurora effect. In a pinch, you can substitute with a high-quality blueberry nectar, but reduce the sugar by 2 tablespoons since nectar is already sweetened. I tested this with frozen blueberries that I thawed and pressed through a fine-mesh strainer, and it works beautifully — just expect a slightly more rustic color.
Agar-Agar Powder: This plant-based gelling agent is what gives the shell its crystal-clear structure. It’s made from seaweed and sets at room temperature, which means you don’t need to work with gelatin or worry about melting. I buy the Now Foods brand from my local health food store, but any brand works as long as it’s pure agar-agar powder — not flakes or bars, which require different ratios. One thing I learned in Paris: always whisk the agar-agar into the cold liquid first, then heat it slowly. This prevents clumping and ensures an even set.
Mascarpone Cheese: This Italian cream cheese is the heart of the cream core. It’s richer and silkier than regular cream cheese, with a buttery texture that pairs beautifully with the tart lemon and blueberry. I always bring my mascarpone to room temperature before whipping — this takes about 20 minutes on the counter and prevents lumps. If you can’t find mascarpone, you can substitute with an equal amount of cream cheese blended with 2 tablespoons of heavy cream, but the texture will be slightly less luscious.
Lemon Curd: Just one tablespoon of lemon curd adds a bright, tangy note to the cream core that cuts through the richness of the mascarpone and cream. I use store-bought (Bonne Maman is my go-to), but if you have homemade, even better. The lemon curd also helps stabilize the cream filling, making it easier to pipe without losing its shape. If you don’t have lemon curd, you can substitute with 1 teaspoon of lemon zest plus an extra tablespoon of powdered sugar — the flavor will be slightly less complex but still delicious.
| Original Ingredient | Best Substitution | Flavor / Texture Impact |
|---|---|---|
| Blueberry juice | Thawed frozen blueberries, pressed through a strainer | Slightly less vibrant, more rustic color; same flavor |
| Agar-agar powder | Agar-agar flakes (use 3 tbsp flakes for 2½ tsp powder) | Slightly softer set; must soak flakes 10 min before heating |
| Mascarpone cheese | Cream cheese + 2 tbsp heavy cream (blended) | Less rich, slightly tangier; core will be less silky |
| Lemon curd | 1 tsp lemon zest + 1 extra tbsp powdered sugar | Less complex tang; still bright, but less creamy |
How to Make Aurora Lemon Blueberry Crystal Bombs — Step-by-Step
Trust me when I say that this recipe is easier than it looks. The key is patience between the chilling stages — let the agar do its job, and you’ll be rewarded with the most gorgeous crystal-clear shells you’ve ever made at home. I’ve broken everything down so you can follow along without any guesswork.
Step 1: Prepare the Crystal Shell Mixture
In a medium saucepan, combine 1 cup blueberry juice, 1 cup lemon juice, 1½ cups water, ¾ cup granulated sugar, 2½ teaspoons agar-agar powder, 1 teaspoon lemon zest, a few drops of blue and violet food coloring (if using), and ¼ teaspoon salt. Whisk everything together until the agar-agar powder is fully dissolved — you shouldn’t feel any gritty grains on the bottom of the pan. Place the saucepan over medium heat and stir continuously until the mixture comes to a gentle simmer. Let it simmer for 2 minutes, stirring occasionally, until the sugar and agar are completely dissolved and the liquid is slightly thickened. The mixture should be clear and glossy, not cloudy.
💡 Stella’s Pro Tip: To test if the agar is fully activated, dip a cold spoon into the mixture and let it sit for 10 seconds. If the liquid on the spoon forms a thin, wobbly gel, it’s ready. If it’s still liquid, simmer for another minute and test again.
Step 2: Mold the Shells
Remove the saucepan from the heat and allow the mixture to cool for 3 to 4 minutes — it should still be warm but not hot. Pour it into sphere-shaped silicone molds, coating the sides and filling each cavity halfway. Tilt the molds gently to ensure the mixture coats the entire inner surface. Place the molds on a baking sheet and refrigerate for 30 to 40 minutes, until the mixture is partially set — it should feel firm to the touch but still have a slightly soft center. The shells should be thick enough to hold the cream filling without breaking.
⚠️ Common Mistake to Avoid: Don’t skip the cooling step before pouring! If the mixture is too hot, it can create condensation inside the mold, which leads to a cloudy shell instead of a crystal-clear one. Let it cool until you can comfortably touch the side of the saucepan.
Step 3: Make the Cream Core
While the shells are setting, make the cream filling. In a large mixing bowl, combine 8 oz mascarpone cheese (at room temperature), ½ cup heavy whipping cream, ¼ cup powdered sugar, 1 teaspoon vanilla bean paste, and 1 tablespoon lemon curd. Using a hand mixer or a stand mixer with the whisk attachment, whip on medium speed until the mixture is smooth, light, and fluffy — about 2 to 3 minutes. Be careful not to overwhip, or the cream can separate. The finished cream should hold a soft peak when you lift the whisk. Transfer the cream to a piping bag fitted with a medium round tip and refrigerate until you’re ready to use it.
💡 Stella’s Pro Tip: For the fluffiest cream core, chill your mixing bowl and whisk attachment in the freezer for 10 minutes before whipping. This keeps the cream cold and helps it whip up faster and lighter.
Step 4: Fill and Seal the Bombs
Remove the molds from the refrigerator. The shells should be partially set — firm on the outside but still slightly soft in the center. Pipe a generous amount of cream filling into the center of each shell, filling it about three-quarters full and leaving a ¼-inch border around the edges. You want enough cream to create a satisfying core, but not so much that it spills over when you add the top layer. Gently reheat the remaining blueberry-lemon mixture if it has thickened — just a few seconds in the microwave or a quick stir over low heat. Pour it over the cream filling, covering it completely and filling the mold to the top. Tap the mold gently on the counter to release any air bubbles. Refrigerate for at least 2 hours, or until the shells are fully set and crystal clear.
⚠️ Common Mistake to Avoid: If your top layer doesn’t seal smoothly, it’s because the reserved mixture has cooled too much and started to gel. Reheat it gently until it’s liquid again, but not hot. A smooth, warm pour is the secret to a seamless crystal finish.
Step 5: Unmold and Glaze
Once the bombs are fully set and the surface is firm to the touch, carefully unmold them onto a chilled serving platter. The silicone mold should flex easily — gently press the bottom of each cavity to release the bomb. To make the glaze, warm ¼ cup blueberry preserves, 2 tablespoons honey, 1 tablespoon water, and 1 tablespoon lemon juice in a small saucepan over low heat. Stir until the mixture is smooth, glossy, and fully combined. Allow the glaze to cool slightly — it should be warm but not hot, and still pourable. Brush or drizzle the glaze over each bomb, letting it cascade down the sides to create a luminous, aurora-like crystal shine. The glaze will set to a glossy finish as it cools.
💡 Stella’s Pro Tip: For the most dramatic aurora effect, apply the glaze in two thin layers. Brush the first layer, let it set for 2 minutes, then brush a second layer at a slightly different angle. This creates depth and light refraction that looks just like the Northern Lights.
Step 6: Garnish and Serve
While the glaze is still slightly tacky, garnish each bomb with fresh blueberries, candied lemon peel, white chocolate curls, a dusting of edible pearl dust, and a touch of edible silver shimmer. The garnishes should adhere naturally to the glaze. Serve the bombs thoroughly chilled — they should be cold enough that the shell has a slight firmness and the cream core is luxuriously cold and silky. For the best experience, serve them within 30 minutes of glazing, while the glaze is still glossy and the garnishes are fresh.
⚠️ Common Mistake to Avoid: Don’t add the edible pearl dust too early! If you sprinkle it on before the glaze has set slightly, it will dissolve and disappear. Wait until the glaze is tacky (about 2 minutes after brushing) so the dust stays suspended on the surface and catches the light.
| Step | Action | Duration | Key Visual Cue |
|---|---|---|---|
| 1 | Prepare shell mixture | 5 min | Glossy, clear liquid; coats spoon evenly |
| 2 | Mold the shells | 30–40 min | Firm outer edge, slightly soft center |
| 3 | Make cream core | 5 min | Soft peaks; smooth and fluffy |
| 4 | Fill and seal bombs | 2 hrs | Fully set, crystal-clear surface |
| 5 | Unmold and glaze | 5 min | Glossy, smooth glaze coating |
| 6 | Garnish and serve | 5 min | Garnishes adhered; shimmer visible |
Serving & Presentation
These crystal bombs are a showstopper on any dessert table, and the way you present them can elevate the entire experience. I like to serve them on a chilled black slate platter — the dark background makes the aurora colors pop and the edible pearl dust really catches the light. Arrange the bombs in a gentle curve, like the arc of the Northern Lights, and scatter fresh blueberries and candied lemon peel around the plate for a natural, organic feel. A light dusting of edible silver shimmer over the entire platter ties everything together and adds that ethereal glow.
For a more intimate setting, serve each bomb on its own small dessert plate with a dollop of lightly sweetened whipped cream and a few fresh blueberries on the side. I love pairing these with a chilled glass of sparkling lemonade or a dry Prosecco — the acidity cuts through the richness of the cream core and complements the bright citrus-berry shell. If you’re serving these after a heavy meal, consider a light herbal tea like mint or chamomile to cleanse the palate. And if you’re feeling extra festive, a tiny pinch of edible gold leaf on top of each bomb makes them look like they came from a palace kitchen.
One of my favorite ways to enjoy these is the way my mother taught me: with a warm cup of Moroccan mint tea on the side. The contrast between the cold, crystal-clear shell and the hot, fragrant tea is absolutely magical. It’s a pairing that connects my two worlds — the vibrant markets of Marrakesh and the gleaming pastry shops of Paris — and I hope it brings you as much joy as it brings me.
| Pairing Type | Suggestions | Why It Works |
|---|---|---|
| Side Dish | Lightly sweetened whipped cream, fresh berries, shortbread cookies | Adds texture contrast and extra creaminess; cookies provide crunch |
| Sauce / Dip | Warm blueberry compote, lemon anglaise, honey drizzle | Warm sauce contrasts with cold bomb; enhances fruit flavor |
| Beverage | Sparkling lemonade, dry Prosecco, Moroccan mint tea | Acidity cuts richness; tea adds aromatic warmth |
| Garnish | Edible gold leaf, fresh mint sprigs, crystallized violets | Elevates visual appeal; adds delicate floral or herbal notes |
Make-Ahead, Storage & Reheating
Living in NYC means my schedule is always full, so I rely on make-ahead recipes that don’t sacrifice quality. These aurora bombs are perfect for prepping in stages — you can make the shells and cream core on separate days, then assemble and glaze the day you serve them. I’ve tested this extensively, and the texture holds up beautifully if you follow my storage tips.
| Method | Container | Duration | Reheating Tip |
|---|---|---|---|
| Refrigerator | Airtight container, layered with parchment | Up to 3 days | Serve straight from fridge; no reheating needed |
| Freezer | Freezer-safe container, individually wrapped in plastic | Up to 1 month | Thaw in fridge 4 hours; glaze after thawing |
| Make-Ahead | Shells (unfilled) in mold; cream core in piping bag | Shells: 2 days; Cream: 1 day | Assemble and glaze on day of serving for best texture |
If you’re storing the finished bombs in the refrigerator, place them in a single layer in an airtight container with parchment between layers. The glaze will stay glossy for up to 24 hours, but after that, it may start to absorb moisture and lose some of its shine. For the best presentation, I recommend glazing and garnishing the bombs within 3 hours of serving. If you’ve frozen the bombs, thaw them in the refrigerator overnight and apply a fresh layer of glaze before serving — the glaze is what gives them that luminous aurora-like crystal shine, so a fresh coat makes all the difference.
One thing I learned the hard way: never microwave these bombs to soften them! The agar-agar shell will break down and become rubbery, and the cream core will separate. Always serve them thoroughly chilled, straight from the refrigerator. If you want a slightly softer texture, let them sit at room temperature for 5 minutes before serving — just long enough to take the chill off without compromising the structure.
Variations & Easy Swaps
One of the things I love most about this recipe is how versatile it is. Once you master the basic technique of working with agar-agar shells, you can customize the flavors to suit any season or dietary need. Here are three of my favorite variations that I’ve tested in my NYC kitchen — each one brings something unique to the table while keeping that stunning crystal-clear presentation.
| Variation | Key Change | Best For | Difficulty Impact |
|---|---|---|---|
| Tropical Mango-Passionfruit | Replace blueberry juice with mango nectar, lemon juice with passionfruit juice | Summer parties, tropical-themed desserts | Easy — same technique |
| Dairy-Free Coconut Core | Replace mascarpone with coconut cream; use coconut yogurt instead of heavy cream | Dairy-free, vegan-friendly (use plant-based curd) | Medium — coconut cream whips differently |
| Winter Spice Cranberry-Orange | Replace blueberry juice with cranberry juice; add ½ tsp cinnamon to shell | Holiday table, Thanksgiving, Christmas | Easy — same technique; warm spice aroma |
Tropical Mango-Passionfruit Bombs
This variation is pure sunshine. Replace the blueberry juice with 1 cup of mango nectar and the lemon juice with ½ cup passionfruit juice (plus ½ cup water to keep the liquid ratio the same). The passionfruit adds a tart, floral note that cuts through the sweetness of the mango beautifully. For the cream core, I like to fold in 1 tablespoon of toasted coconut flakes just before piping — it adds a subtle texture and a hint of tropical flavor. This version is always a hit at summer barbecues and pool parties, and the golden-orange color of the shell looks stunning against the edible pearl dust.
Dairy-Free Coconut Core Bombs
For a dairy-free version that still feels indulgent, replace the mascarpone with 8 oz of full-fat coconut cream (chilled overnight and scooped from the top of the can) and the heavy cream with ½ cup of coconut yogurt. The coconut cream whips up beautifully — just make sure it’s very cold, and add 1 tablespoon of cornstarch to stabilize it. Use a dairy-free lemon curd or substitute the lemon curd with 1 tablespoon of lemon juice and an extra tablespoon of powdered sugar. The coconut flavor pairs surprisingly well with the blueberry and lemon, and the texture is just as silky as the original. I tested this for a friend with dairy allergies, and she said it was the best dessert she’d had in years.
Winter Spice Cranberry-Orange Bombs
When the holidays roll around, I swap the blueberry juice for 1 cup of unsweetened cranberry juice and add ½ teaspoon of ground cinnamon to the shell mixture. The lemon juice stays, but I also add 1 tablespoon of orange zest for a bright, festive note. The cream core gets a holiday makeover too — I fold in 1 teaspoon of orange zest and replace the lemon curd with 1 tablespoon of orange marmalade. The deep red color of the shell, combined with the silver shimmer and candied orange peel garnish, makes these look like edible ornaments. I serve them at my annual NYC holiday party, and they never last more than 10 minutes on the table.
FAQ
What is the best way to prepare the lemon and blueberry mixture for the crystal shell in Aurora Lemon Blueberry Crystal Bombs?
The best way to prepare the lemon and blueberry mixture is to combine all the shell ingredients — blueberry juice, lemon juice, water, sugar, agar-agar powder, lemon zest, food coloring (if using), and salt — in a cold saucepan first. Whisk everything together thoroughly before turning on the heat to ensure the agar-agar powder dissolves completely without clumping. Then bring the mixture to a gentle simmer over medium heat, stirring continuously, and let it simmer for exactly 2 minutes. This activates the agar-agar and ensures a crystal-clear set. Always let the mixture cool for 3 to 4 minutes before pouring it into the molds to prevent condensation and cloudiness.
Can I use frozen blueberries instead of fresh for the Aurora Lemon Blueberry Crystal Bombs recipe?
Yes, you can absolutely use frozen blueberries to make the juice for this recipe. I’ve tested this several times, and it works beautifully. Simply thaw 2 cups of frozen blueberries (any brand works), then press them through a fine-mesh strainer using the back of a spoon to extract the juice. You’ll get about 1 cup of juice from 2 cups of frozen blueberries. The flavor will be just as vibrant, though the color may be slightly less intense than fresh-pressed juice. If you want to deepen the color, add an extra drop of blue or violet food coloring. Just avoid using blueberries that have been frozen with added sugar or syrup, as that will throw off the sweetness balance of the shell.
How long do you need to freeze the cream core before assembling the crystal bombs?
You don’t actually need to freeze the cream core at all for this recipe! The cream core is piped directly into the partially set shell, and then the bombs are refrigerated (not frozen) until fully set. The key is to have the shells partially set — firm on the outside but still slightly soft in the center — so they can hold the cream without it sinking or breaking through. If you freeze the cream core, it will become too firm to pipe smoothly and may create air pockets when you seal the bombs. For the best texture, whip the cream core just before you’re ready to fill the shells, and keep it refrigerated in the piping bag if you need to wait more than 10 minutes.
What can I substitute for the cream core to make a dairy-free version of these crystal bombs?
For a dairy-free cream core, I recommend using full-fat coconut cream as the base. Chill a can of full-fat coconut milk overnight, then scoop out the solid cream from the top — this gives you about 8 oz. Whip it with ½ cup of coconut yogurt (for tang and lightness), ¼ cup powdered sugar, 1 teaspoon vanilla bean paste, and 1 tablespoon of dairy-free lemon curd or lemon juice. The coconut cream whips up beautifully, though it’s slightly less stable than mascarpone, so I recommend adding 1 tablespoon of cornstarch to help it hold its shape. The texture is silky and luxurious, and the coconut flavor pairs wonderfully with the blueberry and lemon. I’ve tested this version multiple times, and it’s always a crowd-pleaser.
Why did my crystal shell turn cloudy instead of clear?
Cloudy shells are usually caused by one of three things. First, pouring the mixture into the molds while it’s still too hot can create steam and condensation inside the mold, which clouds the shell. Always let the mixture cool for 3 to 4 minutes before pouring. Second, air bubbles in the mixture can scatter light and make the shell look cloudy. To avoid this, whisk gently and tap the mold on the counter after pouring to release any bubbles. Third, using a mold that isn’t completely dry can cause cloudiness. Make sure your silicone molds are perfectly dry before you start. If your shells are already cloudy, don’t worry — the glaze will help disguise it, and the flavor is still perfect.
Can I make these crystal bombs without a silicone sphere mold?
Yes, you can! While sphere-shaped silicone molds give you that dramatic ball shape, you can use any silicone mold with a smooth interior surface. Half-sphere molds work wonderfully — you can fill two halves, let them set partially, sandwich the cream core between them, and seal with a little warm mixture. You can also use small dome-shaped molds or even shallow round silicone baking cups. The key is that the mold must be flexible enough to unmold the bombs without cracking the shell. Avoid rigid metal or plastic molds, as the shell is delicate and needs the flexibility of silicone to release cleanly. I’ve even made these in silicone ice cube trays for a bite-sized version!
How far in advance can I prepare the Aurora Lemon Blueberry Crystal Bombs?
You can prepare these bombs in stages over several days. The shells (unfilled and still in the molds) can be refrigerated for up to 2 days — just cover them tightly with plastic wrap to prevent them from absorbing fridge odors. The cream core can be made 1 day in advance and stored in a piping bag in the refrigerator. On the day you plan to serve them, fill and seal the bombs, refrigerate for 2 hours until fully set, then glaze and garnish within 3 hours of serving for the best visual effect. Fully assembled and glazed bombs will keep in the refrigerator for up to 24 hours, but the glaze may lose some of its high-shine gloss after that. I don’t recommend freezing fully assembled bombs, as the glaze can become tacky when thawed.
Can I use gelatin instead of agar-agar for the crystal shell?
I don’t recommend substituting gelatin for agar-agar in this recipe for two reasons. First, gelatin creates a softer, more elastic set that won’t hold the same crystal-clear, glass-like structure — the bombs would be wobbly rather than firm and shatterable. Second, gelatin requires refrigeration to set and can melt at room temperature, while agar-agar sets at room temperature and holds its shape much more reliably. If you absolutely must use gelatin, use 2 tablespoons of powdered gelatin bloomed in ¼ cup of cold water, then dissolved into the warm mixture. But please know that the texture will be noticeably different — more like a firm jelly than a crystal shell. The bombs will still taste good, but they won’t have that signature aurora-like clarity and crunch.
What is edible pearl dust and where can I buy it?
Edible pearl dust is a food-grade finishing powder made from mica and titanium dioxide that gives a luminous, pearlescent sheen to desserts. It’s completely safe to eat and adds that magical aurora-like shimmer that makes these bombs so special. You can find it at most baking supply stores, specialty kitchen shops, or online retailers like Amazon and Sur La Table. I use the brand “Lustre Dust” by Chefmaster, which comes in a range of pearl and metallic shades. For this recipe, I recommend a white pearl dust or a very pale pink pearl dust to complement the blueberry and lemon colors. Apply it with a small, soft brush after the glaze has set slightly tacky — it will adhere beautifully and catch the light from every angle.
How do I get the glaze to look glossy and not streaky?
The secret to a glossy, streak-free glaze is all in the temperature and application. First, make sure your glaze is warm but not hot — it should feel comfortably warm to the touch, like a warm cup of tea. If it’s too hot, it will melt the surface of the shell and create a cloudy appearance. If it’s too cold, it will thicken and apply unevenly. Second, apply the glaze in two thin layers using a soft silicone brush. Brush the first layer in one direction, let it set for 2 minutes until it’s tacky, then brush the second layer in a perpendicular direction. This creates a smooth, even coating with no streaks. Finally, make sure your bombs are thoroughly chilled before glazing — a cold surface helps the glaze set quickly and evenly, locking in that high-gloss shine.
Share Your Version!
I absolutely love seeing how you all make these recipes your own. Whether you stick with the classic blueberry-lemon combination or try one of the variations, I’d be so happy to see your crystal bombs in all their aurora glory. Snap a photo before they disappear (and trust me, they will disappear fast!) and share it on Instagram or Pinterest — tag me @leosfoods so I can see your creation. Leave a star rating and a comment below to let me know how it turned out, or share your own twist on the recipe. Did you try the tropical mango version? Did you add a pinch of cardamom like my mother would have? I want to hear it all.
One question I’d love for you to answer: what was the first thing that surprised you when you unmolded your bombs? For me, it was the way the light caught the edges — that first shimmer made me feel like I had bottled a piece of the sky. I can’t wait to hear about your moment of discovery. From my NYC kitchen to yours — I hope this recipe brings as much warmth to your table as it does to mine. — Stella 🧡
If you enjoyed this Aurora Lemon Blueberry Crystal Bombs with Cream Core recipe, don’t let it get lost in your browser tabs! 😄 Pin it now so you can find it again anytime — and explore hundreds more tried-and-tested recipes waiting for you on my Pinterest boards.
Love This Recipe? Save It to Pinterest!
If you enjoyed this Aurora Lemon Blueberry Crystal Bombs with Cream Core recipe, don’t let it get lost in your browser tabs! 😄 Pin it now so you can find it again anytime — and explore hundreds more tried-and-tested recipes waiting for you on my Pinterest boards.
👉 Follow Stella on Pinterest @stellarecipeblog
📌 Pin this recipe · 🔁 Re-pin your favorites · 💬 Tag me when you make it — I love seeing your creations!
⭐️ Tried this recipe? Leave a star rating below! ⭐️
I read every comment and I’d love to know — what was the first thing that surprised you when you unmolded your bombs?
📸 Tag @leosfoods on Instagram or Pinterest for a chance to be featured in my stories!
“`
Print
Aurora Lemon Blueberry Crystal Bombs with Cream Core
Vibrant citrus-berry shell surrounding a silky cream core, finished with a luminous aurora-like crystal shine.
- Yield: 6 1x
Ingredients
- For the Aurora Crystal Shell:
- 1 cup blueberry juice
- 1 cup lemon juice
- 1 1/2 cups water
- 3/4 cup granulated sugar
- 2 1/2 tsp agar-agar powder
- 1 tsp lemon zest
- A few drops blue and violet food coloring (optional)
- 1/4 tsp salt
- For the Cream Core:
- 8 oz mascarpone cheese
- 1/2 cup heavy whipping cream
- 1/4 cup powdered sugar
- 1 tsp vanilla bean paste
- 1 tbsp lemon curd
- For the Blueberry-Lemon Glaze:
- 1/4 cup blueberry preserves
- 2 tbsp honey
- 1 tbsp water
- 1 tbsp lemon juice
- For Garnish (optional):
- Fresh blueberries
- Candied lemon peel
- White chocolate curls
- Edible pearl dust
- Edible silver shimmer
Instructions
- Combine blueberry juice, lemon juice, water, sugar, agar-agar powder, lemon zest, food coloring (if using), and salt in a saucepan. Heat while stirring until fully dissolved and bring to a gentle simmer.
- Pour the mixture into sphere-shaped silicone molds, coating the sides and filling each cavity halfway. Refrigerate until partially set.
- Whip mascarpone cheese, heavy whipping cream, powdered sugar, vanilla bean paste, and lemon curd until smooth, light, and fluffy. Transfer to a piping bag.
- Pipe a generous amount of cream filling into the center of each partially set shell, leaving room around the edges. Cover with the remaining blueberry-lemon mixture and refrigerate until fully set and crystal clear.
- Carefully unmold the bombs onto a chilled serving platter.
- Warm blueberry preserves, honey, water, and lemon juice until smooth and glossy. Allow to cool slightly while remaining pourable.
- Brush or drizzle the glaze over each bomb to create a luminous aurora-like crystal shine.
- Garnish with fresh blueberries, candied lemon peel, white chocolate curls, edible pearl dust, and silver shimmer.
- Serve thoroughly chilled for a vibrant citrus-berry shell surrounding a silky cream core.
Nutrition
- Calories: 305
- Sugar: 33g
- Fat: 16g
- Carbohydrates: 38g
- Protein: 4g
Tried This Recipe? Leave a Comment!
Did you make this recipe? I’d love to hear how it turned out! Please leave a comment and a rating below. Your feedback helps other home cooks and supports cheerychop.com!
For more delicious inspiration, follow me on Pinterest!