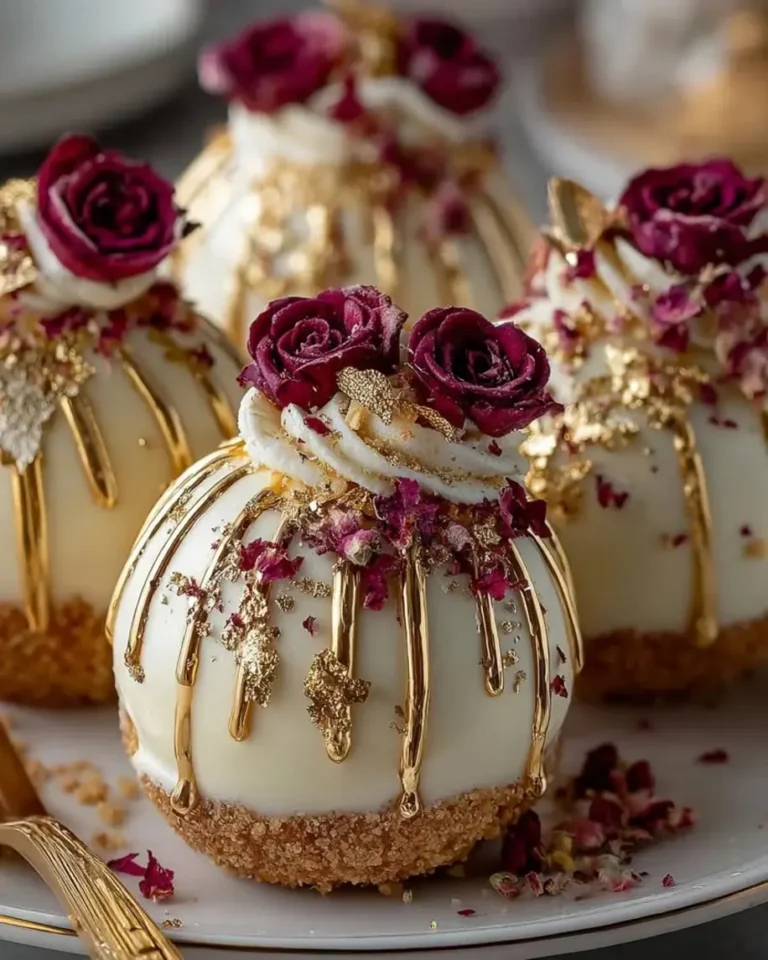
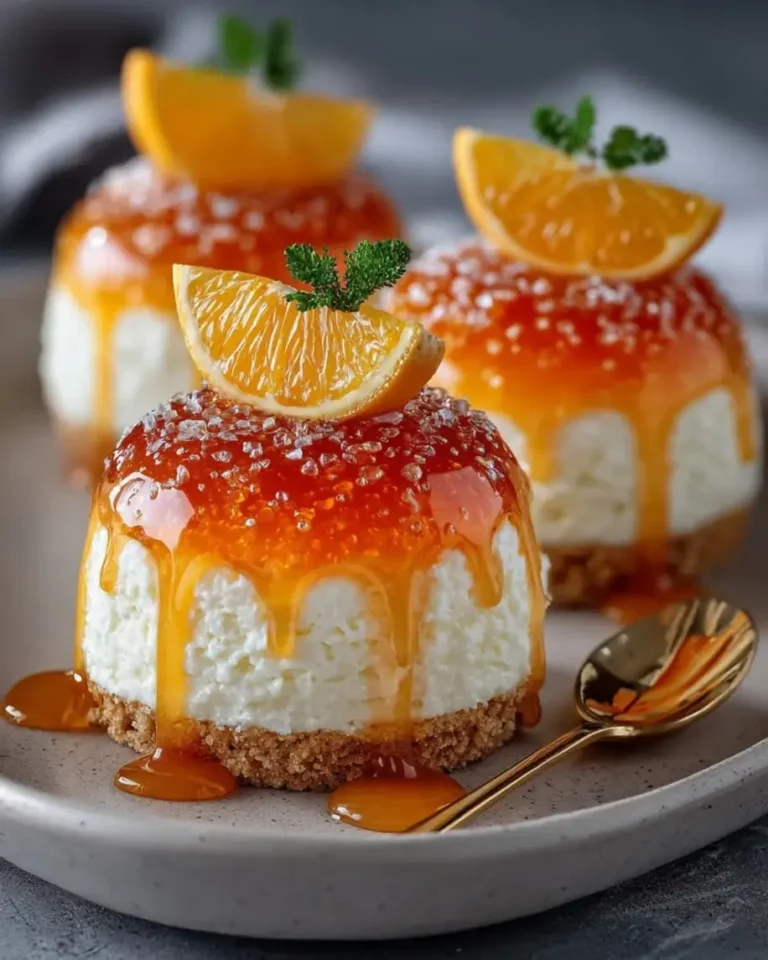
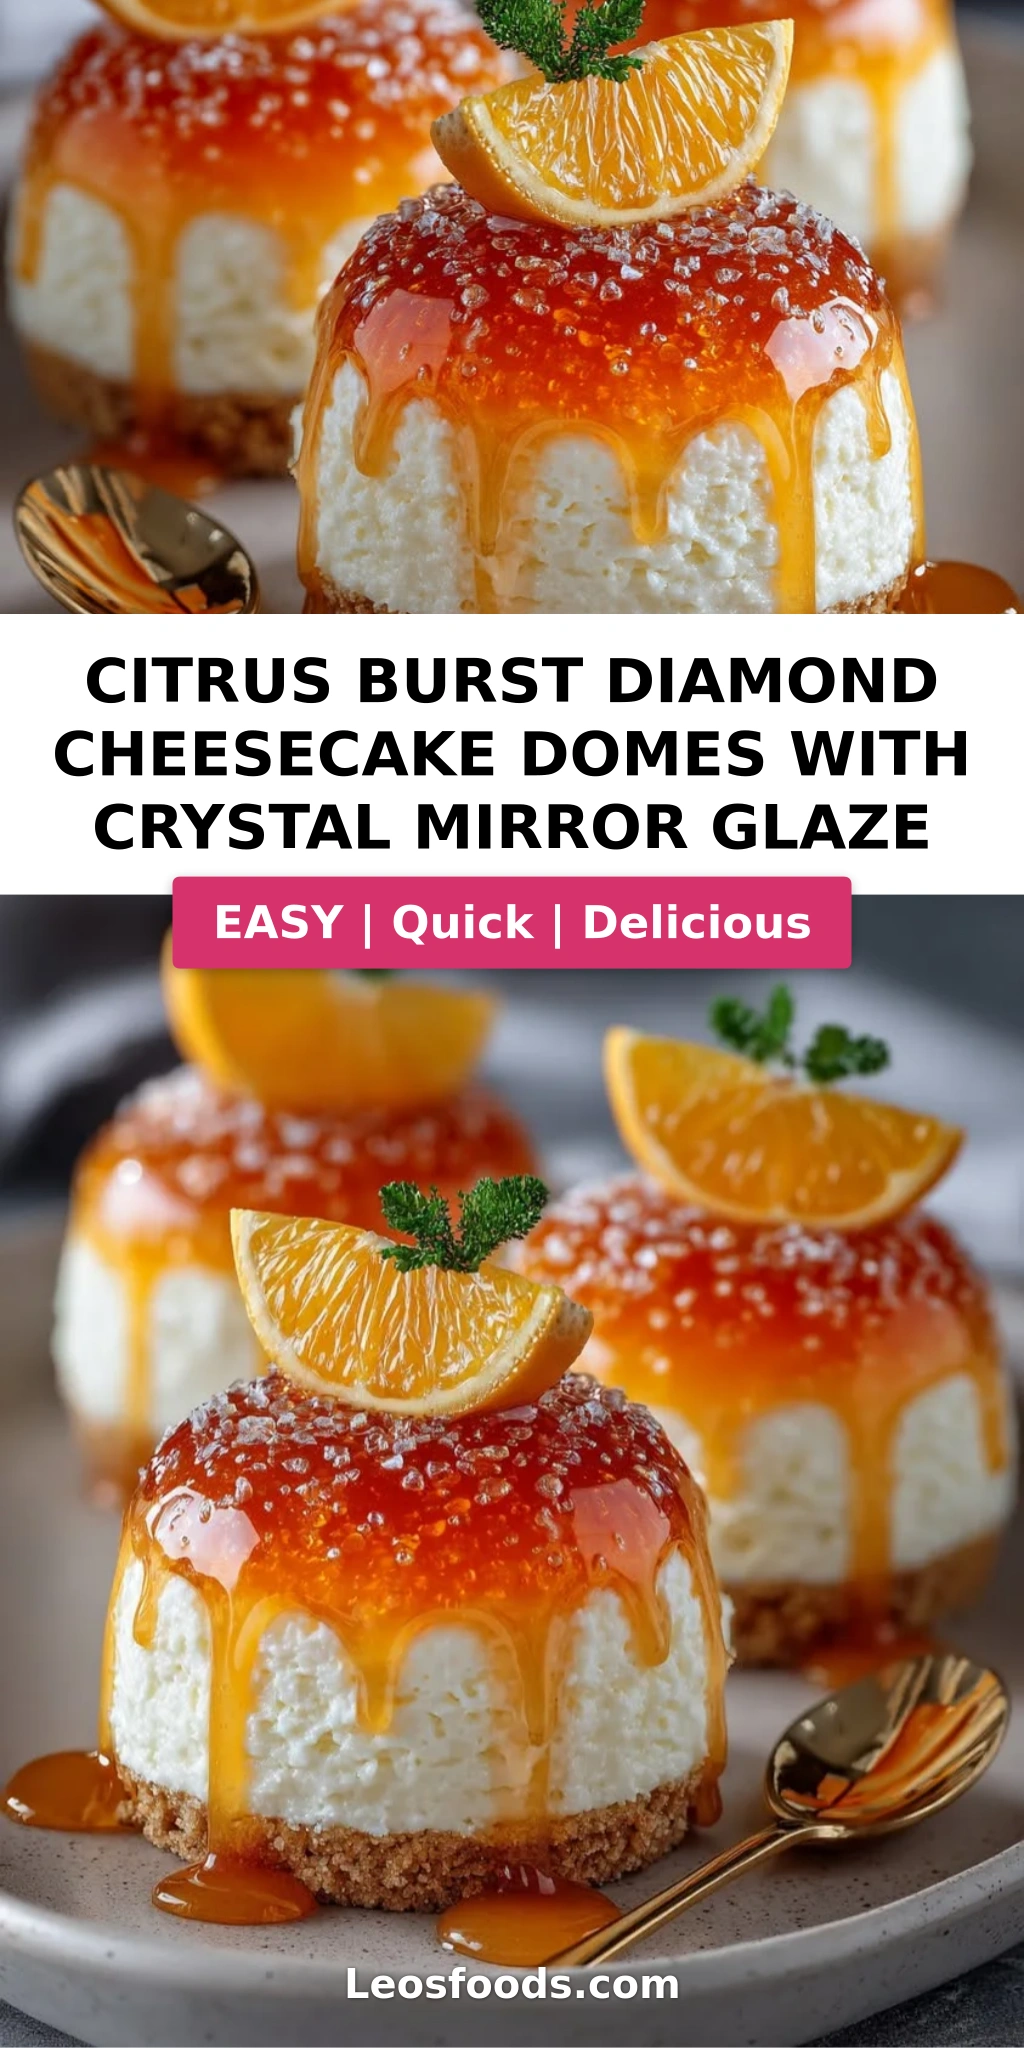
Citrus Burst Diamond Cheesecake Domes with Mirror Glaze

Table of Contents
Citrus Burst Diamond Cheesecake Domes with Crystal Mirror Glaze – A Stunning Dessert with a Hidden Citrus Surprise
I still remember the first time I made a crystal mirror glaze in pastry school in Paris. The chef demonstrator poured that shimmering, jewel-toned liquid over a perfectly frozen dome, and the entire classroom fell silent. It was like watching liquid glass cascade over a gemstone. That moment stayed with me, and years later, after moving to New York City and opening my own kitchen, I knew I had to create a version that honored my North African roots. These citrus burst diamond cheesecake domes are the result — a stunning dessert where creamy citrus cheesecake meets a hidden jelly center and a breathtaking crystal mirror glaze cheesecake finish that shines like a diamond. The secret? A burst of bright citrus jelly hiding inside, inspired by the preserved lemons and orange blossom water my mother used in her kitchen in Morocco.
Imagine cutting into a perfectly glossy dome — the mirror glaze shatters ever so slightly under your spoon, revealing a velvety citrus cheesecake layer, and then, right in the center, a bright, tangy citrus jelly that bursts with sunshine. The texture is a symphony: the smooth, almost creamy cheesecake, the firm yet tender jelly center, and the crackling-smooth mirror glaze that melts on your tongue. The aromas of lemon, orange, and a whisper of grapefruit lift up as you bring the spoon to your mouth. It’s bright without being tart, sweet without being heavy, and visually so striking that every dinner guest will reach for their phone before their fork. This is the kind of dessert that makes you feel like a pastry chef — even if you’ve never made a dome in your life.
I’ve tested this recipe more times than I can count, tweaking the gelatin ratios, the glaze temperature, and the citrus balance so that it works beautifully for home cooks. What sets this citrus cheesecake domes recipe apart is the double-citrus punch: a creamy cheesecake infused with fresh lemon and orange zest, plus a hidden jelly center made from orange and grapefruit juice. The diamond mirror glaze cake technique I’ll share with you is the same one I learned in Paris, but I’ve simplified it so you don’t need a kitchen torch or a pastry degree. I’ll also walk you through the most common mistakes — like glaze that’s too thick or domes that stick to the mold — so you can skip the frustration and go straight to the wow factor. Let’s make something beautiful together.
Why This Citrus Burst Diamond Cheesecake Domes Recipe Is the Best
The flavor secret here is deeply personal. Growing up in Morocco, my mother would make a simple citrus salad with orange slices, a dusting of cinnamon, and a drizzle of orange flower water. That bright, sun-kissed flavor memory is the soul of this dessert. I took that inspiration and married it with the French technique of a crystal mirror glaze — the kind that pastry chefs spend years perfecting. The result is a dessert that tastes like nostalgia but looks like modern art. The citrus jelly center isn’t just a gimmick; it’s a concentrated burst of brightness that cuts through the richness of the cream cheese, making each bite feel fresh and balanced. Most cheesecake domes are one-note creamy, but this one has layers of flavor that unfold as you eat it.
Perfected texture came from countless trial and error in my NYC kitchen. The key is the gelatin ratio in the cheesecake filling — too little and the domes won’t hold their shape when unmolded; too much and they become rubbery. I landed on the sweet spot: 2 teaspoons of powdered gelatin bloomed in cold water, then gently warmed and folded into the cream cheese mixture. The mirror glaze is equally precise. I heat the sugar, water, and condensed milk until steaming but never boiling, then add white chocolate and gelatin for that glass-like sheen. Cooling it to exactly 90°F before pouring is the trick that separates a mirror from a mess. I’ve tested this on humid NYC summer days and dry winter afternoons, and these ratios hold up every time.
And here’s the best part: this recipe is far more forgiving than you’d think. Yes, it looks like something from a fancy patisserie, but the steps are logical and straightforward. You don’t need special equipment beyond a set of dome molds and an immersion blender. The most technically demanding step — the glaze — comes together in about 10 minutes of active work. I’ve taught this recipe to complete beginners in my cooking workshops, and every single person walked away with beautiful domes. If you can make a batch of Jell-O and beat cream cheese, you can absolutely nail this. The sense of accomplishment when you see that glossy, flawless dome is absolutely worth the effort.
Citrus Burst Diamond Cheesecake Domes Ingredients
Every Sunday morning in the summer, I head to the Union Square Greenmarket in NYC to grab the freshest citrus I can find. There’s something about the smell of oranges and lemons piled high on a wooden crate that takes me straight back to the souks of Marrakech. For this recipe, you want fruit that feels heavy for its size — that means it’s full of juice. I also pick up my cream cheese from a local dairy farm stand when I can, but any good-quality block cream cheese will work beautifully. Here’s everything you’ll need to create these stunning citrus burst diamond cheesecake domes.
Ingredients List
For the Cheesecake Filling:
- 8 oz cream cheese, softened
- 1/2 cup granulated sugar
- 1 cup heavy cream
- 1 tsp vanilla extract
- 1 tbsp lemon juice
- 1 tbsp orange juice
- 1 tsp lemon zest
- 1 tsp orange zest
- 2 tsp powdered gelatin
- 2 tbsp cold water
For the Biscuit Base:
- 1 cup digestive biscuits, finely crushed
- 3 tbsp melted butter
For the Citrus Jelly Center:
- 1/2 cup orange juice
- 1/2 cup grapefruit juice
- 2 tbsp sugar
- 1 tsp powdered gelatin
- 1 tbsp cold water
For the Crystal Mirror Glaze:
- 1 cup granulated sugar
- 1/2 cup water
- 1/2 cup condensed milk
- 1 cup white chocolate, finely chopped
- 1 tbsp powdered gelatin
- 3 tbsp cold water
- 1/2 cup clear citrus juice (strained lemon-orange mix)
- Yellow and orange food coloring (optional)
For Garnish (optional):
- Candied citrus peel
- Edible gold flakes
- Micro mint leaves
Ingredient Spotlight
Cream Cheese: This is the backbone of your cheesecake filling, so don’t skimp. Use a full-fat block cream cheese (not the spreadable kind in a tub) for the creamiest texture and best stability. I prefer Philadelphia brand for its consistent results. Let it soften to room temperature before beating — about 45 minutes on the counter. If you’re in a hurry, cut it into small cubes and let it sit for 20 minutes. Cold cream cheese will give you a lumpy filling that won’t set evenly.
White Chocolate for the Glaze: The quality of your white chocolate directly determines how glossy and stable your mirror glaze will be. Use a good-quality couverture or baking bar with at least 30% cocoa butter. Avoid white chocolate chips, which often contain stabilizers that prevent smooth melting. I use Valrhona Ivoire or Guittard white wafers. Finely chop the chocolate so it melts evenly when you pour the hot sugar mixture over it — this prevents lumps that can ruin the mirror finish.
Gelatin: Powdered gelatin is what gives both the cheesecake domes and the mirror glaze their structure. I use Knox brand, which is widely available in US grocery stores. Always bloom it in cold water for 5 minutes before using — this step is non-negotiable. Blooming hydrates the gelatin granules so they dissolve smoothly without clumping. If you skip this step, you’ll end up with rubbery bits in your otherwise silky filling. For a vegetarian version, you can use agar-agar, but the texture will be slightly firmer and less creamy.
Citrus Juice: Freshly squeezed juice is absolutely essential here. The bottled stuff has a flat, one-dimensional flavor and often contains preservatives that can affect how the jelly sets. I use a combination of orange, lemon, and grapefruit for a complex, layered citrus flavor that isn’t just sweet or just tart. Strain the juice through a fine-mesh sieve to remove any pulp or seeds, especially for the mirror glaze, where clarity is key. A clear, pulp-free juice gives you that glass-like finish.
| Original Ingredient | Best Substitution | Flavor / Texture Impact |
|---|---|---|
| Cream cheese | Mascarpone (full-fat) | Richer, slightly tangier; domes will be softer, freeze 1 hour longer |
| Digestive biscuits | Graham crackers or shortbread cookies | Similar crunch; graham adds honey note, shortbread is buttery |
| White chocolate | High-quality white chocolate bar (no chips) | Same result; avoid compound coating which won’t set as hard |
| Grapefruit juice | Pink grapefruit or blood orange juice | Sweeter, less tart; blood orange gives deeper color |
How to Make Citrus Burst Diamond Cheesecake Domes — Step-by-Step
I’ve broken this down into clear, manageable steps so you can work through it with confidence. The most important thing to remember is to read through the entire recipe before you start — especially because there are several resting and freezing periods. Trust me, the payoff is spectacular. Let’s make some magic.
Step 1: Prepare the Biscuit Base
Finely crush 1 cup of digestive biscuits into crumbs — you can use a food processor or seal them in a zip-top bag and crush with a rolling pin. Mix the crumbs with 3 tablespoons of melted butter until the texture resembles wet sand. Divide the mixture evenly among your dome molds and press firmly into a flat, even layer at the bottom of each mold. Use the back of a small spoon or a flat-bottomed glass to compact it well — this prevents the base from crumbling when you unmold the domes later. Place the molds in the refrigerator and chill for 15 minutes while you prepare the filling.
💡 Stella’s Pro Tip: For an even sturdier base, bake the pressed crumbs at 350°F for 8 minutes before adding the filling. This extra step gives them a toasty flavor and helps them hold together better when you bite into the finished dome.
Step 2: Bloom the Gelatin
In a small bowl, combine 2 teaspoons of powdered gelatin with 2 tablespoons of cold water. Stir gently to break up any clumps, then let it sit undisturbed for 5 minutes. The gelatin will absorb the water and form a firm, jiggly solid — that’s exactly what you want. This process, called blooming, is essential for smooth, lump-free incorporation into the cheesecake filling. While the gelatin blooms, you can prepare the cream cheese mixture.
⚠️ Common Mistake to Avoid: Don’t use warm or hot water to bloom gelatin. It will cause the gelatin to dissolve unevenly and form strings or clumps in your filling. Always use cold tap water and let it sit the full 5 minutes.
Step 3: Make the Cheesecake Filling
In a large mixing bowl, beat 8 oz of softened cream cheese with 1/2 cup granulated sugar until smooth and fluffy — about 2 minutes with an electric mixer on medium speed. Add 1 tsp vanilla extract, 1 tbsp lemon juice, 1 tbsp orange juice, 1 tsp lemon zest, and 1 tsp orange zest, and beat until fully incorporated. In a small saucepan, warm about 2 tablespoons of the heavy cream over low heat until just steaming — do not let it boil. Remove from heat, add the bloomed gelatin, and stir until completely dissolved. Pour this gelatin-cream mixture into the cream cheese base and mix well. In a separate bowl, whip the remaining heavy cream to soft peaks — when you lift the whisk, the cream should droop slightly but hold its shape. Gently fold the whipped cream into the cream cheese mixture until no white streaks remain.
💡 Stella’s Pro Tip: When folding the whipped cream into the cream cheese base, use a rubber spatula and a gentle hand. Cut through the center of the mixture, scoop along the bottom of the bowl, and fold over the top. Rotate the bowl a quarter turn with each fold. About 12 to 15 folds should be enough — over-mixing will deflate the cream and make the filling dense instead of airy.
Step 4: Assemble the Domes
Remove the chilled molds from the refrigerator. Spoon or pipe the cheesecake mixture into each mold, filling them about halfway. Use the back of a small spoon to create a shallow well in the center of the filling. Place about 1 to 2 teaspoons of the prepared citrus jelly (recipe below) into each well. Then, cover the jelly completely with the remaining cheesecake mixture, spreading it evenly to the edges of the mold. Smooth the tops with an offset spatula so they’re flush with the rim of the mold — this ensures your domes will sit flat when unmolded.
💡 Stella’s Pro Tip: To make the citrus jelly center ahead of time, combine 1/2 cup orange juice, 1/2 cup grapefruit juice, and 2 tbsp sugar in a small saucepan. Sprinkle 1 tsp gelatin over 1 tbsp cold water and let it bloom for 5 minutes. Warm the juice mixture until steaming, add the bloomed gelatin, and stir until dissolved. Pour into a small dish and refrigerate for 2 hours until set. Scoop out small balls with a melon baller or teaspoon for the centers.
Step 5: Freeze the Domes
Place the filled molds on a baking sheet and transfer to the freezer. Freeze for at least 6 hours, or preferably overnight. The domes must be completely solid before unmolding and glazing — if they’re even slightly soft in the center, they may collapse when you pour the warm glaze over them. I usually make these a day ahead and let them freeze overnight. For best results, cover the baking sheet with plastic wrap after 2 hours to prevent freezer odors from affecting the flavor.
⚠️ Common Mistake to Avoid: Freezing for less than 6 hours is the number one reason for dome failures. The warm glaze (90°F) hitting a partially frozen dome can cause the cheesecake to soften and slide right off the base. Be patient — a full freeze is your insurance policy.
Step 6: Make the Crystal Mirror Glaze
About 30 minutes before you’re ready to glaze, start making the mirror glaze. In a small bowl, bloom 1 tablespoon of powdered gelatin in 3 tablespoons of cold water for 5 minutes. In a medium saucepan, combine 1 cup granulated sugar, 1/2 cup water, and 1/2 cup condensed milk. Heat over medium heat, stirring gently, until the mixture is steaming and the sugar has dissolved — do not let it boil. Remove from heat and add 1 cup finely chopped white chocolate. Let it sit for 1 minute, then stir until smooth. Add the bloomed gelatin and stir until fully dissolved. Add 1/2 cup clear citrus juice (strained) and a few drops of yellow and orange food coloring if desired. Use an immersion blender to blend the glaze until completely smooth — this removes any air bubbles. Pour the glaze through a fine-mesh sieve into a tall measuring cup or bowl. Let it cool to 90°F (32°C), stirring occasionally. This is the perfect pouring temperature.
💡 Stella’s Pro Tip: To check if your glaze is at the right temperature without a thermometer, dip a clean finger into the glaze. It should feel warm but not hot — like a comfortable bath temperature. If it’s too hot, it will melt the dome; too cold, and it will thicken and won’t flow smoothly. The immersion blender step is key: it emulsifies the glaze and eliminates tiny bubbles that would mar the mirror finish.
Step 7: Glaze the Domes
Remove the frozen domes from the molds — gently run the outside of the mold under warm water for a few seconds to loosen, then invert onto a clean surface. The domes should pop out easily if fully frozen. Place a wire rack over a baking sheet lined with parchment paper (to catch excess glaze). Transfer each dome onto the rack, biscuit base facing down. Pour the cooled glaze (at 90°F) evenly over each dome, starting from the top and letting it cascade down the sides. Make sure the entire surface is coated. Work quickly but calmly — the glaze sets fast. Tap the rack gently on the counter to help any excess glaze drip off and to smooth out the coating. Transfer the glazed domes to the refrigerator and let them set for 30 minutes before serving.
⚠️ Common Mistake to Avoid: Don’t pour the glaze in a single spot — move in a steady stream over the entire dome. If you pour too slowly, the glaze will set in streaks before it covers the whole surface. If you pour too fast, it can splash and create uneven patches. A confident, steady pour is the secret to a flawless mirror finish.
Step 8: Garnish and Serve
Once the glaze has set for 30 minutes in the refrigerator, the domes are ready to garnish and serve. Place each dome on a serving plate or a small pedestal. Garnish with a small piece of candied citrus peel placed artfully on top, a sprinkle of edible gold flakes for that extra-special sparkle, and a tiny micro mint leaf for a pop of green. Serve immediately, or keep refrigerated for up to 24 hours before serving. The mirror glaze will remain glossy and beautiful for up to two days in the fridge.
💡 Stella’s Pro Tip: If you’re garnishing with edible gold flakes, use a dry brush or tweezers to place them — they stick to anything damp, including your fingers. A light touch is all you need; the gold is meant to catch the light, not overwhelm the dome. For a more dramatic presentation, place a dome on a mirror or dark slate plate to really show off that glossy finish.
| Step | Action | Duration | Key Visual Cue |
|---|---|---|---|
| 1 | Prepare biscuit base | 10 mins + 15 mins chill | Mixture holds together when pinched |
| 2 | Bloom gelatin for filling | 5 mins | Gelatin is firm and jiggly |
| 3 | Make cheesecake filling | 10 mins | Smooth, fluffy, no lumps |
| 4 | Assemble domes | 15 mins | Filling is level with mold rim |
| 5 | Freeze domes | 6+ hours | Firm to the touch, solid throughout |
| 6 | Make mirror glaze | 15 mins + cooling | Smooth, glossy, no bubbles |
| 7 | Glaze domes | 5 mins | Even coating, no bald spots |
| 8 | Garnish and serve | 10 mins | Glaze set, garnishes in place |
Serving & Presentation
Serving these domes is a moment of pure theater. I love to plate each dome on a chilled white plate with a small swoosh of citrus curd or a dusting of powdered sugar around the base. The contrast between the glossy mirror glaze and the matte white plate is stunning. For special occasions, I arrange the domes on a mirrored tray or a dark slate board — the reflection doubles the visual impact. A few candied citrus peel curls, a scatter of edible gold flakes, and a tiny sprig of micro mint on top of each dome create a look that’s both elegant and whimsical. This is a dessert that commands attention at any dinner party, holiday table, or celebration.
In my NYC kitchen, I often serve these domes after a heavy Moroccan-inspired tagine or a rich French braised dish. The bright citrus cuts through the richness and cleanses the palate beautifully. I also love to serve them alongside a small glass of limoncello or a citrus-infused tea. For a truly memorable dessert spread, pair these domes with a simple panna cotta or a bowl of fresh berries. The textures and temperatures play off each other beautifully — the cold, creamy dome against a room-temperature sauce or fresh fruit.
If you’re serving these at a party, you can arrange the glazed domes on a platter up to 2 hours ahead and keep them in the refrigerator. Just add the garnishes right before serving so the micro mint stays bright and the gold flakes don’t absorb moisture. I’ve also served these as individual desserts at seated dinners, placing each dome on a small slate tile with a hand-written name tag tucked underneath — it makes guests feel incredibly special.
| Pairing Type | Suggestions | Why It Works |
|---|---|---|
| Side Dish | Fresh berry compote, citrus salad, light shortbread cookies | Berries add tart contrast; shortbread adds buttery crunch |
| Sauce / Dip | Passion fruit coulis, raspberry sauce, caramel with sea salt | Bright fruit sauces complement citrus; salted caramel adds richness |
| Beverage | Limoncello, prosecco, jasmine tea, espresso | Citrus liqueur echoes the filling; tea cleanses; espresso cuts sweetness |
| Garnish | Candied citrus peel, edible gold flakes, micro mint, edible flowers | Adds texture, color, and a touch of luxury |
Make-Ahead, Storage & Reheating
One of the best things about these citrus burst diamond cheesecake domes is how well they work for make-ahead entertaining. In my busy NYC schedule, I rely on recipes that let me do the heavy lifting days before a dinner party. The domes can be prepared, filled, and frozen up to two weeks in advance — just wrap the baking sheet tightly in plastic wrap after the domes are fully frozen. The mirror glaze is best made the day you plan to serve, but you can prepare the citrus jelly center and the biscuit base up to three days ahead and store them in the refrigerator. This recipe is designed to reduce last-minute stress so you can actually enjoy your own party.
| Method | Container | Duration | Reheating Tip |
|---|---|---|---|
| Refrigerator | Airtight container, single layer | Up to 3 days | Serve cold directly from fridge; no reheating needed |
| Freezer | Baking sheet, wrapped in plastic, then foil | Up to 2 weeks | Glaze while still frozen; thaw in fridge 1 hour after glazing |
| Make-Ahead | Jelly in sealed container; base in mold wrapped | Jelly: 5 days; Base: 3 days | Assemble and freeze up to 2 weeks before glazing |
If you’ve already glazed the domes and have leftovers, they’ll keep in the refrigerator for up to 3 days, though the mirror glaze may lose some of its high shine after the first 24 hours. To refresh the shine, you can very gently warm the domes with a hair dryer on low setting for a few seconds — but honestly, they’re still beautiful and delicious even with a slightly matte finish. Never microwave a glazed dome — the heat will melt the glaze and ruin the presentation. If you want to freeze already-glazed domes, place them on a baking sheet in a single layer, freeze until solid, then wrap individually in plastic wrap. Thaw in the refrigerator overnight before serving. The glaze may develop a few small cracks, but the flavor will be just as spectacular.
Variations & Easy Swaps
One of the things I love most about this citrus burst diamond cheesecake domes recipe is how adaptable it is. Whether you’re catering to dietary needs, seasonal cravings, or just a sense of adventure, there’s a variation here for you. I’ve tested all of these in my own kitchen, so I can vouch for the results.
| Variation | Key Change | Best For | Difficulty Impact |
|---|---|---|---|
| Berry Burst Cheesecake Domes | Replace citrus jelly with mixed berry jelly; swap citrus zest for 1 tsp vanilla | Summer entertaining, Valentine’s Day, berry lovers | Same difficulty; strain seeds from berry puree |
| Dairy-Free / Vegan Version | Use vegan cream cheese, coconut cream, agar-agar instead of gelatin | Dairy-free guests, plant-based diets | Medium; agar sets differently, requires testing |
| Tropical Twist | Replace citrus with passion fruit and mango; use coconut in the base | Tropical-themed parties, summer, exotic flavors | Same difficulty; adjust sugar for fruit sweetness |
Variation 1: Berry Burst Cheesecake Domes
For a gorgeous deep red-purple dome that’s perfect for Valentine’s Day or summer entertaining, swap the citrus jelly center for a mixed berry version. Puree 1 cup of mixed raspberries and blackberries, strain out the seeds, and use the puree in place of the citrus juice for the jelly. Add an extra tablespoon of sugar to balance the tartness. Leave the citrus zest out of the cheesecake filling and add 1 teaspoon of vanilla bean paste instead for a creamier flavor profile. The mirror glaze can be tinted pink or left clear for a beautiful contrast. The technique is identical — just make sure to strain the berry puree thoroughly to avoid seeds getting into the jelly or glaze.
Variation 2: Dairy-Free / Vegan Version
I developed this version for a friend’s dairy-free birthday, and it was a hit. Use a high-quality vegan cream cheese (I like Miyoko’s or Violife) and full-fat coconut cream in place of the heavy cream. For the gelatin, substitute agar-agar powder at a ratio of 1 tsp agar per 1 cup of liquid for the filling, and 1/2 tsp agar per 1 cup of liquid for the jelly. The mirror glaze is trickier to veganize — use a high-quality vegan white chocolate and vegan condensed milk (or make your own with coconut milk and sugar). The texture will be slightly firmer and less creamy than the original, but the flavor is bright and delicious. Note that agar-agar sets at room temperature, so you’ll need to work a bit faster during assembly.
Variation 3: Tropical Twist
This is my go-to for summer gatherings in NYC. Replace the citrus juice in the jelly with a mix of passion fruit pulp and mango puree (about 1/2 cup total). Add 1 tablespoon of toasted coconut flakes to the biscuit base for extra texture and flavor. The cheesecake filling stays the same, but I add 1 teaspoon of lime zest for an extra layer of brightness. For the mirror glaze, I use a combination of passion fruit juice and a touch of yellow food coloring to achieve a brilliant golden hue. Garnish with a small piece of dried mango or a passion fruit seed. The tropical version is a bit sweeter and more aromatic, and it pairs beautifully with a coconut-lime sorbet on the side.
Share Your Version!
I absolutely love seeing how you make these citrus burst diamond cheesecake domes your own. Whether you stick to the original recipe or try one of the variations, I want to hear about it. Drop a comment below and let me know how it went — did the mirror glaze turn out perfectly? Did you try a flavor twist I haven’t thought of? Your feedback and photos are what keep this kitchen community so vibrant and inspiring. Every time someone tells me they made this recipe for a special occasion and it was a hit, my heart does a little flip.
If you share your creation on Instagram or Pinterest, please tag @leosfoods so I can see and share your beautiful work. I read every single comment and reply to as many as I can — your questions, your wins, and even your learning moments are all part of the journey. And if you’re ever in New York City, stop by my kitchen — I’d love to make you a cup of mint tea and hear your story. From my NYC kitchen to yours — I hope this recipe brings as much warmth to your table as it does to mine. — Stella 🧡
🌟🌟🌟🌟🌟
Did you make this recipe? Please leave a star rating and a comment below — I personally read every single one and it helps other readers know what to expect.
📸 Tag @leosfoods on Instagram or Pinterest and I’ll feature your creation!
What is the best way to achieve a smooth, bubble-free crystal mirror glaze for cheesecake domes?
The secret to a perfectly smooth, bubble-free crystal mirror glaze lies in three key steps. First, always strain your citrus juice through a fine-mesh sieve to remove any pulp or seeds before adding it to the glaze — impurities create bubbles and uneven texture. Second, use an immersion blender to emulsify the glaze after combining all the ingredients; this breaks down any tiny air bubbles and gives the glaze that glass-like clarity. Blend for about 30 seconds, tilting the blender at different angles to incorporate everything evenly. Third, let the glaze cool to exactly 90°F (32°C) before pouring — if it’s too hot, it will melt the frozen dome and create steam bubbles; if too cold, it will thicken and trap existing bubbles. I also recommend pouring the glaze through a fine-mesh sieve one final time right before glazing, just to catch any last air pockets. Working in a cool, dry room also helps — humidity can cause condensation on the frozen dome, which interferes with the glaze adhesion.
Can I substitute the citrus flavor with another fruit in this diamond cheesecake recipe?
Absolutely — this recipe is wonderfully flexible. You can substitute the citrus jelly center with almost any fruit puree, as long as you adjust the sweetness and gelatin ratio accordingly. For berries like raspberry or strawberry, puree and strain the seeds, then use the same amount of liquid as the recipe calls for (1 cup total). For stone fruits like mango or peach, you may need to add an extra tablespoon of lemon juice to balance the sweetness and help the jelly set. One important note: fruits with high water content, like watermelon or cucumber, will require additional gelatin to set properly — I’d add 1/2 teaspoon more gelatin per cup of juice. I’ve also made this with a passion fruit center, which is incredible — just reduce the sugar slightly since passion fruit is naturally quite tart. The mirror glaze can also be flavored with other fruit juices, but stick to clear or lightly colored juices to maintain that diamond-like transparency.
How do I properly unmold and assemble the cheesecake domes without damaging the mirror glaze?
Unmolding and glazing these domes is actually easier than it looks once you know the technique. First, make sure the domes are fully frozen — at least 6 hours, preferably overnight. When you’re ready to unmold, run the outside of the silicone mold under warm tap water for about 10 to 15 seconds. This slightly warms the surface and releases the dome. Gently press the bottom of the mold to pop the dome out onto your palm or a clean work surface. If the dome sticks, run a thin offset spatula around the edge and try again. For glazing, place the unmolded domes on a wire rack set over a parchment-lined baking sheet. Pour the cooled glaze steadily over each dome, starting at the top and moving in a circular motion. Don’t touch the dome with the glaze container — let gravity do the work. After glazing, tap the rack gently to encourage excess glaze to drip off. Transfer the glazed domes to the refrigerator for at least 30 minutes before serving. The glaze will set into a firm, non-stick surface that’s safe to handle with a spatula.
How far in advance can I make the citrus burst cheesecake domes before serving?
These cheesecake domes are a perfect make-ahead dessert, which is one of the reasons I love them for entertaining. You can prepare and freeze the domes (without the glaze) up to 2 weeks in advance. Once they’re fully frozen, wrap the baking sheet tightly in plastic wrap and then foil to protect them from freezer odors. The mirror glaze is best made the day you plan to serve — it takes only about 15 minutes of active time plus cooling. However, you can prepare the citrus jelly center and the biscuit base up to 3 days ahead and store them separately in the refrigerator. On the day of serving, unmold the frozen domes, make the glaze, pour it over, and let it set for 30 minutes. Once glazed, the domes will keep beautifully in the refrigerator for up to 24 hours, though the shine is best within the first 4 to 6 hours. I often do the freezing step a week ahead and the glazing step the morning of my dinner party — it makes the whole process feel effortless.
Why did my mirror glaze turn out cloudy instead of clear and shiny?
A cloudy mirror glaze usually comes down to one of a few issues. The most common cause is using white chocolate that isn’t high quality — white chocolate chips often contain stabilizers and less cocoa butter, which prevents the glaze from forming that glossy, translucent finish. Always use a good-quality white chocolate bar or couverture with at least 30% cocoa butter. Another culprit is adding the gelatin before it’s fully bloomed, or not dissolving it completely in the hot liquid — undissolved gelatin particles scatter light and create a hazy appearance. Make sure your gelatin is fully bloomed in cold water for a full 5 minutes, and stir until every trace of gelatin is dissolved. Third, if your glaze is too hot when you pour it (above 100°F or so), it can cause the white chocolate to separate slightly, leading to a dull finish. Use a thermometer to hit that sweet spot of 90°F. Finally, if your citrus juice isn’t strained properly, pulp particles will make the glaze look murky. Strain through a fine-mesh sieve lined with cheesecloth for the clearest results.
Can I use gelatin sheets instead of powdered gelatin in this recipe?
Yes, you can absolutely substitute gelatin sheets for powdered gelatin in this recipe — many professional pastry chefs actually prefer sheets because they produce a cleaner, more consistent gel. The conversion is simple: 1 packet of powdered gelatin (about 2 1/4 teaspoons or 7 grams) is equivalent to about 4 sheets of gold-grade gelatin. For this recipe, you’ll need: for the cheesecake filling, 2 teaspoons powdered gelatin equals roughly 3.5 to 4 gold sheets; for the citrus jelly center, 1 teaspoon powdered gelatin equals about 2 gold sheets; and for the mirror glaze, 1 tablespoon powdered gelatin equals about 5 to 6 gold sheets. To use sheets, soak them in a bowl of cold water for 5 to 10 minutes until completely softened, then squeeze out the excess water and dissolve the sheets directly into your warm liquid. The texture will be slightly more delicate and smooth compared to powdered gelatin, but the results are equally beautiful.
What if I don’t have a dome mold — can I use a different shape?
You absolutely don’t need special dome molds to make this recipe — plenty of home cooks improvise with great results. The best alternative is a standard muffin tin, which gives you a similar rounded top. Line each muffin cup with a strip of parchment paper to help with unmolding, then press the biscuit base into the bottom and follow the same assembly steps. For a more dramatic presentation, you can use small glass prep bowls or even oven-safe custard cups — just make sure they’re freezer-safe. The domes will be slightly different in shape, but the flavor and texture are identical. If you use a metal muffin tin, line it with plastic wrap or a very light coat of neutral oil to prevent the cheesecake from sticking. For a truly unique look, try using small silicone egg molds or even the silicone molds designed for bath bombs — just check the volume and adjust the filling amounts accordingly. The mirror glaze works beautifully on any curved surface.
How do I store leftover mirror glaze, and can I reuse it?
Leftover mirror glaze can be stored and reused, which is great because the recipe makes just a bit extra to ensure full coverage. Pour any leftover glaze into a glass jar or airtight container and refrigerate for up to 5 days. To reuse, gently warm the glaze in a heatproof bowl set over a pot of simmering water (double-boiler method) or microwave in 10-second bursts at 50% power, stirring between each burst. Heat until the glaze is fluid again, then check the temperature — you want it back at about 90°F before pouring. The glaze may thicken slightly after refrigeration, so you can add a teaspoon of warm water or citrus juice to thin it if needed. Keep in mind that each reheat can slightly dull the shine, so I recommend using leftover glaze within the first day or two for best results. If you have leftover glaze that’s already been poured over a dome and set, you can scrape it off and re-melt it, but it may have picked up crumbs or cheesecake residue — I’d use it only for secondary glazes or practice tests.
Love This Recipe? Save It to Pinterest!
If you enjoyed this Citrus Burst Diamond Cheesecake Domes with Crystal Mirror Glaze recipe, don’t let it get lost in your browser tabs! 😄 Pin it now so you can find it again anytime — and explore hundreds more tried-and-tested recipes waiting for you on my Pinterest boards.
👉 Follow Stella on Pinterest @stellarecipeblog
📌 Pin this recipe · 🔁 Re-pin your favorites · 💬 Tag me when you make it — I love seeing your creations!
Citrus Burst Diamond Cheesecake Domes with Crystal Mirror Glaze
A stunning dessert featuring creamy citrus cheesecake domes with a jewel-like mirror glaze and a burst of citrus jelly center.
- Yield: 8 1x
Ingredients
- For the Cheesecake Filling:
- 8 oz cream cheese, softened
- 1/2 cup granulated sugar
- 1 cup heavy cream
- 1 tsp vanilla extract
- 1 tbsp lemon juice
- 1 tbsp orange juice
- 1 tsp lemon zest
- 1 tsp orange zest
- 2 tsp powdered gelatin
- 2 tbsp cold water
- For the Biscuit Base:
- 1 cup digestive biscuits, finely crushed
- 3 tbsp melted butter
- For the Citrus Jelly Center:
- 1/2 cup orange juice
- 1/2 cup grapefruit juice
- 2 tbsp sugar
- 1 tsp powdered gelatin
- 1 tbsp cold water
- For the Crystal Mirror Glaze:
- 1 cup granulated sugar
- 1/2 cup water
- 1/2 cup condensed milk
- 1 cup white chocolate, finely chopped
- 1 tbsp powdered gelatin
- 3 tbsp cold water
- 1/2 cup clear citrus juice (strained lemon-orange mix)
- Yellow and orange food coloring (optional)
- For Garnish (optional):
- Candied citrus peel
- Edible gold flakes
- Micro mint leaves
Instructions
- 1. Mix crushed biscuits with melted butter and press into dome molds as a base. Chill for 15 minutes.
- 2. Bloom gelatin for cheesecake filling in cold water for 5 minutes.
- 3. Beat cream cheese, sugar, vanilla, citrus juices, and zest until smooth.
- 4. Warm a small portion of cream and dissolve bloomed gelatin, then mix into cheesecake base.
- 5. Whip remaining cream to soft peaks and fold into mixture.
- 6. Fill dome molds halfway with cheesecake mixture.
- 7. Place a small scoop of citrus jelly center into each mold, then cover with remaining cheesecake mixture.
- 8. Freeze domes for at least 6 hours until fully set.
- 9. Bloom gelatin for mirror glaze in cold water.
- 10. Heat sugar, water, and condensed milk until steaming (do not boil).
- 11. Remove from heat, add white chocolate and gelatin, then blend until smooth.
- 12. Add citrus juice and colorings, then cool glaze to about 90°F (32°C).
- 13. Unmold frozen domes and place on a rack.
- 14. Pour glaze evenly over domes until fully coated.
- 15. Let set in the fridge for 30 minutes before serving.
- 16. Garnish with candied citrus peel, gold flakes, and micro mint.
Nutrition
- Calories: 320
- Sugar: 30 g
- Fat: 18 g
- Carbohydrates: 36 g
- Protein: 4 g
Tried This Recipe? Leave a Comment!
Did you make this recipe? I’d love to hear how it turned out! Please leave a comment and a rating below. Your feedback helps other home cooks and supports cheerychop.com!
For more delicious inspiration, follow me on Pinterest!