Ultimate Cosmic Blackberry Mirror Glaze Sphere Cakes
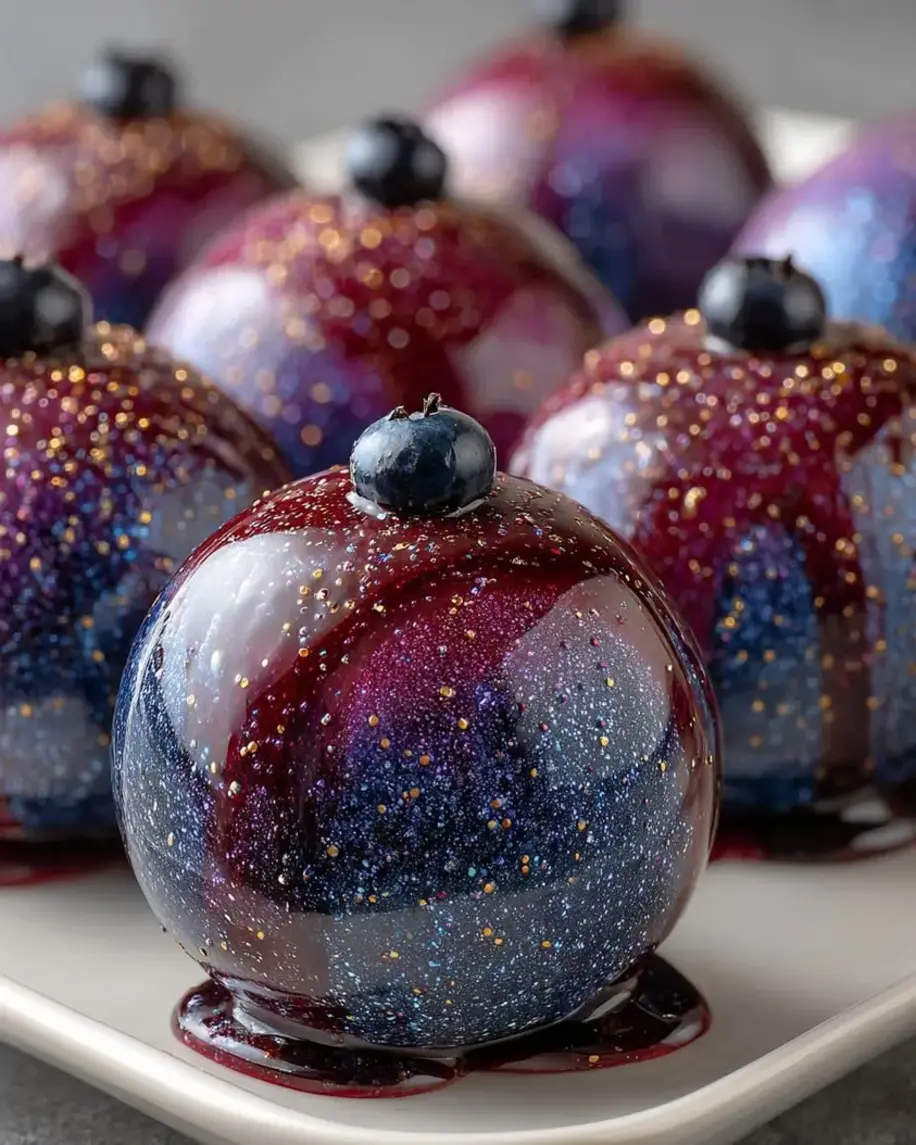
Table of Contents
Cosmic Blackberry Mirror Glaze Sphere Cakes – A Stunning Dessert That Tastes as Good as It Looks
I still remember the first time I saw a mirror glaze cake in a Parisian pâtisserie window — a perfect dome of shimmering violet, reflecting the city lights like a jewel box. I was 22, fresh out of culinary school, and I stood there for a full ten minutes just staring. That glossy, cosmic finish felt like magic. Now, decades later, living in New York and cooking out of my own little kitchen, I’ve reimagined that memory into something deeply personal: my Cosmic Blackberry Mirror Glaze Sphere Cakes. These little domes are part French technique, part Moroccan soul — the blackberry puree reminds me of the wild berries my mother would pick near our home in Marrakech, and the mirror glaze is pure Parisian showmanship. Let me show you how to bring this cosmic dessert to your table.
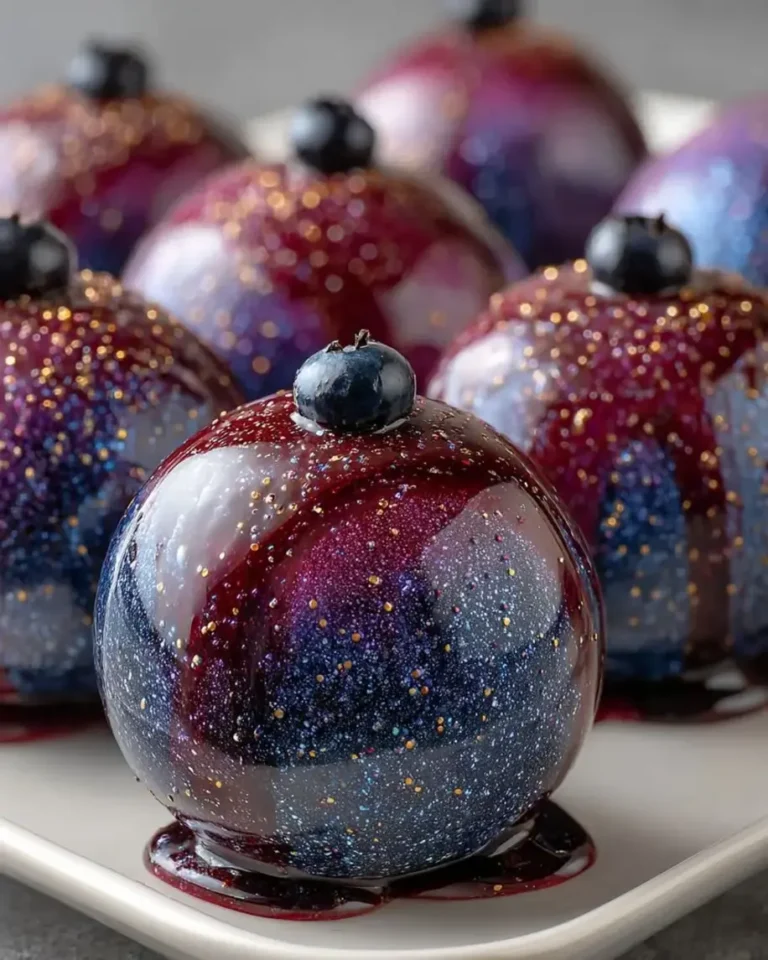
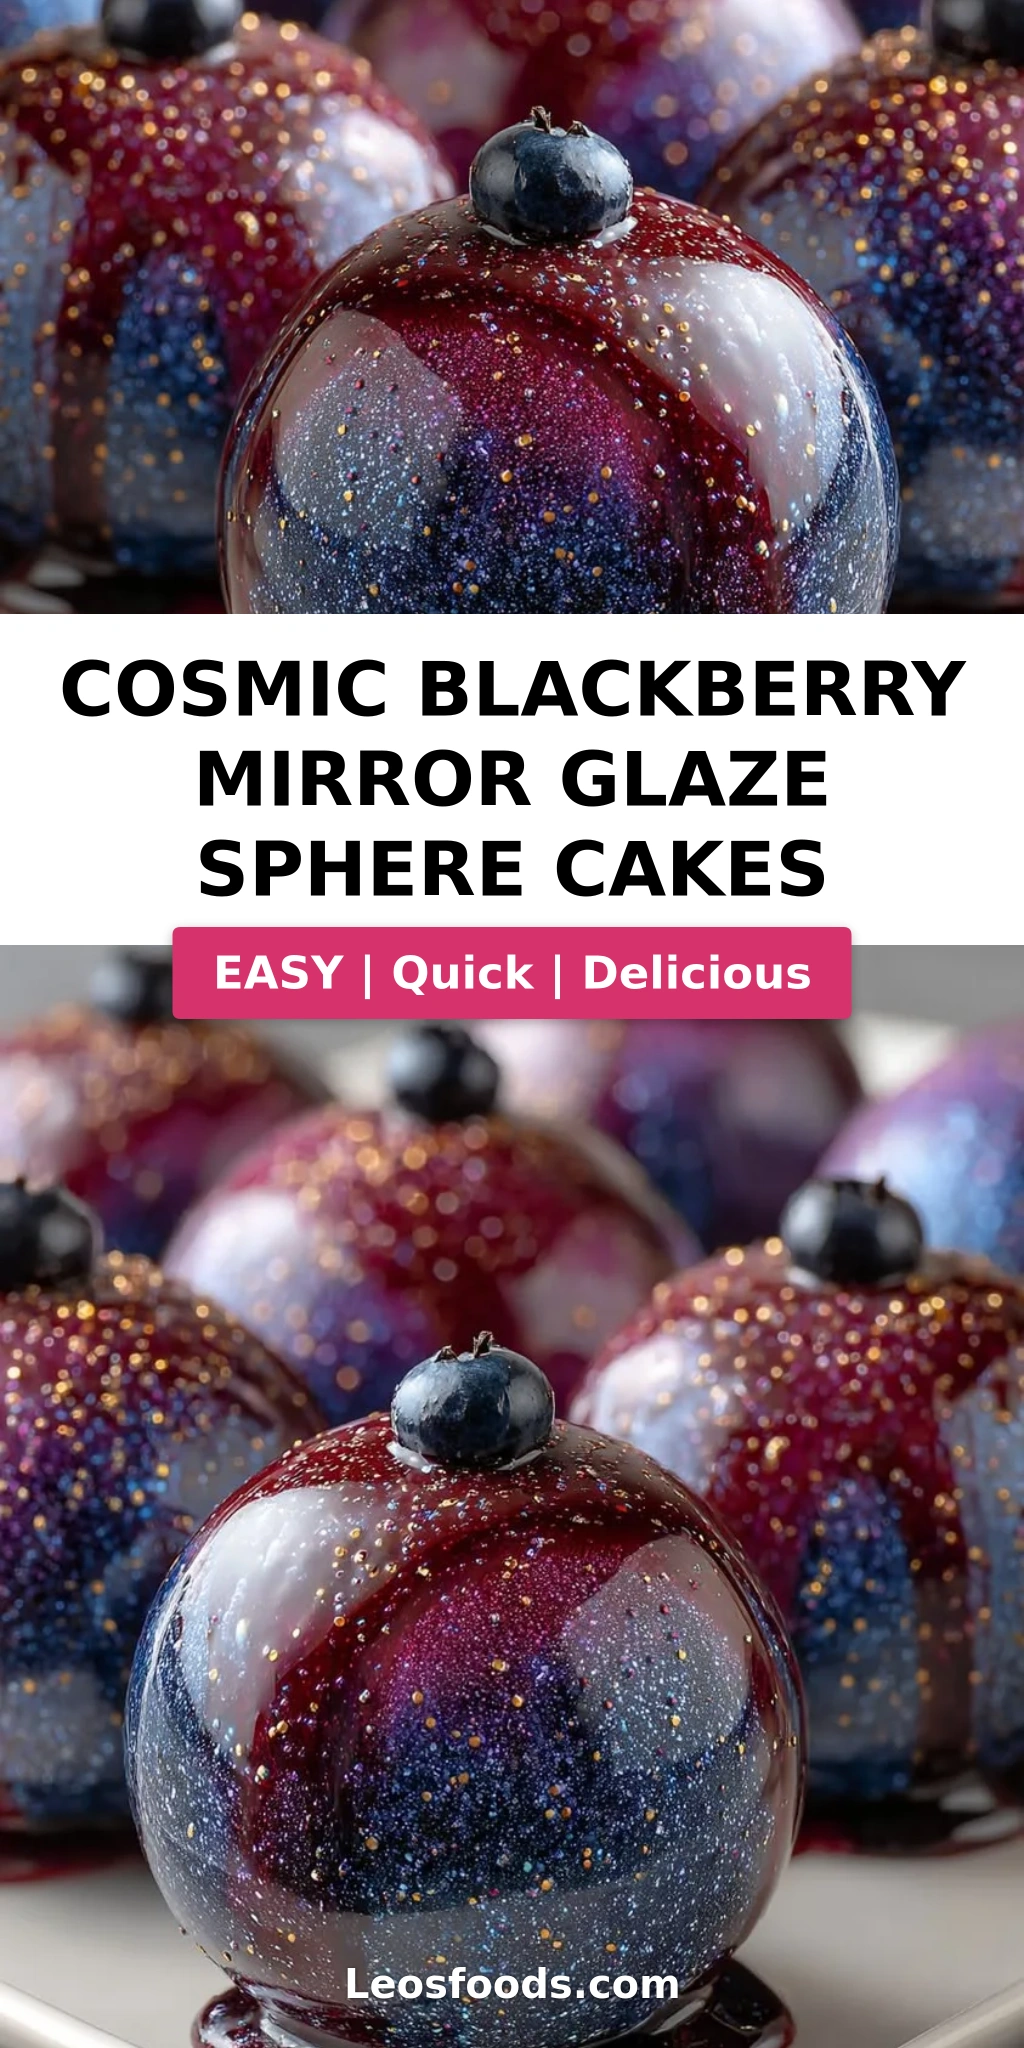
Each sphere is a multi-sensory adventure. You start with a tender vanilla blackberry sponge — light, fruity, and just sweet enough. Then comes the star: a silky blackberry cheesecake mousse, creamy and tangy, with real berry flavor that tastes like summer in the Catskills. And then — the glaze. That deep violet, almost galactic sheen ripples with hints of black and shimmering silver, like looking into a nebula. When you break through that glossy shell with your spoon, the mousse beneath is cloud-soft, and the sponge adds just enough structure. It’s a dessert that feels impossibly elegant but is built on techniques any home cook can master with a little patience.
I’ve tested this recipe more times than I can count — through humid NYC summers, dry winter days, and everything in between. The version I’m sharing today is the one that finally made my husband say, “This is the best thing you’ve ever made.” And I agree. What makes it special is the balance: the blackberry puree is reduced just enough to concentrate flavor without making the mousse weep, and the glaze is cooled to exactly 90°F so it clings like velvet. In this post, I’ll walk you through every step, share my best tips for a flawless mirror finish, and point out the one mistake that can ruin your glaze — so you can avoid it. Let’s bake something cosmic today.
Why This Cosmic Blackberry Mirror Glaze Sphere Cakes Recipe Is the Best
The Flavor Secret. Most mirror glaze cakes you see online are all show and no substance — a bland cake under a pretty coat. Not this one. I’ve infused blackberry puree into every layer: the sponge, the mousse, and even the glaze itself (though the color comes from gel coloring). That triple-berry punch means every bite tastes like real fruit, not sugar water. I learned this layering technique from a pastry chef in Lyon who said, “If you want a fruit cake to taste like fruit, you have to commit.” I’ve committed. And the tangy cream cheese in the mousse cuts through the sweetness like a bright note in a symphony.
Perfected Texture. The magic of a mirror glaze sphere cake is in the contrast — the glassy shell, the airy mousse, the tender sponge. Getting all three right requires precision. My mousse uses just enough gelatin to set firmly but still spoon-soft, and I whip the cream to soft peaks only — over-whipping leads to a grainy texture. The sponge is baked in an 8-inch pan and cut into rounds, so it fits perfectly in the sphere molds. No gaps, no sinking. I also let the frozen spheres sit at room temperature for exactly 90 seconds before glazing — that brief thaw creates a micro-layer of water that helps the glaze adhere evenly. It’s a small detail, but it makes all the difference.
Foolproof & Fast for a Showstopper. Yes, this is an advanced recipe. But I’ve broken it into manageable steps that even a confident beginner can handle. You don’t need a stand mixer for the mousse — a hand whisk and a sturdy arm work beautifully. The glaze comes together in one saucepan. And the best part? Almost all the work happens a day ahead. You make the sponge, assemble the spheres, and freeze them overnight. The next day, you just make the glaze, pour, and watch the magic happen. It’s the perfect dessert for a dinner party: minimal last-minute fuss, maximum wow factor.
Cosmic Blackberry Mirror Glaze Sphere Cakes Ingredients
I source my blackberries from the Union Square Greenmarket when they’re in season — those tiny, intensely flavored wild ones are worth every penny. In winter, I use frozen organic blackberries from Whole Foods, and they work just as well. The cream cheese I always buy full-fat; low-fat makes the mousse loose and sad. And the white chocolate for the glaze? Go for a good brand like Valrhona or even Ghiradelli — the quality matters because the glaze is all about that smooth, glossy mouthfeel. Below is the complete ingredient list, organized by component.
Ingredients List
- For the Vanilla Blackberry Sponge:
- 1 1/2 cups all-purpose flour
- 1 1/2 tsp baking powder
- 1/4 tsp salt
- 1/2 cup unsalted butter, softened
- 3/4 cup granulated sugar
- 2 large eggs
- 1 tsp vanilla extract
- 1/2 cup whole milk
- 1/2 cup blackberry puree (fresh or frozen, seeds strained out)
- For the Blackberry Cheesecake Mousse:
- 8 oz (225 g) cream cheese, softened
- 1/3 cup powdered sugar
- 1/2 cup blackberry puree (strained)
- 1 tsp vanilla extract
- 1 tsp unflavored gelatin
- 2 tbsp cold water
- 1 cup heavy whipping cream
- For the Cosmic Mirror Glaze:
- 1/2 cup sweetened condensed milk
- 7 oz (200 g) white chocolate, finely chopped
- 2 tsp powdered gelatin
- 1/4 cup cold water
- 1/2 cup granulated sugar
- 1/4 cup water
- Purple gel food coloring
- Black gel food coloring
- Silver edible shimmer dust
- For Garnish (optional):
- Fresh blackberries
- Edible silver leaf
- Micro mint leaves
Ingredient Spotlight
Blackberry Puree. This is the heart of the recipe. You can make it by blending fresh or frozen blackberries and passing them through a fine-mesh sieve to remove seeds. I recommend frozen berries in winter — they’re often sweeter and more consistent. One 12-ounce bag yields about 1 cup of puree, enough for both the sponge and mousse with a little left over. If you’re in a pinch, you can substitute high-quality blackberry preserves (seedless), but reduce the sugar in the mousse by a tablespoon.
White Chocolate. For the mirror glaze, white chocolate provides the base that gives the glaze its creamy opacity and brilliant shine. Avoid white chocolate chips — they often contain stabilizers that prevent smooth melting. Instead, buy a bar of couverture white chocolate (at least 30% cocoa butter). I like Valrhona Ivoire or Callebaut. If you can’t find those, Ghiradelli white chocolate bars work beautifully. Do not use white candy melts; they have a different fat composition and won’t set properly.
Gelatin. Both the mousse and the glaze rely on gelatin for structure. I use powdered gelatin (Knox is my go-to brand). The key is to bloom it in cold water for exactly 5 minutes before melting it gently. If you overheat gelatin, it loses its setting power and your mousse will be soup. I’ve made that mistake exactly once — on a hot July day in my NYC apartment — and the mousse never set. Now I’m obsessive about blooming times and temperatures. For a vegetarian version, you can use agar-agar, but the texture will be slightly firmer and less creamy.
| Original Ingredient | Best Substitution | Flavor / Texture Impact |
|---|---|---|
| Blackberry puree | Seedless blackberry preserves (reduce sugar by 1 tbsp in mousse) | Slightly sweeter, less tart; texture is smoother |
| White chocolate (couverture) | Ghiradelli white chocolate bar | Slightly less glossy finish; still good |
| Powdered gelatin | Agar-agar (use 1 tsp, follow package directions) | Firmer set; mousse less creamy; glaze stiffer |
| Heavy whipping cream | Full-fat coconut cream (chilled, whipped) | Coconut flavor noticeable; lighter texture |
How to Make Cosmic Blackberry Mirror Glaze Sphere Cakes — Step-by-Step
Take a deep breath — I promise you can do this. I’ve organized the process into five clear stages, each with a pro tip and a common mistake to watch out for. Read through all the steps before you start, and set up your ingredients and equipment ahead of time. A little mise en place goes a very long way here.
Step 1: Prepare the Vanilla Blackberry Sponge
Preheat your oven to 350°F (175°C). Grease an 8-inch round cake pan and line the bottom with parchment paper. In a medium bowl, whisk together 1 1/2 cups all-purpose flour, 1 1/2 tsp baking powder, and 1/4 tsp salt. In a large bowl, beat 1/2 cup softened unsalted butter and 3/4 cup granulated sugar with a hand mixer on medium speed until light and fluffy, about 3 minutes. Add 2 large eggs one at a time, beating well after each, then mix in 1 tsp vanilla extract. Alternate adding the flour mixture and 1/2 cup whole milk, starting and ending with flour. Gently fold in 1/2 cup blackberry puree until just combined — don’t overmix, or the cake will be tough. Pour the batter into the prepared pan and bake for 25–30 minutes, until a toothpick inserted in the center comes out clean. Cool the cake completely on a wire rack, then use a 2-inch round cutter to stamp out circles that will fit snugly into your sphere molds.
💡 Stella’s Pro Tip: When folding in the blackberry puree, do it in three gentle strokes. The puree streaks through the batter beautifully, and you want those ribbons of color to remain visible — they make the finished sponge look gorgeous when you cut into the sphere.
Step 2: Make the Blackberry Cheesecake Mousse
In a small bowl, sprinkle 1 tsp unflavored gelatin over 2 tbsp cold water. Let it bloom for 5 minutes — it will become a firm, wobbly disk. In a large bowl, beat 8 oz softened cream cheese, 1/3 cup powdered sugar, 1/2 cup blackberry puree, and 1 tsp vanilla extract until smooth and lump-free. Gently melt the bloomed gelatin by microwaving it for 5-second bursts (about 10–15 seconds total) or by setting the bowl over a pan of simmering water. Stir the melted gelatin into the cream cheese mixture immediately. In a separate bowl, whip 1 cup heavy whipping cream to soft peaks — the cream should hold a gentle curve when you lift the whisk, not stand up stiffly. Gently fold the whipped cream into the cream cheese mixture in two additions, using a rubber spatula. Fold just until no white streaks remain; over-folding will deflate the mousse.
⚠️ Common Mistake to Avoid: If you melt the gelatin too quickly — blasting it for 30 seconds in the microwave — it will seize into rubbery clumps. Always melt in 5-second bursts and stir between each. If it does seize, discard and start over with fresh gelatin. Trust me, it’s not worth trying to salvage.
Step 3: Assemble and Freeze the Spheres
Spoon the mousse into a piping bag or a zip-top bag with a corner snipped off. Pipe the mousse into silicone sphere molds (about 2.5 inches in diameter), filling each mold halfway. Place a sponge circle on top of the mousse, pressing it down gently so it sits level. Cover the sponge with more mousse, filling the mold to the top. Use an offset spatula to scrape away any excess so the surface is flat. Tap the molds gently on the counter to release air bubbles. Freeze the spheres for at least 8 hours, preferably overnight. The spheres must be frozen solid before glazing — this is non-negotiable.
💡 Stella’s Pro Tip: To keep the sponge circles from floating up in the mousse, press them in until they’re fully submerged and the mousse rises around them. If your mold has a flat base, you can even set a small flat weight (like a mini tart ring) on top to keep the sponge anchored.
Step 4: Create the Cosmic Mirror Glaze
Bloom 2 tsp powdered gelatin in 1/4 cup cold water for 5 minutes. In a small saucepan, combine 1/2 cup granulated sugar and 1/4 cup water. Heat over medium heat, stirring until the sugar dissolves completely — do not let it boil. Once dissolved, stir in 1/2 cup sweetened condensed milk. Remove from heat and pour the hot mixture over 7 oz finely chopped white chocolate in a heatproof bowl. Let it sit for 1 minute, then add the bloomed gelatin and stir until the chocolate is fully melted and the glaze is smooth. If needed, use an immersion blender to eliminate any lumps — but don’t incorporate air bubbles. Divide the glaze into 3 portions. Tint one portion with purple gel food coloring, one with black gel coloring, and leave the third portion white. To create the cosmic swirl, pour the three colors into a shallow dish and gently swirl them with a toothpick. Add a pinch of silver edible shimmer dust to the surface and swirl once more. Cool the glaze to 90°F (32°C) — this is the perfect pouring temperature.
⚠️ Common Mistake to Avoid: If the glaze is too hot (above 95°F), it will slide right off the frozen sphere and pool at the bottom. If it’s too cool (below 85°F), it will set too quickly and look dull. Use a digital thermometer to hit that sweet spot — and trust the temperature, not the clock.
Step 5: Glaze and Garnish
Remove the frozen spheres from the molds and place them on a wire rack set over a baking sheet. Let them sit at room temperature for 90 seconds — this allows a thin layer of condensation to form, which helps the glaze grip. Pour the cooled cosmic glaze over each sphere in a steady, circular motion, covering the entire surface. Let the excess drip off for about 30 seconds. Transfer the glazed spheres to individual serving plates using a small offset spatula. Garnish immediately with a fresh blackberry, a small piece of edible silver leaf, and a tiny sprig of micro mint. Serve right away, or keep refrigerated for up to 2 hours before serving — the glaze will stay glossy.
💡 Stella’s Pro Tip: If the glaze starts to set before you’ve finished pouring, reheat it gently over a bain-marie (or in 5-second microwave bursts) and re-check the temperature. You can reheat and re-pour up to two times before the glaze loses its shine.
| Step | Action | Duration | Key Visual Cue |
|---|---|---|---|
| 1 | Bake sponge | 25–30 min | Toothpick comes out clean; top is golden |
| 2 | Make mousse | 10 min | Mousse is smooth; cream at soft peaks |
| 3 | Assemble & freeze | 8 hr minimum | Spheres are solid; no give when pressed |
| 4 | Make glaze | 15 min | Glaze smooth; temp exactly 90°F |
| 5 | Glaze & garnish | 5 min per sphere | Glossy even coat; no bare spots |
Serving & Presentation
These Cosmic Blackberry Mirror Glaze Sphere Cakes are meant to be the centerpiece of a celebration. I love serving them on a dark slate board or a matte black plate — the contrast makes the violet glaze pop like a jewel. Place each sphere slightly off-center and add a small pile of fresh blackberries on the side. A tiny pinch of flaky sea salt on the plate (yes, really) enhances the berry flavor beautifully. For a dinner party, I plate them individually and bring them to the table with a flourish — guests always gasp when they see that glossy surface.
In the summer, I like to serve these with a side of lightly sweetened crème fraîche or a scoop of vanilla bean ice cream. The tangy cream cuts through the sweetness of the glaze and echoes the cheesecake mousse. In the cooler months, a drizzle of warm blackberry coulis underneath adds a cozy, rustic touch. And if you’re serving these for a holiday — think New Year’s Eve or a milestone birthday — the silver edible leaf and micro mint make it feel extra special. I once brought a tray of these to a friend’s rooftop party in Brooklyn, and they were gone in fifteen minutes. People couldn’t stop taking photos.
| Pairing Type | Suggestions | Why It Works |
|---|---|---|
| Side Dish | Lightly sweetened crème fraîche, vanilla bean ice cream | Creamy tang balances sweetness; cool texture contrasts glaze |
| Sauce / Dip | Warm blackberry coulis, raspberry sauce | Adds fruit depth; coulis soaks into the plate for a pretty presentation |
| Beverage | Espresso, chamomile tea, brut rosé | Coffee cuts sweetness; rosé echoes berry notes |
| Garnish | Fresh blackberries, edible silver leaf, micro mint, flaky sea salt | Visual drama; salt enhances berry flavor; mint adds freshness |
Make-Ahead, Storage & Reheating
This is a dream recipe for make-ahead entertaining. I often prepare the sponge and assemble the spheres two days before a party, then glaze them the morning of. The frozen spheres are incredibly forgiving — they’ll sit happily in your freezer for up to two weeks. In fact, I always make a double batch and keep a few unglazed spheres on hand for last-minute dessert emergencies. When you’re ready to serve, just whip up the glaze (it takes 15 minutes) and pour. The trick is to glaze only as many spheres as you plan to eat; leftover glazed spheres can be refrigerated, but the glaze will lose its mirror shine after about 24 hours.
| Method | Container | Duration | Reheating Tip |
|---|---|---|---|
| Refrigerator (unglazed) | Airtight container, wrapped tightly | Up to 3 days | Not recommended for unglazed; mousse will soften |
| Freezer (unglazed) | Sealed freezer bag or container with lid | Up to 2 weeks | Thaw 90 seconds at room temp before glazing |
| Refrigerator (glazed) | Open air on plate, loosely covered | Up to 24 hours | Glaze may soften; serve cold, do not reheat |
If you have leftover glaze, you can store it in the refrigerator for up to 5 days and reheat gently to 90°F when you need it. I keep my leftover glaze in a glass jar and use it to top mini cheesecakes or even ice cream sundaes. The glaze also freezes beautifully for up to 1 month — just thaw overnight in the fridge and reheat. One more tip: never microwave the glaze directly on high heat. Always use 5-second bursts or a bain-marie, stirring frequently, to prevent scorching the white chocolate.
Variations & Easy Swaps
| Variation | Key Change | Best For | Difficulty Impact |
|---|---|---|---|
| Raspberry Cosmic Spheres | Substitute raspberry puree for blackberry | Slightly tarter flavor; pinkish hue | No change |
| Gluten-Free Version | Use 1:1 gluten-free flour blend | Celiac-friendly; slightly denser sponge | Easy |
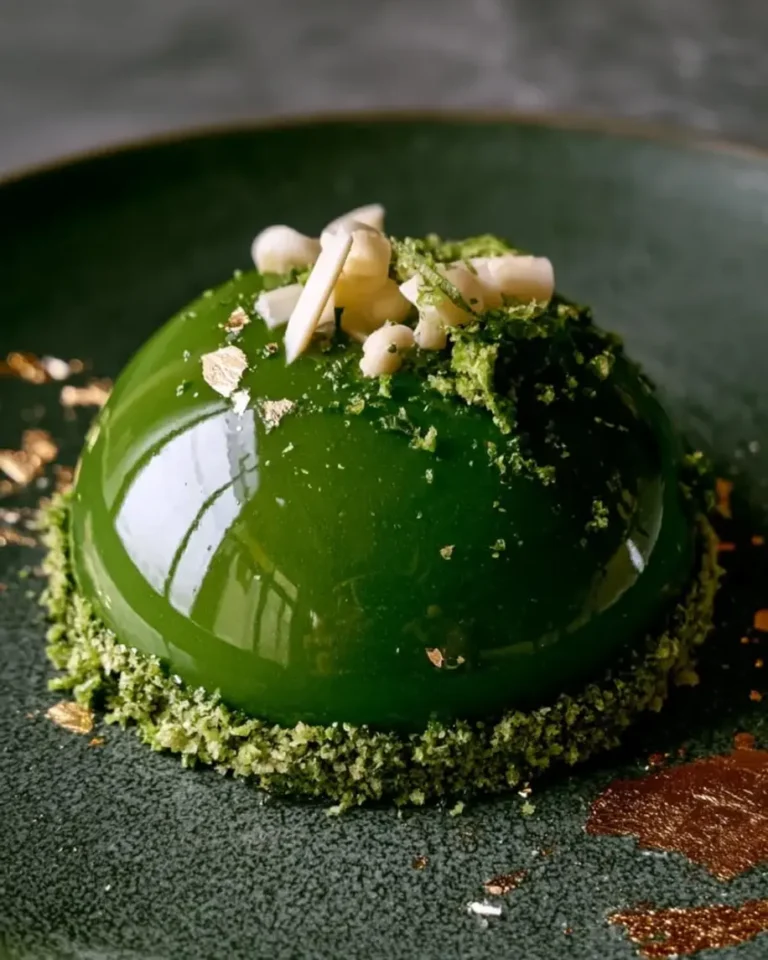
| Matcha Mirror Glaze | Add 1 tsp matcha powder to glaze; omit blackberry | Earthy, elegant; beautiful green color | No change |
Raspberry Cosmic Spheres
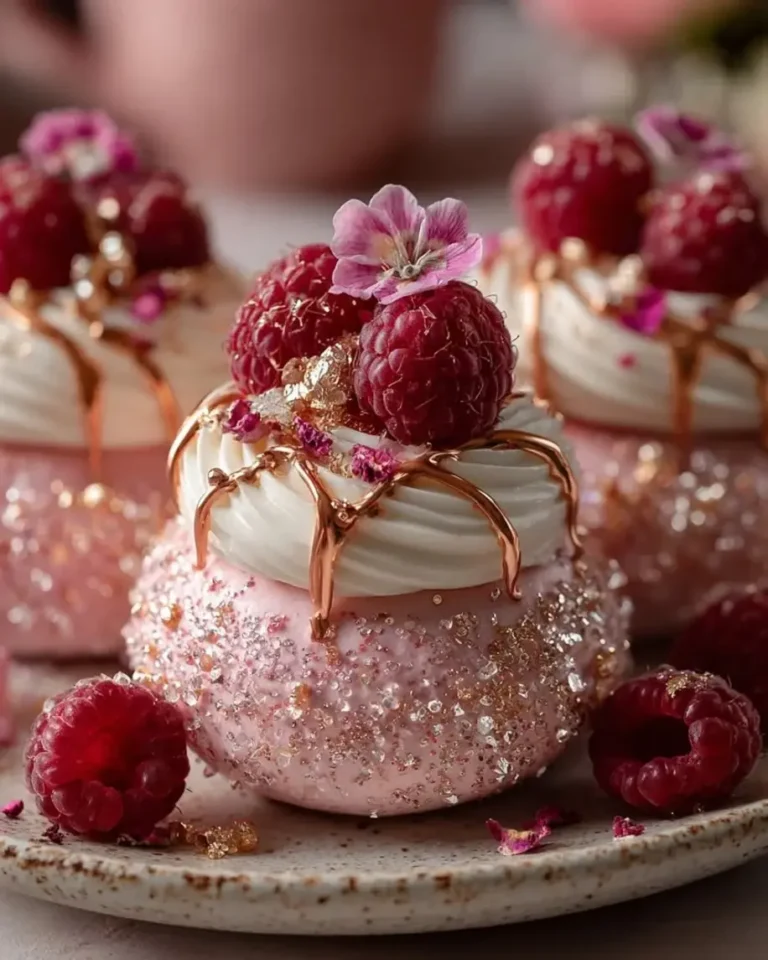
If blackberries aren’t your thing or you want a slightly brighter flavor, swap in an equal amount of raspberry puree. The mousse will take on a lovely pinkish-lavender hue, and the flavor is a touch more tart. I like to add 1 tablespoon of rose water to the mousse when I make this version — it’s a combination that reminds me of the Moroccan rose-scented pastries my mother used to make. The glaze can stay the same purple-black palette, or you can tint it pink and gold for a softer cosmic look.
Gluten-Free Version
I’ve tested this with several gluten-free flour blends, and the best result comes from a 1:1 baking blend that contains xanthan gum (like King Arthur Measure for Measure). The sponge will be slightly more tender and a bit more delicate, so let it cool completely in the pan before slicing. The mousse and glaze are naturally gluten-free, so this is an easy swap if you’re cooking for a celiac friend. Just make sure your white chocolate is certified gluten-free — most are, but check the label.
Matcha Mirror Glaze
For an entirely different vibe — and a nod to my love of Japanese tea culture — try a matcha mirror glaze. Omit the blackberry puree from the glaze entirely, and whisk 1 teaspoon of high-quality matcha powder into the warm glaze mixture until fully dissolved. The sponge and mousse remain blackberry-flavored, which creates a beautiful contrast: green outside, berry inside. This version is a showstopper for a spring brunch or a bridal shower. I first made it for a friend’s wedding, and it was such a hit that it’s become a regular request.
What is a cosmic blackberry mirror glaze sphere cake made of?
A cosmic blackberry mirror glaze sphere cake is a multi-component dessert consisting of a vanilla blackberry sponge cake, a creamy blackberry cheesecake mousse, and a glossy mirror glaze that is tinted purple, black, and silver to create a cosmic, nebula-like appearance. The cake is assembled in spherical molds, frozen solid, and then coated in the glaze, which sets to a high-shine finish. Garnishes often include fresh blackberries, edible silver leaf, and micro mint. The combination yields a dessert that is as visually striking as it is flavorful — tart berry notes balanced by sweet cream cheese and a smooth, glossy coating.
How do you get a mirror glaze to stick to a frozen sphere cake?
The key to getting a mirror glaze to adhere to a frozen sphere cake is temperature control. The sphere must be frozen solid (at least 8 hours), and the glaze must be cooled to exactly 90°F (32°C). Just before glazing, let the frozen sphere sit at room temperature for about 90 seconds — this creates a thin layer of condensation on the surface, which helps the glaze grip evenly. Pour the glaze in a steady, circular motion, covering the entire sphere in one continuous pour. The cold surface causes the glaze to set almost instantly, creating that flawless, mirror-like finish.
Can I use frozen blackberries for the mirror glaze puree?
Absolutely — frozen blackberries are actually my preferred choice for this recipe, especially when fresh berries are out of season. Frozen berries are picked at peak ripeness and flash-frozen, so they often have more consistent flavor and sweetness than fresh berries that have traveled long distances. To make the puree, simply thaw the berries, blend them in a food processor or blender, and then press the mixture through a fine-mesh sieve to remove the seeds. One 12-ounce bag of frozen blackberries yields about 1 cup of puree, which is exactly what you need for both the sponge and the mousse with a little to spare.
How far in advance can I make the blackberry mirror glaze sphere cakes?
You can make the unglazed spheres up to two weeks in advance and keep them stored in an airtight container in the freezer. The sponge can be baked up to three days ahead and stored wrapped at room temperature. The mousse should be assembled and frozen within a day of making it for the freshest texture. The glaze itself is best made the day you plan to serve the cakes — it takes only 15 minutes to prepare and needs to be poured while the spheres are frozen. Once glazed, the cakes are best served within 2 to 4 hours. If you need to store glazed cakes overnight, you can refrigerate them, but the glaze may lose some of its high-gloss shine by the next day.
Why did my mirror glaze crack or peel off the sphere?
Mirror glaze cracking or peeling usually happens for one of three reasons. First, the sphere was not frozen solid enough — it needs a minimum of 8 hours in the freezer. Second, the glaze was too hot or too cold when poured; the ideal temperature is exactly 90°F (32°C). If the glaze is too hot, it will slide off. If it’s too cold, it will set in thick, uneven patches that can crack as they settle. Third, the sphere may have been too dry on the surface. The 90-second rest at room temperature is crucial — it allows a thin layer of frost to form, which helps the glaze bond. If your glaze cracked, check these three factors next time and you’ll see a big improvement.
Can I make this recipe without a silicone sphere mold?
Yes, you can, though the sphere shape is part of the dramatic presentation. If you don’t have silicone sphere molds, you can use a standard 9-inch round cake pan or a loaf pan to create a dome-shaped cake. Simply line the pan with plastic wrap, fill with mousse and sponge layers, and freeze. Once frozen, unmold and use a large spoon or melon baller to carve the edges into a rounded shape before glazing. Alternatively, you can use silicone hemisphere molds (often sold as “bombes” or “dome molds”) — they’re widely available online and give you a beautiful half-sphere shape that glazes beautifully. You can also use regular muffin tins lined with plastic wrap for mini individual dome cakes.
What is the best way to store leftover mirror glaze?
Leftover mirror glaze can be stored in an airtight container in the refrigerator for up to 5 days. When you’re ready to use it again, reheat it gently using a double boiler or in 5-second bursts in the microwave, stirring thoroughly between each burst, until it reaches 90°F (32°C). You may need to add a teaspoon of warm water or milk if the glaze has thickened too much. The glaze can also be frozen for up to 1 month — thaw it overnight in the refrigerator, then reheat as directed. I like to keep leftover glaze on hand for drizzling over ice cream, cheesecake slices, or even as a dip for fresh fruit.
How do I get the cosmic swirl effect in the mirror glaze?
The cosmic swirl effect is achieved by tinting separate portions of the glaze with different colors — in this case, purple, black, and a white base — and then gently swirling them together before pouring. Pour the three colored glazes into a shallow dish or a small baking pan, alternating colors in random patterns. Use a toothpick or the tip of a knife to drag through the colors in a figure-eight motion, creating streaks and swirls. Add a pinch of silver edible shimmer dust and swirl once more. Then dip your frozen sphere into the glaze or pour the glaze over the sphere in one smooth motion. The colors will blend and flow over the surface, creating a unique cosmic pattern every time.
Is this recipe suitable for a beginner baker?
This recipe is rated advanced because of the multiple components and the precision required for the glaze. However, a confident beginner can absolutely succeed if they read the full recipe carefully, set up all ingredients in advance, and follow the temperature guidelines closely. The sponge is straightforward, the mousse is forgiving as long as you bloom the gelatin properly, and the glaze is mostly about hitting 90°F. I recommend making a test batch of the glaze first — just the glaze — and practicing pouring it over a frozen bowl or a silicone ice mold to build confidence. Once you see that first perfect pour, you’ll be hooked. I was.
Can I use a different fruit instead of blackberry?
Yes, this recipe is very adaptable to other fruits. Raspberry is the most direct swap — use the same amount of raspberry puree in the sponge and mousse, and adjust the glaze color to pink and gold for a different cosmic look. Strawberry, blueberry, and even passion fruit all work well. Keep in mind that the sweetness and acidity of the fruit will vary: passion fruit is much tarter, so you may need to add 1-2 tablespoons of sugar to the mousse. For stone fruits like peach or mango, peel and blend the flesh, then strain. The technique remains exactly the same — the fruit puree replaces the blackberry puree in equal measure.
Share Your Version!
I’d love to see how your Cosmic Blackberry Mirror Glaze Sphere Cakes turn out! Leave a star rating and a comment below — tell me if you tried any of the variations, or if you came up with your own twist. Did you go with the matcha glaze? Raspberry instead of blackberry? I read every comment and I love hearing about your kitchen triumphs (and even the happy accidents — some of my best recipes started as mistakes).
Share your photo on Instagram or Pinterest and tag me @leosfoods — I feature my favorites on my stories. And if you have a question that I didn’t answer in the FAQ, just ask in the comments. I’m here for you, from my NYC kitchen to yours. Now go make something cosmic. — Stella 🧡
⭐ Loved this recipe? ⭐
Drop a star rating below and share a photo of your cosmic creation — I can’t wait to see your galaxy on a plate!
Tag @leosfoods on your post so I can share the love. ✨
Love This Recipe? Save It to Pinterest!
If you enjoyed this Cosmic Blackberry Mirror Glaze Sphere Cakes recipe, don’t let it get lost in your browser tabs! 😄 Pin it now so you can find it again anytime — and explore hundreds more tried-and-tested recipes waiting for you on my Pinterest boards.
👉 Follow Stella on Pinterest @stellarecipeblog
📌 Pin this recipe · 🔁 Re-pin your favorites · 💬 Tag me when you make it — I love seeing your creations!
Cosmic Blackberry Mirror Glaze Sphere Cakes
- Yield: 8 1x
Ingredients
- For the Vanilla Blackberry Sponge:
- 1 1/2 cups all-purpose flour
- 1 1/2 tsp baking powder
- 1/4 tsp salt
- 1/2 cup unsalted butter, softened
- 3/4 cup granulated sugar
- 2 large eggs
- 1 tsp vanilla extract
- 1/2 cup whole milk
- 1/2 cup blackberry puree
- For the Blackberry Cheesecake Mousse:
- 8 oz (225 g) cream cheese, softened
- 1/3 cup powdered sugar
- 1/2 cup blackberry puree
- 1 tsp vanilla extract
- 1 tsp unflavored gelatin
- 2 tbsp cold water
- 1 cup heavy whipping cream
- For the Cosmic Mirror Glaze:
- 1/2 cup sweetened condensed milk
- 7 oz (200 g) white chocolate, finely chopped
- 2 tsp powdered gelatin
- 1/4 cup cold water
- 1/2 cup granulated sugar
- 1/4 cup water
- Purple gel food coloring
- Black gel food coloring
- Silver edible shimmer dust
- For Garnish (optional):
- Fresh blackberries
- Edible silver leaf
- Micro mint leaves
Instructions
- Preheat the oven to 350°F (175°C). Grease and line an 8-inch cake pan.
- Whisk together the flour, baking powder, and salt.
- Beat the butter and sugar until light and fluffy. Add the eggs one at a time, then mix in the vanilla.
- Alternate adding the dry ingredients with the milk, then fold in the blackberry puree.
- Bake for 25–30 minutes. Cool completely and cut into circles to fit the sphere molds.
- Bloom the gelatin in the cold water for 5 minutes.
- Beat the cream cheese, powdered sugar, blackberry puree, and vanilla until smooth.
- Melt the bloomed gelatin and stir it into the cheesecake mixture.
- Whip the heavy cream to soft peaks and gently fold it into the mixture.
- Fill silicone sphere molds halfway with mousse, insert a sponge cake round, cover with more mousse, and freeze for at least 8 hours.
- For the glaze, bloom the gelatin in the cold water. Heat the sugar and water until dissolved, then stir in the condensed milk. Pour over the white chocolate, add the gelatin, and blend until smooth. Divide and tint with purple and black coloring, then swirl together with silver shimmer. Cool the glaze to about 90°F (32°C) and pour over the frozen spheres. Garnish with fresh blackberries, edible silver leaf, and micro mint before serving.
Nutrition
- Calories: 465
- Sugar: 36 g
- Fat: 28 g
- Carbohydrates: 47 g
- Protein: 7 g
Tried This Recipe? Leave a Comment!
Did you make this recipe? I’d love to hear how it turned out! Please leave a comment and a rating below. Your feedback helps other home cooks and supports cheerychop.com!
For more delicious inspiration, follow me on Pinterest!