How to Make Emerald Lime White Chocolate Dream Bombs
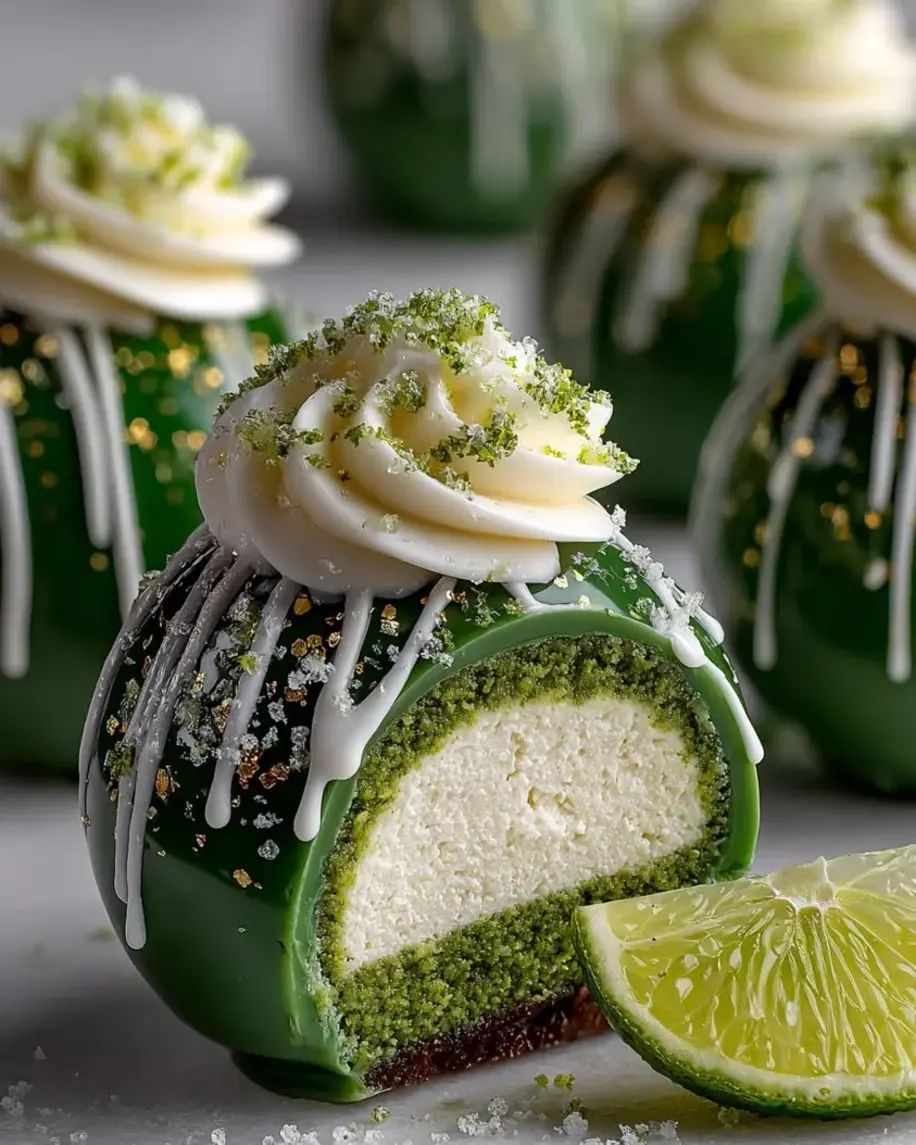
Table of Contents
Emerald Lime White Chocolate Dream Bombs – Stunning Mirror Glaze Dessert
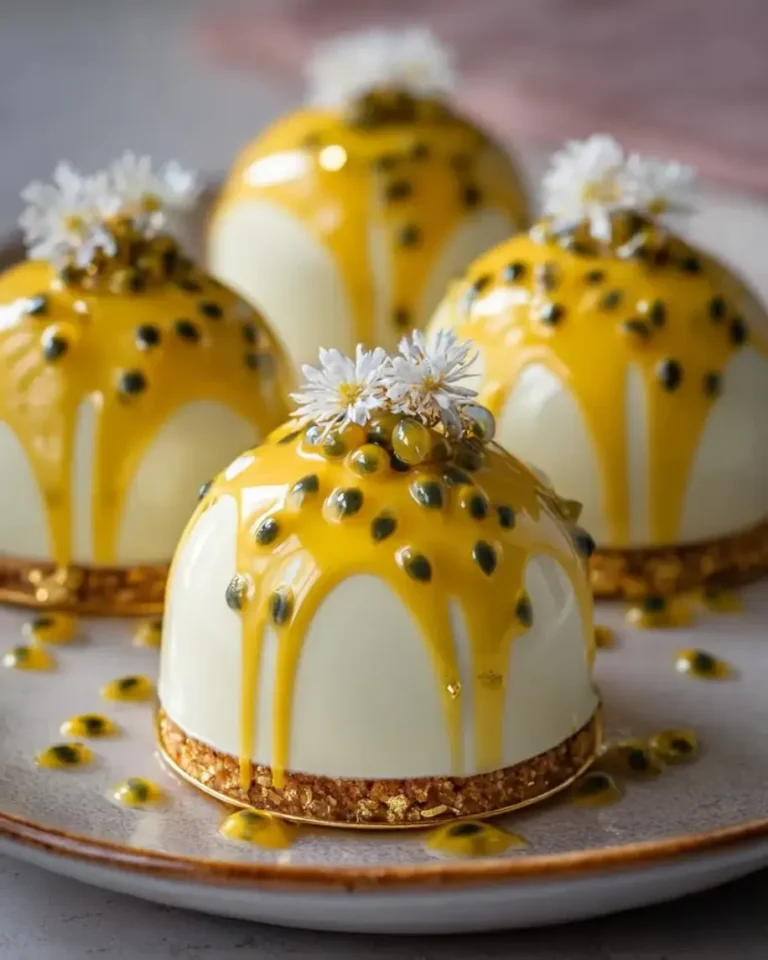
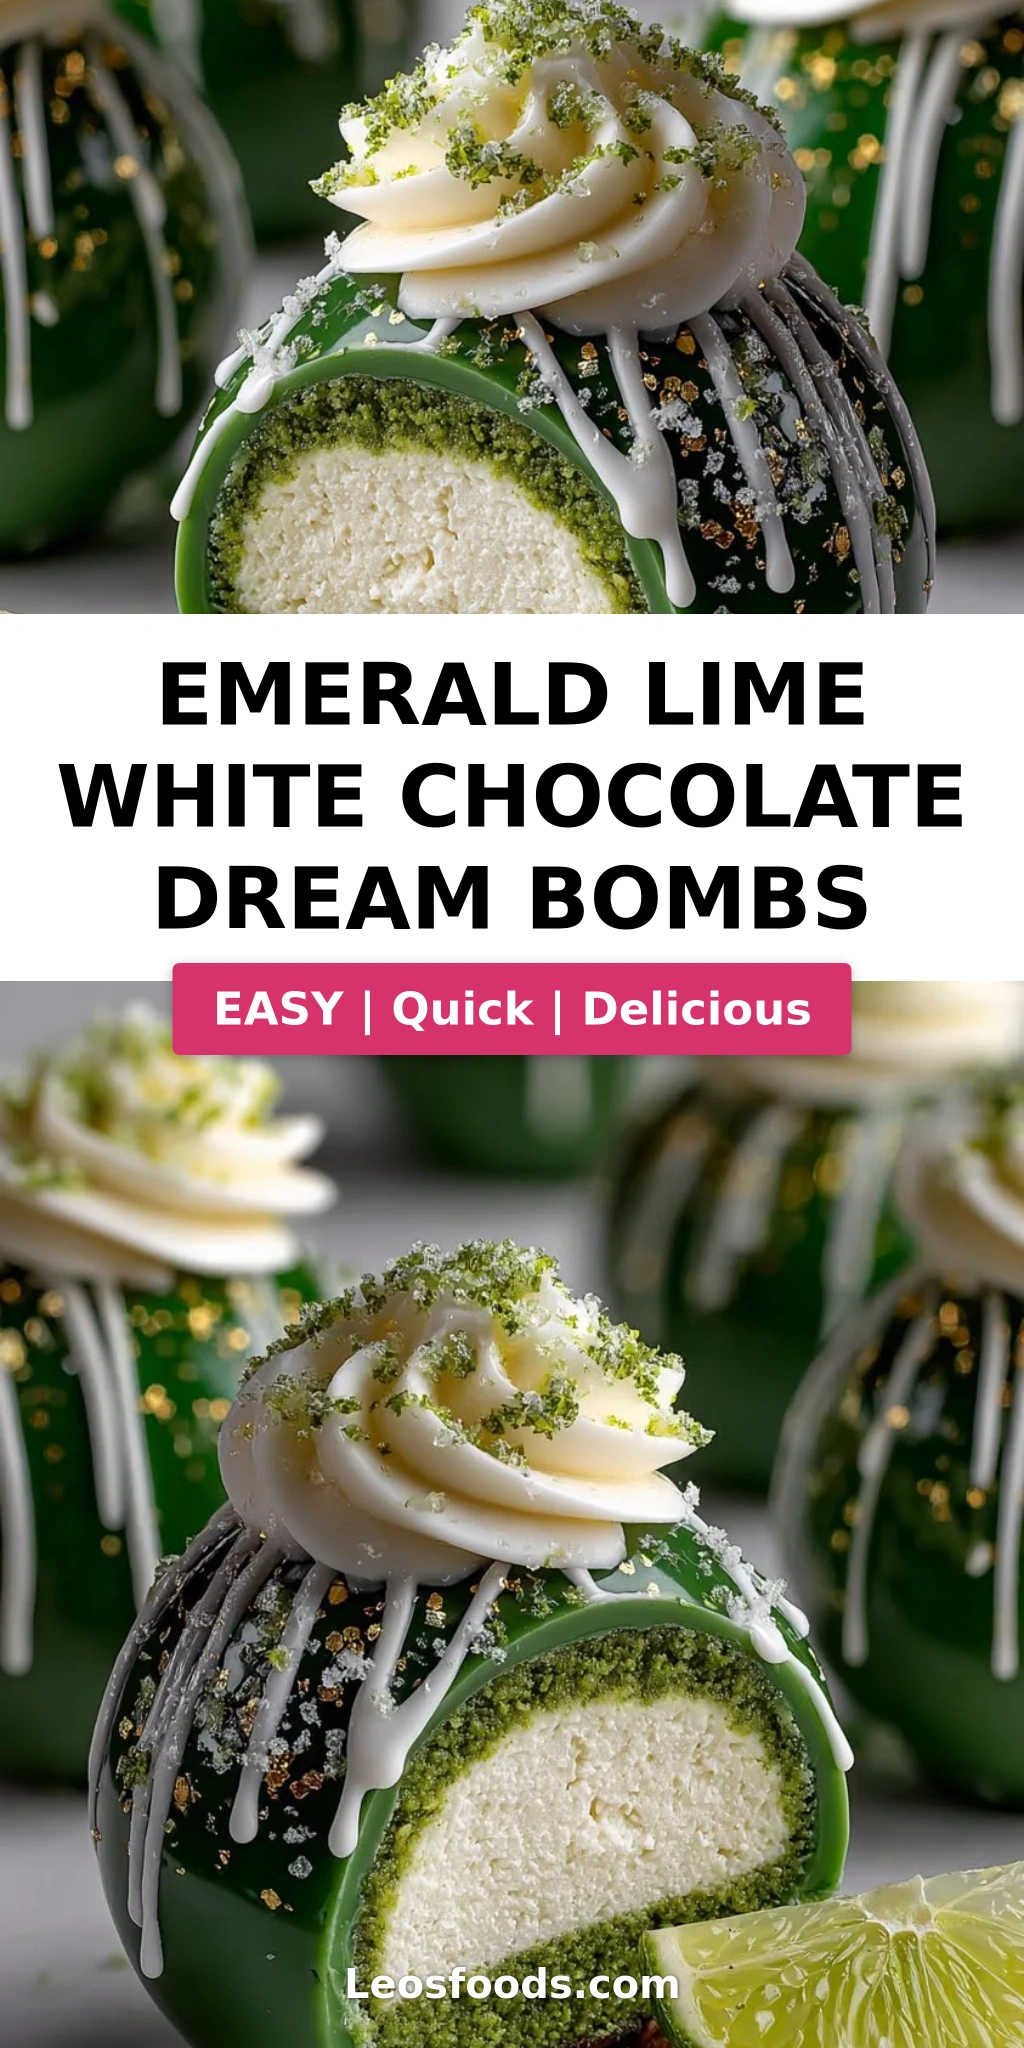
I first tasted a dream bomb dessert—a luscious sphere of white chocolate with a hidden cream center—while studying pastry at Le Cordon Bleu in Paris, and I knew I had to create a version that carried the bright, sun-drenched flavors of my Moroccan childhood. These Emerald Lime White Chocolate Dream Bombs are that vision come to life: a lime-infused white chocolate shell cradling a silky vanilla mascarpone center, all draped in a jewel-toned emerald mirror glaze that shimmers like a gem. The first time I served these at a dinner party in my NYC apartment, my guests literally gasped. The combination of zesty lime, creamy white chocolate, and that show-stopping glossy emerald finish is pure magic—and I’m going to walk you through every step so you can make them at home with confidence.
Imagine cracking through a perfectly tempered white chocolate shell to reveal a cloud of mascarpone cream kissed with vanilla bean, while the bright pop of lime cuts through the richness like sunlight. The emerald mirror glaze—a technique I honed in Paris and adapted with a touch of edible pearl luster dust—glides over the frozen bombs in a waterfall of vivid green, catching the light with every angle. The aroma is pure indulgence: sweet white chocolate mingling with freshly grated lime zest, a scent that instantly transports me to the citrus groves of Marrakech. Each bite is a dance of textures—snap, cream, and a silky finish that lingers on your palate.
What sets my version apart is the triple-layered flavor architecture: a lime-white chocolate shell infused with fresh zest and juice, a vanilla mascarpone center that’s light as a cloud, and an emerald mirror glaze that’s both stunning and surprisingly achievable at home. I’ve tested this recipe more than a dozen times to eliminate the common pitfalls—cracked shells, weeping glaze, and grainy centers—so you can skip straight to the triumph. 💡 Stella’s Pro Tip: The secret to a flawless mirror glaze is patience—let it cool to exactly 90°F before pouring, and you’ll get that glass-like finish every time. Let’s dive in!
Why This Emerald Lime White Chocolate Dream Bombs Recipe Is the Best
The Flavor Secret: Most dream bomb recipes rely on plain white chocolate, but I layer in freshly squeezed lime juice and finely grated lime zest directly into the shell mixture. This isn’t just a hint of lime—it’s a bright, authentic citrus note that balances the sweetness of white chocolate and the richness of mascarpone. Growing up in Morocco, my mother always added preserved lemon or fresh citrus to sweets, and that principle of brightening a rich dessert with acid is the heartbeat of this recipe. The lime zest also adds aromatic oils that perfume every bite.
Perfected Texture: The key to a dream bomb that doesn’t feel heavy is the mascarpone-vanilla center. I whip it with heavy cream and just enough powdered sugar to give structure without weighing it down. The white chocolate shell, meanwhile, gets a precise amount of gelatin for structure—too little and it won’t unmold cleanly, too much and it becomes rubbery. I spent weeks perfecting that ratio during my pastry training in Paris, and it’s exactly what makes these bombs so satisfying to crack into.
Foolproof & Fast: While mirror glaze desserts look intimidating, I’ve broken this into clear, manageable stages—make the shells, freeze, then glaze. You can prepare the bombs up to the freezing stage two days ahead, then glaze the day you serve them. Even if you’ve never worked with gelatin or mirror glaze before, my step-by-step instructions with visual cues will guide you to a professional finish. No pastry degree required—just a little patience and a lot of love.
Emerald Lime White Chocolate Dream Bombs Ingredients
I source my white chocolate from a little French épicerie in Union Square, but a good-quality brand like Valrhona or Guittard from your grocery store works beautifully. The limes I pick up from the farmers market in Chelsea—look for thin-skinned, heavy limes that feel juicy. The mascarpone? I always grab the imported Italian tub at Eataly, but any full-fat mascarpone will do. Each ingredient plays a crucial role, so let’s break it down.
Ingredients List
- For the Lime White Chocolate Shells:
- 1 1/2 cups whole milk
- 3/4 cup white chocolate, finely chopped
- 1/2 cup heavy cream
- 1/3 cup granulated sugar
- 3 tbsp fresh lime juice
- 1 tbsp lime zest
- 2 tsp gelatin powder
- 2 tbsp cold water (for blooming gelatin)
- Pinch of salt
- For the Vanilla Cream Center:
- 1 cup mascarpone cheese
- 1/2 cup heavy whipping cream
- 3 tbsp powdered sugar
- 1 tsp vanilla bean paste
- For the Emerald Mirror Glaze:
- 1 cup white chocolate, finely chopped
- 1/2 cup sweetened condensed milk
- 1/4 cup water
- 1 tbsp gelatin powder
- 3 tbsp cold water (for blooming gelatin)
- 1 tsp lime juice
- 1/2 tsp edible pearl luster dust
- Green food coloring, as needed
- For Garnish (optional):
- 1 tbsp lime zest
- 1 tbsp white chocolate curls
- Edible gold flakes
Ingredient Spotlight
White Chocolate: The backbone of both the shell and the glaze. Use a high-quality white chocolate with cocoa butter listed as the first ingredient—avoid “white morsels” that contain palm oil, as they won’t melt as smoothly and can produce a grainy shell. Chop it finely so it melts evenly. A good substitution is high-quality white chocolate callets (pistoles) from Ghirardelli or Valrhona.
Lime Zest and Juice: Fresh is absolutely non-negotiable here. Bottled lime juice lacks the bright acidity and aromatic oils that make these bombs sing. For the zest, use a microplane and only take the green outer layer—the white pith is bitter and will ruin the delicate flavor. One medium lime yields about 1 tablespoon of zest and 2 tablespoons of juice, so you’ll need 2–3 limes total.
Gelatin Powder: This is what gives the shell structure and the mirror glaze its signature bounce and shine. I use Knox brand gelatin powder (unflavored) from any grocery store. Always bloom it in cold water for exactly 5 minutes before heating—this step ensures it dissolves completely without lumps. If you prefer a plant-based option, agar-agar can work but behaves very differently; I don’t recommend it for first-timers.
Mascarpone: This Italian cream cheese is lighter and silkier than American cream cheese, with a higher fat content that whips into a dreamy, cloud-like center. If you can’t find mascarpone, you can substitute a 50/50 blend of full-fat cream cheese and heavy cream, but the texture will be slightly denser. For the best results, let your mascarpone sit at room temperature for 15 minutes before whipping.
| Original Ingredient | Best Substitution | Flavor / Texture Impact |
|---|---|---|
| White chocolate | High-quality blond chocolate (caramelized white chocolate) | Richer, deeper caramel notes; slightly less sweet |
| Fresh lime juice | Fresh lemon juice | More tart, less floral; still bright and refreshing |
| Mascarpone | Full-fat cream cheese + 1 tbsp heavy cream (blended) | Slightly tangier, a bit denser but still creamy |
| Edible pearl luster dust | Extra green food coloring + skip shimmer | Loses the pearl shimmer; still a vibrant emerald |
How to Make Emerald Lime White Chocolate Dream Bombs — Step-by-Step
You’ve got your ingredients prepped and your silicone bomb molds ready—let’s make some magic. Take it one stage at a time, and don’t rush the freezing steps; they’re the key to clean unmolding and a perfect glaze finish.
Step 1: Bloom the Gelatin
In a small bowl, sprink 2 tsp of gelatin powder over 2 tbsp of cold water. Let it sit undisturbed for 5 minutes until it becomes a firm, wobbly mass. This process, called blooming, hydrates the gelatin so it dissolves smoothly into the warm liquid without clumps.
💡 Stella’s Pro Tip: Always use cold—not warm—water for blooming. Warm water will partially dissolve the gelatin and create lumps. Think of it like steeping tea: patience yields clarity.
Step 2: Heat the Milk and Cream
In a medium saucepan, combine 1 1/2 cups whole milk, 1/2 cup heavy cream, 1/3 cup granulated sugar, and a pinch of salt. Heat over medium heat, stirring occasionally, until the mixture is steaming and small bubbles form around the edges—about 165°F on a thermometer. Do not let it boil. Remove from heat and whisk in the bloomed gelatin until fully dissolved, about 30 seconds.
⚠️ Common Mistake to Avoid: Boiling the milk mixture will cause it to curdle or form a skin. Use a gentle hand—steaming is your signal. I always keep a thermometer clipped to the pan when I’m teaching this in my NYC classes.
Step 3: Add White Chocolate and Lime
Add 3/4 cup finely chopped white chocolate to the warm milk mixture and whisk until completely smooth and glossy. Stir in 3 tbsp fresh lime juice and 1 tbsp lime zest. The mixture will thin slightly from the juice—that’s perfect. Let it cool for 5 minutes at room temperature.
💡 Stella’s Pro Tip: If you see any tiny lumps of undissolved chocolate, strain the mixture through a fine-mesh sieve before pouring into the molds. A smooth shell starts with a smooth base.
Step 4: Coat the Molds
Pour a thin layer of the lime white chocolate mixture into each cavity of silicone bomb molds (about 2 tbsp per 3-inch mold). Using the back of a small spoon or a pastry brush, spread the mixture evenly up the sides, ensuring no thin spots. Tap the mold gently on the counter to release air bubbles. Chill in the refrigerator for 15–20 minutes until partially set—the coating should feel firm to the touch but not hard.
⚠️ Common Mistake to Avoid: If you spread the mixture too thin at the top edge, the shell will crack when unmolding. Aim for an even thickness of about 3–4 mm all around. I like to use a small offset spatula for precision.
Step 5: Prepare Vanilla Cream Center
In a large bowl, combine 1 cup mascarpone cheese, 1/2 cup heavy whipping cream, 3 tbsp powdered sugar, and 1 tsp vanilla bean paste. Use a hand mixer or stand mixer with the whisk attachment to whip on medium speed until light, fluffy, and stiff peaks form—about 2–3 minutes. Be careful not to over-whip, or it will turn buttery.
💡 Stella’s Pro Tip: For the fluffiest center, chill your mixing bowl and whisk attachment in the freezer for 10 minutes before whipping. This is a classic French pastry trick that makes a huge difference, especially in a warm NYC kitchen.
Step 6: Fill and Seal the Bombs
Spoon or pipe the vanilla cream into the center of each chilled shell, filling it nearly to the top but leaving a small 1/4-inch border around the edges. Spoon the remaining lime white chocolate mixture over the cream to seal, spreading it flush with the edge of the mold. Use a small offset spatula to level the surface.
⚠️ Common Mistake to Avoid: If you overfill the cream, the seal won’t hold and the bomb may leak when frozen. Leave that border—it’s your security seal. I learned this the hard way during my first test batch in Paris!
Step 7: Freeze Until Firm
Place the filled mold in the freezer and freeze for at least 4 hours, or overnight, until the bombs are completely solid. This is non-negotiable for clean unmolding and for the mirror glaze to set properly—the bombs must be frozen solid so the warm (but not hot) glaze sets on contact.
💡 Stella’s Pro Tip: Once frozen, you can pop the bombs out of the silicone molds and store them in a sealed freezer bag for up to 3 weeks before glazing. This makes them perfect for holiday prep—I always have a batch in my freezer for last-minute dinner parties.
Step 8: Make the Emerald Mirror Glaze
In a small bowl, bloom 1 tbsp gelatin powder in 3 tbsp cold water for 5 minutes. Meanwhile, finely chop 1 cup of white chocolate and place it in a heatproof bowl. Have your green food coloring and 1/2 tsp edible pearl luster dust measured and ready.
⚠️ Common Mistake to Avoid: Chop the white chocolate very finely—the finer the chop, the faster and more evenly it melts. Large chunks can create a lumpy glaze that won’t pour smoothly.
Step 9: Heat Condensed Milk
In a small saucepan, combine 1/2 cup sweetened condensed milk and 1/4 cup water. Heat over medium heat until steaming (about 160°F), then remove from heat and stir in the bloomed gelatin until fully dissolved. Pour this hot mixture directly over the chopped white chocolate.
💡 Stella’s Pro Tip: Don’t let the condensed milk mixture boil—boiling can cause the sugar to crystallize and the glaze to turn dull rather than glossy. Steam is your green light.
Step 10: Combine with Chocolate
Let the mixture sit for 1 minute to gently melt the chocolate, then whisk slowly until completely smooth and glossy. Stir in 1 tsp lime juice, 1/2 tsp edible pearl luster dust, and enough green food coloring to achieve a vivid emerald shade. Whisk gently—you want to avoid creating air bubbles.
⚠️ Common Mistake to Avoid: Whisking too vigorously or using a hand blender will incorporate air bubbles that show up as tiny craters in your finished glaze. Slow, steady whisking is the way to go. If bubbles do appear, strain the glaze through a fine-mesh sieve.
Step 11: Cool the Glaze
Allow the glaze to cool at room temperature, stirring occasionally, until it reaches 90°F on a thermometer—about 15–20 minutes. It should be slightly thickened but still pourable, like warm honey. If it thickens too much, gently reheat it in 5-second bursts in the microwave.
💡 Stella’s Pro Tip: The temperature window for pouring mirror glaze is 88°F to 92°F. Too warm, and it will slide right off the bomb; too cool, and it will clump and not self-level. An instant-read thermometer is your best friend here—I keep one clipped to my apron at all times.
Step 12: Unmold and Glaze
Remove the frozen bombs from the molds and place them on a wire rack set over a baking sheet (to catch the drips). Working quickly, pour the emerald mirror glaze evenly over each bomb, covering the entire surface. The glaze should flow smoothly and cling to the frozen shell. Let the excess drip away for about 30 seconds.
⚠️ Common Mistake to Avoid: Don’t touch or smooth the glaze once it’s poured—it will self-level as it sets. Any interference will leave fingerprints or streaks. Trust the process! I always remind my students: “Pour, pause, and don’t poke.”
Step 13: Chill and Garnish
Use a small offset spatula to carefully transfer each glazed bomb to a serving plate. Chill in the refrigerator for 10 minutes to allow the glaze to fully set. Just before serving, finish with a sprinkle of lime zest, white chocolate curls, and a few edible gold flakes for that extra wow factor.
💡 Stella’s Pro Tip: For the most dramatic presentation, serve these on a dark plate or mirrored tray—the emerald green pops beautifully against a dark background. I use matte black slate plates from a little shop in Brooklyn, and they never fail to impress.
| Step | Action | Duration | Key Visual Cue |
|---|---|---|---|
| 1 | Bloom gelatin | 5 min | Firm, wobbly mass |
| 2 | Heat milk and cream | 5 min | Steaming, small bubbles at edges |
| 3 | Add chocolate and lime | 3 min | Smooth and glossy |
| 4 | Coat molds | 10 min + 20 min chill | Firm to touch, not hard |
| 5 | Whip vanilla cream | 3 min | Stiff peaks form |
| 6 | Fill and seal | 10 min | Level with mold edge |
| 7 | Freeze | 4 hrs min | Completely solid |
| 8 | Bloom gelatin (glaze) | 5 min | Firm, wobbly mass |
| 9 | Heat condensed milk | 3 min | Steaming, not boiling |
| 10 | Combine with chocolate | 5 min | Smooth, glossy, vivid emerald |
| 11 | Cool glaze | 15–20 min | 90°F, like warm honey |
| 12 | Unmold and glaze | 5 min | Even coverage, self-levels |
| 13 | Chill and garnish | 10 min | Glaze set, garnishes adhere |
Serving & Presentation
These Emerald Lime White Chocolate Dream Bombs are the crown jewel of any dessert table—I’ve served them at everything from intimate dinner parties in my West Village apartment to holiday gatherings with my extended family back in Morocco. The emerald mirror glaze catches the light like a gemstone, and the first crack of the spoon through the shell never fails to elicit a round of applause. For a truly stunning presentation, place each bomb on a chilled plate with a small dollop of whipped cream or a quenelle of lime sorbet on the side.
I love to garnish mine with a tiny pinch of flaky sea salt alongside the lime zest and gold flakes—the salt enhances the sweetness and makes the citrus pop even more. If you’re serving these at a brunch or afternoon tea, pair them with a pot of Moroccan mint tea (my grandmother’s recipe calls for fresh spearmint and a touch of orange blossom water) for a beautiful cross-cultural moment. For wine lovers, a chilled glass of Moscato d’Asti or a late-harvest Riesling complements the creamy white chocolate and bright lime beautifully.
| Pairing Type | Suggestions | Why It Works |
|---|---|---|
| Side | Lime sorbet, fresh berries, mint sprig | Bright acidity cuts the richness; berries add color contrast |
| Sauce | Raspberry coulis, passion fruit sauce, caramel | Tart fruit sauces balance sweet white chocolate beautifully |
| Beverage | Moroccan mint tea, Moscato d’Asti, espresso | Tea brings floral notes; wine’s sweetness mirrors the dessert |
| Garnish | Lime zest, gold flakes, white chocolate curls, sea salt | Adds texture, color, and a touch of elegance |
Make-Ahead, Storage & Reheating
Between running my food blog and catering private dinners in NYC, I rely on make-ahead strategies to keep my sanity intact. These dream bombs are actually designed to be prepped in stages—you can make and freeze the filled bombs up to three weeks ahead, then glaze them the morning of your event. The mirror glaze itself can be made a day ahead and gently rewarmed to 90°F before pouring. Here’s exactly how to store every component.
| Method | Container | Duration | Reheating Tip |
|---|---|---|---|
| Refrigerator | Airtight container, single layer | Up to 3 days (glazed) | Serve chilled—no reheating needed |
| Freezer | Sealed freezer bag or airtight container | Up to 3 weeks (unglazed) | Glaze directly from frozen—do not thaw first |
| Make-Ahead | Freeze filled bombs in mold, then pop out | Freeze up to 3 weeks | Add glaze + garnish on serving day only |
One thing I always tell my readers: never refrigerate unglazed frozen bombs for longer than 30 minutes before glazing, or condensation will form on the surface and prevent the glaze from adhering properly. If you’re storing glazed bombs in the fridge, place them on a paper towel-lined plate and cover loosely with plastic wrap—this prevents the glaze from sweating. And if you have leftover glaze, you can store it in an airtight jar in the fridge for up to 2 weeks and reheat it gently in a water bath for another project (it’s amazing over ice cream or cheesecake).
Variations & Easy Swaps
| Variation | Key Change | Best For | Difficulty Impact |
|---|---|---|---|
| Lemon Dream | Substitute lime with lemon zest + juice | Bridal showers, spring gatherings | Same difficulty |
| Dairy-Free | Use oat milk, coconut cream, vegan white chocolate | Vegan guests, lactose-intolerant | Moderately harder |
| Berry Swirl | Swirl raspberry puree into cream center | Valentine’s Day, romantic dinners | Same difficulty |
Lemon Dream Variation
If you love lemon as much as lime, swap the lime zest and juice for equal amounts of fresh lemon. The flavor becomes slightly more floral and a touch less tart—reminiscent of the lemon tarts I used to make at a patisserie in the 6th arrondissement of Paris. I also add a tiny pinch of turmeric to the mirror glaze to give it a warm golden hue instead of emerald. Serve with a side of fresh raspberries for a classic French combination.
Dairy-Free Version
I developed this version for a client in NYC who was dairy-free, and it turned out better than I expected. Use full-fat oat milk (not almond—too thin) in place of whole milk, and substitute coconut cream (the thick part from a can of full-fat coconut milk) for the heavy cream and mascarpone. Use a high-quality vegan white chocolate that’s specifically labeled “dairy-free.” The texture will be slightly less rich, but the coconut adds a lovely tropical note that pairs beautifully with lime. Note that the mirror glaze is harder to get perfectly glossy with vegan white chocolate, so plan for a slightly more matte finish.
Berry Swirl Twist
For a burst of color and tartness, swirl 2 tablespoons of seedless raspberry puree into the vanilla cream center before filling the shells. I use a toothpick to create gentle figure-eight swirls—don’t overmix, or you’ll lose the marbled effect. This variation is stunning when you cut into the bomb and see the pink swirl against the white cream. I first tried this idea after a trip to the Union Square farmers market in June, when raspberries were at their peak. It’s become a favorite for Valentine’s Day and anniversaries.
What is an Emerald Lime White Chocolate Dream Bomb made of?
An Emerald Lime White Chocolate Dream Bomb is a show-stopping frozen dessert made of three distinct layers. The outer shell is a lime-infused white chocolate mixture set with gelatin, giving it a firm yet creamy texture. Inside that shell is a light and fluffy vanilla mascarpone cream center—like a cloud of vanilla bean cheesecake. The entire bomb is then coated in an emerald mirror glaze made from white chocolate, sweetened condensed milk, gelatin, lime juice, and green food coloring with edible pearl luster dust for shimmer. Optional garnishes include lime zest, white chocolate curls, and edible gold flakes. It’s a dessert that combines citrus brightness with creamy richness and a stunning glossy finish.
Can I use milk chocolate instead of white chocolate for Emerald Lime Dream Bombs?
Technically yes, but I don’t recommend it for this specific recipe. White chocolate has a high cocoa butter content and a neutral sweetness that allows the bright, zesty lime flavor to shine as the star. Milk chocolate would add cocoa solids and a stronger chocolate flavor that would compete with—and likely overpower—the lime and the vanilla cream center. If you want to try a chocolate version, I suggest using a 35% blond chocolate (caramelized white chocolate) instead, which offers a deeper, nuttier flavor that still lets the citrus come through. The texture of the shell and glaze will also behave differently with milk chocolate, so you’d need to adjust the gelatin ratio.
How do you keep the white chocolate shell from cracking when making Dream Bombs?
Preventing cracks in white chocolate shells comes down to three key factors. First, make sure your lime white chocolate mixture has enough gelatin—2 teaspoons per batch as specified—because gelatin provides the structural flexibility that prevents brittleness. Second, coat the silicone molds with an even layer about 3–4 mm thick, paying extra attention to the edges where cracks most often start. Third, and most importantly, don’t rush the freezing process. Chill the coated molds in the refrigerator for 15–20 minutes until partially set before adding the cream filling, then freeze for at least 4 hours until fully solid. Rapid temperature changes—like moving from a warm kitchen straight into a deep freeze—can cause thermal shock and cracking. If you see hairline cracks after unmolding, don’t worry: the emerald mirror glaze will seal them beautifully.
How long do Emerald Lime White Chocolate Dream Bombs need to set in the fridge?
Once glazed, the bombs only need about 10 minutes in the refrigerator for the mirror glaze to fully set before serving. However, the unglazed bombs must be frozen for at least 4 hours (or overnight) before unmolding and glazing. This long freeze is critical because the bombs need to be frozen solid so that the warm mirror glaze—poured at 90°F—sets on contact without melting the shell. If you try to glaze a bomb that isn’t fully frozen, the glaze will slide right off and the shell may collapse. For best results, freeze the filled bombs in their silicone molds for a full 4 hours, then pop them out and glaze immediately. After glazing, the 10-minute chill in the fridge is just to stabilize the glaze before serving.
Can I make Emerald Lime White Chocolate Dream Bombs without a silicone bomb mold?
Silicone bomb molds are highly recommended because their flexibility allows you to unmold the frozen shells cleanly without cracking them. However, if you don’t have one, you can use a large silicone muffin pan or even a 6-cavity silicone egg mold as a substitute. The shape will be slightly different—more like a dome than a perfect sphere—but the flavor and texture will be identical. Avoid using rigid metal or glass molds, as you won’t be able to unmold the frozen bombs without breaking them. If you’re desperate, you can also use 4-inch-wide ramekins lined with plastic wrap, but the shell coating will be trickier to apply evenly. I’d suggest investing in a set of silicone hemisphere molds—they’re inexpensive and available on Amazon or at any baking supply store, and they open up a whole world of frozen dessert possibilities.
Why did my emerald mirror glaze turn out cloudy instead of shiny?
A cloudy or dull mirror glaze is almost always caused by one of three issues. First, the glaze temperature was wrong when poured—it needs to be exactly 88–92°F. If it’s too hot, the cocoa butter separates and creates a greasy film; if it’s too cool, the gelatin sets before the glaze can self-level, leaving a matte finish. Second, air bubbles were incorporated during whisking—always stir gently and avoid using a hand blender, which can create micro-bubbles that scatter light. Third, the white chocolate quality matters: cheaper white chocolate with vegetable oils instead of cocoa butter won’t set with the same glossy shine. If your glaze turns cloudy, you can gently rewarm it to 90°F, stir in a teaspoon of coconut oil, strain it, and try again. And always test your glaze on a chilled spoon before pouring over the bombs.
What is the best way to transport Emerald Lime White Chocolate Dream Bombs?
Transporting these delicate desserts requires a bit of strategy. The best method is to freeze the unglazed bombs solid, then transport them in a portable freezer bag or insulated cooler with ice packs. Glaze them only after you arrive at your destination—this avoids any risk of the glaze smudging or the bombs sliding around. If you’re transporting already-glazed bombs, place each bomb in its own paper-lined cupcake liner and nestle them snugly in a single layer inside a sturdy box or cake carrier. Keep them refrigerated until just before serving. For a dinner party, I often bring the frozen unglazed bombs plus the mirror glaze in a thermos, then glaze them on-site—it takes less than 10 minutes and always looks incredibly impressive to guests. Never stack them, as the weight will crack the shells.
Can I use bottled lime juice instead of fresh for these Dream Bombs?
I strongly advise against using bottled lime juice for this recipe. Fresh lime juice provides bright, vibrant acidity and natural aromatic compounds that bottled juice simply cannot replicate. Bottled lime juice is often pasteurized and contains preservatives that can give it a slightly metallic or flat taste, and it lacks the essential oils that make fresh lime zest so fragrant. Since the lime flavor is one of the three star components in these bombs (alongside the white chocolate and vanilla cream), using fresh is non-negotiable for the best result. One large lime yields about 2 tablespoons of juice, so you’ll need 2–3 limes total for the shell and glaze. I also recommend using a microplane to zest the limes before juicing them—you’ll get more zest and it’s much easier when the fruit is still whole.
Share Your Version!
I absolutely love seeing how you make these Emerald Lime White Chocolate Dream Bombs your own! Did you try the lemon variation, or maybe you added a swirl of raspberry puree? Drop a star rating and a comment below—I read every single one and it means the world to know my recipes are being enjoyed in your kitchen. Tag me on Instagram or Pinterest @leosfoods when you share your creation, and use the hashtag #StellaDreamBombs so our community can find and celebrate each other’s gorgeous desserts.
If you’re feeling adventurous, I’d love to hear what unique pairing you served alongside these bombs—maybe a Moroccan mint tea or a bold espresso? Your twist might just inspire someone else’s next kitchen triumph. From my NYC kitchen to yours — I hope this recipe brings as much warmth to your table as it does to mine. — Stella 🧡
⭐️ Loved this recipe? Leave a comment and star rating below! ⭐️
Your feedback helps me create more recipes you’ll love—and don’t forget to tag @leosfoods in your photos!
Love This Recipe? Save It to Pinterest!
If you enjoyed this Emerald Lime White Chocolate Dream Bombs recipe, don’t let it get lost in your browser tabs! 😄 Pin it now so you can find it again anytime — and explore hundreds more tried-and-tested recipes waiting for you on my Pinterest boards.
👉 Follow Stella on Pinterest @stellarecipeblog
📌 Pin this recipe · 🔁 Re-pin your favorites · 💬 Tag me when you make it — I love seeing your creations!
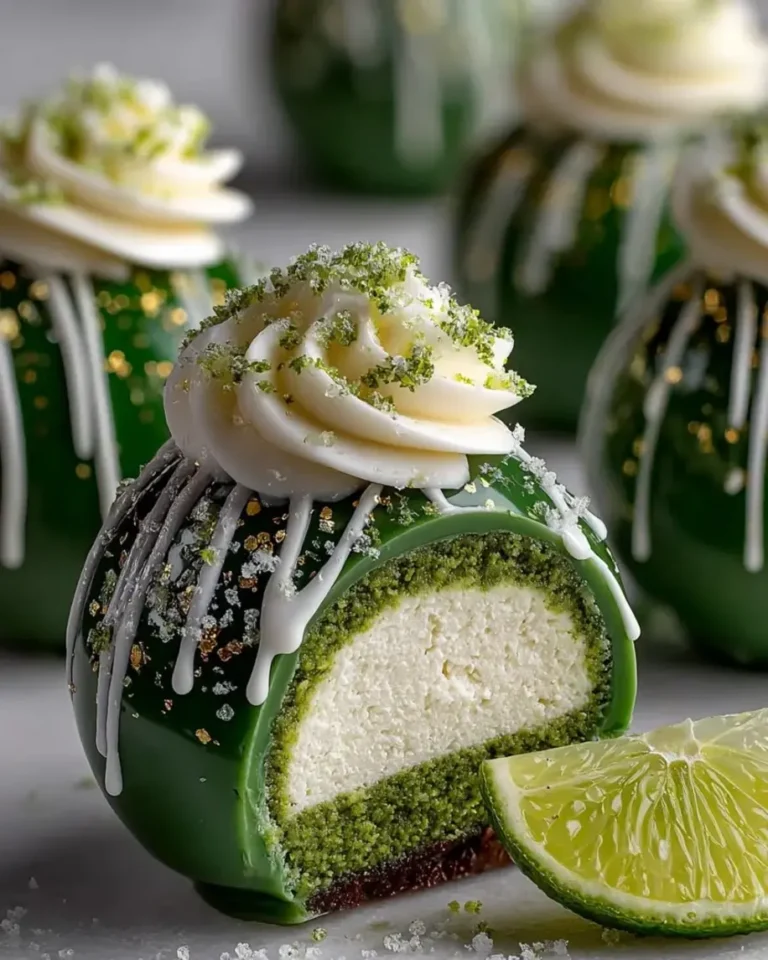
Emerald Lime White Chocolate Dream Bombs
A stunning dessert featuring lime-infused white chocolate shells, a creamy vanilla center, and an emerald mirror glaze.
- Yield: 6 1x
Ingredients
- For the Lime White Chocolate Shells:
- 1 1/2 cups whole milk
- 3/4 cup white chocolate, finely chopped
- 1/2 cup heavy cream
- 1/3 cup granulated sugar
- 3 tbsp fresh lime juice
- 1 tbsp lime zest
- 2 tsp gelatin powder
- 2 tbsp cold water
- Pinch of salt
- For the Vanilla Cream Center:
- 1 cup mascarpone cheese
- 1/2 cup heavy whipping cream
- 3 tbsp powdered sugar
- 1 tsp vanilla bean paste
- For the Emerald Mirror Glaze:
- 1 cup white chocolate, finely chopped
- 1/2 cup sweetened condensed milk
- 1/4 cup water
- 1 tbsp gelatin powder
- 3 tbsp cold water
- 1 tsp lime juice
- 1/2 tsp edible pearl luster dust
- Green food coloring, as needed
- For Garnish (optional):
- 1 tbsp lime zest
- 1 tbsp white chocolate curls
- Edible gold flakes
Instructions
- Bloom gelatin in cold water for 5 minutes.
- Heat milk, heavy cream, sugar, and salt until warm. Remove from heat and stir in the bloomed gelatin until fully dissolved.
- Add white chocolate and whisk until smooth. Stir in lime juice and lime zest.
- Pour a thin layer of the mixture into silicone bomb molds, coating the sides evenly. Chill until partially set.
- Whip mascarpone, heavy cream, powdered sugar, and vanilla bean paste until light and fluffy.
- Fill the center of each shell with the vanilla cream mixture, leaving a small border around the edges.
- Seal with the remaining lime white chocolate mixture and freeze for at least 4 hours until fully firm.
- For the mirror glaze, bloom gelatin in cold water for 5 minutes.
- Heat sweetened condensed milk and water until steaming. Remove from heat and stir in gelatin until dissolved.
- Pour over white chocolate and whisk until smooth and glossy. Add lime juice, pearl luster dust, and green food coloring to create a vibrant emerald finish.
- Allow the glaze to cool until slightly thickened but still pourable.
- Unmold the frozen bombs and place on a wire rack. Pour the emerald mirror glaze evenly over each bomb, allowing excess glaze to drip away.
- Transfer to serving plates and chill for 10 minutes before serving.
- Finish with lime zest, white chocolate curls, and edible gold flakes.
Nutrition
- Calories: 430
- Sugar: 33g
- Fat: 29g
- Carbohydrates: 38g
- Protein: 6g
Tried This Recipe? Leave a Comment!
Did you make this recipe? I’d love to hear how it turned out! Please leave a comment and a rating below. Your feedback helps other home cooks and supports cheerychop.com!
For more delicious inspiration, follow me on Pinterest!