No-Bake Hazelnut Mocha Cheesecake Domes with Ganache
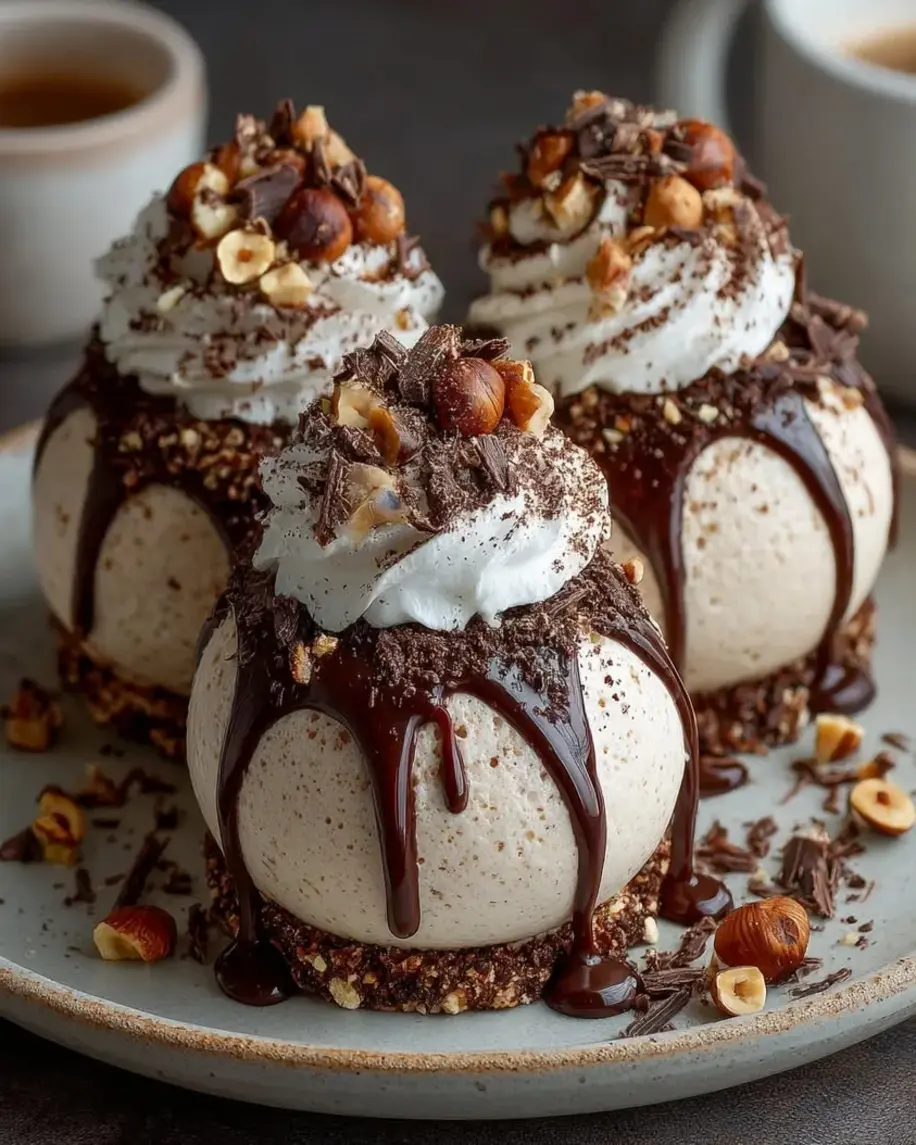
Table of Contents
Hazelnut Mocha Cheesecake Domes – No-Bake Elegance Meets Deep Espresso Flavor
I still remember the first time I tasted a hazelnut mocha—it was a chilly afternoon at a little café in the 6th arrondissement of Paris, and the combination of deep espresso and toasted hazelnut hit me like a warm hug. Years later, here in my NYC kitchen, I set out to capture that same cozy indulgence in dessert form. These Hazelnut Mocha Cheesecake Domes are the result: a no-bake showstopper that layers silky mocha cheesecake with a hidden hazelnut crunch, all draped in glossy dark chocolate ganache. This mocha cheesecake recipe is my go-to when I want something that looks like I spent hours in the pastry kitchen but actually comes together with simple, honest techniques.
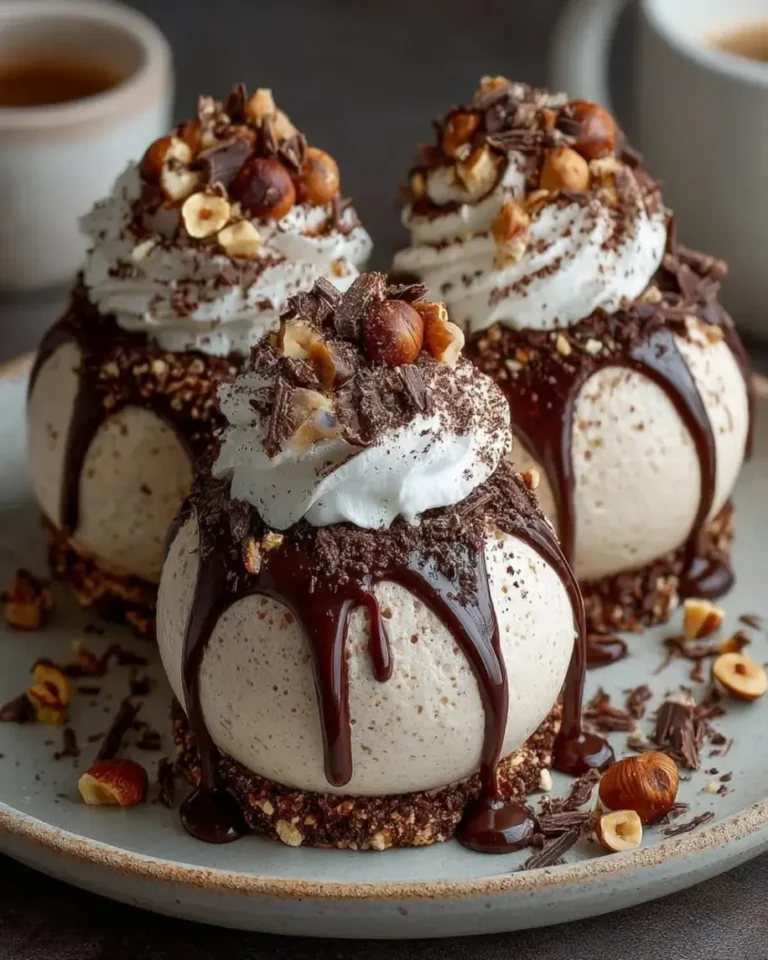
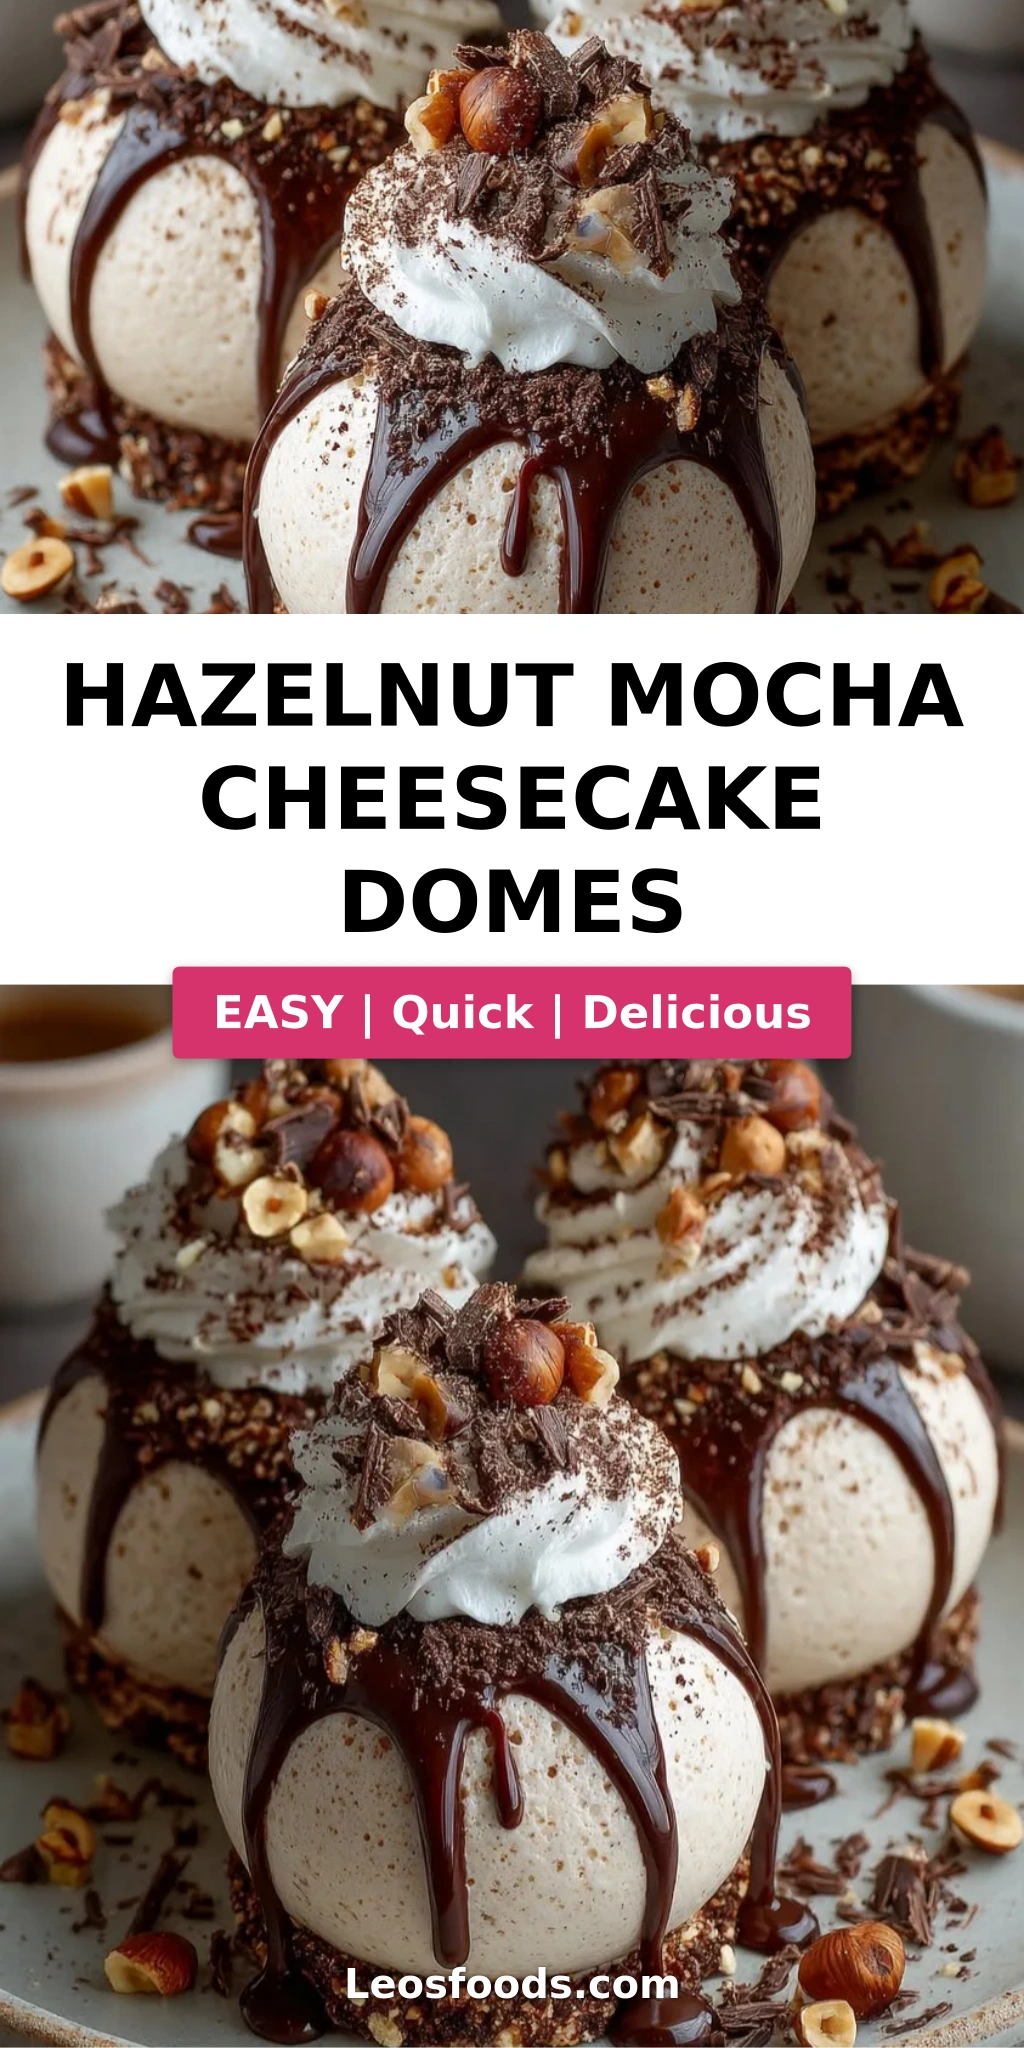
Imagine breaking through a shell of rich, semi-sweet ganache to reveal an airy, mousse-like cheesecake that tastes of hazelnut spread and bold espresso—then hitting a surprise center of crunchy hazelnuts and chocolate wafer crumbs. Each bite is a journey: creamy, crunchy, silky, and deeply chocolatey. The hazelnut cheesecake domes are finished with a dusting of cocoa, a curl of dark chocolate, and a sprinkle of toasted hazelnuts that nods to the nutty, roasted notes I grew up loving in Moroccan pastries. It’s a dessert that feels both elegant and familiar—like something you’d serve after a special dinner but that your family would happily devour any night of the week.
What makes these no-bake cheesecake domes truly special is the texture trifecta: the cloud-like cheesecake filling, the crunchy hazelnut layer, and the firm ganache shell. I’ve tested this recipe more times than I can count—first in my tiny Paris kitchen, then for friends in Brooklyn. The key is getting the cheesecake mixture light and airy by folding in whipped cream gently, and making sure the domes are fully frozen before you glaze them. A common mistake is rushing the freezing step—trust me, patience pays off here. Let me show you exactly how to make these beauties at home, with all the pro tips I’ve picked up along the way.
Why This Hazelnut Mocha Cheesecake Domes Recipe Is the Best
The Flavor Secret — Most mocha cheesecake recipes just stir in coffee and call it a day. But I draw on my French pastry training to build layers of flavor: I dissolve instant espresso powder in just a little hot water to concentrate the coffee punch, then blend it with both cream cheese and hazelnut spread. The result is a mocha flavor that’s deep, aromatic, and never watery. The hazelnut crunch layer—inspired by the nutty fillings my mother made in Morocco—adds a toasted, buttery contrast that elevates the whole dessert.
Perfected Texture — The secret to the airy, mousse-like texture lies in the folding technique. I whip the heavy cream to soft peaks separately, then gently fold it into the cream cheese mixture. This ensures the domes are light and creamy, not dense or gluey. The ganache coating is kept fluid with a touch of butter for a mirror-like shine that sets to a thin, snappable shell. Every element has been calibrated for the perfect mouthfeel—from the first crack of the ganache to the last crumb of the hazelnut center.
Foolproof & Fast — This is a no-bake recipe that delivers bakery-level results with minimal equipment. You don’t need a stand mixer or any special pastry skills—just a bowl, a whisk, and silicone dome molds. The hardest part is waiting for the domes to freeze! I’ve included all my tested shortcuts and visual cues so that even if it’s your first time making a molded dessert, you’ll feel confident and successful.
Hazelnut Mocha Cheesecake Domes Ingredients
I picked up most of these ingredients at my favorite NYC market—Citarella in Chelsea Market—but everything is easy to find at any well-stocked grocery store. The hazelnut spread reminds me of the jars my aunt would bring from Morocco, and the espresso powder is a staple I learned to appreciate in Parisian cafés.
Ingredients List
For the Hazelnut Mocha Cheesecake:
- 8 oz (225 g) cream cheese, softened
- 1/3 cup powdered sugar
- 1 tsp vanilla extract
- 2 tbsp instant espresso powder
- 1 tbsp hot water
- 1/3 cup hazelnut spread (like Nutella)
- 1 cup heavy whipping cream, whipped to soft peaks
For the Chocolate Ganache Coating:
- 8 oz (225 g) semi-sweet chocolate, finely chopped
- 1/2 cup heavy cream
- 1 tbsp unsalted butter
For the Hazelnut Crunch Layer:
- 1/2 cup roasted hazelnuts, finely chopped
- 1/4 cup chocolate wafer cookie crumbs
- 2 tbsp melted unsalted butter
- 1 tbsp cocoa powder
For Garnish (optional):
- Chopped roasted hazelnuts
- Dark chocolate curls
- Light dusting of cocoa powder
Ingredient Spotlight
Instant Espresso Powder — This is the backbone of the mocha flavor. I use Medaglia d’Oro or Café Bustelo for a deep, bold coffee taste that stands up to the chocolate and hazelnut. Instant coffee can be used in a pinch, but espresso powder gives a richer, more authentic coffeehouse flavor. Dissolve it in hot water first to ensure it blends smoothly into the cheesecake.
Hazelnut Spread — Look for a spread with real hazelnuts and chocolate—Nutella is the most common, but artisanal brands like Rigoni di Asiago have a more pronounced nutty flavor. The spread adds creaminess and that signature hazelnut taste that pairs so beautifully with coffee. For a less sweet version, you can use a hazelnut butter with a touch of honey.
Semi-Sweet Chocolate — I recommend a good-quality chocolate like Guittard, Ghirardelli, or Valrhona for the ganache. The chocolate should be finely chopped so it melts evenly when the hot cream is poured over it. A chocolate with 60–70% cacao gives the best balance of sweetness and depth for the coating.
Roasted Hazelnuts — I buy mine from the bulk bins at Whole Foods or online from nuts.com. Toasting them yourself deepens their flavor—spread them on a baking sheet at 350°F for 8–10 minutes until fragrant and the skins begin to flake. Rub them in a clean kitchen towel to remove most of the skins before chopping.
| Original Ingredient | Best Substitution | Flavor / Texture Impact |
|---|---|---|
| Instant Espresso Powder | Instant coffee (use 1 ½ tbsp) | Less bold, slightly more bitter—add a pinch of cocoa to round it out. |
| Hazelnut Spread | Chocolate-hazelnut butter + 1 tbsp maple syrup | Less sweet, more intense hazelnut flavor; texture slightly grainier. |
| Heavy Whipping Cream | Full-fat coconut cream (chilled) | Dairy-free; lighter texture with a subtle coconut note that pairs surprisingly well with chocolate. |
| Chocolate Wafer Cookie Crumbs | Graham cracker crumbs + 1 tsp cocoa powder | Slightly less chocolatey, but still crunchy—add an extra tsp of cocoa to compensate. |
How to Make Hazelnut Mocha Cheesecake Domes — Step-by-Step
I’ve broken down every step with the exact visual cues I use in my own kitchen. Don’t worry—these domes are much easier than they look, and I’m here to guide you through each one.
Step 1: Dissolve the Espresso
In a small bowl, combine 2 tbsp instant espresso powder with 1 tbsp hot water. Stir until the granules are fully dissolved. Set aside to cool completely—about 5 minutes. You want the espresso mixture to be at room temperature before adding it to the cream cheese, or it might cause the mixture to separate.
💡 Stella’s Pro Tip: If your espresso powder clumps, use a fork to break it up as you stir. A smooth mixture ensures even flavor throughout the cheesecake.
Step 2: Make the Cheesecake Base
In a large bowl, beat 8 oz softened cream cheese, 1/3 cup powdered sugar, 1 tsp vanilla extract, 1/3 cup hazelnut spread, and the cooled espresso mixture. Beat on medium speed until completely smooth and no lumps remain, about 2 minutes. Scrape down the sides and bottom of the bowl with a spatula.
⚠️ Common Mistake to Avoid: Using cold cream cheese will leave you with a lumpy batter. Let it sit at room temperature for at least 30 minutes before you start, or microwave it in 10-second bursts until softened but not warm.
Step 3: Fold in the Whipped Cream
In a separate bowl, whip 1 cup heavy whipping cream to soft peaks—it should hold a gentle ribbon when you lift the whisk but not be stiff. Add one-third of the whipped cream to the cream cheese mixture and fold gently with a spatula to lighten the batter. Then fold in the remaining whipped cream in two additions, just until no white streaks remain. The mixture should be light, airy, and mousse-like.
💡 Stella’s Pro Tip: Fold using a figure-8 motion, scraping the bottom and sides of the bowl. Stop as soon as the cream is incorporated—over-folding will deflate the air and make the domes dense.
Step 4: Prepare the Hazelnut Crunch
In a small bowl, combine 1/2 cup finely chopped roasted hazelnuts, 1/4 cup chocolate wafer cookie crumbs, 2 tbsp melted unsalted butter, and 1 tbsp cocoa powder. Stir until the mixture is well combined and resembles wet sand. This will be the hidden crunchy center of your domes.
⚠️ Common Mistake to Avoid: Don’t over-process the hazelnuts—aim for fine crumbs with a few tiny pieces for texture. If you grind them into a paste, the crunch layer will be greasy instead of crispy.
Step 5: Assemble the Domes
Spoon the cheesecake mixture halfway into silicone dome molds (about 2 tbsp each, depending on your mold size). Drop a small spoonful (about 1 tsp) of the hazelnut crunch mixture into the center of each dome. Cover with the remaining cheesecake mixture, completely enclosing the crunch layer. Smooth the tops with an offset spatula or the back of a spoon.
💡 Stella’s Pro Tip: Use a piping bag for the cheesecake mixture—it makes filling the molds cleaner and helps you avoid air pockets. If you don’t have a piping bag, a zip-top bag with one corner snipped off works perfectly.
Step 6: Freeze the Domes
Place the filled silicone molds on a baking sheet and freeze for at least 6 hours, or preferably overnight. The domes must be completely firm—like ice cream—before you unmold and glaze them. If they’re even slightly soft, the ganache won’t set properly and the domes may lose their shape.
⚠️ Common Mistake to Avoid: Rushing the freezing time is the #1 mistake I see. Set a timer for at least 6 hours—I often make these a day ahead so they freeze solid overnight.
Step 7: Make the Ganache
Finely chop 8 oz semi-sweet chocolate and place it in a heatproof bowl. Heat 1/2 cup heavy cream in a small saucepan until it just simmers—tiny bubbles around the edge, but not boiling. Pour the hot cream over the chopped chocolate and let it stand undisturbed for 2 minutes. Then stir gently in concentric circles until the ganache is smooth and glossy. Stir in 1 tbsp unsalted butter until fully incorporated. Let the ganache cool for 8–10 minutes until it’s still fluid but no longer warm to the touch.
💡 Stella’s Pro Tip: If the ganache looks separated or grainy, whisk in a tablespoon of warm cream one teaspoon at a time—it will come back together. Don’t over-stir or you’ll incorporate air bubbles.
Step 8: Unmold and Glaze
Remove the frozen domes from the freezer. Gently flex the silicone molds to release the domes—they should pop out easily. Place them on a wire rack set over a baking tray (to catch drips). Pour the slightly cooled ganache evenly over each dome, starting from the center and letting it flow over the sides. Use an offset spatula to smooth the bottom edge if needed.
⚠️ Common Mistake to Avoid: If the ganache is too thick, it will coat unevenly; if too thin, it will run off. It should have the consistency of thick maple syrup. Test on one dome first—if it runs off too fast, let the ganache cool another 2–3 minutes.
Step 9: Garnish and Chill
While the ganache is still wet, garnish with chopped roasted hazelnuts, dark chocolate curls, and a light dusting of cocoa powder. Transfer the domes to a serving platter or individual plates and chill in the refrigerator for at least 20 minutes before serving. This allows the ganache to set to a firm, glossy shell while the cheesecake interior softens to a creamy, mousse-like consistency.
💡 Stella’s Pro Tip: For the best chocolate curls, warm a block of dark chocolate slightly with the heat of your palm, then shave it with a vegetable peeler. They’ll curl naturally and look gorgeous on the domes.
| Step | Action | Duration | Key Visual Cue |
|---|---|---|---|
| 1 | Dissolve espresso | 2 mins | No granules visible |
| 2 | Beat cheesecake base | 2 mins | Smooth, no lumps |
| 3 | Fold in whipped cream | 1–2 mins | No white streaks, airy |
| 4 | Prepare hazelnut crunch | 3 mins | Wet sand consistency |
| 5 | Assemble domes | 10 mins | Filled to the brim, smooth top |
| 6 | Freeze | 6+ hours | Firm to touch, solid |
| 7 | Make ganache | 8–10 mins | Glossy, smooth, ribbons off spoon |
| 8 | Unmold and glaze | 10 mins | Even coating, drips collect on tray |
| 9 | Garnish and chill | 20 mins | Ganache set, shiny |
Serving & Presentation
These Hazelnut Mocha Cheesecake Domes are a stunner on any dessert table. I love serving them on simple white plates to let the glossy ganache and garnishes shine. Arrange one dome per person with a small spoonful of lightly sweetened whipped cream on the side for dipping. The contrast between the cold, creamy dome and the billowy room-temperature cream is absolutely luxurious. For an extra touch, drizzle a little warm chocolate sauce around the plate before placing the dome in the center—it adds drama and flavor.
In my NYC dinner parties, I often pair these domes with a double espresso or a small glass of amaro for a digestif that echoes the coffee notes. The hazelnut and chocolate flavors also pair beautifully with a late-harvest Riesling or a rich dessert stout. For a non-alcoholic option, a cold brew coffee or a vanilla oat milk latte is divine. When I’m feeling nostalgic for Paris, I serve them with a tiny scoop of vanilla bean ice cream on the side—the temperature and texture contrast is pure magic.
| Pairing Type | Suggestions | Why It Works |
|---|---|---|
| Side Dish | Lightly sweetened whipped cream, fresh raspberries, mint sprig | Fresh berries cut the richness; cream adds a cool, airy contrast. |
| Sauce / Dip | Warm caramel sauce, salted butter ganache, raspberry coulis | Caramel adds buttery sweetness; coulis adds bright acidity. |
| Beverage | Double espresso, cold brew, vanilla oat milk latte, amaro, late-harvest Riesling | Coffee echoes the mocha flavor; sweet wine or amaro complements the chocolate. |
| Garnish | Chopped toasted hazelnuts, dark chocolate curls, cocoa dusting, edible gold leaf | Adds texture, visual appeal, and reinforces the hazelnut-chocolate theme. |
Make-Ahead, Storage & Reheating
These domes are a dream for busy schedules—I often make them two days ahead of a dinner party. Because they’re no-bake and freeze beautifully, you can do almost all the work in advance. In my NYC life, that means I can prep the domes on a Sunday, freeze them, and then glaze and garnish them an hour before guests arrive on Tuesday. The key is to store them properly at each stage.
| Method | Container | Duration | Reheating Tip |
|---|---|---|---|
| Refrigerator | Airtight container, single layer | Up to 3 days | Serve chilled directly from the fridge—no reheating needed. |
| Freezer | Freezer-safe container, parchment between layers | Up to 2 months | Thaw in the fridge overnight before serving. Glaze after thawing for best appearance. |
| Make-Ahead | In the silicone molds, covered with plastic wrap | Up to 1 week in freezer | Glaze the day of serving. The ganache is best fresh—it stays shinier. |
One of my favorite tricks: I keep a batch of unglazed frozen domes in my freezer for unexpected guests. When company drops by, I can make the ganache in 10 minutes, glaze the domes, and have a stunning dessert ready in under 30 minutes. The domes will hold their shape beautifully as long as they stay frozen until glazing. If you’re storing glazed domes in the fridge, cover them loosely with plastic wrap to prevent the ganache from absorbing fridge odors—though honestly, they rarely last long enough for that to be an issue!
Variations & Easy Swaps
I love how adaptable this recipe is. Over the years, I’ve tested many variations—some inspired by my Moroccan roots, others by seasonal finds at the Union Square Greenmarket. Here are my favorite ways to switch it up.
| Variation | Key Change | Best For | Difficulty Impact |
|---|---|---|---|
| Moroccan Spice Twist | Add 1 tsp cinnamon and ¼ tsp cardamom to the cheesecake base | Fall gatherings, holiday tables | Easy — just add spices |
| Dairy-Free / Vegan | Use vegan cream cheese, coconut cream, and dairy-free chocolate | Dairy-free guests, vegan diets | Medium — texture varies by brand |
| Mocha Mint Domes | Add ½ tsp peppermint extract to the cheesecake; garnish with crushed candy cane | Holiday parties, winter dessert | Easy — extract swap + garnish |
Moroccan Spice Twist
Growing up in Morocco, we often added cinnamon and cardamom to sweet pastries and coffee. For this variation, I whisk 1 tsp cinnamon and ¼ tsp ground cardamom into the cream cheese mixture along with the espresso. The warm spices amplify the chocolate and hazelnut beautifully, giving the domes a subtle, fragrant complexity. It’s my favorite version for fall dinner parties—it feels like a cozy sweater in dessert form.
Dairy-Free / Vegan
I’ve tested this with vegan cream cheese (Miyoko’s works best), full-fat coconut cream whipped to soft peaks, and dairy-free chocolate for the ganache. The texture is slightly lighter and the coconut adds a whisper of tropical flavor that pairs surprisingly well with chocolate and coffee. Use a high-quality dark chocolate (70% or higher) for the ganache to ensure it sets properly. Note that the crunch layer should use a vegan butter stick, not margarine.
Mocha Mint Domes
This seasonal twist is a hit at my holiday gatherings. I add ½ tsp peppermint extract to the cheesecake mixture and top the glazed domes with crushed candy cane or dark chocolate mint bark. The cool peppermint cuts through the rich chocolate and hazelnut, creating a refreshing contrast. I found this idea after a trip to the farmers market in Union Square, where fresh mint was piled high—it’s become a December tradition in my kitchen.
How do you make hazelnut mocha cheesecake domes without a dome mold?
You don’t need a special silicone dome mold to make these domes! A simple trick I use in my NYC kitchen is to line a standard muffin tin with plastic wrap, pressing the wrap snugly into each cup. Fill the lined cups with the cheesecake mixture and hazelnut crunch, then gather the edges of the plastic wrap to form a pouch. Freeze until solid, then peel off the plastic wrap—the shape will be a rounded dome. Alternatively, you can use small glass or ceramic bowls (like dariole molds or even small custard cups) lined with plastic wrap. The key is to make sure the container is smooth-sided so the frozen dome releases easily. The shape might be slightly less perfect than a silicone mold, but the flavor and texture will be exactly the same!
Can I use instant coffee instead of espresso in hazelnut mocha cheesecake domes?
Yes, you absolutely can substitute instant coffee for the espresso powder, but there are a few things to keep in mind. Instant coffee is less concentrated than espresso powder, so you’ll need about 1 ½ tablespoons of instant coffee granules dissolved in the same 1 tablespoon of hot water for a similar level of coffee flavor. The taste will be slightly milder and could have a touch more bitterness, but it will still be delicious. To compensate, I recommend adding a tiny pinch of cocoa powder to the coffee mixture—it rounds out the flavor and mimics the depth that espresso powder naturally provides. I’ve made this swap many times when I run out of espresso powder, and honestly, most guests don’t notice the difference!
How long do hazelnut mocha cheesecake domes need to set in the freezer?
You need to freeze the assembled domes for at least 6 hours, but I always recommend overnight if you have the time. The domes must be completely solid—like a rock—before you attempt to unmold and glaze them. If they’re even slightly soft in the center, the dome shape won’t hold and the ganache coating will slide off rather than forming a smooth shell. I freeze mine for a full 24 hours when I’m planning ahead, which also makes the recipe perfect for make-ahead entertaining. The good news is that once they’re fully frozen, you can keep them in the freezer for up to 2 months, so you can make them well in advance of a special occasion.
What can I substitute for hazelnuts in hazelnut mocha cheesecake domes?
If you need a substitute for hazelnuts—whether due to allergy or availability—I’ve tested several options. Almonds are the closest replacement: use toasted, skinned almonds chopped finely for the crunch layer. The flavor will lean more marzipan-like but still pair beautifully with chocolate and coffee. For a nut-free version, use toasted pumpkin seeds (pepitas) or sunflower seeds chopped to a similar texture. They won’t have the same buttery richness, but they’ll still add a satisfying crunch. You can also double the chocolate wafer cookie crumbs and skip the nuts entirely—the texture will be more cookie-like but still delicious. If you’re avoiding hazelnut spread too, use a chocolate almond spread or a chocolate-coconut spread as a 1:1 replacement.
Can I make these domes in advance for a party?
Absolutely—these domes are one of my favorite make-ahead desserts for entertaining! Here’s my tested timeline: Make and freeze the domes (un-glazed) up to 1 week in advance. Keep them in the silicone molds, covered with plastic wrap, in the freezer. On the day of your party, remove them from the molds and place them on a wire rack. Make the ganache (it takes about 10 minutes), let it cool slightly, then pour it over the frozen domes. Garnish immediately, then refrigerate for 20–30 minutes to let the ganache set. The domes can sit in the fridge for up to 3 hours before serving—any longer and the ganache may start to dull slightly. This method means you’re only 30 minutes away from a stunning dessert on party day.
Why did my ganache turn out lumpy or grainy?
Lumpy or grainy ganache usually happens for one of three reasons. First, the cream might have been too hot—if it boils, it can cause the chocolate to seize or separate. Always heat the cream just until it simmers (tiny bubbles around the edge, not a full boil). Second, the chocolate might have been chopped unevenly, so some pieces melted faster than others. Chop your chocolate finely and uniformly. Third, moisture can cause chocolate to seize—make sure your bowl and utensils are completely dry. If your ganache does turn grainy, don’t panic! Whisk in a tablespoon of warm cream one teaspoon at a time, stirring gently after each addition. This often brings it back to a smooth, glossy state. If it’s still lumpy, strain it through a fine-mesh sieve—it won’t be as shiny, but it will still taste wonderful.
Can I use milk chocolate instead of semi-sweet for the ganache?
Yes, you can use milk chocolate, but the ganache will be much sweeter and softer. Milk chocolate has a higher sugar and milk fat content than semi-sweet, so it melts differently. If you swap to milk chocolate, reduce the cream slightly—use ⅓ cup heavy cream instead of ½ cup—to help the ganache set properly. The flavor will be less intensely chocolatey and more like a sweet milk chocolate coating. For a middle ground, try using a combination of half semi-sweet and half milk chocolate—this gives you a creamier flavor with a better set. I personally prefer the deep, bittersweet contrast of semi-sweet against the sweet cheesecake filling, but if you have a sweeter tooth, milk chocolate is a perfectly valid choice.
How do I get the ganache coating perfectly smooth on the domes?
The key to a perfectly smooth ganache coating is three-fold: temperature, technique, and consistency. First, make sure the domes are completely frozen—any soft spots will cause the ganache to pool or slide. Second, let the ganache cool to the right consistency: it should be fluid enough to pour but thick enough to cling—think warm maple syrup. Test it by pouring a small amount; it should flow slowly and coat the back of a spoon. Third, pour the ganache from a spouted measuring cup or a small pitcher, starting at the top center of each dome and letting it cascade evenly over the sides. Use an offset spatula to gently guide any bare spots. If you need a second coat, let the first coat set for 2–3 minutes in the fridge before applying another. For the cleanest look, trim any drips at the base with a warm knife after the ganache sets.
Can I make these domes without a mixer?
Yes, you can make these domes entirely by hand—I’ve done it many times in my tiny first apartment in Paris! The cream cheese mixture can be beaten with a wooden spoon or a silicone spatula; just make sure the cream cheese is very soft (room temperature) so it blends smoothly. For the whipped cream, use a whisk and a large bowl—it takes about 3–4 minutes of vigorous whisking to reach soft peaks. I find that using a chilled bowl and a cold whisk speeds up the process significantly. The rest of the assembly doesn’t require any electrical appliances at all. While a hand mixer or stand mixer makes the job easier and faster, it’s absolutely not necessary. This recipe is quite forgiving and can be made with nothing more than a bowl, a whisk, and some arm power.
How many calories are in each hazelnut mocha cheesecake dome?
Each hazelnut mocha cheesecake dome contains approximately 445 calories, with 28 grams of carbohydrates, 35 grams of fat, 6 grams of protein, and 22 grams of sugar. This is based on the recipe as written, using standard ingredients like full-fat cream cheese, heavy cream, semi-sweet chocolate, and hazelnut spread. If you’re looking to lighten them up, you can reduce the calories by using reduced-fat cream cheese, swapping half the heavy cream for whipped coconut cream, and using a sugar-free hazelnut spread. The texture will be slightly different, but the domes will still be delicious. I recommend enjoying these as an occasional treat—they’re rich, decadent, and meant to be savored in small portions. One dome is plenty satisfying for dessert.
Share Your Version!
I absolutely love hearing how these Hazelnut Mocha Cheesecake Domes turn out in your kitchen! Leave a star rating and a comment below to let me know how it went—did you try one of the variations, or invent your own twist? I read every single comment and often feature reader creations on my Instagram stories. Tag me @leosfoods when you share your photo—I can’t wait to see your gorgeous domes!
One question for you: did you go with the classic recipe or try a variation like the Moroccan spice twist? I’d love to know which version caught your eye and how it turned out. Your feedback helps me create even better recipes for this community. From my NYC kitchen to yours — I hope this recipe brings as much warmth to your table as it does to mine. — Stella 🧡
Love This Recipe? Save It to Pinterest!
If you enjoyed this Hazelnut Mocha Cheesecake Domes recipe, don’t let it get lost in your browser tabs! 😄 Pin it now so you can find it again anytime — and explore hundreds more tried-and-tested recipes waiting for you on my Pinterest boards.
👉 Follow Stella on Pinterest @stellarecipeblog
📌 Pin this recipe · 🔁 Re-pin your favorites · 💬 Tag me when you make it — I love seeing your creations!
Hazelnut Mocha Cheesecake Domes
- Yield: 8 1x
Ingredients
- For the Hazelnut Mocha Cheesecake:
- 8 oz (225 g) cream cheese, softened
- 1/3 cup powdered sugar
- 1 tsp vanilla extract
- 2 tbsp instant espresso powder
- 1 tbsp hot water
- 1/3 cup hazelnut spread
- 1 cup heavy whipping cream, whipped to soft peaks
- For the Chocolate Ganache Coating:
- 8 oz (225 g) semi-sweet chocolate, finely chopped
- 1/2 cup heavy cream
- 1 tbsp unsalted butter
- For the Hazelnut Crunch Layer:
- 1/2 cup roasted hazelnuts, finely chopped
- 1/4 cup chocolate wafer cookie crumbs
- 2 tbsp melted unsalted butter
- 1 tbsp cocoa powder
- For Garnish (optional):
- Chopped roasted hazelnuts
- Dark chocolate curls
- Light dusting of cocoa powder
Instructions
- Dissolve the espresso powder in the hot water and let it cool.
- In a large bowl, beat the cream cheese, powdered sugar, vanilla extract, hazelnut spread, and cooled espresso until smooth.
- Fold the whipped cream into the cheesecake mixture until light and airy.
- In a small bowl, combine the chopped hazelnuts, chocolate wafer cookie crumbs, melted butter, and cocoa powder.
- Spoon the cheesecake mixture halfway into silicone dome molds.
- Add a spoonful of the hazelnut crunch mixture to the center of each dome.
- Cover with the remaining cheesecake mixture and smooth the tops.
- Freeze for at least 6 hours, or until completely firm.
- Heat the heavy cream until just simmering, then pour it over the chopped chocolate. Let stand for 2 minutes before stirring until smooth. Stir in the butter.
- Unmold the frozen cheesecake domes and place them on a wire rack over a baking tray.
- Pour the slightly cooled ganache evenly over each dome until fully coated.
- Garnish with chopped roasted hazelnuts, dark chocolate curls, and a light dusting of cocoa powder. Chill for 20 minutes before serving.
Nutrition
- Calories: 445
- Sugar: 22 g
- Fat: 35 g
- Carbohydrates: 28 g
- Protein: 6 g
Tried This Recipe? Leave a Comment!
Did you make this recipe? I’d love to hear how it turned out! Please leave a comment and a rating below. Your feedback helps other home cooks and supports cheerychop.com!
For more delicious inspiration, follow me on Pinterest!