
Lattice Apple Pie
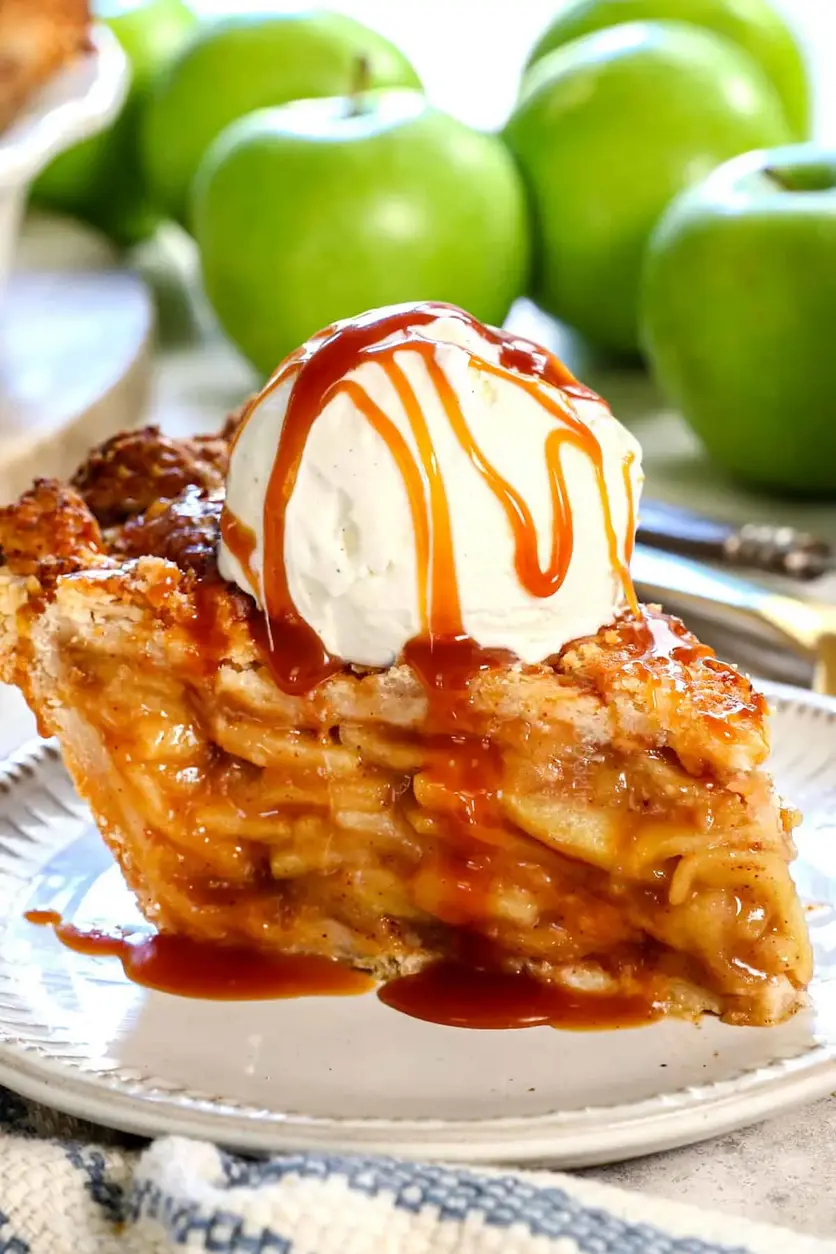
Table of Contents
Lattice Apple Pie: Foolproof Thanksgiving Pie – The Best Lattice Apple Pie with a Never-Runny Filling
Growing up in Morocco, my mother’s kitchen was a symphony of spices and patience. She taught me that the best dishes come from a gentle hand and a trusting heart. Now, living in New York City, I’ve channeled that same philosophy into this foolproof Lattice Apple Pie. This is the BEST 100% foolproof apple pie recipe, so bring it to Thanksgiving with confidence. My unique angle is simple: we pre-cook the filling on the stovetop, which guarantees a never-runny, caramel-like sauce that perfectly coats every fork-tender slice. No more soggy bottoms or soupy pies!
Imagine cutting into a golden, buttery lattice crust to reveal a mountain of Honeycrisp and Granny Smith apples nestled in a rich, spiced syrup. The aroma of cinnamon, ginger, and nutmeg will fill your kitchen with pure comfort. The filling is sweet and tart, each apple slice holding its shape yet yielding to the bite. The crust is shatteringly crisp, offering a satisfying contrast to the tender fruit. This is the apple pie of your dreams, perfected through my training at a Parisian culinary school and my years of experimenting in my tiny NYC apartment kitchen.
I’ve tested this Lattice Apple Pie recipe dozens of times to ensure it’s truly foolproof for home bakers. The secret weapon is cooking the apples first to control the liquid and concentrate the flavor. Forget worrying about runny fillings or cracked crusts. I’ll guide you through each step, from making the perfect lattice to achieving that beautiful golden finish. A common mistake is skipping the pre-cook step, which leads to a watery pie, but we’re going to avoid that today. Let’s bake with confidence!
Why This Lattice Apple Pie Recipe Is the Best
The Flavor Secret: My French training taught me that layering flavors is key. By cooking the apples with both light brown sugar for molasses depth and white sugar for pure sweetness, I create a caramel sauce that tastes impossibly complex. The blend of warm spices—cinnamon, ginger, nutmeg, and allspice—echoes the aromatic spice blends I learned from my mother in Morocco. It’s a global harmony that makes this pie unforgettable. I love sourcing Honeycrisp apples from the Union Square Greenmarket for their perfect balance of sweet and tart.
Perfected Texture: This isn’t just any lattice apple pie; it’s a textural masterpiece. The pre-cooking technique ensures the apples remain fork-tender but never mushy. While the topping bakes into a buttery, flaky lattice, the bottom crust stays crisp because the filling isn’t seeping into it. The four-hour cooling time is my Parisian pastry chef trick—it allows the pectin in the apples and the flour to set into a luscious, sliceable gel. Every bite is a perfect contrast between crunchy crust and tender, juicy apples.
Foolproof & Fast: I know how busy life gets in NYC, so this recipe is designed for reliability. The stovetop method removes guesswork. You don’t risk an under-baked, runny center. The lattice weave looks fancy but is much easier than a full top crust—my step-by-step photos (which would be here if I could include them) make it simple. Even beginners can create a bakery-worthy pie on their first try. This is the recipe I rely on for Thanksgiving, and I want you to feel that same confidence.
Lattice Apple Pie Ingredients
I still remember buying my first mushrooms at the Marché des Enfants Rouges in Paris, learning to smell the difference between button and cremini. For this pie, I bring that same scrutiny to my apple-picking at the local grocery store. The ingredients are simple, but their quality makes all the difference. Here is everything you need to create this masterpiece.
Ingredients List
- 2 recipes Homemade Pie Crust ((1 for bottom crust and 1 for lattice top))
- Egg wash: 1 egg beaten with 1 TB heavy cream ((may sub milk))
- Optional: Coarse raw sugar for sprinkling on lattice topping
- 3 1/2 pounds Honeycrisp apples
- 1 1/2 pounds Granny Smith apples
- 2/3 cup packed light brown sugar
- 1/2 cup granulated sugar
- 1/3 cup + 1 TB all-purpose flour
- 2 tablespoons lemon juice, (divided)
- 1 1/2 teaspoons ground cinnamon
- 1/2 tsp EACH ground ginger, ground nutmeg, allspice
- 1/8 teaspoon salt
- 1 teaspoon vanilla extract
Ingredient Spotlight
Honeycrisp Apples: These are the star of the show. Their naturally intense sweetness and crisp texture hold up beautifully during cooking. When selecting, look for firm apples with no bruises. In a pinch, Fuji or Braeburn make excellent substitutes, though they will be slightly softer. The key is their high sugar and low water content.
Granny Smith Apples: These provide the essential tartness that balances the honey-like sweetness of the Honeycrisps. Their firm flesh resists breaking down too much, giving the filling a wonderful structure. If you can’t find them, use Pink Lady apples for a similar tart-sweet profile. The contrast between the two apple types is the secret to a complex flavor.
All-Purpose Flour: This is my thickening agent. When cooked with the apples, it creates a creamy, caramel-like sauce that clings to every slice. Do not substitute with cornstarch or tapioca flour directly; the flour’s protein content helps stabilize the filling and prevents it from becoming slimy. If you need a gluten-free option, use a 1:1 gluten-free all-purpose blend with xanthan gum.
Light Brown Sugar: This is where the molasses flavor comes from. It deepens the caramel notes and adds moisture to the filling. Make sure your sugar is packed firmly for an accurate measurement. Dark brown sugar can be used for an even richer profile, but be careful not to overpower the apple flavor. I always prefer light brown for this recipe.
| Original Ingredient | Best Substitution | Flavor / Texture Impact |
|---|---|---|
| Honeycrisp Apples | Fuji or Braeburn | Slightly softer texture, still very sweet. Good flavor. |
| Granny Smith Apples | Pink Lady or Jonathan | Similar tartness, holds shape well. Excellent choice. |
| All-Purpose Flour | 1:1 Gluten-Free All-Purpose Flour (with xanthan gum) | Works perfectly. Texture remains creamy, no gumminess. |
| Light Brown Sugar | Dark brown sugar | Richer molasses flavor. Use slightly less (1/2 cup + 1/2 cup). |
How to Make Lattice Apple Pie — Step-by-Step
This foolproof lattice apple pie will be the star of your holiday table, and I’m here to walk you through every step. Let’s get started!
Step 1: Prepare the Pie Dough
Prepare one full pie crust recipe through step 6 (Make Dough) from my homemade pie crust recipe. Then, roll out the second disc into a 11×11-inch rectangle. Place it on a parchment-lined baking sheet, generously dust with flour, and freeze for 20-30 minutes. This will make cutting the lattice strips much cleaner and easier.
💡 Stella’s Pro Tip: For perfectly even strips, use a ruler and a pizza cutter. The frozen dough cuts like butter, with no jagged edges!
Step 2: Make the Bottom Crust
Line your standard 9-10-inch pie pan with the first rolled-out crust. Lightly brush the bottom and sides (not the fluted edge) with your egg wash. Place the pie shell in the freezer for 20 minutes to firm up, then cover and refrigerate for at least 45 minutes before filling. This step ensures a crisp, non-soggy bottom crust.
⚠️ Common Mistake to Avoid: Don’t skip the freezing and chilling. A warm crust will shrink and become soggy during baking.
Step 3: Cut the Lattice Strips
Once the rectangle of dough is frozen, use a ruler and a pizza cutter to cut it into 1-inch-wide strips. Cover the strips with plastic wrap and freeze them for 30 minutes (or refrigerate for up to 24 hours). This extra chill makes them MUCH easier to weave without breaking. While they chill, start the apple filling.
💡 Stella’s Pro Tip: If your strips become too stiff, let them rest on the counter for 10 minutes. They need to be pliable, not brittle.
Step 4: Slice the Apples
Peel all 5 pounds of apples (Honeycrisp and Granny Smith). Make 4 slices around the core to remove it. Place each apple segment cut-side down on a cutting board and slice into 1/8-inch-thick slices. Transfer them to a large Dutch oven as you go to keep your workspace tidy. Aim for uniformly thin slices for even cooking.
⚠️ Common Mistake to Avoid: Don’t slice the apples too thick. Thin, even slices ensure they become fork-tender in the same amount of time.
Step 5: Pre-Cook the Filling
Add the sugars, flour, 1 tablespoon of lemon juice, and spices (cinnamon, ginger, nutmeg, allspice, and salt) to the apples in the Dutch oven. Gently stir to coat. Cook over medium heat, covered, for 15-20 minutes. Stir every couple of minutes, replacing the lid each time. The apples are done when they are fork-tender but still hold their shape—they will NOT become more tender in the oven.
💡 Stella’s Pro Tip: Don’t cook to mush! Taste an apple slice. If it yields easily to a fork but isn’t falling apart, it’s perfect.
Step 6: Cool the Filling
Once the apples are tender, stir in the remaining 1 tablespoon of lemon juice and the vanilla extract. Line a rimmed baking sheet with parchment paper or a silicone mat. Spread the apples and their caramel juices onto the sheet in a single layer. Pop the pan in the fridge or freezer for about 25 minutes to cool to room temperature. This is critical for setting the filling.
⚠️ Common Mistake to Avoid: Adding warm filling to a chilled crust causes the crust to melt and become soggy. Always cool completely.
Step 7: Assemble and Weave the Lattice
Transfer the cooled apple mixture and all its sauce to the chilled pie shell. Compact it by layering the apples horizontally. Lay five horizontal strips evenly over the pie. Fold the 1st, 3rd, and 5th strips back, then place a vertical strip on the left side. Unfold them, then fold the 2nd and 4th strips back. Add a second vertical strip. Repeat until you have five vertical and five horizontal strips. Press the edges to seal, then flute or crimp.
💡 Stella’s Pro Tip: Don’t stress over perfect tightness! A slightly loose weave is charming and allows the caramel to peek through.
Step 8: Egg Wash and Chill
Brush the lattice top and edges with your reserved egg wash. If using, sprinkle coarse raw sugar over the lattice, avoiding the edges. Place the unbaked pie in the refrigerator for 30 minutes. This final chill is non-negotiable—it helps the crust retain its shape and prevents shrinking.
⚠️ Common Mistake to Avoid: If you use a glass pie pan, do not chill the pie. The thermal shock of a cold pan hitting a hot oven can shatter it.
Step 9: Bake to Perfection
Preheat your oven to 425°F immediately after transferring your pie to the fridge. Place a baking sheet on the bottom rack to heat up. Once chilled, transfer the pie to the hot baking sheet. Bake at 425°F for 25 minutes. Then, reduce heat to 375°F and bake for 35-45 more minutes, until the filling is bubbling around the edges. If the crust browns too quickly, cover with a pie shield or foil.
💡 Stella’s Pro Tip: You must see bubbling. If the filling isn’t bubbling, it won’t thicken properly. That’s the sign it’s done.
Step 10: Cool and Set
Transfer the pie to a cooling rack and let it rest for a full 4 hours. This is the most important step for a sliceable lattice apple pie. The filling needs this time to set up into a beautiful, non-runny consistency. You can speed up the process by placing the pie in the fridge or freezer. It can rest at room temp for up to 2 days or be refrigerated for up to 5.
⚠️ Common Mistake to Avoid: Cutting into a warm pie will result in a runny mess. Patience is rewarded with perfect slices!
<
Print
Lattice Apple Pie
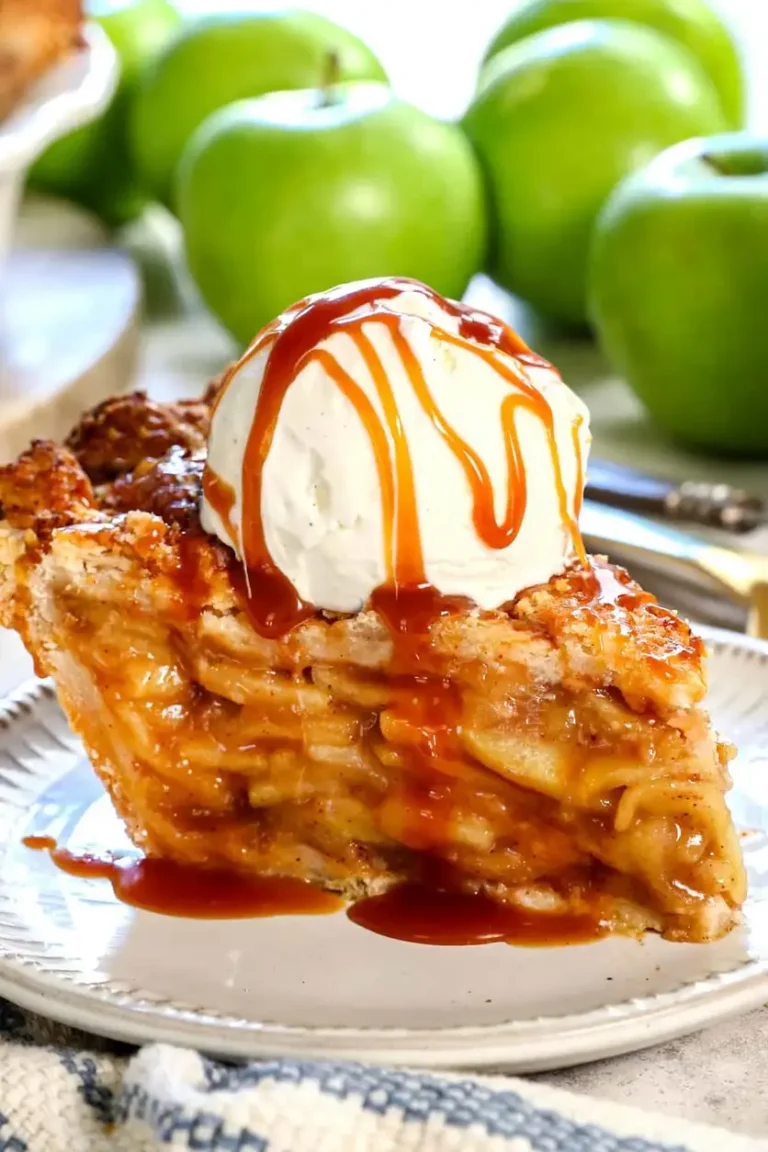
This is the BEST 100% foolproof Apple Pie recipe, so bring it to Thanksgiving with confidence! By following my technique, you and your guests will sink your teeth into a mountain of perfectly tender, flavorful apples enveloped in a caramel-like sauce that is never runny, the right balance of sweet and tart, and a golden, never-soggy crust. See the post for step-by-step photos and helpful tips and tricks.
Ingredients
- 2 recipes Homemade Pie Crust ((1 for bottom crust and 1 for lattice top))
- Egg wash: 1 egg beaten with 1 TB heavy cream ((may sub milk))
- Optional: Coarse raw sugar for sprinkling on lattice topping
- 3 1/2 pounds Honeycrisp apples
- 1 1/2 pounds Granny Smith apples
- 2/3 cup packed light brown sugar
- 1/2 cup granulated sugar
- 1/3 cup + 1 TB all-purpose flour
- 2 tablespoons lemon juice, (divided)
- 1 1/2 teaspoons ground cinnamon
- 1/2 tsp EACH ground ginger, ground nutmeg, allspice
- 1/8 teaspoon salt
- 1 teaspoon vanilla extract
Instructions
- Note: The Apple Pie Filling can be made at any time and refrigerated until ready to add to the pie pan. See Note/Warning if using a glass pie pan before you begin.
- Make the Pie Dough: Prepare one pie crust recipe through step 6 under Make Dough (click HERE for the recipe.) Prepare the second pie crust through step 2 under Roll Dough using a standard 9-10-inch pie pan (1 1/2-inches deep).
- Make the Bottom Pie Crust: Lightly brush the bottom and sides of the crust in the pan (not edges that will be fluted) with the egg wash. Reserve the egg wash in the refrigerator for later. Tip: I find it easiest to add the egg wash after the pie dough has firmed up a bit, so I place the pie in the freezer for 20 minutes. After adding the egg wash, immediately cover the pie and refrigerate it while you prep the rest of the recipe (at least 45 minutes up to 5 days before baking).
- Roll Out the Dough for the Lattice Top: Place a large piece of parchment paper on a baking sheet and generously dust with flour. Roll the dough disc into a rough 11×11-inch rectangle on the parchment paper. At this point, I cover and freeze the dough (on the baking sheet) for 20-30 minutes for easier/cleaner slices.
- Make the Lattice Strips: After chilling, use a ruler and a pizza cutter, pastry wheel, or sharp knife to cut the dough into 1-inch-wide strips. Cover with plastic wrap and freeze for 30 minutes or refrigerate for up to 24 hours for MUCH easier-to-handle lattices. When you're ready to use the lattices, make the apple pie filling first:
- Slice the apples: Peel the apples and make 4 slices around the core to remove it. Lay the 4 remaining apple segments, cut side down, on a cutting board, and slice into 1/8-inch slices. Transfer the apples to a large Dutch oven as you go to keep the workspace clean.
- Apple pie filling: Add the sugars, flour, 1 tablespoon of lemon juice, and spices to the sliced apples and set over medium heat. Gently stir until evenly coated. Cover and cook for 15-20 minutes, stirring every couple minutes and replacing the lid. The apples are done when they reach YOUR desired apple pie tenderness they will not become more tender in the oven. They should be fork-tender but still hold their shape. (They will not become mushy when baked; see the science behind it in the post.) Once tender, stir in the remaining 1 tablespoon of lemon juice and the vanilla.
- Cool the Apples: Line a rimmed baking sheet with parchment paper or a silicone baking mat for easy cleanup. Transfer the apples and their caramel juices to the baking sheet. Pop the pan in the fridge or freezer to cool to room temperature for about 25 minutes.
- Assemble: Once the apples have cooled, transfer them and the sauce to the chilled pie shell, rearranging and layering them horizontally to compact.
- Weave the Lattice Top (See Post for Photos): If the strips become too stiff to work with, let them rest on the counter for 10 minutes. Start by laying five horizontal strips evenly spaced over the pie (center the middle strip). Fold the first, third, and fifth horizontal strips back and place a vertical strip on the left side. Unfold the first, third, and fifth strips over the perpendicular strip and fold the second and fourth strips back. Add a second vertical strip, then unfold the second and fourth strip. Repeat the process for a total of ten strips, five running in each direction.
- Make the Edges: Press the edges of the strips into the edges of the crust to seal. Flute, crimp, or create whatever edge design you prefer. Lightly brush the edges and the lattice top with the egg wash. Sprinkle the lattice top (avoid the edges) with coarse sugar if using.
- Refrigerate: Chill the unbaked pie for 30 minutes. Dont skip this stepit will help the crust not shrink unless you have a glass pie pan. Then, bake without chilling, or the pan can shatter (see Notes).
- Preheat the Oven: Immediately after transferring the pie to the fridge, place a baking sheet on the bottom rack of your oven and preheat the oven to 425 degrees F so the baking sheet can get very hot.
- Bake: Transfer the chilled pie to the rimmed baking sheet. Bake at 425 degrees F for 25 minutes (keep an eye on the crust so it doesn't become too brown). Reduce the heat to 375 degrees F and continue to bake for 35-45 minutes or until the filling is bubbling around the edges (if you dont wait for it to bubble, your filling will be runny). Cover the edges with a pie shield or the top with foil if they are browning too quickly.
- Cool: Transfer the pie to a cooling rack and let it rest for 4 hours to cool to room temperature so the filling can set. You can pop the pie in the fridge or freezer to speed up the cooling process. The pie can rest at room temperature for up to 2 days or be refrigerated for up to 5.
- Reheat: After the pie has cooled, you can reheat/refresh it in the oven. Tent the pie with foil and place it in a cold oven. Turn the oven to 375 degrees F, and when the preheat bell dings, leave the pie in for another 10-15 minutes or until warmed.
| Step | Action | Duration | Key Visual Cue |
|---|---|---|---|
| 1 | Prepare Dough | 20 min + 30 min freeze | Dough is firm to touch |
| 2 | Make Bottom Crust | 20 min freeze + 45 min chill | Crust is cold and firm |
| 3 | Cut Strips | 30 min freeze | Strips are rigid |
| 4-5 | Slice & Cook Apples | 15-20 min | Apples are fork-tender |
| 6 | Cool Filling | ~25 min | Filling is room temp |
| 7 | Assemble & Weave | 10-15 min | Lattice is in place |
| 8 | Egg Wash & Chill |