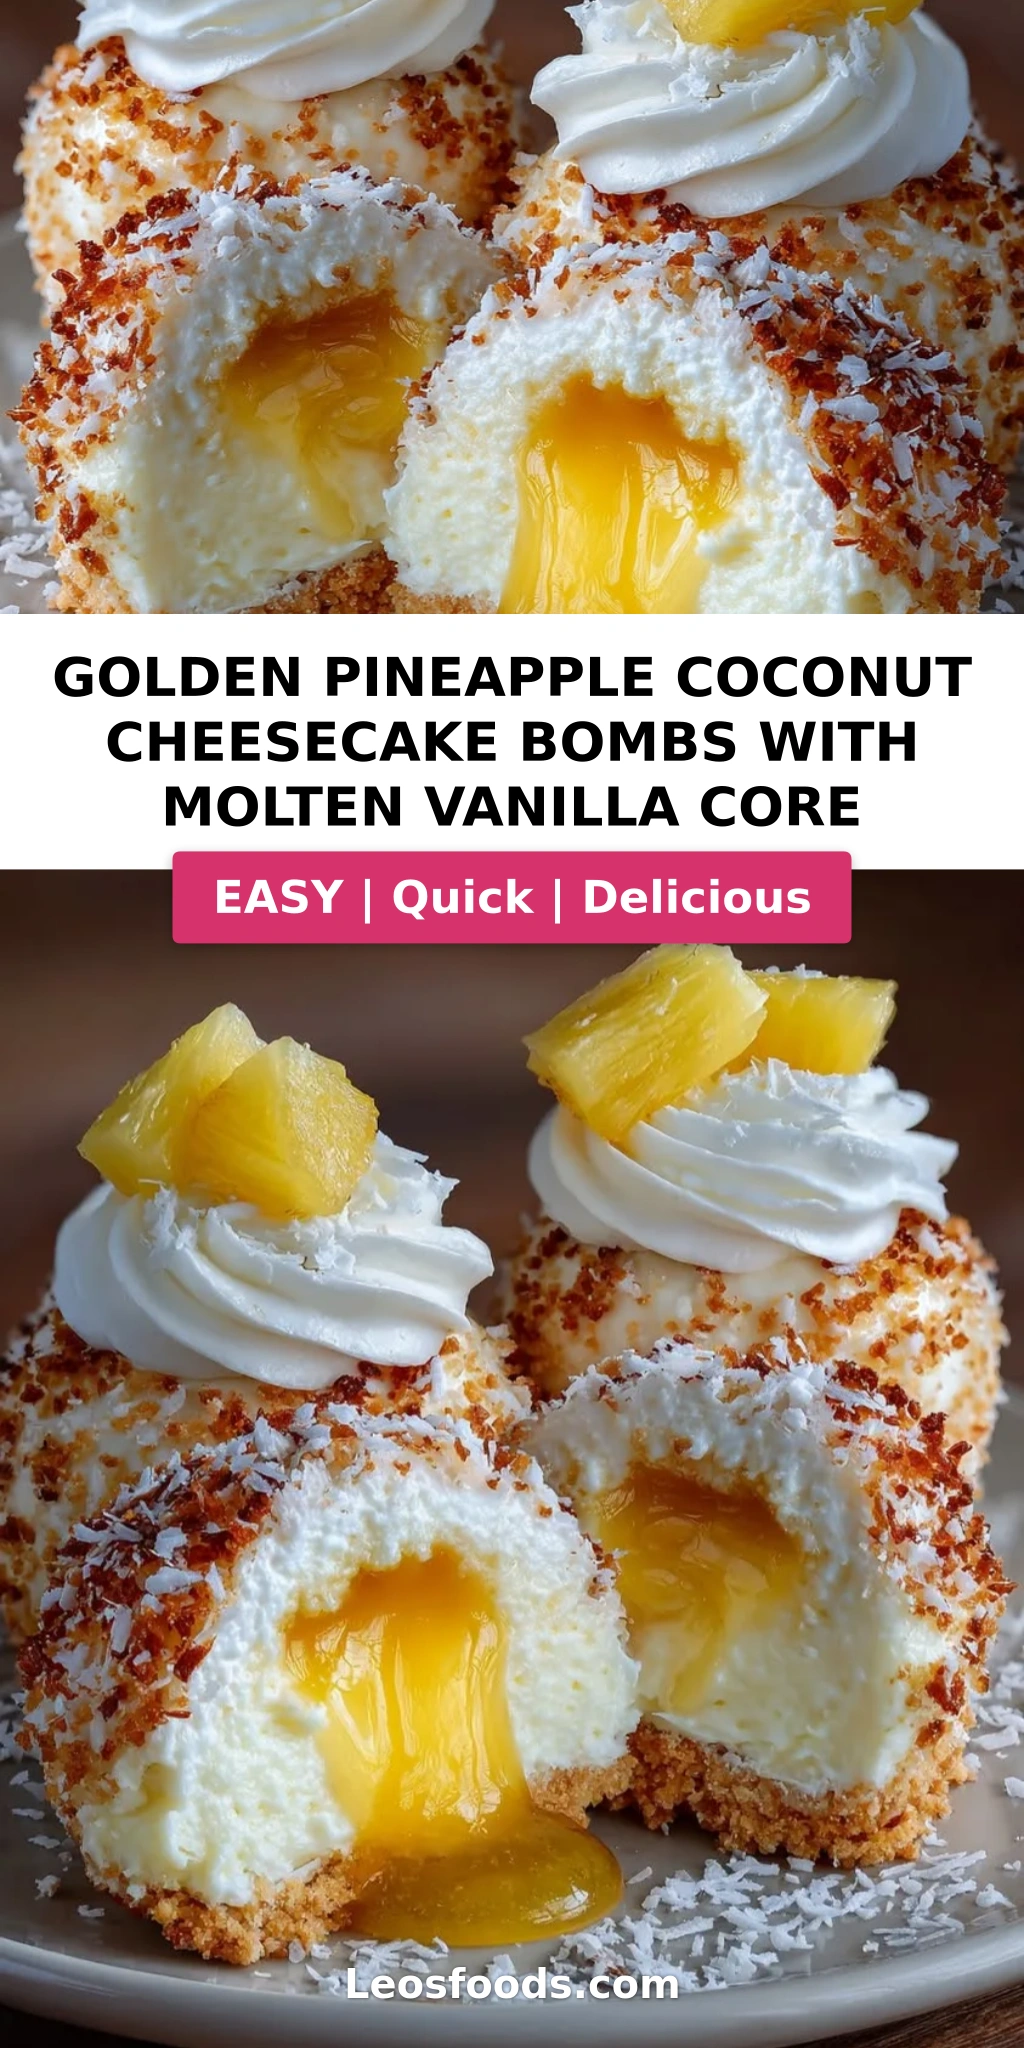
Pineapple Coconut Cheesecake Bombs with Molten Vanilla Core

“`html
Table of Contents
Golden Pineapple Coconut Cheesecake Bombs with Molten Vanilla Core – A Tropical Showstopper with a Surprise Center
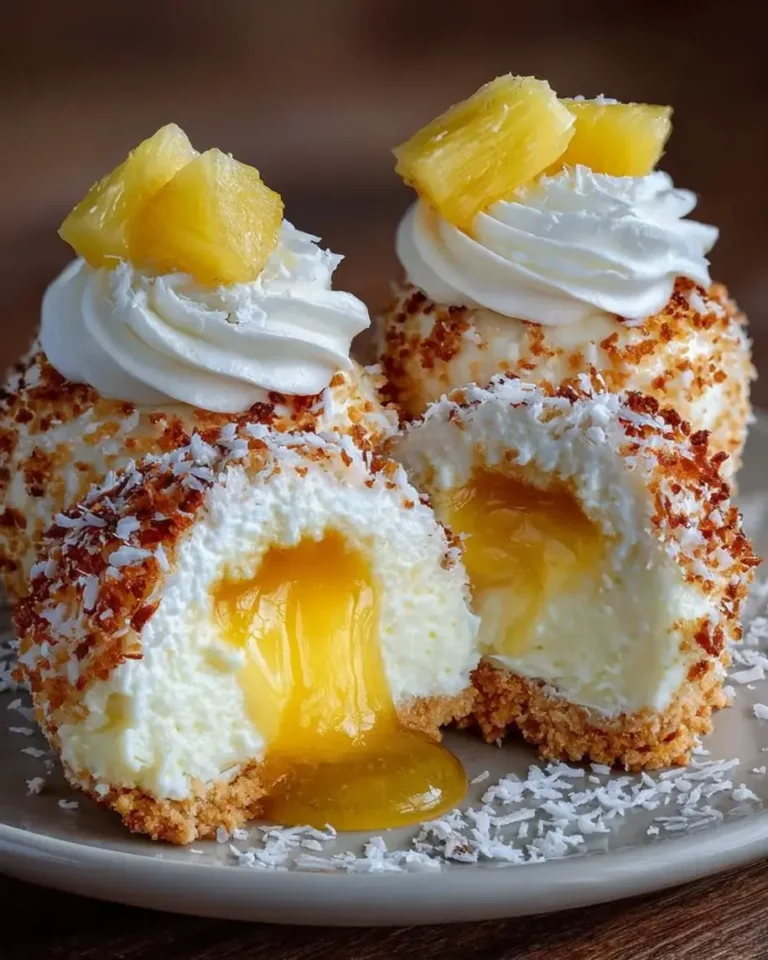
I still remember the first time I bit into a dessert with a molten center — it was at a tiny pastry shop near the Place de la Concorde in Paris, during my culinary school days. That warm, liquid vanilla core spilling out onto the plate felt like pure magic. Years later, standing in my NYC kitchen with a pile of ripe pineapples from the Union Square farmers market, I knew I had to recreate that sensation with a tropical twist. These Golden Pineapple Coconut Cheesecake Bombs with Molten Vanilla Core are the result — a dessert that combines my French pastry training with the sunny, bold flavors I grew up loving in Morocco. The pineapple coconut cheesecake bombs are like little edible treasures: a creamy, tropical mousse shell hiding a liquid vanilla heart, all wrapped in a dazzling golden mirror glaze.
Imagine this: you cut through the glossy gold exterior with your spoon, and the cheesecake mousse — light as a cloud, perfumed with pineapple and toasted coconut — gives way to a river of silky vanilla cream that pools on the plate. The aroma hits you in layers: first the bright, sunny pineapple, then the deep toasted notes of coconut, and finally the warm, familiar vanilla. The golden mirror glaze catches the light like a jewel, flecked with subtle gold shimmer. Every bite is a contrast of temperatures and textures — the cool, firm mousse against the slightly warmer, liquid core, the crunchy cookie base adding a buttery anchor. It’s the kind of dessert that stops conversation and starts smiles.
What sets my version apart is the technique I developed during my Paris pâtisserie training: a stabilized vanilla core that stays perfectly liquid even after hours in the freezer, thanks to a precise ratio of pastry cream and condensed milk. The pineapple coconut cheesecake mousse uses a double-gelatin method that gives it structure without making it rubbery, so it holds its dome shape beautifully under the glaze. In this post, I’ll walk you through every detail — including 💡 Stella’s Pro Tip for getting that mirror glaze flawlessly smooth, and the one common mistake that can cause the molten core to freeze solid. Let’s make some magic.
Why This Golden Pineapple Coconut Cheesecake Bombs Recipe Is the Best
The flavor secret here is the way the pineapple and coconut work together. In Morocco, my mother would grill fresh pineapple with cinnamon and honey before folding it into creams — that caramelized depth is exactly what I wanted in this mousse. I use a high-quality pineapple puree that I reduce slightly on the stove to concentrate its sweetness, then fold it into a French-style cheesecake mousse. The shredded coconut is toasted beforehand, which brings out its nutty oils and prevents it from turning soggy inside the frozen bomb. This isn’t just a dessert — it’s a transportive experience that takes you from a Parisian pâtisserie to a Moroccan courtyard to a New York dinner party, all in one bite.
The texture is where my French training really shines. The cheesecake mousse uses a stabilized whipped cream technique: I whip the heavy cream to soft peaks separately, then fold it into the cream cheese mixture along with dissolved gelatin. This creates a mousse that’s airy and light but sturdy enough to hold its dome shape when frozen. The molten vanilla core relies on a specific ratio of pastry cream to sweetened condensed milk — the condensed milk lowers the freezing point of the core, so it stays soft and liquid even when surrounded by frozen mousse. The golden mirror glaze, made with white chocolate and gelatin, sets with a glossy, mirror-like finish that doesn’t crack or wrinkle when poured over the frozen bombs.
What makes this recipe foolproof is the way I’ve broken down the process into manageable stages. The entire dessert can be made over two days — the cores and mousse on day one, the glazing and assembly on day two — which takes the pressure off. I’ve tested this with home cooks in my NYC cooking workshops, and even beginners have gotten beautiful results by following the visual cues I provide. The golden mirror glaze cheesecake technique is actually more forgiving than most people think, as long as you get the temperature right. And the pineapple coconut dessert balls are completely no-bake, so there’s no risk of overbaking or curdling. Every step has a clear doneness indicator, so you’ll know exactly when to move to the next stage.
Pineapple Coconut Cheesecake Bombs Ingredients
When I shop for these ingredients in New York, I head to the specialty baking shops in Chelsea for the white chocolate and gelatin, and to the Asian markets on Canal Street for the best pineapple puree at a fair price. The coconut I source from a little spice shop in Brooklyn that imports directly from Sri Lanka — the flavor difference is remarkable. For the vanilla, I use a Madagascar bourbon vanilla extract that I bring back from my trips to Paris. Every ingredient has a story, and together they tell the tale of a dessert that spans continents.
Ingredients List
For the Pineapple Coconut Cheesecake Mousse:
- 1 cup pineapple puree (fresh or high-quality canned)
- 8 oz cream cheese, softened to room temperature
- 1/2 cup powdered sugar
- 1 cup heavy cream, cold
- 1/2 cup shredded coconut, toasted (optional: toast for deeper flavor)
- 1 tsp vanilla extract
- 1 tbsp gelatin powder (unflavored)
- 3 tbsp warm water (for blooming gelatin)
For the Molten Vanilla Core:
- 1/2 cup vanilla pastry cream (homemade or high-quality store-bought)
- 2 tbsp sweetened condensed milk
- 1 tsp vanilla extract
- 1 tbsp heavy cream
For the Golden Mirror Glaze:
- 1 cup white chocolate, finely chopped (use a good melting brand like Callebaut or Guittard)
- 1/2 cup sweetened condensed milk
- 1 tbsp gelatin powder
- 3 tbsp warm water
- Gold food coloring, as needed (gel-based works best)
For the Cookie Base:
- 1 cup coconut cookie crumbs (or graham cracker crumbs mixed with shredded coconut)
- 3 tbsp melted butter
- 1 tbsp granulated sugar
- Pinch of salt
For Garnish (optional):
- Pineapple cubes, fresh or candied
- Toasted coconut flakes
- White chocolate curls
Ingredient Spotlight
Pineapple Puree: This is the backbone of the tropical cheesecake recipe flavor. Use a good-quality canned pineapple puree from a specialty store, or make your own by blending fresh pineapple chunks and straining out the fibers. The puree should be thick and not watery — if it’s too thin, simmer it on the stove for 5-7 minutes to reduce and concentrate the flavor. A tested substitution is mango puree, which gives a similar tropical sweetness with a slightly different acidity profile.
Cream Cheese: Full-fat block cream cheese is essential here — the spreadable kind in a tub has too much air and water, which will make the mousse grainy. Let it come to room temperature for at least 30 minutes before beating, or microwave it in 10-second bursts until soft but not warm. For a dairy-free version, use a high-quality vegan cream cheese block, though the texture will be slightly less stable. I’ve tested this with Philadelphia brand and it works beautifully every time.
White Chocolate: For the golden mirror glaze cheesecake, the white chocolate needs to be high-quality with a high cocoa butter content. Cheap white chocolate chips often contain stabilizers that prevent smooth melting. I recommend Callebaut or Guittard white chocolate wafers, which melt into a silky glaze without seizing. If you can’t find white chocolate, you can use a white candy melt, but the flavor will be sweeter and less nuanced. The gold food coloring should be gel-based, not liquid, to avoid thinning the glaze.
Gelatin Powder: Unflavored gelatin powder is used in both the mousse and the glaze. It provides structure without adding flavor. I use Knox brand, which is widely available in US grocery stores. The gelatin must be bloomed in cold or warm water (depending on the recipe) for at least 5 minutes before being dissolved. For a vegetarian version, you can substitute agar-agar, but the texture will be slightly different and the setting time will be longer. I don’t recommend substituting the gelatin in the glaze, as it’s essential for that mirror-smooth finish.
| Original Ingredient | Best Substitution | Flavor / Texture Impact |
|---|---|---|
| Pineapple puree | Mango puree | Sweeter, less acidic, equally tropical |
| Full-fat cream cheese | Vegan cream cheese block | Slightly less stable, still creamy |
| White chocolate | White candy melts | Sweeter, less buttery flavor |
| Shredded coconut | Finely chopped almonds (toasted) | Nutty, less chewy, different texture |
| Gelatin powder | Agar-agar (vegan) | Longer set time, slightly firmer texture |
How to Make Golden Pineapple Coconut Cheesecake Bombs — Step-by-Step
I’ve broken this recipe into clear, manageable steps so you can make these beautiful molten vanilla core dessert bombs with confidence. Take your time, follow the visual cues, and remember — every great pastry chef started with a single batch.
Step 1: Prepare the Molten Vanilla Core
In a small bowl, whisk together 1/2 cup vanilla pastry cream, 2 tablespoons sweetened condensed milk, 1 teaspoon vanilla extract, and 1 tablespoon heavy cream until the mixture is completely smooth and homogenous. The pastry cream gives it body, while the condensed milk and cream keep it from freezing solid. Transfer the mixture to a piping bag fitted with a small round tip, or to a zip-top bag with a tiny corner snipped off. Pipe the mixture into small silicone hemisphere molds (about 1 inch in diameter), filling each cavity almost to the top. Tap the mold gently on the counter to release any air bubbles, then freeze for 45-60 minutes, until the cores are firm on the outside but still slightly soft in the very center when pressed gently.
💡 Stella’s Pro Tip: The key to a truly molten center is not freezing the cores solid. You want them firm enough to handle but still soft in the center — about 80% frozen. If they freeze completely solid, the core won’t be liquid when you serve the bomb. Set a timer for 45 minutes and check them.
Step 2: Bloom the Gelatin
In two separate small bowls, sprinkle 1 tablespoon of gelatin powder over 3 tablespoons of warm water (for the mousse) and another 1 tablespoon of gelatin over 3 tablespoons of warm water (for the glaze). Let each stand for 5 minutes without stirring. The gelatin will absorb the water and become a firm, jiggly mass — this is called blooming. After blooming, gently warm each bowl in the microwave for 10-15 seconds or over a double boiler, just until the gelatin dissolves into a clear liquid. Do not boil, as this will weaken the gelatin’s setting power. Set aside and keep warm.
⚠️ Common Mistake to Avoid: Adding gelatin directly to cold mixtures without blooming first will result in lumps and uneven setting. Always bloom in warm water (not hot, not cold) and dissolve completely before adding to your mousse or glaze.
Step 3: Make the Pineapple Coconut Cheesecake Mousse
In a large mixing bowl, beat 8 oz of softened cream cheese with 1/2 cup powdered sugar using an electric mixer on medium speed until completely smooth and free of lumps, about 2 minutes. Scrape down the sides of the bowl. Add 1 cup pineapple puree, 1/2 cup toasted shredded coconut, and 1 teaspoon vanilla extract, and beat on low speed until just combined — do not overmix. In a separate chilled bowl, whip 1 cup heavy cream to soft peaks (the cream should hold a gentle curl when you lift the whisk). Pour the dissolved gelatin from the first bowl into the cream cheese mixture and stir immediately to incorporate. Then, in three additions, gently fold the whipped cream into the pineapple-cream cheese mixture using a rubber spatula. Fold until no white streaks remain, but stop as soon as it’s combined — overfolding will deflate the mousse.
💡 Stella’s Pro Tip: Fold the whipped cream in with a light hand — use a figure-8 motion and rotate the bowl. The mousse should be airy and billowy, like a cloud. If it looks thin or runny, the cream was overwhipped or the mixture wasn’t cold enough. Pop it in the fridge for 10 minutes to firm up before using.
Step 4: Assemble the Cheesecake Bombs
Line a baking sheet with parchment paper. Fill the cavities of a silicone dome mold (about 2.5 inches in diameter) halfway with the pineapple coconut cheesecake mousse. Use a small offset spatula or the back of a spoon to spread the mousse up the sides of each cavity, creating a little well in the center. Remove the frozen vanilla cores from their mold — they should be firm but not rock hard. Place one core into the center of each mousse-filled cavity, pressing gently so it’s surrounded by mousse on all sides. Immediately cover the core with the remaining mousse, spreading it to completely encase the core and fill the mold to the top. Smooth the bottoms (which will become the tops of the bombs) with the spatula. Tap the mold gently to settle the mousse.
⚠️ Common Mistake to Avoid: If the vanilla core is not fully encased in mousse, it can leak out during glazing. Make sure there’s a thin layer of mousse over the top of the core — at least 1/4 inch. Use a toothpick to check and adjust if needed.
Step 5: Freeze the Bombs
Place the filled silicone mold on the prepared baking sheet and freeze for at least 4 hours, or overnight, until the bombs are completely solid. The bombs need to be fully frozen before glazing — the extreme cold is what allows the warm glaze to set instantly into a smooth, glossy shell. If the bombs are not frozen solid, the glaze will soak into the mousse and create a sticky, dull mess. To test, gently press the surface of a bomb — it should feel rock hard with no give. While the bombs freeze, prepare the cookie base and the golden mirror glaze.
💡 Stella’s Pro Tip: For the best results, freeze the bombs on a flat surface in the coldest part of your freezer. If you have space, place the mold directly on a metal baking sheet that has been chilled in the freezer — the direct cold contact helps the bombs freeze faster and more evenly.
Step 6: Make the Golden Mirror Glaze
In a heatproof bowl set over a pot of simmering water (double boiler method), combine 1 cup finely chopped white chocolate and 1/2 cup sweetened condensed milk. Stir gently with a rubber spatula until the white chocolate is completely melted and the mixture is smooth and glossy. Remove from heat. Add the dissolved gelatin from the second bowl and stir until fully incorporated. Add gold food coloring, a few drops at a time, stirring after each addition, until you achieve a rich, golden hue that reminds you of liquid honey. Strain the glaze through a fine-mesh sieve into a clean bowl to remove any lumps. Let the glaze cool to about 90°F (32°C) — it should be warm to the touch but not hot. If it’s too hot, it will melt the frozen bombs; if too cool, it will set too thickly and not flow smoothly.
⚠️ Common Mistake to Avoid: The most common reason mirror glaze cracks is temperature shock. If the glaze is too hot (above 100°F), it will melt the bomb’s surface and create cracks as it cools. If it’s too cold (below 80°F), it will set before it can flow into a smooth layer. Use an instant-read thermometer for accuracy.
Step 7: Glaze the Bombs
Remove the frozen bombs from the freezer and unmold them immediately. Place them on a wire rack set over a baking sheet lined with parchment paper (to catch drips). Working quickly, pour the warm golden mirror glaze over each bomb, starting from the top and allowing the glaze to flow evenly down the sides. Use a small offset spatula to gently guide the glaze if needed, but try to handle the bomb as little as possible. The glaze should set within 30-60 seconds on contact with the frozen surface. If the glaze in the bowl starts to thicken, warm it gently over the double boiler for a few seconds and stir. Once all bombs are glazed, use a thin metal spatula to carefully transfer each bomb to a clean parchment-lined sheet.
💡 Stella’s Pro Tip: Hold the bomb close to the glaze bowl as you pour — this gives you more control and prevents splashing. Pour in a steady stream, not all at once. If the glaze starts to pool at the base of the bomb, use the spatula to gently lift the bomb and let the excess drip off before setting it down.
Step 8: Make the Cookie Base and Garnish
While the glazed bombs are setting, prepare the cookie base. In a medium bowl, combine 1 cup coconut cookie crumbs, 3 tablespoons melted butter, 1 tablespoon granulated sugar, and a pinch of salt. Stir with a fork until the mixture is evenly moistened and holds together when pinched. Press about 2 tablespoons of the crumb mixture into small round discs, about 2 inches in diameter and 1/4 inch thick, using a small ring mold or your hands. Place each disc on a serving plate. Once the glazed bombs have set for about 5 minutes, carefully place one bomb onto each cookie base, glazed side up. Garnish with fresh pineapple cubes, toasted coconut flakes, and white chocolate curls. Chill the assembled bombs in the refrigerator for 10-15 minutes before serving to allow the mousse to soften slightly and the flavors to meld.
⚠️ Common Mistake to Avoid: Don’t skip the chilling step after glazing. The bombs need those 10-15 minutes in the fridge for the mousse to soften from its frozen state to a creamy, scoopable texture. If served directly from the freezer, the mousse will be too hard and the molten core won’t flow.
| Step | Action | Duration | Key Visual Cue |
|---|---|---|---|
| 1 | Prepare molten vanilla core | 45–60 mins freeze | Firm outside, soft center when pressed |
| 2 | Bloom gelatin | 5 mins bloom + 15 sec warm | Gelatin becomes firm, jiggly mass |
| 3 | Make cheesecake mousse | 10 mins | Airy, billowy, no white streaks |
| 4 | Assemble bombs | 10 mins | Core fully encased in mousse |
| 5 | Freeze bombs | 4 hrs or overnight | Rock hard, no give when pressed |
| 6 | Make golden mirror glaze | 15 mins | Smooth, glossy, honey-gold color |
| 7 | Glaze bombs | 5 mins | Smooth, even coating, sets in 30–60 sec |
| 8 | Make base & garnish | 10 mins | Crumb holds together, garnish in place |
Serving & Presentation
These Golden Pineapple Coconut Cheesecake Bombs are meant to be the grand finale of a dinner party — the kind of dessert that makes everyone pull out their phones before they take a bite. I like to serve them on simple white plates to let the golden mirror glaze take center stage. Place one bomb on its cookie base slightly off-center, and add a small quenelle of coconut sorbet or a drizzle of passion fruit coulis on the side for an extra tropical hit. The contrast of the glossy gold against the white plate is stunning, and the first cut into the bomb reveals the liquid vanilla core — it’s a moment of pure theater.
For a Moroccan touch, I sometimes sprinkle a tiny pinch of ground cinnamon and a few grains of fleur de sel over the top just before serving — the salt enhances the sweetness and the cinnamon adds a warm, aromatic note that reminds me of my mother’s kitchen. During summer in New York, I’ve served these at rooftop parties with a side of grilled pineapple slices and a dollop of coconut whipped cream. The bombs are rich, so I recommend small portions — one per person is plenty. Let them sit at room temperature for 5-7 minutes after coming out of the fridge to take the chill off the mousse and allow the molten core to flow freely.
When I plate these for my cooking classes in NYC, I tell students to embrace asymmetry. A smear of coconut cream on the plate, a few toasted coconut flakes scattered like snow, a tiny edible gold leaf if you’re feeling extra fancy — these little touches make the dessert feel like it came from a high-end pâtisserie. The cookie base adds a crucial textural contrast: crunchy and buttery against the silky mousse and liquid core. If you want to go all out, serve each bomb on a pool of warm pineapple caramel sauce. Your guests will remember this dessert for years.
| Pairing Type | Suggestions | Why It Works |
|---|---|---|
| Side Dish | Grilled pineapple wedges, coconut sorbet | Reinforces tropical theme, adds freshness |
| Sauce / Dip | Passion fruit coulis, pineapple caramel sauce | Adds acidity or deep caramel notes to balance sweetness |
| Beverage | Sparkling water with lime, coconut rum cocktail, green tea | Cleanses palate, complements tropical flavors |
| Garnish | Cinnamon + fleur de sel, edible gold leaf, toasted coconut | Adds aroma, visual sparkle, and texture |
Make-Ahead, Storage & Reheating
As a busy New Yorker who often hosts dinner parties after a full day of recipe testing, I rely on make-ahead strategies like this one. These cheesecake bombs are actually designed to be made in stages, which makes them perfect for entertaining. The components can be prepared over two days, and the finished bombs keep beautifully in the fridge or freezer, so you’re never scrambling at the last minute.
| Method | Container | Duration | Reheating Tip |
|---|---|---|---|
| Refrigerator | Airtight container, single layer | Up to 3 days | Serve cold or let sit at room temp 10 mins |
| Freezer | Freezer-safe container, separated by parchment | Up to 2 months | Thaw in fridge 4 hours, then serve cold |
| Make-Ahead | Mousse + cores frozen in molds | Up to 1 week before glazing | Glaze and assemble day of serving |
For best results, glaze the bombs on the day you plan to serve them. The mirror glaze is at its most brilliant and shiny within the first 12 hours. If you need to store glazed bombs in the fridge, cover them loosely with plastic wrap — but avoid touching the glaze, as it can stick and create blemishes. Leftover unglazed frozen bombs can be kept in the freezer for up to 2 months in an airtight container. When you’re ready to serve, thaw them in the refrigerator for 4 hours, then glaze them fresh. The molten vanilla core will still be beautifully liquid after freezing, as long as the bombs were properly frozen and stored.
Variations & Easy Swaps
| Variation | Key Change | Best For | Difficulty Impact |
|---|---|---|---|
| Tropical Mango-Passion Fruit | Replace pineapple puree with mango puree, add passion fruit pulp to core | Those who love a tangy-sweet tropical combo | Same difficulty |
| Gluten-Free / Dairy-Free | Use gluten-free cookies for base, vegan cream cheese, coconut cream instead of heavy cream | Dietary restrictions, vegan guests | Slightly more advanced |
| Holiday Spice | Add 1/2 tsp cinnamon and 1/4 tsp nutmeg to mousse, use dark chocolate glaze | Fall and winter entertaining | Same difficulty |
Tropical Mango-Passion Fruit Variation
This variation is inspired by the mango stands I used to visit in Marrakech — fragrant, sun-warmed fruit that tasted like pure gold. Replace the pineapple puree with an equal amount of mango puree (from fresh or high-quality canned Alphonso mangoes). For the molten vanilla core, whisk in 1 tablespoon of passion fruit pulp along with the other ingredients — the seeds add a delightful crunch and the acidity cuts through the richness. The golden mirror glaze can be tinted a deeper orange with a drop of yellow and red coloring. This version is slightly more tart and complex, and it pairs beautifully with a coconut-lime sorbet.
Gluten-Free / Dairy-Free Variation
I developed this version for a friend with celiac disease who also avoids dairy, and it turned out so well that I now make it regularly. For the cookie base, use gluten-free graham crackers or crushed gluten-free shortbread mixed with melted coconut oil instead of butter. Replace the cream cheese with a high-quality vegan cream cheese block (I like the one from Miyoko’s Kitchen). Use full-fat coconut cream from a can (chilled and whipped) instead of heavy cream — it whips up beautifully and adds a subtle coconut flavor. For the glaze, use a dairy-free white chocolate brand like Pascha or Enjoy Life. The texture is slightly less firm but equally delicious, and the molten vanilla core works perfectly with coconut cream.
Seasonal Holiday Spice Variation
When the weather turns cold in New York, I love adding warming spices to this tropical dessert for a surprising winter twist. Add 1/2 teaspoon of ground cinnamon and 1/4 teaspoon of freshly grated nutmeg to the cheesecake mousse along with the vanilla extract. For the cookie base, use ginger snap cookies instead of coconut cookies — the molasses and ginger notes play beautifully with the pineapple. Instead of the golden mirror glaze, make a dark chocolate mirror glaze using dark chocolate (at least 60% cocoa) and tint it with a touch of orange food coloring. Garnish with candied ginger and a dusting of cinnamon. It’s a holiday showstopper that bridges the gap between winter comfort and tropical escape.
How do you make a molten vanilla core that stays liquid inside the cheesecake bombs?
The secret to a molten vanilla core that stays liquid even after hours in the freezer is the ratio of pastry cream to sweetened condensed milk. The condensed milk lowers the freezing point of the mixture, meaning it stays soft and fluid at temperatures that would freeze plain cream solid. I use a base of vanilla pastry cream (which provides body and flavor) mixed with condensed milk, a touch of heavy cream, and extra vanilla extract. The core is frozen only until firm on the outside but still soft in the center — about 45 to 60 minutes. This partial freeze means that when the bomb is cut, the center flows out like warm custard. The key is not to freeze the cores completely solid, and to encase them fully in the mousse so they’re protected from the full cold of the freezer.
Can I use canned pineapple instead of fresh for the golden pineapple flavor?
Yes, absolutely — and in many cases, canned pineapple puree actually works better than fresh for this recipe because it has a more consistent texture and sweetness level. Look for canned pineapple puree that is 100% fruit with no added sugar or citric acid, or use canned crushed pineapple that you blend and strain to remove the fibers. If using canned pineapple in syrup, be sure to drain it well and reduce the puree on the stove for 5-7 minutes to concentrate the flavor and remove excess moisture. Fresh pineapple is wonderful when it’s in season and perfectly ripe, but it contains an enzyme called bromelain that can break down gelatin and cause the mousse to be runny. To use fresh pineapple safely, bring the puree to a gentle boil for 2-3 minutes to deactivate the enzyme before using it in the mousse.
What is the best way to freeze these cheesecake bombs before glazing?
The best way to freeze these cheesecake bombs is to freeze them in the silicone dome molds on a flat baking sheet in the coldest part of your freezer, ideally at 0°F or below. Freeze them for at least 4 hours, but overnight is even better — this ensures the bombs are solid all the way through, which is essential for the mirror glaze to set properly. If you have a chest freezer or a deep freezer, use that for the fastest, most even freeze. Make sure the molds are sitting flat so the bombs freeze with an even dome shape. Once frozen solid, you can unmold the bombs and store them in a freezer-safe container separated by parchment paper for up to 2 months. Do not glaze them until the day you plan to serve, as the glaze is at its most brilliant within the first 12 hours.
Can I substitute the coconut with another ingredient if I don’t like coconut?
Absolutely — if you’re not a fan of coconut, you have several excellent options. For the shredded coconut in the mousse, substitute finely chopped toasted almonds or macadamia nuts — both add a pleasant crunch and nutty richness that pairs beautifully with pineapple. For the coconut cookie crumbs in the base, use graham cracker crumbs or crushed shortbread cookies instead. If you want to keep the tropical theme without coconut, try using crushed macadamia nuts or toasted sesame seeds for the garnish. One of my favorite variations is to replace the coconut with finely chopped white chocolate and use a vanilla wafer crust — it gives a completely different but equally delicious dessert. Just note that the texture will be slightly different: coconut adds a chewy, fibrous quality that nuts and cookies don’t quite replicate.
What type of gelatin should I use for the cheesecake mousse and mirror glaze?
I recommend using unflavored powdered gelatin, specifically Knox brand, which is widely available in US grocery stores. Powdered gelatin is easy to bloom and dissolves cleanly into both the mousse and the glaze. Each envelope of Knox gelatin contains about 2 1/4 teaspoons, which is slightly less than 1 tablespoon, so you’ll need two envelopes for this recipe (one for the mousse and one for the glaze). For the mousse, bloom the gelatin in warm water (about 90°F) for 5 minutes until it becomes a firm, jiggly mass, then warm it gently to dissolve. For the glaze, follow the same process. Sheet gelatin can also be used — use about 4 sheets (gold strength) per tablespoon of powdered gelatin, and bloom them in cold water for 5-10 minutes before squeezing out excess water and dissolving into warm liquid.
How do I achieve a perfectly smooth golden mirror glaze?
A perfectly smooth golden mirror glaze requires attention to three things: temperature, straining, and pouring technique. First, the glaze must be at the right temperature — about 90°F (32°C). Use an instant-read thermometer to be precise. If it’s too hot, it will melt the frozen bomb and cause cracks; if too cool, it will set too thickly and not flow smoothly. Second, always strain the glaze through a fine-mesh sieve before using to remove any lumps from undissolved gelatin or white chocolate that didn’t melt fully. Third, pour the glaze in a steady, even stream starting from the top of the bomb, letting it flow naturally over the sides. Don’t touch the bomb or try to spread the glaze with a spatula — let gravity do the work. If the glaze starts to thicken while you work, warm it gently over a double boiler for 10-15 seconds and stir.
Can I make these cheesecake bombs ahead of time for a party?
Yes, these cheesecake bombs are actually ideal for make-ahead entertaining because the components can be prepared in stages. Here’s my recommended timeline: Up to 1 week before the party, make the vanilla cores and the cheesecake mousse, assemble the bombs in the silicone molds, and freeze them solid. Keep them frozen in the molds, wrapped tightly in plastic wrap. The day before your party, prepare the golden mirror glaze and glaze the bombs, then place them on the cookie bases and refrigerate overnight. The glaze will stay beautifully shiny for up to 12 hours. On the day of the party, add the garnishes and let the bombs sit at room temperature for 5-7 minutes before serving to allow the mousse to soften and the molten core to flow. This staggered timeline means you’re never doing everything at once, and your dessert is ready to shine when your guests arrive.
Why did my mirror glaze crack or not set properly?
Mirror glaze cracking or not setting properly is usually caused by one of three issues: temperature shock, improper gelatin blooming, or the bombs not being frozen solid enough. If the glaze is too hot when poured over the frozen bomb (above 100°F), the extreme temperature difference can cause the glaze to contract and crack as it cools. Always cool the glaze to 90°F before pouring. If the gelatin wasn’t fully bloomed and dissolved, the glaze won’t set firmly — make sure your gelatin has bloomed for a full 5 minutes and is completely dissolved into a clear liquid before adding it to the glaze mixture. If the bombs are not frozen solid (they should be rock hard with no give when pressed), the warmth of the glaze will partially thaw the bomb’s surface, causing the glaze to sink in and create a dull, uneven finish. Freeze bombs for at least 4 hours, ideally overnight.
Can I use a different type of white chocolate for the glaze?
The type of white chocolate you use for the mirror glaze makes a significant difference in both flavor and texture. I recommend using a high-quality white chocolate with a cocoa butter content of at least 28% — brands like Callebaut, Guittard, or Valrhona are excellent choices. These chocolates melt smoothly and create a glossy, stable glaze. Avoid white chocolate chips from most grocery store brands, as they often contain added stabilizers and lower cocoa butter content that can cause the glaze to seize or turn grainy. If you can only find white chocolate chips, look for ones that list cocoa butter as an ingredient (not palm oil or other vegetable fats). White candy melts (sometimes called white confectionery coating) can be used in a pinch, but they contain palm oil instead of cocoa butter and will produce a thinner, less flavorful glaze that doesn’t set as firmly.
How should I store leftover cheesecake bombs?
Leftover cheesecake bombs should be stored in an airtight container in the refrigerator for up to 3 days. Place them in a single layer with enough space between them so the glaze doesn’t stick to the sides of the container. If you need to stack them, separate layers with parchment or wax paper. The mirror glaze will stay glossy for about 12 hours, after which it may start to dull slightly as it absorbs moisture from the fridge. If you’re keeping them longer than a day, it’s best to store unglazed frozen bombs and glaze them fresh when you’re ready to serve. For longer storage, unglazed frozen bombs can be kept in a freezer-safe container for up to 2 months. To serve leftovers, let the bomb sit at room temperature for 10 minutes to take the chill off the mousse — the molten core may not be as liquid as on the first day, but it will still be deliciously soft and creamy.
Share Your Version!
I absolutely love seeing how my recipes come to life in your kitchens. If you make these Golden Pineapple Coconut Cheesecake Bombs with Molten Vanilla Core, I’d be so grateful if you left a star rating and a comment below — tell me how they turned out, what variations you tried, and whether your guests gasped when they cut into that liquid vanilla center. That moment of surprise and delight is exactly why I do what I do.
Snap a photo of your golden beauties and share it on Instagram or Pinterest — tag me @leosfoods so I can see your masterpiece. I love featuring your recreations in my stories. And if you have a question about the recipe that isn’t answered in the FAQ above, drop it in the comments and I’ll get back to you within 24 hours. What’s the one thing you’re most excited to try first — the molten core technique, the golden mirror glaze, or the tropical mousse?
From my NYC kitchen to yours — I hope this recipe brings as much warmth to your table as it does to mine. — Stella 🧡
⭐ Made this recipe? Drop a comment below and tell me — which part of the process are you most excited to try? I read every single one! 💬
Love This Recipe? Save It to Pinterest!
If you enjoyed this Golden Pineapple Coconut Cheesecake Bombs with Molten Vanilla Core recipe, don’t let it get lost in your browser tabs! 😄 Pin it now so you can find it again anytime — and explore hundreds more tried-and-tested recipes waiting for you on my Pinterest boards.
👉 Follow Stella on Pinterest @stellarecipeblog
📌 Pin this recipe · 🔁 Re-pin your favorites · 💬 Tag me when you make it — I love seeing your creations!
“`
Print
Golden Pineapple Coconut Cheesecake Bombs with Molten Vanilla Core
- Yield: 8 1x
Ingredients
- For the Pineapple Coconut Cheesecake Mousse:
- 1 cup pineapple puree
- 8 oz cream cheese, softened
- 1/2 cup powdered sugar
- 1 cup heavy cream
- 1/2 cup shredded coconut
- 1 tsp vanilla extract
- 1 tbsp gelatin powder
- 3 tbsp warm water
- For the Molten Vanilla Core:
- 1/2 cup vanilla pastry cream
- 2 tbsp sweetened condensed milk
- 1 tsp vanilla extract
- 1 tbsp heavy cream
- For the Golden Mirror Glaze:
- 1 cup white chocolate, finely chopped
- 1/2 cup sweetened condensed milk
- 1 tbsp gelatin powder
- 3 tbsp warm water
- Gold food coloring, as needed
- For the Cookie Base:
- 1 cup coconut cookie crumbs
- 3 tbsp melted butter
- 1 tbsp granulated sugar
- Pinch of salt
- For Garnish (optional):
- Pineapple cubes
- Toasted coconut flakes
- White chocolate curls
Instructions
- 1. Whisk vanilla pastry cream, condensed milk, vanilla extract, and heavy cream until smooth.
- 2. Pipe the mixture into small silicone molds and freeze until mostly firm but still soft in the center.
- 3. Bloom gelatin in warm water and let stand for 5 minutes.
- 4. Beat cream cheese and powdered sugar until smooth.
- 5. Mix in pineapple puree, shredded coconut, and vanilla extract.
- 6. Whip heavy cream to soft peaks and fold into the pineapple mixture.
- 7. Stir in dissolved gelatin until fully incorporated.
- 8. Fill silicone dome molds halfway with the cheesecake mousse.
- 9. Place a frozen vanilla core into the center of each mold.
- 10. Cover with remaining mousse and freeze until completely firm.
- 11. Combine white chocolate, condensed milk, dissolved gelatin, and gold food coloring until smooth and glossy.
- 12. Unmold the frozen bombs and place on a wire rack.
- 13. Pour the golden mirror glaze evenly over each bomb.
- 14. Mix cookie crumbs, melted butter, sugar, and salt, then press into small round bases.
- 15. Place each glazed bomb onto a prepared base.
- 16. Garnish with pineapple cubes, toasted coconut flakes, and white chocolate curls.
- 17. Chill for 10–15 minutes before serving.
Nutrition
- Calories: 445
- Sugar: 34 g
- Fat: 30 g
- Carbohydrates: 40 g
- Protein: 6 g
Tried This Recipe? Leave a Comment!
Did you make this recipe? I’d love to hear how it turned out! Please leave a comment and a rating below. Your feedback helps other home cooks and supports cheerychop.com!
For more delicious inspiration, follow me on Pinterest!