Showstopping Rose Gold Peach Vanilla Dream Domes
“`html
Table of Contents
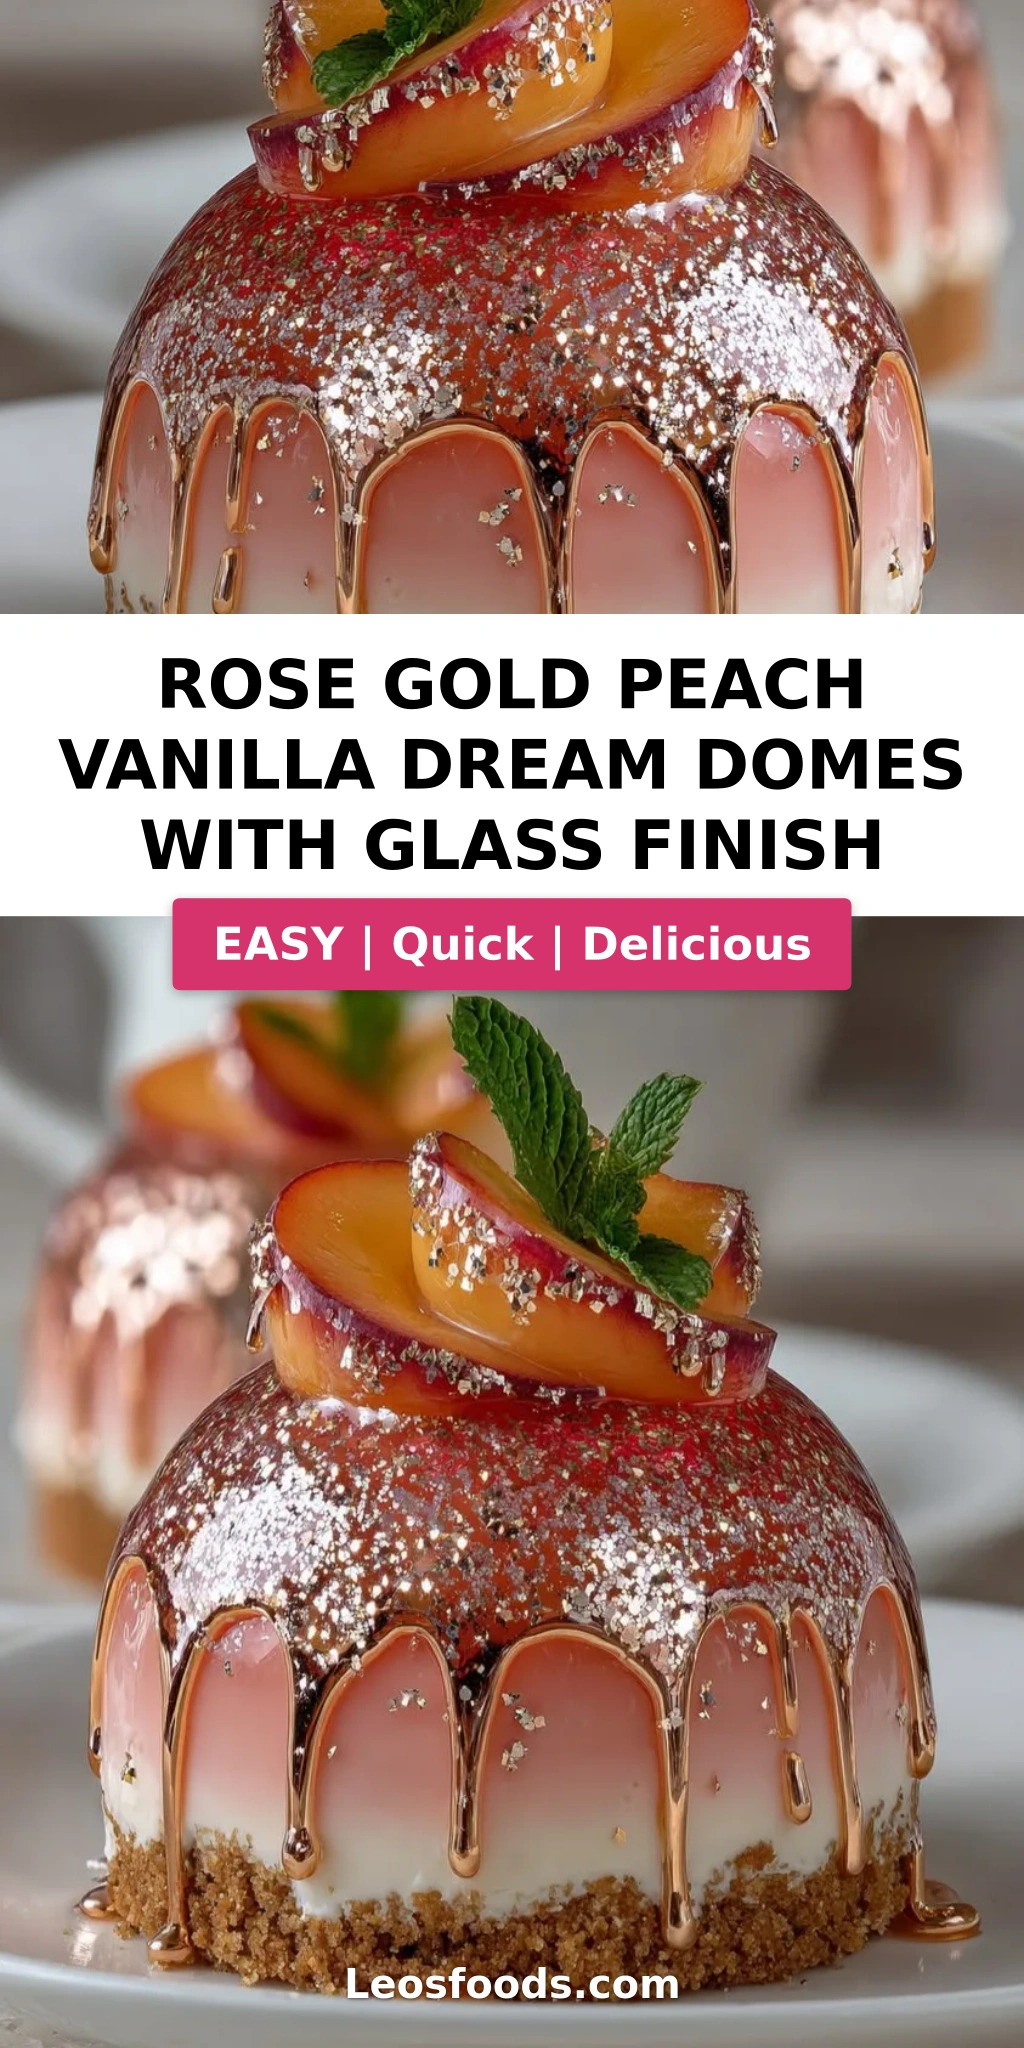
Rose Gold Peach Vanilla Dream Domes with Glass Finish – Elegant Mirror Glaze Dessert for Special Occasions
I still remember the first time I made these Rose Gold Peach Vanilla Dream Domes — it was for a friend’s engagement party in my tiny NYC kitchen, and the moment that shimmering glass glaze slid over the frozen domes, everyone gasped. Growing up in Morocco, my mother taught me that dessert should be a celebration — layers of flavor, texture, and love. Later, training at Le Cordon Bleu in Paris, I learned the precision behind mirror glazes and mousse work. These rose gold peach vanilla dream domes bring all of that together: the warmth of North African hospitality, the technique of French pastry, and the bold elegance of New York entertaining. This is not just a dessert — it’s a showstopper.
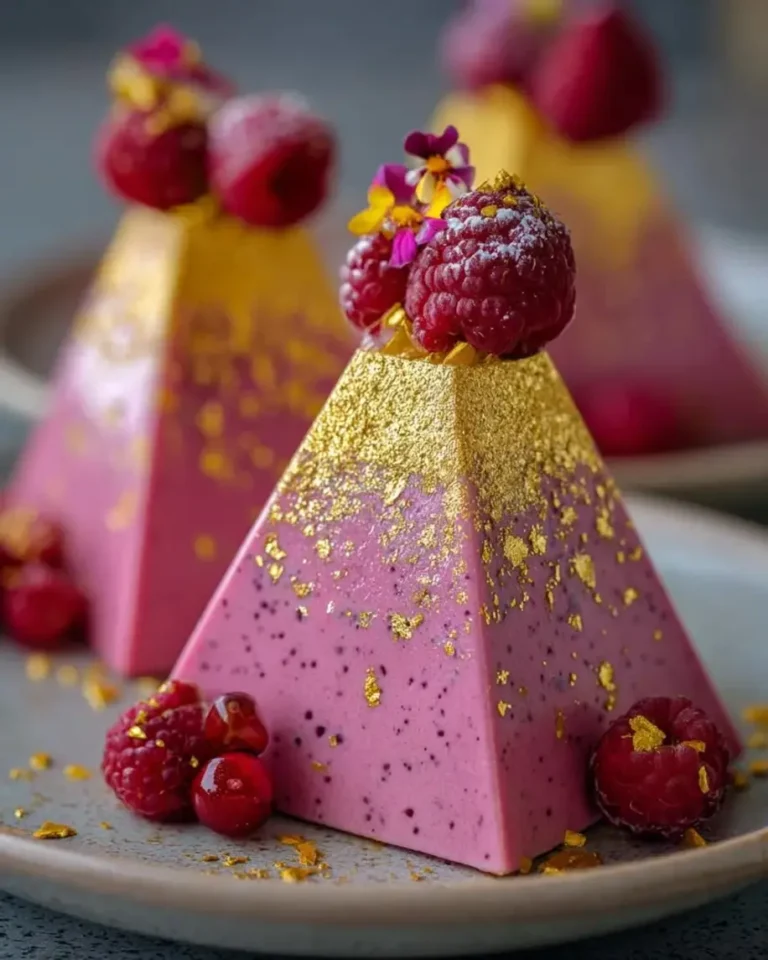
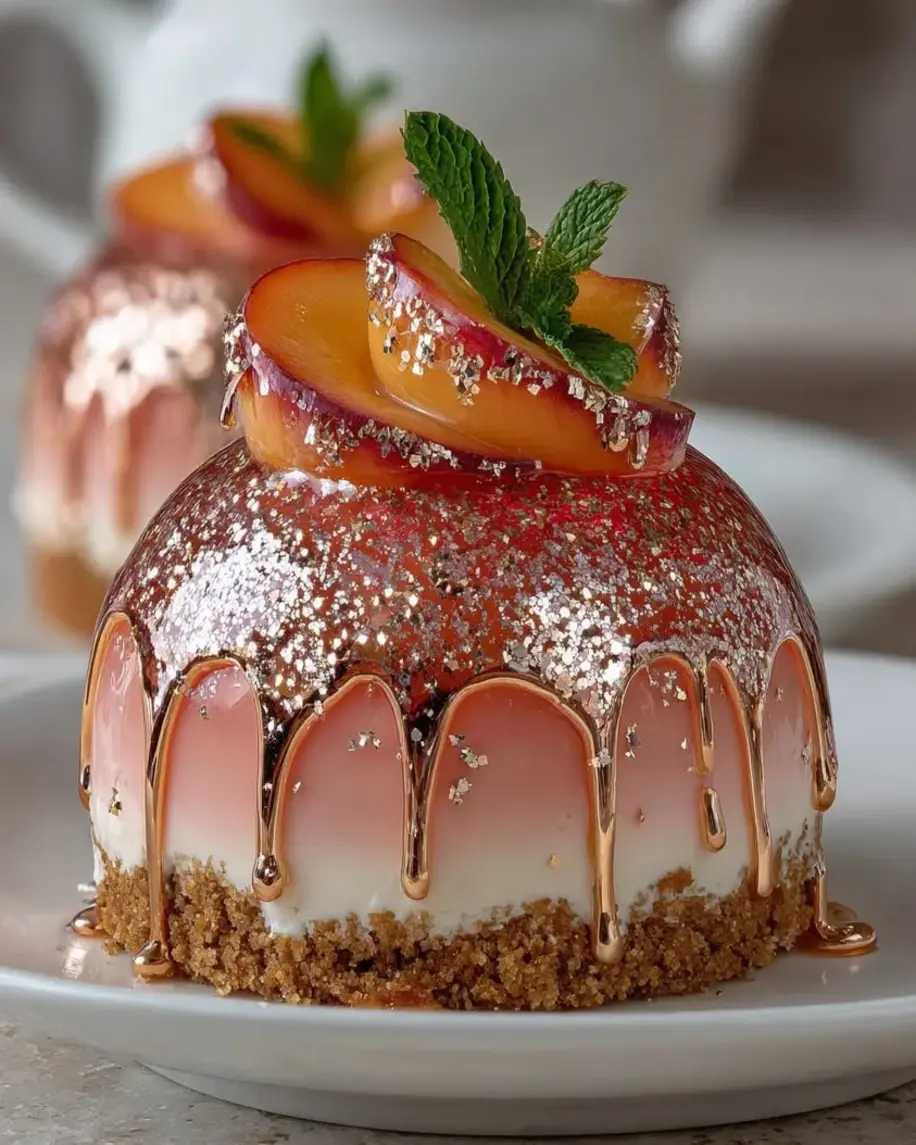
Picture this: a silky peach vanilla mousse wrapped around a luscious vanilla cream core, resting on a buttery biscuit base, all encased in a flawless rose gold mirror glaze that catches the light like liquid jewelry. The first spoonful cracks through that glossy shell into the airy, fruit-forward mousse, then hits the creamy center — it’s pure magic. The peaches bring a bright, sun-ripened sweetness that’s tempered by the floral notes of vanilla, while the biscuit base adds just the right crunch. I love serving these at spring dinner parties or bridal showers — they look like something from a high-end patisserie, but with my tested shortcuts, they’re absolutely achievable at home.
What makes my version of these rose gold peach vanilla dream domes truly special is the technique I developed during my Paris days: a stabilized glass glaze that stays brilliantly reflective without cracking, and a peach mousse that keeps its light, airy texture even after freezing. I’ve tested this recipe eight times to get the gelatin ratios perfect for home cooks, and I’m sharing every pro tip I learned along the way. The most common mistake I see is glazing domes that aren’t frozen solid enough — trust me, patience pays off here. Whether you’re a confident home baker looking to impress or someone who just loves a beautiful dessert, these domes will make you feel like a pastry chef.
Why This Rose Gold Peach Vanilla Dream Domes Recipe Is the Best
The flavor secret starts with the peaches. I use ripe, fragrant peaches in season — the kind you find at the Union Square Greenmarket in late summer — and cook them down to a concentrated puree that packs intense fruit flavor without excess water. Growing up in Morocco, we’d preserve peaches with rose water and honey, and that memory inspired me to add just a whisper of floral notes through the rose gold luster dust. The vanilla cream core, made from a classic French pastry cream, provides a rich, custardy contrast that makes every bite feel luxurious.
Texture is everything in a domed dessert, and I’ve perfected the balance through careful technique. The mousse uses cream cheese for stability and a slight tang that complements the peaches, while the whipped cream is folded in gently to maintain maximum airiness. The biscuit base, pressed firmly into the molds, creates a sturdy foundation that doesn’t get soggy — a trick I learned from making cheesecake crusts in Paris. And the glass finish? That’s where my training really shines: the precise temperature of 90°F ensures the glaze flows evenly and sets to a mirror-like sheen without pooling.
What makes this recipe foolproof for home cooks is my step-by-step approach with clear visual cues. I’ve broken down the process into manageable stages — make the biscuit base, prepare the mousse, freeze overnight, then glaze the next day. You don’t need a commercial kitchen or specialty equipment; a set of dome silicone molds and a kitchen thermometer are your best friends. I’ve also included tested substitutions for gelatin, dairy, and fruit so you can adapt this recipe to what you have on hand. These rose gold peach vanilla dream domes are designed to impress without causing stress.
Rose Gold Peach Vanilla Dream Domes Ingredients
Every ingredient in this recipe has been carefully chosen for its role in creating that perfect dome experience. I source my peaches from the farmers market when they’re in season — there’s nothing like a locally grown peach for pure, concentrated flavor. The rose gold luster dust, which gives the domes their signature shimmer, I order online from a specialty baking supplier I discovered during my Paris days. Let me walk you through what you’ll need and why each ingredient matters.
Ingredients List
- For the Peach Vanilla Mousse:
- 2 cups peach puree (about 4–5 ripe peaches, blended and strained)
- 1 cup heavy cream
- 1/2 cup cream cheese, softened
- 1/3 cup granulated sugar
- 1 tsp vanilla extract
- 2 tsp powdered gelatin
- 3 tbsp cold water (for blooming gelatin)
- For the Vanilla Cream Core:
- 3/4 cup vanilla pastry cream (homemade or high-quality store-bought)
- For the Biscuit Base:
- 1 cup digestive biscuits, finely crushed
- 3 tbsp melted butter
- For the Rose Gold Glass Finish:
- 1 cup granulated sugar
- 1/2 cup water
- 1/2 cup sweetened condensed milk
- 1 cup white chocolate, finely chopped
- 1 tbsp powdered gelatin
- 3 tbsp cold water (for blooming)
- 1 tsp vanilla extract
- 1–2 tsp edible rose gold luster dust
- For Garnish (optional):
- Thin peach slices
- Edible gold flakes
- Micro mint leaves
Ingredient Spotlight
Peaches: The star of the show. Choose peaches that are fragrant and yield slightly to pressure — they should smell like summer. If fresh peaches aren’t available, frozen peach slices (thawed and drained) work beautifully. Avoid canned peaches in syrup, as they’re too sweet and watery for the mousse to set properly.
White Chocolate for the Glaze: This is the backbone of your glass finish. Use a high-quality white chocolate with at least 30% cocoa butter — I prefer Valrhona or Callebaut. The better the chocolate, the more brilliant the shine. Avoid white chocolate chips, which often contain stabilizers that dull the glaze.
Edible Rose Gold Luster Dust: This is what transforms the glaze from simple to spectacular. Look for a product labeled “edible” and “rose gold” — a little goes a long way. I mix it directly into the warm glaze for even distribution. You can find it at specialty baking stores or online.
| Original Ingredient | Best Substitution | Flavor / Texture Impact |
|---|---|---|
| Peach puree (fresh) | Frozen peach slices, thawed and drained | Slightly less intense flavor; drain well to avoid excess water |
| Heavy cream | Coconut cream (full fat, chilled) | Coconut flavor comes through; lighter texture |
| Cream cheese | Mascarpone cheese | Richer, less tangy; slightly softer mousse |
| White chocolate | High-quality white chocolate bars (not chips) | Same result; bars melt more smoothly |
| Powdered gelatin | Agar-agar (1 tsp for each 2 tsp gelatin) | Firmer set; different melting point, not ideal for glaze |
How to Make Rose Gold Peach Vanilla Dream Domes — Step-by-Step
Making these rose gold peach vanilla dream domes is a journey, but I promise every step is worth it. I’ve organized the process into clear stages so you can work through them without feeling overwhelmed. Take your time, read through each step before starting, and trust the process — your patience will be rewarded with the most stunning dessert you’ve ever made at home.
Step 1: Prepare the Biscuit Base
Mix the finely crushed digestive biscuits with melted butter until the texture resembles wet sand. Press a thin, even layer into the bottom of each dome mold (about 1 tablespoon per dome). Use the back of a small spoon or a tart tamper to press firmly. Chill the molds for 15 minutes while you prepare the mousse. This creates a stable base that won’t shift when you add the mousse.
💡 Stella’s Pro Tip: For extra flavor, add a pinch of salt and a tiny dash of cinnamon to the biscuit crumbs. It complements the peach beautifully and adds a subtle warmth that reminds me of Moroccan spice blends.
Step 2: Bloom the Gelatin for the Mousse
Sprinkle the 2 teaspoons of powdered gelatin over 3 tablespoons of cold water in a small bowl. Let it sit undisturbed for 5 minutes until the gelatin absorbs the water and becomes a firm, spongy mass. Blooming gelatin properly is essential for a smooth, lump-free mousse — don’t rush this step.
⚠️ Common Mistake to Avoid: Adding gelatin directly to hot liquid without blooming first. This creates lumps and uneven setting. Always bloom in cold water first, then gently warm to dissolve.
Step 3: Make the Peach Mousse Base
In a large bowl, beat the softened cream cheese, granulated sugar, vanilla extract, and peach puree together until completely smooth. There should be no lumps of cream cheese. In a small saucepan, warm about 2 tablespoons of the heavy cream until steaming, then add the bloomed gelatin and stir until fully dissolved. Pour this gelatin mixture into the peach mixture and whisk immediately to combine.
💡 Stella’s Pro Tip: If the gelatin mixture seizes or forms strings when added to the cold peach base, warm the peach base slightly over a water bath while whisking. It will smooth right out — a trick I learned in pastry school in Paris.
Step 4: Whip and Fold the Cream
Whip the remaining heavy cream to soft peaks — it should hold its shape but still be pillowy. Gently fold the whipped cream into the peach mixture in three additions, using a rubber spatula with a light hand. Fold until no white streaks remain, but don’t overmix or you’ll deflate the mousse. The finished mixture should be airy, thick, and pale peach in color.
⚠️ Common Mistake to Avoid: Over-whipping the cream to stiff peaks makes it hard to fold in evenly and can make the mousse grainy. Stop at soft peaks — the cream should droop slightly when you lift the whisk.
Step 5: Assemble the Domes
Spoon about 2 tablespoons of mousse into each chilled dome mold, spreading it up the sides slightly. Add a small spoonful of vanilla pastry cream (about 1 tablespoon) in the center, then cover completely with the remaining mousse, filling the molds to the top. Tap the molds gently on the counter to release air bubbles. Freeze for at least 6 hours, preferably overnight.
💡 Stella’s Pro Tip: For perfectly centered cream cores, pipe the pastry cream using a small piping bag or a zip-top bag with a corner snipped off. This keeps the core neat and prevents it from sinking to the bottom.
Step 6: Make the Rose Gold Glass Glaze
Bloom the 1 tablespoon of gelatin in 3 tablespoons of cold water for 5 minutes. In a small saucepan, combine the sugar, water, and sweetened condensed milk. Heat gently over medium-low, stirring constantly, until the mixture is steaming and the sugar is dissolved — do not let it boil. Remove from heat and add the chopped white chocolate, stirring until melted and smooth. Add the bloomed gelatin and stir until fully incorporated. Finally, add the vanilla extract and rose gold luster dust, whisking until the glaze is glossy, smooth, and evenly colored.
⚠️ Common Mistake to Avoid: Overheating the sugar mixture can cause the glaze to become grainy or separate. Heat only until steaming — if you see bubbles forming around the edges, remove it from the heat immediately.
Step 7: Cool and Glaze
Let the glaze cool to 90°F (32°C) — this is crucial. If it’s too warm, it will melt the mousse; too cool, it will thicken and not flow evenly. Unmold the frozen domes carefully and place them on a wire rack set over a baking sheet. Pour the glaze evenly over each dome, starting from the top and letting it cascade down the sides. Work quickly and pour in one continuous motion for the smoothest finish.
💡 Stella’s Pro Tip: Hold the dome with your fingers or a fork inserted into the bottom (the biscuit base hides the hole). This allows you to rotate the dome as you pour for even coverage. I learned this trick from a pastry chef at a Michelin-starred restaurant in Paris.
Step 8: Chill and Garnish
Place the glazed domes on a serving plate or tray and refrigerate for at least 30 minutes to allow the glaze to set completely. Just before serving, garnish with thin peach slices, edible gold flakes, and micro mint leaves for a stunning presentation. The domes can be refrigerated for up to 6 hours after glazing before serving.
⚠️ Common Mistake to Avoid: Touching the glaze with your fingers after it sets — it leaves fingerprint marks. If you need to adjust a dome, use a small offset spatula or a paper towel.
| Step | Action | Duration | Key Visual Cue |
|---|---|---|---|
| 1 | Mix biscuit base and press into molds | 5 mins + 15 mins chill | Crumb mixture holds together when pressed |
| 2 | Bloom and dissolve gelatin for mousse | 5 mins | Gelatin becomes firm and spongy |
| 3 | Make peach mousse base | 10 mins | Smooth, uniform peach mixture |
| 4 | Whip cream and fold into mousse | 5 mins | Soft peaks form; mousse is airy and thick |
| 5 | Fill molds with mousse and cream core | 15 mins | Molds filled to top; cream centered |
| 6 | Freeze domes | 6+ hours | Domes are solid to the touch |
| 7 | Prepare and cool rose gold glaze | 15 mins + cooling | Glaze reaches 90°F; smooth and glossy |
| 8 | Unmold and glaze domes | 10 mins | Glaze flows evenly and coats completely |
| 9 | Chill and garnish | 30 mins chill | Glaze is set and shiny; garnishes fresh |
Serving & Presentation
These rose gold peach vanilla dream domes are at their absolute best when served chilled, straight from the refrigerator. The glaze should be firm but yielding to the spoon, and the mousse inside should be light and creamy — not icy. I like to serve them on simple white plates to let the rose gold shimmer take center stage. A dollop of unsweetened whipped cream on the side adds a lovely contrast, though these domes are plenty rich on their own.
For garnishes, I keep it elegant: a thin slice of fresh peach fanned out beside the dome, a sprinkle of edible gold flakes that catch the light, and a tiny sprig of micro mint for a pop of green. In my NYC kitchen, I often add a drizzle of passion fruit coulis around the plate — the tartness cuts through the sweetness beautifully. If you’re serving these at a dinner party, arrange them on a marble slab or a mirrored tray for maximum drama.
In Morocco, we’d serve something like this with mint tea on the side — the cool, sweet dome paired with hot, fragrant tea is a match made in heaven. In Paris, I learned to always let the dessert speak for itself: minimal garnish, maximum impact. For a truly stunning presentation, place each dome on a smear of raspberry coulis or a dusting of freeze-dried peach powder. Your guests will think you ordered from a five-star patisserie.
| Pairing Type | Suggestions | Why It Works |
|---|---|---|
| Side / Accompaniment | Unsweetened whipped cream, raspberry coulis, fresh berries | Adds freshness and balances sweetness |
| Sauce / Drizzle | Passion fruit coulis, caramel sauce, honey glaze | Tart or rich sauces complement the peach |
| Beverage | Mint tea, sparkling rosé, espresso, iced peach tea | Hot tea cuts sweetness; rosé echoes fruit notes |
| Garnish | Edible gold flakes, micro mint, thin peach slices, rose petals | Adds visual elegance and textural contrast |
Make-Ahead, Storage & Reheating
One of the best things about these rose gold peach vanilla dream domes is how well they work for entertaining. In my busy NYC schedule, I often prepare the domes fully through the freezing stage up to a week before an event, then glaze them the morning of serving. The glaze is best applied within 24 hours of serving, but the unfrozen mousse domes (without glaze) can be stored in the freezer for up to 2 weeks in an airtight container.
| Method | Container | Duration | Reheating Tip |
|---|---|---|---|
| Refrigerator | Covered container, single layer | Up to 3 days after glazing | Serve cold — no reheating needed |
| Freezer (unglazed) | Airtight container, parchment between layers | Up to 2 weeks | Thaw 30 mins in fridge before glazing |
| Make-Ahead (glazed) | Covered, not touching lid | 12–24 hours before serving | Keep refrigerated; garnish just before serving |
If you’re storing glazed domes in the refrigerator, be careful not to let the lid touch the glaze — it will stick and ruin the finish. I use a tall container or place a layer of plastic wrap directly on the surface of the domes. For the best texture, let the domes sit at room temperature for about 5 minutes before serving — this softens the mousse slightly while keeping the glaze firm. One thing I’ve learned from years of testing: never microwave these domes to soften them. The glaze will melt and the mousse will become watery. Patience is key!
Variations & Easy Swaps
One of the joys of this recipe is how easily it adapts to different seasons, dietary needs, and flavor preferences. Whether you’re avoiding dairy, looking for a gluten-free option, or just want to experiment with different fruits, these variations will keep your rose gold peach vanilla dream domes exciting all year round. I’ve tested each variation at least twice in my own kitchen, so you can swap with confidence.
| Variation | Key Change | Best For | Difficulty Impact |
|---|---|---|---|
| Mango Passion Fruit Dom | Replace peach puree with mango puree; add passion fruit to glaze | Tropical-themed parties, summer entertaining | Same difficulty |
| Gluten-Free Version | Use gluten-free digestive biscuits or almond flour crust | Gluten-sensitive guests, Celiac-friendly | Same difficulty |
| Dairy-Free Version | Use coconut cream, dairy-free cream cheese, and dairy-free white chocolate | Vegan or lactose-intolerant guests | Slightly harder (texture adjustments) |
Mango Passion Fruit Variation
This tropical twist is one of my favorites — it’s like sunshine in a dome. Replace the peach puree with an equal amount of fresh mango puree (about 2 cups). For the glaze, add 2 tablespoons of passion fruit pulp along with the rose gold luster dust for a tangy-sweet finish that complements the mango beautifully. The passion fruit seeds add a lovely crunch against the smooth glaze. This variation reminds me of the tropical fruit markets I visited during a pastry workshop in Martinique — vibrant, bold, and unforgettable.
Gluten-Free Version
Making these domes gluten-free is actually quite simple. Swap the digestive biscuits for certified gluten-free digestive biscuits or use a combination of almond flour (1 cup) and melted butter (3 tablespoons) pressed into the molds. The almond flour crust has a slightly nuttier flavor that pairs wonderfully with the peach. I’ve also tested this with crushed gluten-free graham crackers — they work perfectly. Just be sure to check that all other ingredients, including the white chocolate and luster dust, are certified gluten-free if needed.
Dairy-Free Version
For a dairy-free version, I recommend using full-fat coconut cream (chilled) in place of heavy cream, a dairy-free cream cheese alternative for the mousse base, and a high-quality dairy-free white chocolate for the glaze. The coconut flavor pairs surprisingly well with peach and vanilla. Note that the mousse will be slightly less airy and more dense, so be extra gentle when folding. For the biscuit base, use a dairy-free butter alternative. This version is perfect for anyone with dairy sensitivities — and honestly, it’s delicious enough that I sometimes make it on purpose.
Frequently Asked Questions
What is the best way to achieve a smooth glass finish on dessert domes at home?
The key to a flawless glass finish is temperature control and technique. First, make sure your domes are completely frozen — at least 6 hours, preferably overnight. The glaze must be cooled to exactly 90°F (32°C); any warmer and it will melt the mousse, any cooler and it will thicken and not flow smoothly. Use a kitchen thermometer for accuracy. When pouring, work quickly and pour in one steady stream over the center of the dome, letting the glaze cascade naturally. Hold the dome with a fork inserted into the bottom so you can rotate it as you pour. If the glaze is too thick, warm it gently over a water bath; if too thin, let it cool a few more minutes. Practice on one dome first — you’ll get the feel for it quickly.
Can I substitute fresh peaches with frozen or canned peaches for the vanilla peach filling?
Yes, you can use frozen peaches, but I do not recommend canned peaches for this recipe. Frozen peach slices work beautifully — just thaw them completely, drain off any excess liquid, and blend them into a smooth puree. You may need to cook the puree down slightly to concentrate the flavor and reduce water content, as frozen peaches release more liquid when thawed. For the best results, choose frozen peaches without added sugar. Canned peaches are typically packed in syrup and have a softer, less vibrant flavor that can make the mousse too sweet and prevent it from setting properly. If you’re in a pinch, you can use canned peaches, but drain them well and reduce the sugar in the mousse by half.
How far in advance can I make Rose Gold Peach Vanilla Dream Domes for a party?
You can make these domes up to 2 weeks in advance if you store them correctly. The best make-ahead strategy is to prepare the domes through the freezing stage (unglazed) and keep them in an airtight container in the freezer for up to 14 days. On the morning of your party, prepare the rose gold glass glaze, unmold the frozen domes, and glaze them fresh. After glazing, refrigerate the domes for at least 30 minutes to set, then keep them refrigerated for up to 24 hours before serving. I don’t recommend glazing more than 24 hours in advance, as the glaze can start to dull or develop small cracks over time. Garnish with peach slices and gold flakes just before serving for the freshest presentation.
What type of gelatin or glaze is used to create the rose gold shimmer effect on the domes?
The shimmering rose gold effect comes from two key components: a mirror glaze base and edible luster dust. The glaze itself is made with sugar, water, sweetened condensed milk, white chocolate, and powdered gelatin — this creates the glossy, reflective “glass” finish. The rose gold color and shimmer come from edible rose gold luster dust, which is a fine powder made from mica, titanium dioxide, and food-grade coloring. I whisk 1 to 2 teaspoons of the luster dust directly into the warm glaze until it’s fully dissolved and evenly distributed. The result is a mirror-like finish with a warm, rose-gold sheen that catches the light beautifully. For the best shimmer, use a high-quality edible luster dust from a trusted baking supplier — cheap versions can be dull or grainy.
Can I make these domes without gelatin for a vegetarian version?
Yes, you can substitute the gelatin with agar-agar, a plant-based setting agent derived from seaweed. For the mousse, replace each 2 teaspoons of powdered gelatin with 1 teaspoon of agar-agar powder. For the glaze, replace 1 tablespoon of gelatin with 1½ teaspoons of agar-agar. The key difference is that agar-agar needs to be boiled to activate — bring it to a full boil for 30 seconds, then cool. It also sets at room temperature, so you’ll need to work faster when glazing. The texture will be slightly firmer and less creamy than the gelatin version, but the visual result is still impressive. I’ve tested this several times for vegetarian friends, and while the texture is different, the domes are still beautiful and delicious.
Why did my glass glaze crack or not stick to the dome?
Cracked or peeling glaze is usually caused by temperature issues. The most common culprit is glazing domes that aren’t frozen solid enough — the mousse should be completely firm before you start. If the dome is too soft, the warm glaze will melt the surface, causing it to slide off or crack as it sets. Another cause is glaze that’s too hot (above 95°F) or too cold (below 85°F). Always use a thermometer to hit exactly 90°F. Additionally, make sure your domes are free of ice crystals — if you see frost on the surface, wipe it off gently with a paper towel before glazing. Finally, pour the glaze in one smooth motion; stopping and starting can create uneven coverage that leads to cracking.
Can I use a different fruit instead of peach for the mousse?
Absolutely! This recipe is wonderfully adaptable. Mango, apricot, nectarine, or even raspberry all work beautifully in place of peach. The key is to use a puree that’s thick and not too watery — if using berries, strain out the seeds. For mango, use fresh or frozen mango chunks blended until smooth. For apricots, cook them down with a little sugar until soft, then puree. Each fruit will change the flavor profile: mango adds tropical sweetness, raspberry brings tartness, and apricot offers a delicate floral note. Adjust the sugar in the mousse based on the sweetness of your fruit — you want the mousse to be sweet but not cloying. The rose gold glaze works with any fruit filling, so feel free to experiment!
How do I unmold the domes cleanly without damaging them?
Unmolding frozen domes is easy if you use the right technique. First, make sure the domes are fully frozen — at least 6 hours or overnight. Remove the silicone molds from the freezer and let them sit at room temperature for exactly 30 seconds. Gently press the bottom of each mold cavity to release the dome, then carefully peel the silicone away from the edges. If the dome sticks, let it sit for another 15 seconds — don’t force it or you’ll break the biscuit base. For metal dome molds, briefly dip the bottom in warm water (3–5 seconds) to loosen. Place the unmolded domes on a parchment-lined baking sheet and return them to the freezer for 10 minutes before glazing. This ensures they’re rock-solid for the glaze application.
What can I use instead of digestive biscuits for the base?
If you can’t find digestive biscuits, there are several excellent substitutes. Graham crackers are the closest substitute — use 1 cup of finely crushed graham crackers with 3 tablespoons of melted butter. Shortbread cookies (like Walker’s) also work well and add a buttery richness. For a nutty variation, use 1 cup of almond flour or crushed pecans mixed with 2 tablespoons of melted butter — this creates a gluten-free base that’s delicious with the peach flavor. You can also use vanilla wafer cookies or even crushed biscotti for a firmer texture. Whichever you choose, make sure the crumbs are fine and the butter is fully incorporated so the base holds together when pressed into the molds.
Can I make these domes in a different shape besides domes?
Yes, you can absolutely use different molds. The recipe works beautifully in silicone hemisphere molds (which create the classic dome shape), but you can also use mini bundt pans, rectangular loaf molds (for a terrine-style dessert), or even small ramekins. If using ramekins, note that the presentation will be different — you’ll serve the dessert in the ramekin rather than unmolding it. For clean unmolding, silicone molds are your best option. If using metal or ceramic molds, line them with plastic wrap or use a non-stick spray. The glaze technique works best on curved surfaces, so rounded shapes like hearts, eggs, or teardrops are also great options. Adjust the freezing time based on the size of your molds — smaller shapes may freeze in 4 hours, larger ones may need 8.
Share Your Version!
I absolutely love seeing how you make these rose gold peach vanilla dream domes your own — whether you stick to the classic recipe or try one of the variations, your creations always inspire me. If you make this recipe, please leave a star rating and a comment below telling me how it went. What did your guests say? Did you try a flavor twist? Your feedback helps other home cooks feel confident enough to tackle this dessert for their own special occasions.
Snap a photo of your glazed domes and share it on Instagram or Pinterest — tag me @leosfoods so I can see your gorgeous work! I personally read every comment and love answering your questions, especially about the mirror glaze technique. If there’s a variation you’d like me to test (chocolate? strawberry? lavender?), just ask in the comments and I’ll add it to my kitchen diary. From my NYC kitchen to yours — I hope this recipe brings as much warmth to your table as it does to mine. — Stella 🧡
Love This Recipe? Save It to Pinterest!
If you enjoyed this Rose Gold Peach Vanilla Dream Domes with Glass Finish recipe, don’t let it get lost in your browser tabs! 😄 Pin it now so you can find it again anytime — and explore hundreds more tried-and-tested recipes waiting for you on my Pinterest boards.
👉 Follow Stella on Pinterest @stellarecipeblog
📌 Pin this recipe · 🔁 Re-pin your favorites · 💬 Tag me when you make it — I love seeing your creations!
⭐ Did you make this recipe? I’d love to hear from you!
Drop a star rating below, leave a comment, or tag @leosfoods on Instagram with your gorgeous domes. Your feedback helps me create more recipes you’ll love!
“`
Print

Rose Gold Peach Vanilla Dream Domes with Glass Finish
A stunning dessert featuring peach vanilla mousse domes with a vanilla cream core, biscuit base, and a shimmering rose gold glass glaze.
- Yield: 8 1x
Ingredients
- For the Peach Vanilla Mousse:
- 2 cups peach puree
- 1 cup heavy cream
- 1/2 cup cream cheese, softened
- 1/3 cup granulated sugar
- 1 tsp vanilla extract
- 2 tsp powdered gelatin
- 3 tbsp cold water
- For the Vanilla Cream Core:
- 3/4 cup vanilla pastry cream
- For the Biscuit Base:
- 1 cup digestive biscuits, finely crushed
- 3 tbsp melted butter
- For the Rose Gold Glass Finish:
- 1 cup granulated sugar
- 1/2 cup water
- 1/2 cup sweetened condensed milk
- 1 cup white chocolate, finely chopped
- 1 tbsp powdered gelatin
- 3 tbsp cold water
- 1 tsp vanilla extract
- 1–2 tsp edible rose gold luster dust
- For Garnish (optional):
- Thin peach slices
- Edible gold flakes
- Micro mint leaves
Instructions
- 1. Mix crushed biscuits with melted butter and press into dome molds as the base layer. Chill for 15 minutes.
- 2. Bloom gelatin for mousse in cold water for 5 minutes.
- 3. Beat cream cheese, sugar, vanilla, and peach puree until smooth.
- 4. Warm a small portion of cream, dissolve gelatin, then mix into peach base.
- 5. Whip heavy cream to soft peaks and fold into the mixture.
- 6. Fill molds halfway with mousse, add a spoon of vanilla pastry cream, then cover with remaining mousse.
- 7. Freeze for at least 6 hours until fully set.
- 8. Bloom gelatin for glass finish in cold water.
- 9. Heat sugar, water, and condensed milk until steaming (do not boil).
- 10. Remove from heat and add white chocolate and gelatin, stirring until smooth.
- 11. Blend in vanilla extract and rose gold luster dust until glossy and reflective.
- 12. Cool glaze to about 90°F (32°C).
- 13. Unmold frozen domes and place on a rack.
- 14. Pour glaze evenly over domes until fully coated.
- 15. Chill for 30 minutes before serving.
- 16. Garnish with peach slices, gold flakes, and micro mint.
Notes
For best results, ensure the domes are fully frozen before glazing. The rose gold luster dust can be adjusted for desired shimmer intensity.
Nutrition
- Calories: 330
- Sugar: 31 g
- Fat: 18 g
- Carbohydrates: 36 g
- Protein: 4 g
Tried This Recipe? Leave a Comment!
Did you make this recipe? I’d love to hear how it turned out! Please leave a comment and a rating below. Your feedback helps other home cooks and supports cheerychop.com!
For more delicious inspiration, follow me on Pinterest!