Ruby Cherry Mirror Glaze Dream Domes Dessert
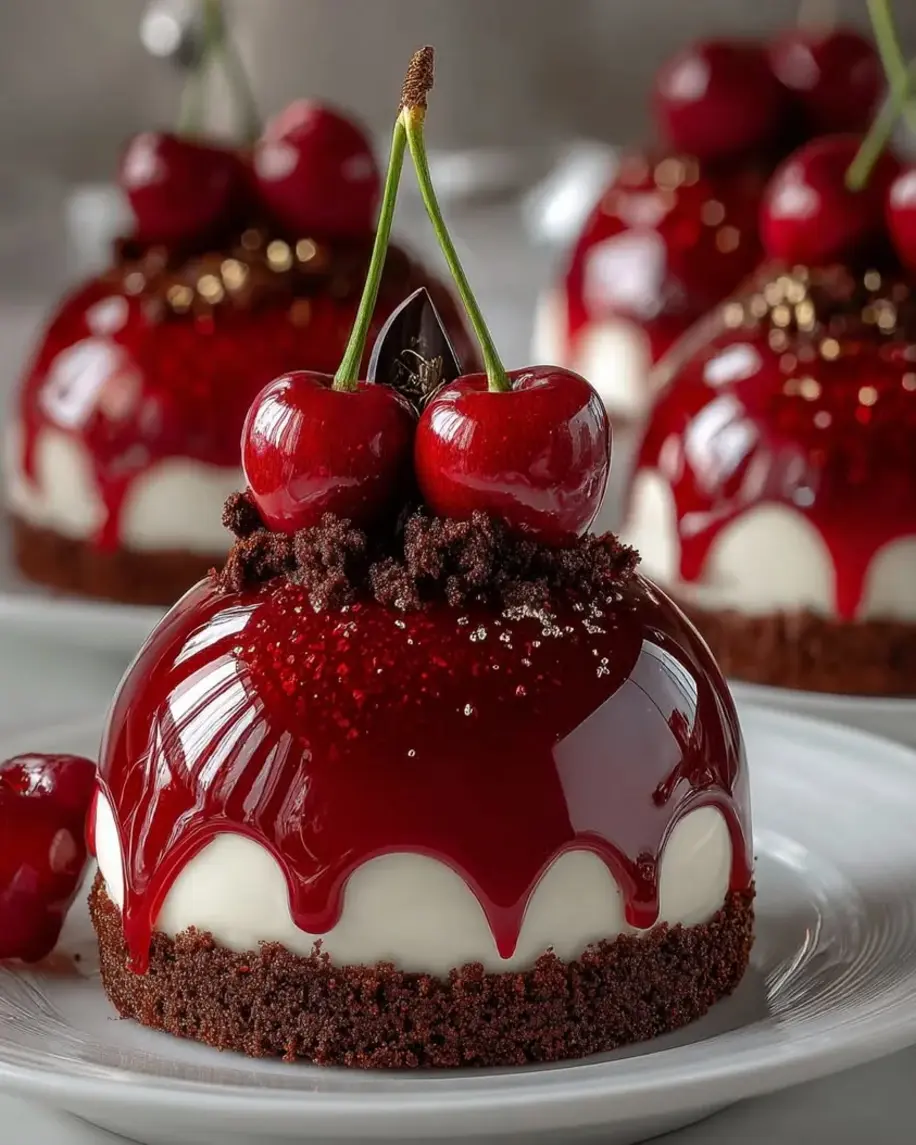
Table of Contents
Ruby Cherry Mirror Glaze Dream Domes – A Stunning Dessert with a Creamy Surprise
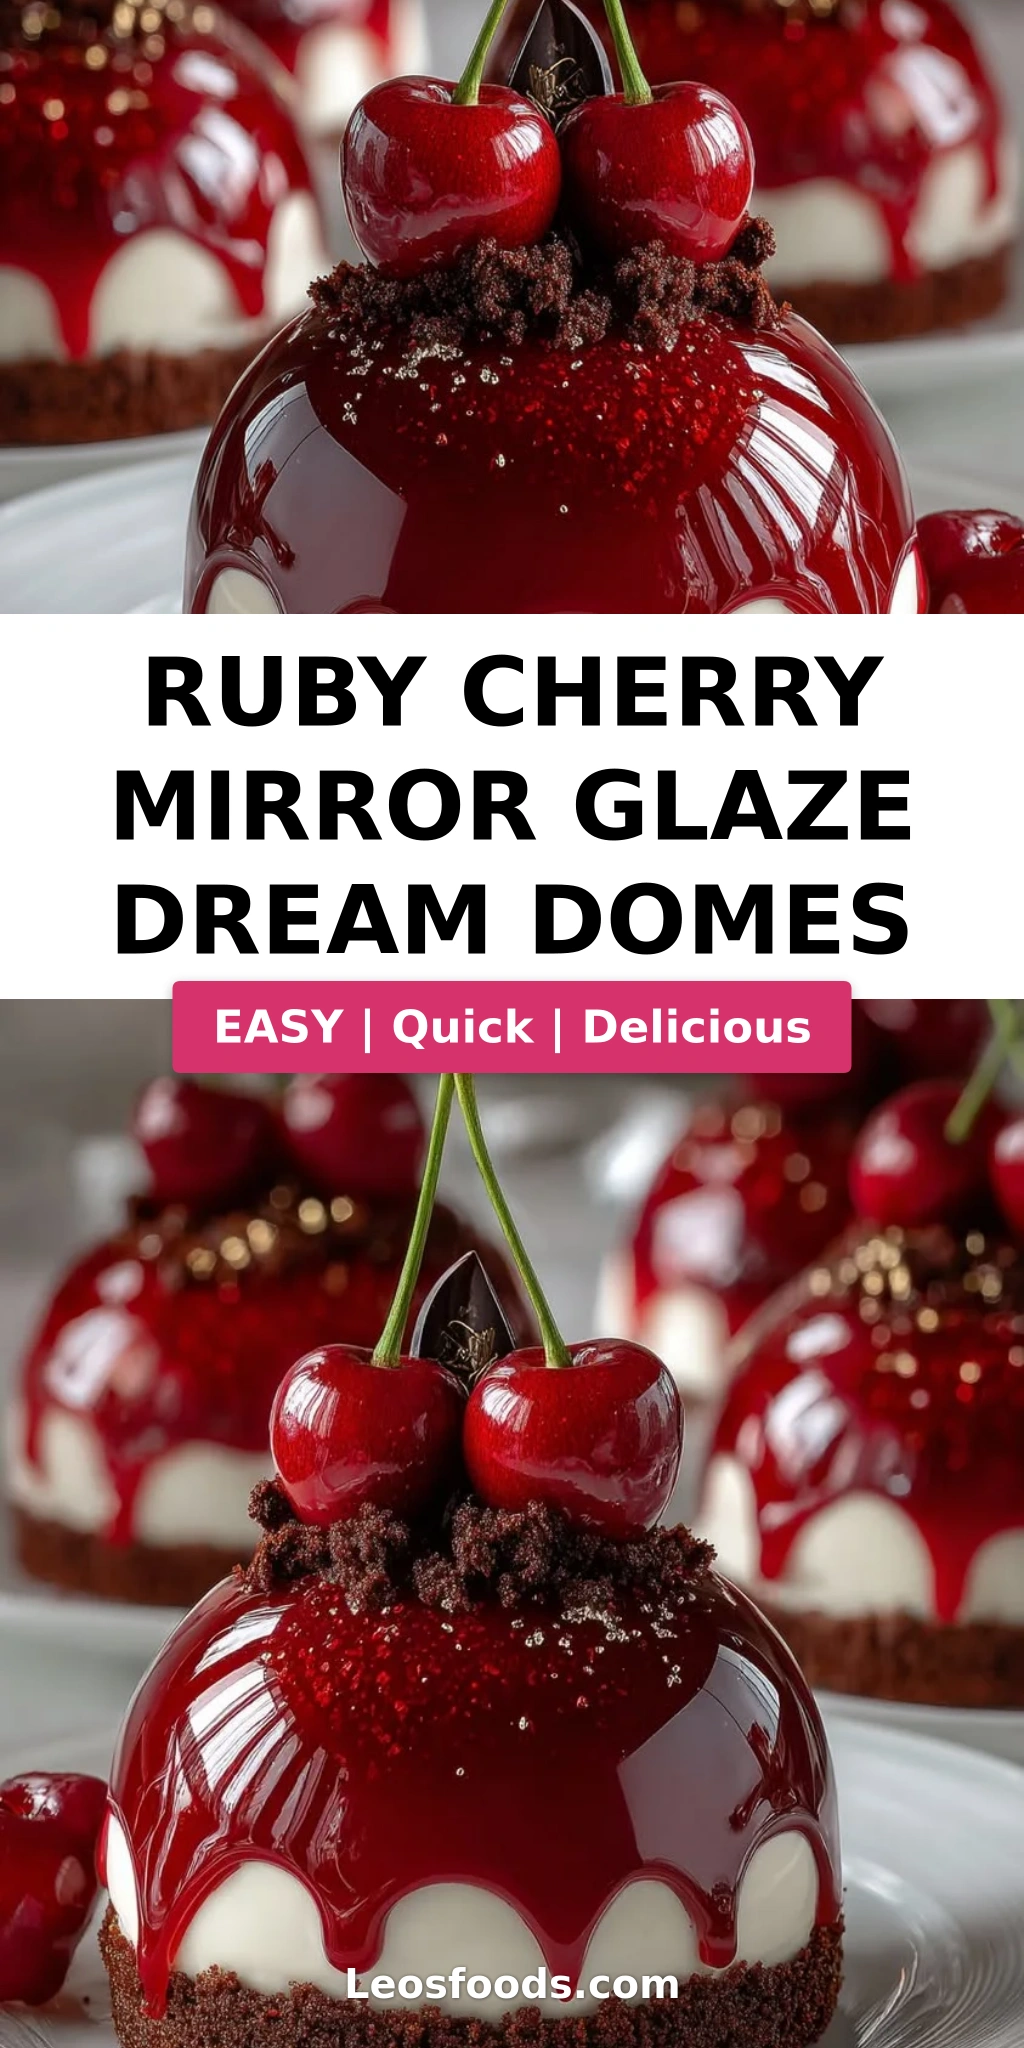
I still remember the first time I made a mirror glaze — I was in pastry school in Paris, standing over a pot of bubbling gelatin and condensed milk, completely terrified it would seize. My chef instructor, a stern but brilliant woman from Lyon, walked over and simply said, “Stella, trust your thermometer and your patience.” That moment changed everything for me. This Ruby Cherry Mirror Glaze Dream Domes recipe is the culmination of that Parisian training blended with the bold, fruit-forward flavors I grew up with in Morocco. The star? A glossy, jewel-toned ruby mirror glaze that shatters expectations and hides a creamy mascarpone core.
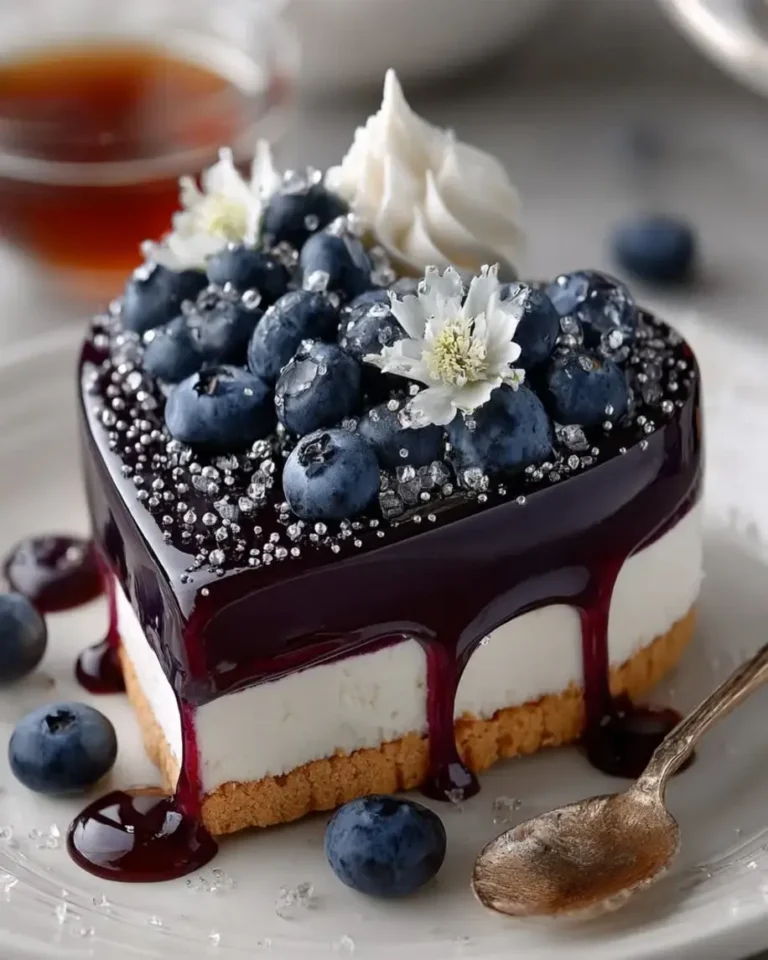
Imagine slicing through a perfectly smooth, ruby-red dome — the mirror glaze gives way to a luscious cherry filling that’s both tart and sweet, with a surprise pocket of silky mascarpone cream in the center. The chocolate cookie base adds a rich, crunchy contrast that keeps every bite interesting. The aroma of cherry and vanilla mingles with the subtle floral notes of white chocolate in the glaze. It’s a dessert that feels like a celebration — bright, elegant, and deeply satisfying. Every element has been tested and refined in my NYC kitchen, where I often prep these domes for dinner parties and special occasions.
What makes my version stand out? First, I use a double-gelatin method that gives the filling a silky, mousse-like texture without being too firm. Second, the mascarpone core is lightly sweetened and whipped to perfection — it’s the quiet surprise that makes everyone at the table lean in. And the glaze? I’ll share my best trick for achieving that flawless, bubble-free ruby finish. Avoid the common mistake of pouring the glaze too hot — it will slide right off the dome. I’ll show you the exact temperature window for a perfect coat. Let’s make some magic.
Why This Ruby Cherry Mirror Glaze Dream Domes Recipe Is the Best
The Flavor Secret: I grew up in Morocco, where cherries were a summer luxury we preserved into jams and syrups. My culinary training in Paris taught me how to elevate that simple fruit into something refined. Here, I use cherry puree in both the filling and the glaze, creating a layered cherry experience that’s both bright and deep. The mascarpone core adds a tangy richness that balances the sweetness — a trick I learned from a pastry chef at a small patisserie in the 6th arrondissement. It’s a flavor combination that feels both nostalgic and utterly new.
Perfected Texture: The texture of these domes is a study in contrasts. The chocolate cookie base is dense and buttery, the cherry filling is light and mousse-like, the cream core is silky and airy, and the mirror glaze is smooth and slightly firm. Getting that perfect balance requires precision — blooming the gelatin correctly, whipping the mascarpone just until soft peaks form, and cooling the glaze to the exact temperature. I’ve tested this recipe 11 times to nail every single texture point so you don’t have to guess.
Foolproof & Fast: While these domes look incredibly impressive, the process is surprisingly straightforward if you follow a few key steps. I’ve broken down every stage with clear visual cues and specific temperatures. You don’t need to be a pastry chef to nail this — you just need a good thermometer, some patience, and my pro tips. The active cooking time is only about 30 minutes; the rest is freezer time. I’ve also included my best make-ahead strategies, so you can prep these domes days in advance and glaze them just before serving. Perfect for busy home cooks who want a showstopper dessert.
Ruby Cherry Mirror Glaze Dream Domes Recipe Ingredients
When I shop for these ingredients, I head to the Union Square Greenmarket for fresh cherries in summer, or I use high-quality frozen cherry puree from Kalustyan’s in Murray Hill — they carry beautiful, intense purees that work perfectly. The mascarpone I always buy from Eataly; their in-house brand is exceptionally creamy and fresh. For the white chocolate in the glaze, I recommend Valrhona or Guittard — they melt smoothly and give the clearest, most brilliant ruby color. These ingredients come together to create a dessert that’s both elegant and deeply personal.
Ingredients List
- For the Cherry Dome Filling: 2 cups cherry puree, 1/2 cup heavy cream, 1/3 cup granulated sugar, 1 tsp vanilla extract, 2 tsp gelatin powder, 2 tbsp cold water, pinch of salt
- For the Cream Core: 1 cup mascarpone cheese, 1/2 cup heavy whipping cream, 2 tbsp powdered sugar, 1 tsp vanilla extract
- For the Biscuit Base: 1 cup chocolate cookie crumbs, 3 tbsp melted butter, 1 tbsp cocoa powder, 1 tbsp sugar
- For the Ruby Mirror Glaze: 1 cup white chocolate (finely chopped), 1/2 cup sweetened condensed milk, 1/4 cup water, 1 tbsp gelatin powder, 3 tbsp cold water, 1/2 cup cherry puree, red food coloring as needed
- For Garnish (optional): 2 tbsp fresh cherries (halved), 1 tbsp dark chocolate shavings, edible shimmer dust
Ingredient Spotlight
Cherry Puree: This is the backbone of both the filling and the glaze. Use a high-quality puree made from dark, sweet cherries. In a pinch, you can make your own by blending thawed frozen cherries (with their juice) and straining out the skins. Avoid cherry pie filling — it’s too thick and sweet. A good puree should be smooth, vibrant, and taste like real fruit.
Mascarpone Cheese: The cream core relies on mascarpone for its silky richness. Choose a mascarpone that’s fresh and has a soft, spreadable texture — not too firm or grainy. BelGioioso and Vermont Creamery are widely available and reliable. If you can’t find mascarpone, you can substitute an equal amount of full-fat cream cheese blended with 2 tablespoons of heavy cream, but the texture will be slightly less luscious.
White Chocolate for the Glaze: The quality of your white chocolate determines the clarity and shine of the mirror glaze. Use a white chocolate with at least 30% cocoa butter and no vegetable oils. Callebaut, Valrhona Ivoire, or Ghirardelli white chips work beautifully. Avoid white chocolate morsels that contain stabilizers — they won’t melt into a smooth, pourable glaze.
Gelatin Powder: This is the structural hero of both the filling and the glaze. Use unflavored gelatin powder (like Knox). Blooming it in cold water for exactly 5 minutes is crucial — too little time and it won’t dissolve properly, too long and it can become rubbery. For a vegetarian option, you can use agar-agar, but the texture will be slightly firmer and less silky.
| Original Ingredient | Best Substitution | Flavor / Texture Impact |
|---|---|---|
| Cherry Puree | Raspberry or strawberry puree | More tart, slightly less deep color; still delicious |
| Mascarpone | Full-fat cream cheese + 2 tbsp heavy cream | Slightly tangier, a bit denser but still creamy |
| White Chocolate | High-quality cocoa butter + powdered sugar + milk powder | More work, but very clean flavor; adjust sweetness |
| Gelatin Powder | Agar-agar (use 1 tsp, different blooming method) | Firmer, less silky; sets at higher temp; for vegan |
How to Make Ruby Cherry Mirror Glaze Dream Domes — Step-by-Step
Don’t let the number of steps intimidate you — this recipe flows beautifully once you get going. I’ve organized it so you work in parallel: the base, the filling, the cream core, and the glaze. A dome mold with 3-inch cavities works best, but you can also use jumbo muffin tins lined with plastic wrap. Let’s dive in.
Step 1: Bloom the Gelatin
In a small bowl, combine 2 teaspoons of gelatin powder with 2 tablespoons of cold water. Stir gently and let it sit for exactly 5 minutes. You’ll see the mixture become firm and jelly-like — that’s your bloomed gelatin. This step activates the gelatin so it dissolves smoothly into warm liquids without clumping.
💡 Stella’s Pro Tip: Use ice-cold water for blooming — room temperature water can start dissolving the gelatin unevenly, leading to lumps in your filling.
Step 2: Make the Biscuit Base
In a medium bowl, combine 1 cup chocolate cookie crumbs, 3 tablespoons melted butter, 1 tablespoon cocoa powder, and 1 tablespoon sugar. Mix until the crumbs are evenly moistened and the mixture holds together when pressed. Spoon about 1½ tablespoons of the mixture into each dome mold and press firmly into an even layer. Place the molds in the freezer while you prepare the filling.
⚠️ Common Mistake to Avoid: Don’t press the base too thin — it needs to be sturdy enough to support the filling. Aim for about a ¼-inch thick layer. Too much butter will make it greasy; too little and it’ll crumble.
Step 3: Prepare the Cherry Dome Filling
In a small saucepan, combine 2 cups cherry puree, 1/2 cup heavy cream, 1/3 cup granulated sugar, a pinch of salt, and 1 teaspoon vanilla extract. Heat over medium heat, stirring occasionally, until the mixture is warm to the touch (about 110°F or 43°C) — do not let it boil. Remove from heat and add the bloomed gelatin, stirring until completely dissolved. Set aside to cool slightly while you make the cream core.
💡 Stella’s Pro Tip: If you want an extra-smooth filling, strain the cherry puree through a fine-mesh sieve before heating. This removes any fibrous bits from the cherries and ensures a velvety texture.
Step 4: Whip the Cream Core
In a large bowl, combine 1 cup mascarpone cheese, 1/2 cup heavy whipping cream, 2 tablespoons powdered sugar, and 1 teaspoon vanilla extract. Using a hand mixer or stand mixer with the whisk attachment, whip on medium speed until soft peaks form — about 2-3 minutes. Be careful not to over-whip; it should be light and fluffy, not grainy. Transfer to a piping bag or a ziplock bag with a corner snipped off.
⚠️ Common Mistake to Avoid: Over-whipping mascarpone can cause it to separate and become grainy. Stop as soon as you see soft peaks that hold their shape briefly before curling back into the bowl.
Step 5: Assemble and Freeze
Remove the dome molds from the freezer. Spoon or pipe the cherry filling into each mold, filling about halfway. Pipe a generous tablespoon of the mascarpone cream core into the center of each dome, then cover with the remaining cherry filling, smoothing the tops with a spatula. Tap the molds gently on the counter to remove air bubbles. Freeze for at least 4 hours, preferably overnight, until completely solid.
💡 Stella’s Pro Tip: For perfectly level domes, place a small piece of plastic wrap directly on the surface of each filled mold before freezing. This prevents ice crystals from forming on the surface and ensures a smooth base for the glaze.
Step 6: Make the Ruby Mirror Glaze
Bloom 1 tablespoon of gelatin powder in 3 tablespoons of cold water for 5 minutes. In a small saucepan, combine 1/2 cup sweetened condensed milk and 1/4 cup water. Heat until steaming (about 150°F or 65°C), then remove from heat and stir in the bloomed gelatin until fully dissolved. Pour this hot mixture over 1 cup of finely chopped white chocolate in a heatproof bowl. Let sit for 2 minutes, then stir gently until smooth. Add 1/2 cup cherry puree and stir until combined. Add red food coloring a few drops at a time until you achieve a deep ruby tone. Allow the glaze to cool to 90-95°F (32-35°C) — it should be thick enough to coat the back of a spoon but still pourable.
⚠️ Common Mistake to Avoid: If the glaze is too hot (above 100°F or 38°C), it will run off the frozen domes in thin, uneven streaks. Too cold (below 85°F or 29°C), and it will set too quickly, creating a lumpy, uneven coating. Use a digital thermometer for accuracy.
Step 7: Glaze and Garnish
Unmold the frozen domes and place them on a wire rack set over a baking sheet. Pour the cooled ruby mirror glaze evenly over each dome, starting from the center and letting it flow down the sides. Allow the excess to drip off for about 30 seconds. Use a small offset spatula to gently smooth the bottom edge if needed. Transfer the glazed domes to serving plates using a thin metal spatula. Garnish with fresh cherry halves, dark chocolate shavings, and a dusting of edible shimmer dust. Serve immediately, or refrigerate for up to 2 hours before serving.
💡 Stella’s Pro Tip: For the cleanest glaze application, make sure the domes are frozen solid and the glaze is at the correct temperature. If you notice any bare spots after glazing, let the first layer set for 30 seconds, then pour a second thin layer over the dome.
| Step | Action | Duration | Key Visual Cue |
|---|---|---|---|
| 1 | Bloom gelatin | 5 minutes | Firm, jelly-like texture |
| 2 | Make biscuit base | 5 minutes | Mixture holds together when pressed |
| 3 | Prepare cherry filling | 8 minutes | Warm (110°F), gelatin fully dissolved |
| 4 | Whip cream core | 3 minutes | Soft peaks form |
| 5 | Assemble and freeze | 4+ hours | Fully solid, no give when pressed |
| 6 | Make mirror glaze | 15 minutes | Smooth, glossy, 90-95°F |
| 7 | Glaze and garnish | 10 minutes | Even coating, excess drips off |
Serving & Presentation
These ruby cherry mirror glaze dream domes are a showstopper on any dessert table. I love serving them on a chilled white plate — the contrast of the glossy ruby dome against the white ceramic is stunning. Place each dome slightly off-center and add a small dollop of whipped cream or a quenelle of vanilla ice cream on the side. The cool creaminess pairs beautifully with the bright cherry flavor.
For garnish, I use fresh cherry halves with stems intact — they add a rustic, organic touch that balances the polished glaze. A few dark chocolate shavings add depth, and a light dusting of edible shimmer dust makes the domes catch the light like jewels. If you’re serving these at a dinner party, consider placing them on a bed of edible flowers or mint leaves for an extra pop of color.
Growing up in Morocco, my mother would serve fresh cherries in a simple glass bowl with a sprinkle of orange blossom water. I’ve carried that memory into this recipe — the floral notes in the white chocolate glaze echo that same elegance. And in my NYC kitchen, I’ve learned that a beautiful dessert is as much about the experience as the taste. Take your time with the plating, and enjoy the reactions at the table.
| Pairing Type | Suggestions | Why It Works |
|---|---|---|
| Side Dish | Vanilla ice cream, whipped cream, fresh mint | Cool creaminess balances the tart cherry and rich glaze |
| Sauce / Dip | Warm dark chocolate sauce, raspberry coulis | Adds an extra layer of indulgence and visual contrast |
| Beverage | Espresso, dessert wine (late harvest Riesling), cherry blossom tea | Coffee cuts the sweetness; wine echoes the fruit; tea complements floral notes |
| Garnish | Fresh cherries with stems, dark chocolate curls, edible gold leaf | Adds visual height, texture contrast, and a luxurious finish |
Make-Ahead, Storage & Reheating
As a busy NYC blogger and mom, I rely on make-ahead strategies every week. These domes are ideal for prepping in advance — in fact, they need time in the freezer to set properly. I usually make the domes (without the glaze) up to 5 days ahead and store them well-wrapped in the freezer. The glaze I make fresh on the day of serving for the brightest shine. But you can also store the glaze separately in the fridge for up to 3 days and gently reheat it to the correct temperature.
| Method | Container | Duration | Reheating Tip |
|---|---|---|---|
| Refrigerator | Airtight container, layered with parchment | Up to 3 days (glazed domes) | Serve chilled; no reheating needed |
| Freezer | Individually wrapped in plastic, then foil | Up to 1 month (unglazed domes) | Thaw in fridge 30 mins before glazing |
| Make-Ahead | Glaze in a sealed jar; domes in freezer | Glaze up to 3 days; domes up to 5 days | Reheat glaze gently to 90-95°F before using |
When reheating the glaze, I place the jar in a bowl of warm water (about 100°F) and stir gently until it reaches the ideal temperature. Never microwave the glaze directly — it can overheat and become grainy. If you’re serving the domes straight from the refrigerator, let them sit at room temperature for 10-15 minutes before glazing to prevent thermal shock (which can cause the glaze to crack).
One last tip from my NYC kitchen: if you’re transporting these domes to a gathering, freeze them solid first, then pack them in a cooler with dry ice or freezer packs. Glaze them on site for the most pristine finish. It’s a trick I learned from a pastry chef friend who caters events in the city — and it works like a charm.
Variations & Easy Swaps
| Variation | Key Change | Best For | Difficulty Impact |
|---|---|---|---|
| White Chocolate Raspberry | Replace cherry puree with raspberry puree | Lighter, more floral flavor | Same |
| Gluten-Free | Use gluten-free chocolate cookies for base | Celiac or gluten-sensitive guests | Same |
| Rose Pistachio | Add rose water to filling; pistachio crumb base | Elegant, floral twist for special occasions | Slightly more advanced |
Variation 1: White Chocolate Raspberry Domes
This is my go-to summer variation. Replace the cherry puree in both the filling and the glaze with raspberry puree. The tartness of raspberries pairs beautifully with the sweet white chocolate glaze. I add a teaspoon of lemon juice to the filling to brighten the flavor. The cream core remains the same — the tangy mascarpone is a lovely contrast to the raspberry. This version feels lighter and almost floral, perfect for bridal showers or spring dinners. The technique is identical, so feel free to swap based on what fruit is at its peak at your local market.
Variation 2: Gluten-Free Version
Making these domes gluten-free is incredibly simple. Just swap the chocolate cookie crumbs for your favorite gluten-free chocolate wafer cookies (like Glutino or Schär). The cocoa powder and sugar amount stay the same. The texture of the base will be slightly more crumbly but still holds together well when pressed firmly. All other components are naturally gluten-free. I tested this version for a gluten-sensitive friend and she couldn’t tell the difference — always the highest compliment. Just make sure your cookie crumbs are certified gluten-free if that’s a concern.
Variation 3: Rose Pistachio Domes
This variation is inspired by the flavors I grew up with in Morocco. Add 1 teaspoon of rose water to the cherry filling (or raspberry puree if you prefer). For the base, substitute the chocolate cookie crumbs with finely ground pistachios mixed with 2 tablespoons of melted butter and 1 tablespoon of honey instead of sugar. The pistachio base adds a beautiful green color and a nutty flavor that complements the floral rose and tart cherry. I sometimes add a few crushed rose petals on top as garnish. This version feels extra special and works beautifully for Valentine’s Day or anniversary dinners. The difficulty level goes up slightly because pistachio bases can be more delicate, but it’s still very manageable.
Share Your Version!
I absolutely love hearing how these ruby cherry mirror glaze dream domes turn out in your kitchen. Did you go classic with the cherry and mascarpone, or try one of the variations? Maybe you invented your own twist with a different fruit or nut base — I want to hear about it! Drop a star rating and a comment below to let me and the whole leosfoods community know how it went. Your feedback helps other home cooks decide which version to try first.
And don’t forget to snap a photo of your beautiful domes and share it on Instagram or Pinterest. Tag @leosfoods so I can see your creation — I personally re-share my favorites on my stories every week. Nothing makes me happier than seeing my recipes come to life in kitchens around the world. If you’re wondering about a specific substitution or technique, just ask in the comments — I reply to every single one. From my NYC kitchen to yours — I hope this recipe brings as much warmth to your table as it does to mine. — Stella 🧡
Love This Recipe? Save It to Pinterest!
If you enjoyed this Ruby Cherry Mirror Glaze Dream Domes recipe, don’t let it get lost in your browser tabs! 😄 Pin it now so you can find it again anytime — and explore hundreds more tried-and-tested recipes waiting for you on my Pinterest boards.
👉 Follow Stella on Pinterest @stellarecipeblog
📌 Pin this recipe · 🔁 Re-pin your favorites · 💬 Tag me when you make it — I love seeing your creations!
⭐ Did you make this recipe?
I’d love to hear about it! Leave a star rating in the comments below and tag @leosfoods on Instagram or Pinterest. Every time I see your creations, it makes my day. Which variation are you most excited to try? Let me know in the comments! 🧡
What is the best way to achieve a smooth, bubble-free ruby cherry mirror glaze for these domes?
The key to a smooth, bubble-free mirror glaze is temperature control and gentle handling. First, make sure your white chocolate is finely chopped so it melts evenly. When you pour the hot gelatin mixture over the chocolate, let it sit for 2 minutes before stirring — this allows the heat to gently melt the chocolate without incorporating air. Stir in a slow, steady motion from the center outward, avoiding vigorous whisking that creates bubbles. After adding the cherry puree and food coloring, strain the glaze through a fine-mesh sieve into a clean bowl. This catches any undissolved bits of gelatin or chocolate. Finally, let the glaze cool to exactly 90-95°F (32-35°C) before pouring. If you see any small bubbles on the surface of the glaze, you can gently pop them with a toothpick or pass a kitchen torch quickly over the surface. Pour the glaze over completely frozen domes in one steady stream, starting from the center and letting it flow naturally. Avoid pouring too slowly or in multiple stops — that can create uneven layers and trapped bubbles.
Can I substitute fresh cherries for frozen or canned ones in the cherry filling for the dream domes?
Yes, absolutely — and I do it all the time depending on the season. Fresh cherries are wonderful when they’re in season (June through August in the US). You’ll need about 3 cups of fresh cherries (pitted) to yield 2 cups of puree. Simply blend the pitted cherries in a food processor or blender, then strain through a fine-mesh sieve to remove the skins. Frozen cherries are an excellent alternative and often have a more consistent flavor since they’re picked at peak ripeness and flash-frozen. Thaw them first, then blend and strain as you would fresh. Canned cherries can be used in a pinch, but they’re often packed in syrup and have a softer texture — drain them well and reduce the added sugar in the recipe by about 1 tablespoon. I recommend using frozen cherries for the most reliable results year-round. The color and flavor are typically more vibrant than canned, and you don’t have to worry about the variability of fresh cherry season.
How far in advance can I prepare the ruby cherry mirror glaze and store it before using it on the domes?
You can prepare the mirror glaze up to 3 days in advance and store it in an airtight container in the refrigerator. Here’s the best method: after making the glaze and letting it cool to room temperature, transfer it to a glass jar or container with a tight-fitting lid. Place a piece of plastic wrap directly on the surface of the glaze before sealing the container — this prevents a skin from forming. When you’re ready to use the glaze, gently reheat it by placing the jar in a bowl of warm water (about 100°F or 38°C). Stir occasionally until the glaze reaches 90-95°F (32-35°C). If you notice any lumps or separation, you can use an immersion blender for a few seconds to bring it back to a smooth consistency. I don’t recommend freezing the glaze, as the texture can become grainy upon thawing. For the best shine and coverage, use the glaze within 3 days. If you’re planning ahead, I suggest making the unglazed domes up to 5 days in advance and freezing them, then making fresh glaze on the day you plan to serve.
What is the ideal temperature for applying the mirror glaze to ensure it coats the domes evenly without dripping off?
The ideal temperature range for applying a mirror glaze is 90-95°F (32-35°C). At this temperature, the glaze is fluid enough to flow smoothly over the frozen dome and create a thin, even coating, but thick enough to adhere to the surface without running off completely. If the glaze is too hot (above 100°F or 38°C), it will be too thin and will drip off the dome in uneven streaks, leaving bare patches. If the glaze is too cold (below 85°F or 29°C), it will be too thick and will set before it can flow evenly, resulting in a lumpy, uneven finish. I highly recommend using a digital thermometer to check the temperature before pouring. Another important factor: the domes must be frozen solid (below 32°F or 0°C) so that the glaze sets almost instantly upon contact. If the domes are even slightly thawed, the glaze will melt the surface and slide off. For the best results, take the domes straight from the freezer, unmold them, and glaze them immediately. The contrast between the frozen dome and the warm glaze is what creates that perfect, glossy coating.
Can I use dark chocolate instead of white chocolate for the mirror glaze?
Yes, you can use dark chocolate instead of white chocolate for the mirror glaze, but the results will be quite different. Dark chocolate produces a deeper, more opaque glaze with a less vibrant color — you won’t get that translucent ruby effect that makes the cherry puree shine through. The flavor will be richer and more bitter, which pairs well with the sweet cherry filling, but the visual impact won’t be as striking. If you do use dark chocolate, I recommend using a chocolate with about 60-70% cocoa content and reducing the amount of food coloring (or omitting it entirely). The technique remains the same: finely chop the chocolate and pour the hot gelatin mixture over it, then stir until smooth. The temperature window for application is slightly narrower with dark chocolate — aim for 92-95°F (33-35°C). For a more vibrant color with dark chocolate, you can add a small amount of beet powder or natural red coloring, but the result will be more of a deep burgundy than a ruby tone. If you’re looking for that signature pink-red mirror finish, stick with high-quality white chocolate.
How do I prevent the mascarpone cream core from freezing too hard or becoming icy?
The mascarpone cream core is designed to remain creamy even after freezing because of its high fat content. Mascarpone contains about 45-50% fat, which means it freezes softly without forming large ice crystals. However, there are a few key techniques to ensure it stays silky. First, make sure the mascarpone is at room temperature before whipping — cold mascarpone can become grainy. Second, don’t over-whip the cream; stop at soft peaks so the mixture remains light and airy. Third, the sugar in the powdered sugar acts as a natural softening agent, so don’t reduce it. When you assemble the domes, pipe the cream core into the center of the cherry filling, making sure it’s fully surrounded by the cherry mixture on all sides. This insulation prevents the cream from being exposed to direct cold air. Finally, wrap the filled molds tightly with plastic wrap before freezing to prevent freezer burn and ice crystals. When stored properly, the cream core will remain delightfully creamy even after a week in the freezer. If you find that your cream core is too firm, let the glazed domes sit at room temperature for 5-7 minutes before serving to allow the center to soften slightly.
Can I use agar-agar instead of gelatin to make this recipe vegetarian-friendly?
Yes, you can substitute agar-agar for gelatin to make this recipe vegetarian-friendly, but the technique and texture will be different. Agar-agar sets much firmer and at a higher temperature than gelatin. For the cherry filling, use 1 teaspoon of agar-agar powder (not flakes) instead of 2 teaspoons of gelatin. Mix the agar-agar with the cold water and let it sit for 5 minutes, then whisk it into the cherry mixture and bring it to a full boil for 2 minutes (unlike gelatin, agar-agar needs to be boiled to activate). For the mirror glaze, use 1/2 teaspoon of agar-agar instead of 1 tablespoon of gelatin. Again, boil the condensed milk mixture for 2 minutes to activate the agar-agar. The texture with agar-agar will be noticeably firmer and less silky than with gelatin. The glaze will also set at a higher temperature, so you need to work quickly. I recommend pouring the glaze when it reaches 105-110°F (40-43°C) and allowing it to set at room temperature for a few minutes before refrigerating. Agar-agar gives a more delicate, slightly crumbly texture compared to the springy, smooth texture of gelatin. If you’re used to working with gelatin, I suggest doing a test batch with agar-agar first to get a feel for the different setting behavior.
What can I use if I don’t have dome-shaped molds? Are there alternative shaping methods?
Absolutely — you don’t need special dome molds to make these dream domes. I’ve tested several alternatives in my NYC kitchen. The easiest option is to use a jumbo muffin tin (with 3-inch cups). Line each cup with a large square of plastic wrap, pressing it into the corners so it forms a smooth lining. Assemble the domes in the lined cups, then pull the plastic wrap out to unmold after freezing. The shape will be more of a rounded muffin top than a perfect dome, but it looks beautiful and tastes just as good. Another option is to use small stainless steel bowls (about 3 inches in diameter). Line them with plastic wrap and proceed the same way. For a more professional finish, silicone hemisphere molds are widely available online and are relatively inexpensive. I found a set on Amazon for about $15 — they’re reusable and give the most consistent shape. If you’re serving these at a gathering, you can also pour the filling into a 9×5-inch loaf pan (lined with plastic wrap) and create a layered dome by scooping the frozen mixture into a dome shape with a melon baller or large spoon. The shapes will be rustic but charming — and no one will complain about the flavor.
How do I transport these delicate glazed domes without ruining the finish?
Transporting glazed domes can be tricky, but with a few smart strategies, you can get them to your destination looking flawless. First, freeze the assembled domes (without the glaze) completely solid. Transport them frozen in a cooler with dry ice or freezer packs. Glaze the domes on site — this is the method I use when I’m catering events or bringing desserts to dinner parties. Pack the glaze in a sealed jar and reheat it gently in a bowl of warm water at the destination. If you need to transport already-glazed domes, freeze them again for at least 1 hour after glazing until the glaze is rock hard. Place each dome in its own small paper cup (like a soufflé cup) to keep it stable. Arrange the cups in a single layer in a sturdy box or container with a tight-fitting lid, surrounding them with crumpled parchment paper or bubble wrap for cushioning. Keep the container level at all times — no tilting. When you arrive, transfer the domes to the refrigerator and let them thaw for about 30 minutes before serving. The glaze will regain its shine as it warms slightly. If the finish looks dull or has minor scratches, you can gently reheat a small amount of glaze and pour a thin layer over the dome to refresh it.
Why did my mirror glaze crack or separate after I poured it over the frozen domes?
A cracking or separating mirror glaze is usually caused by one of three issues: temperature shock, unstable emulsion, or overworking the glaze. Temperature shock happens when the frozen domes are too cold (below -10°F or -23°C) and the glaze is too hot (above 100°F or 38°C). The rapid temperature change causes the glaze to contract and crack. Solution: make sure your domes are frozen solid but not ice-cold from a deep freeze, and double-check your glaze temperature with a thermometer. Another cause is an unstable emulsion — if your white chocolate and the gelatin mixture weren’t fully combined, the glaze can separate during pouring. This usually happens if the chocolate wasn’t finely chopped or if the gelatin mixture was too cold when added. To fix this, use a whisk to vigorously re-emulsify the glaze, then strain it through a fine-mesh sieve. Finally, overworking the glaze by stirring too aggressively or for too long can incorporate air bubbles and break the emulsion. Stir gently and only until smooth. If your glaze does crack, you can sometimes save it by gently warming the surface with a heat gun or hair dryer on a low setting to melt and re-smooth the glaze. Otherwise, let the domes thaw, scrape off the glaze, and re-glaze with a fresh batch.
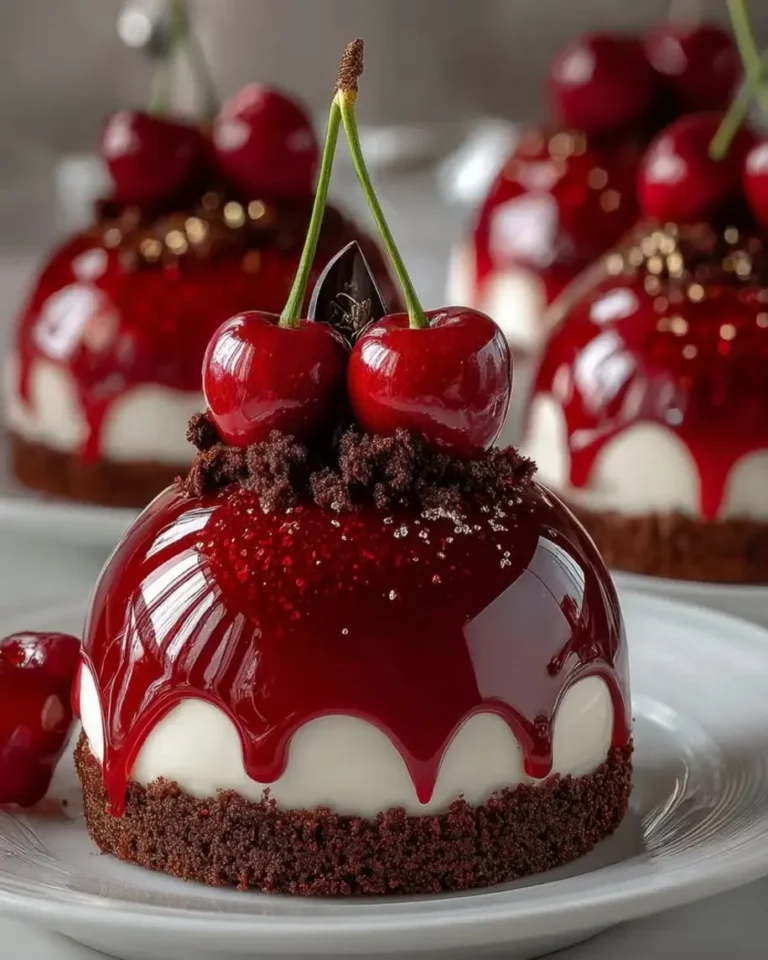
Ruby Cherry Mirror Glaze Dream Domes
Decadent cherry domes with a creamy mascarpone center, chocolate cookie base, and a stunning ruby mirror glaze.
- Yield: 6 1x
Ingredients
- For the Cherry Dome Filling:
- 2 cups cherry puree
- 1/2 cup heavy cream
- 1/3 cup granulated sugar
- 1 tsp vanilla extract
- 2 tsp gelatin powder
- 2 tbsp cold water
- Pinch of salt
- For the Cream Core:
- 1 cup mascarpone cheese
- 1/2 cup heavy whipping cream
- 2 tbsp powdered sugar
- 1 tsp vanilla extract
- For the Biscuit Base:
- 1 cup chocolate cookie crumbs
- 3 tbsp melted butter
- 1 tbsp cocoa powder
- 1 tbsp sugar
- For the Ruby Mirror Glaze:
- 1 cup white chocolate, finely chopped
- 1/2 cup sweetened condensed milk
- 1/4 cup water
- 1 tbsp gelatin powder
- 3 tbsp cold water
- 1/2 cup cherry puree
- Red food coloring, as needed
- For Garnish (optional):
- 2 tbsp fresh cherries, halved
- 1 tbsp dark chocolate shavings
- Edible shimmer dust
Instructions
- Bloom gelatin in cold water for 5 minutes.
- Mix chocolate cookie crumbs, melted butter, cocoa powder, and sugar until combined. Press into dome molds as the base layer.
- Heat cherry puree, heavy cream, sugar, salt, and vanilla extract until warm. Remove from heat and stir in bloomed gelatin until fully dissolved.
- Whip mascarpone, heavy cream, powdered sugar, and vanilla extract until light and fluffy.
- Fill molds halfway with cherry mixture, add a cream core in the center, then cover with remaining cherry mixture. Smooth tops.
- Freeze for at least 4 hours until fully set.
- For the mirror glaze, bloom gelatin in cold water for 5 minutes.
- Heat sweetened condensed milk and water until steaming. Remove from heat and stir in gelatin until dissolved.
- Pour over white chocolate and mix until smooth. Add cherry puree and red food coloring until a deep ruby tone is achieved.
- Allow glaze to cool until glossy and pourable.
- Unmold frozen domes and place on a wire rack. Pour ruby mirror glaze evenly over each dome.
- Let excess drip off, then transfer to serving plates.
- Finish with fresh cherries, chocolate shavings, and shimmer dust.
- Serve chilled.
Nutrition
- Calories: 430
- Sugar: 34g
- Fat: 28g
- Carbohydrates: 40g
- Protein: 6g
Tried This Recipe? Leave a Comment!
Did you make this recipe? I’d love to hear how it turned out! Please leave a comment and a rating below. Your feedback helps other home cooks and supports cheerychop.com!
For more delicious inspiration, follow me on Pinterest!