Easy No-Bake Emerald Kiwi Mint Scarlet Domes Recipe
“`html
Table of Contents
Emerald Kiwi Mint Scarlet Domes – A No-Bake Stunner with Layers of Flavor
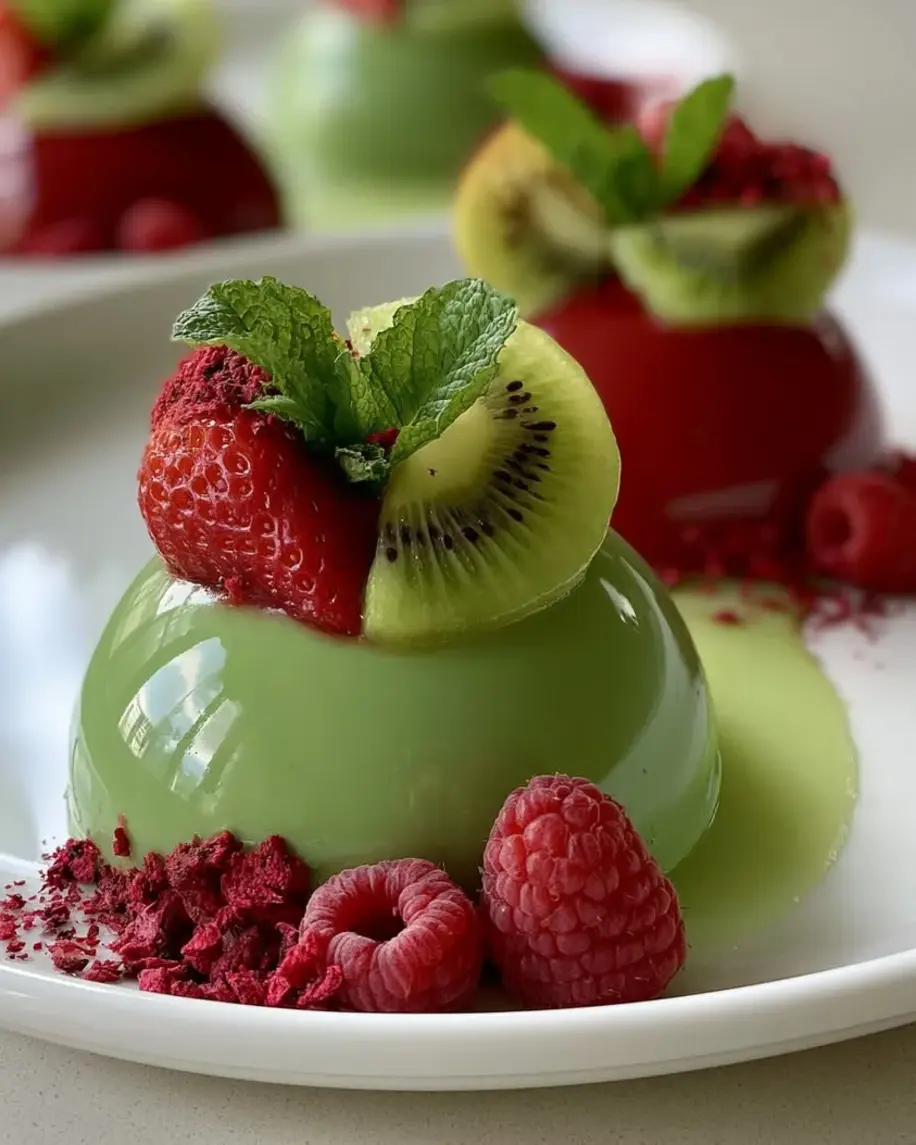
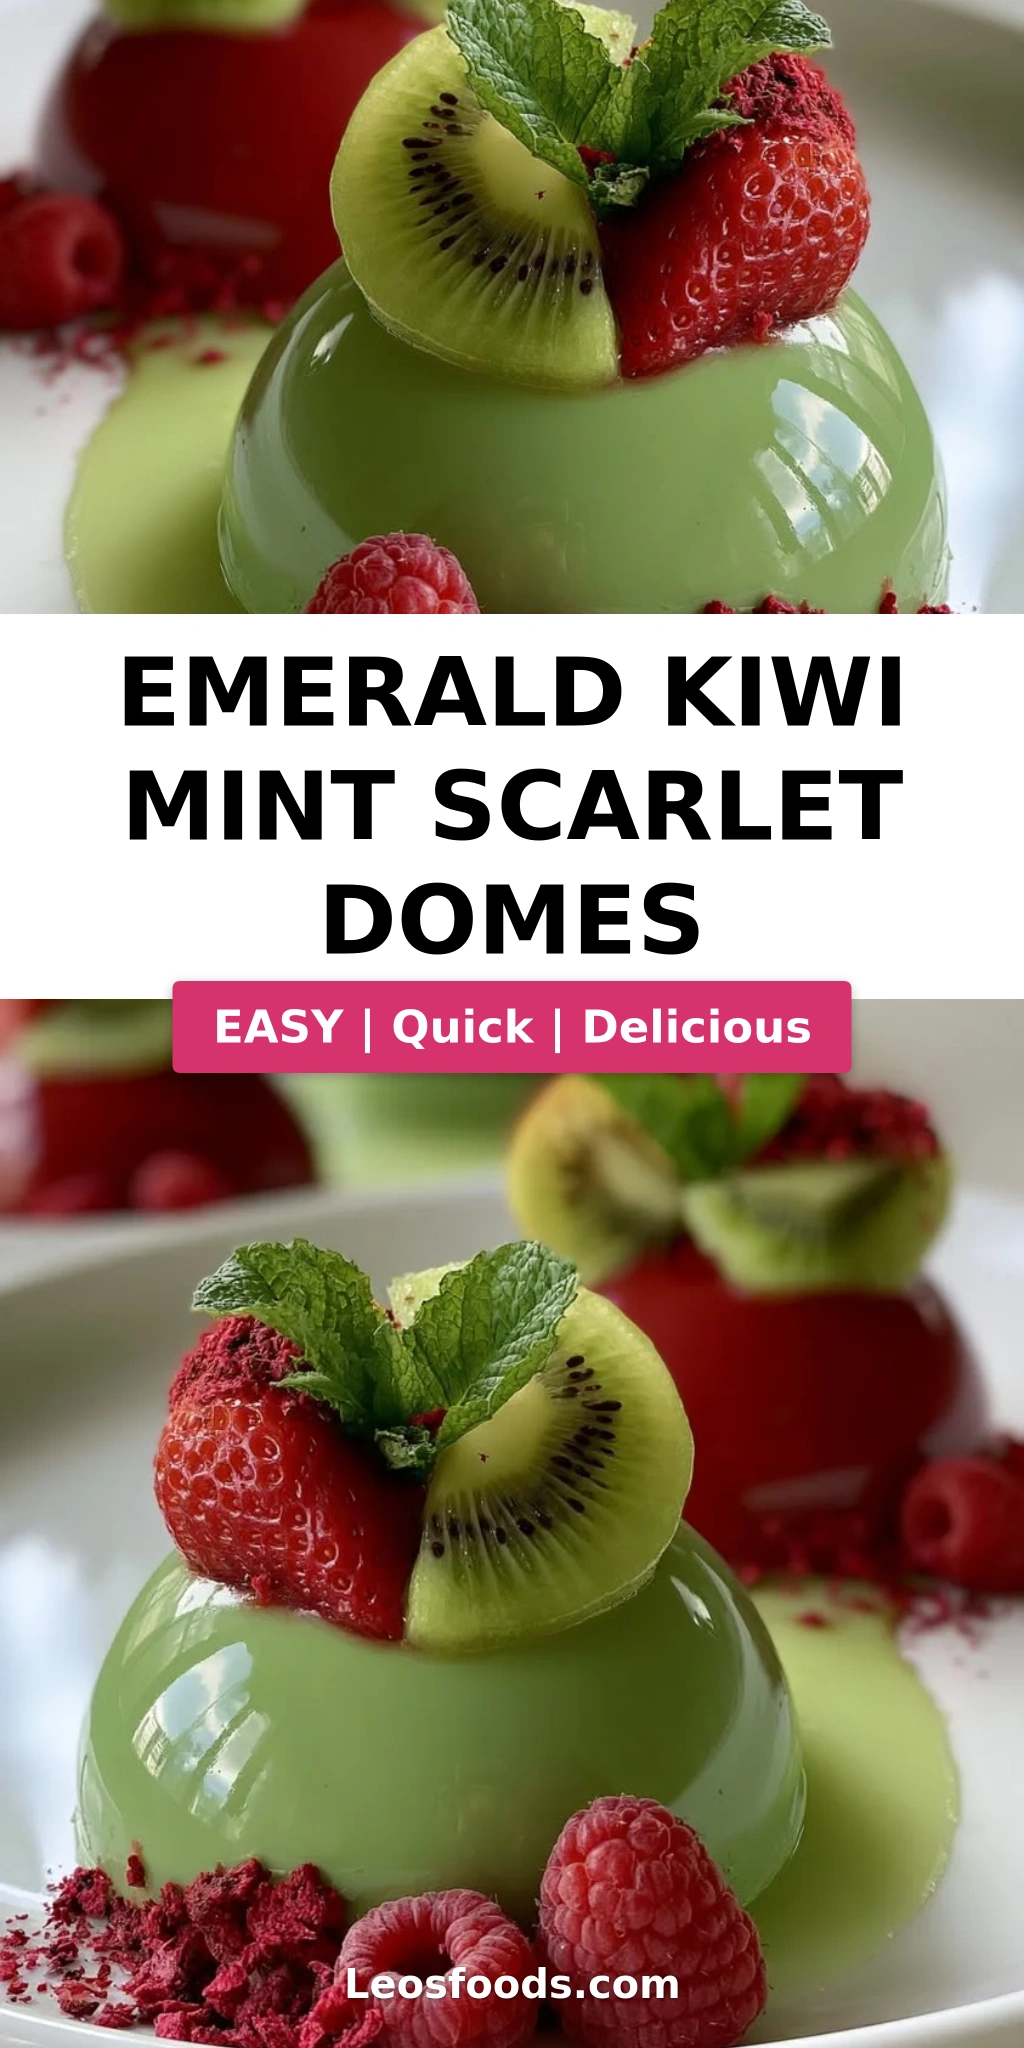
I still remember the first time I tasted a kiwi so perfectly ripe it practically hummed with flavor — I was standing in a dusty market in Marrakech, my mother’s hand on my shoulder, a paper cone of sliced fruit in my other hand. That bright, sunny sweetness, cut with a hint of tartness, has stayed with me for decades. These kiwi mint dessert domes are my grown-up homage to that moment: a no-bake layered dome that combines a vibrant kiwi mint filling with a scarlet berry layer, all wrapped in a silky matcha white chocolate glaze. The emerald dome recipe I’m sharing today is as beautiful as it is refreshing — perfect for spring gatherings, bridal showers, or any time you want to impress without turning on the oven.
Imagine this: you cut into a glossy green dome and discover a hidden stripe of ruby red berry compote nestled against a creamy, cloud-like center. The first bite is cool and luscious — the cream base melts on your tongue, followed by a burst of tangy kiwi and mint that wakes up your palate. Then comes the berry layer, sweet and just a little jammy, balancing the herbal notes. The matcha glaze adds an earthy, slightly bittersweet finish that ties everything together. It’s a dessert that looks like it belongs in a Parisian patisserie window — but I developed it right here in my NYC kitchen, drawing on both my Moroccan roots and my classical French training.
What sets my version apart is the attention to texture and layering. I’ve tested this recipe more times than I can count to make sure the fillings stay distinct without bleeding into each other, and that the glaze sets to a perfect shine. The key is a proper freeze — at least four hours — and a gentle hand when folding the cream. One common mistake I see home cooks make is not cooling the fruit fillings completely before assembling, which can cause the cream base to soften and the layers to blur. In this post, I’ll walk you through every step, share my best pro tips, and show you how to get that gorgeous emerald finish every time. Let’s make something beautiful together.
Why This Emerald Kiwi Mint Scarlet Domes Recipe Is the Best
The Flavor Secret — Most dome desserts lean heavy on chocolate or coffee. I wanted something lighter, brighter, and more surprising. The combination of fresh kiwi and mint is incredibly refreshing — it’s a flavor pairing I first fell in love with in Morocco, where mint tea meets fruit salads. The scarlet berry layer adds a necessary sweetness and acidity that balances the herbal kick, while the matcha white chocolate glaze brings an elegant, slightly savory earthiness. This isn’t just a pretty dessert; it’s a carefully balanced composition where every layer has a job to do.
Perfected Texture — I trained in Paris at Le Cordon Bleu, where I learned that texture is just as important as taste. For these domes, I wanted a filling that was creamy but not heavy, and fruit layers that were concentrated and jammy without being watery. The trick is cooking the kiwi and berry mixtures with just enough cornstarch to thicken them into a spoonable compote, then cooling them completely. The cream base is stabilized with a bit of powdered sugar and whipped to soft peaks, so it holds its shape during freezing and doesn’t become icy. The result is a dome that cuts cleanly and melts in your mouth.
Foolproof & Fast — Despite the elegant look, this recipe is surprisingly beginner-friendly. There’s no baking, no complicated pastry work, and no special equipment you don’t already have. I use standard half-sphere silicone molds that are widely available online or at kitchen supply stores. The active prep time is about 50 minutes, and then the freezer does the rest of the work. I’ve taught this recipe in my NYC cooking workshops, and even first-time dome makers get perfect results. If you can stir a saucepan and whip some cream, you can make these showstopping emerald domes.
Kiwi Mint Dessert Domes Ingredients
I source my kiwis from the farmers market in Union Square when they’re in season — there’s nothing like a sun-warmed kiwi from a local farm. But honestly, good-quality supermarket kiwis work beautifully too. The mint I grow on my fire escape in a little pot (a little piece of Morocco in NYC!). For the berries, I use whatever looks best — fresh strawberries and raspberries are ideal, but frozen work perfectly in a pinch. Here’s everything you’ll need to make these no-bake berry kiwi domes.
Ingredients List
- For the Kiwi Mint Filling:
- 3 ripe kiwis, peeled and blended
- 2 tbsp honey
- 1 tbsp lime juice
- 6 fresh mint leaves, finely chopped
- 1 tsp cornstarch
- 2 tbsp water
- For the Scarlet Berry Layer:
- 1 cup strawberries, chopped
- 1/2 cup raspberries
- 2 tbsp honey
- 1 tsp lemon juice
- 1 tsp cornstarch
- 2 tbsp water
- For the Cream Base:
- 8 oz (225 g) cream cheese, softened
- 1/2 cup heavy cream
- 1/3 cup powdered sugar
- 1 tsp vanilla extract
- For the Glaze:
- 1 cup white chocolate, melted
- 1/2 cup sweetened condensed milk
- 1 tbsp coconut oil
- 1 tsp matcha powder
- For Garnish (optional):
- Fresh kiwi slices
- Mint leaves
- Crushed freeze-dried berries
Ingredient Spotlight
Kiwi — The star of the show. Look for kiwis that yield slightly to gentle pressure (like a ripe avocado). They should smell fragrant at the stem end. If your kiwis are a bit firm, let them ripen on the counter for a day or two. Blending them creates a smooth puree that forms the base of the mint filling. Frozen kiwi chunks can be thawed and blended in a pinch.
Matcha Powder — This is what gives the glaze its stunning emerald color and a subtle earthy flavor that pairs beautifully with the white chocolate. Use culinary-grade matcha for baking — it’s less expensive than ceremonial grade but still vibrantly green. Avoid pre-sweetened matcha blends. Store your matcha in a cool, dark place to preserve its color and freshness.
Fresh Mint — Mint and kiwi are a classic pairing in North African cuisine. The mint adds a cooling, aromatic note that lifts the sweetness of the fruit. Use fresh mint only — dried mint will not give you the same bright flavor and can turn slightly bitter. I like to stack the leaves, roll them tightly, and slice them into thin ribbons (chiffonade) for the finest texture.
White Chocolate — For the glaze, use good-quality white chocolate — I prefer a brand that contains real cocoa butter, not just vegetable oils. This ensures a smooth, glossy finish that sets properly. Ghirardelli or Valrhona are my go-tos. Avoid white chocolate chips, which often contain stabilizers that prevent smooth melting.
| Original Ingredient | Best Substitution | Flavor / Texture Impact |
|---|---|---|
| Fresh kiwi | Frozen kiwi (thawed and blended) | Slightly more watery; cook a minute longer |
| Fresh mint | 1 tsp dried mint (rehydrated in 1 tsp warm water) | Milder, less bright; use 1/2 the amount |
| Cream cheese | Mascarpone or dairy-free cream cheese | Richer with mascarpone; slightly softer with vegan version |
| White chocolate | Coconut butter + 2 tbsp maple syrup | Less sweet, more coconut flavor; slightly thinner glaze |
| Matcha powder | Spirulina powder (for color) + 1/2 tsp vanilla | No earthy flavor; color will be less vibrant green |
How to Make Emerald Kiwi Mint Scarlet Domes — Step-by-Step
Making these domes is a relaxing, rewarding process — think of it as building a little edible sculpture. The key is to work in stages and give each component time to cool and set. I’ll guide you through every step with the exact techniques I use in my own kitchen.
Step 1: Cook the Kiwi Mint Filling
In a small saucepan, combine the blended kiwi, 2 tbsp honey, 1 tbsp lime juice, and the finely chopped mint. In a separate small bowl, whisk the cornstarch with 2 tbsp water until smooth, then stir it into the kiwi mixture. Cook over medium heat, stirring constantly, until the mixture thickens and comes to a gentle simmer — about 3–4 minutes. It should coat the back of a spoon. Remove from heat and let cool completely. I like to transfer it to a bowl and set it in the fridge to speed things up.
💡 Stella’s Pro Tip: Taste the filling before cooling — if your kiwis were tart, add an extra teaspoon of honey. The filling should be sweet-tart with a clear minty finish.
Step 2: Cook the Scarlet Berry Layer
In another small saucepan, combine the chopped strawberries, raspberries, 2 tbsp honey, and 1 tsp lemon juice. Whisk the cornstarch with 2 tbsp water and stir it in. Cook over medium heat, mashing the berries gently with a spoon, until the mixture thickens to a jam-like consistency — about 4–5 minutes. It should be thick enough that it doesn’t run when you tilt the pan. Cool completely.
⚠️ Common Mistake to Avoid: Don’t under-cook the berry layer. If it’s too runny when you add it to the molds, it will bleed into the cream and ruin the clean layer effect. Cook until it’s as thick as loose jam.
Step 3: Make the Cream Base
In a large bowl, beat the softened cream cheese, powdered sugar, and vanilla extract with a hand mixer until smooth and fluffy — about 2 minutes. In a separate bowl, whip the heavy cream to soft peaks (the cream should hold a gentle shape but not be stiff). Gently fold the whipped cream into the cream cheese mixture in two additions, using a rubber spatula. Be careful not to deflate the cream — you want a light, airy base.
💡 Stella’s Pro Tip: Make sure your cream cheese is truly at room temperature — cold cream cheese will leave lumps in your base. Take it out of the fridge at least 30 minutes before you start.
Step 4: Assemble the Domes
Have your half-sphere silicone molds ready on a small baking sheet. Fill each mold halfway with the cream base, using a small spoon or a piping bag for precision. Add a small spoonful (about 1 teaspoon) of the cooled kiwi mint filling into the center of each dome. Follow with a smaller spoonful (about 1/2 teaspoon) of the scarlet berry layer. Top with enough cream base to fill the mold completely, smoothing the tops with a small offset spatula.
⚠️ Common Mistake to Avoid: Don’t overfill the molds. Leave a tiny bit of space at the top — when you press the filling in, you want it to settle into the cream, not overflow. Aim for neat, clean layers.
Step 5: Freeze
Place the baking sheet with the filled molds in the freezer. Freeze for at least 4 hours, or overnight. The domes need to be completely solid to unmold cleanly and to hold their shape under the glaze. I usually make these the day before I plan to serve them.
💡 Stella’s Pro Tip: Cover the molds loosely with plastic wrap after 30 minutes to prevent any freezer odors from affecting the cream. If you’re in a hurry, a quick freeze at -10°F can work in about 2.5 hours — but 4 hours is safest.
Step 6: Make the Glaze
In a heatproof bowl set over a saucepan of simmering water (or in the microwave in 20-second bursts), melt the white chocolate with the sweetened condensed milk and coconut oil, stirring until smooth. Whisk in the matcha powder until completely dissolved and the glaze is a uniform emerald green. Let it cool slightly — it should be warm but not hot to the touch.
⚠️ Common Mistake to Avoid: If the glaze is too hot, it will melt the frozen domes on contact. Let it cool until it’s just warm — about 90°F. Test a drip on the back of your hand; it should feel like a warm bath, not hot.
Step 7: Unmold and Glaze
Remove the frozen domes from the freezer. Gently flex the silicone molds to release each dome. Place the domes on a wire rack set over a baking sheet (to catch drips). Pour the warm matcha glaze over each dome, letting it cascade down the sides. Use a small spoon to gently nudge the glaze if needed. Let the domes sit at room temperature for about 5 minutes to allow the glaze to set.
💡 Stella’s Pro Tip: For the cleanest coverage, make sure the domes are fully frozen when you glaze them — if they’ve softened at all, the glaze will slide off in patches. Work quickly but calmly.
Step 8: Garnish and Serve
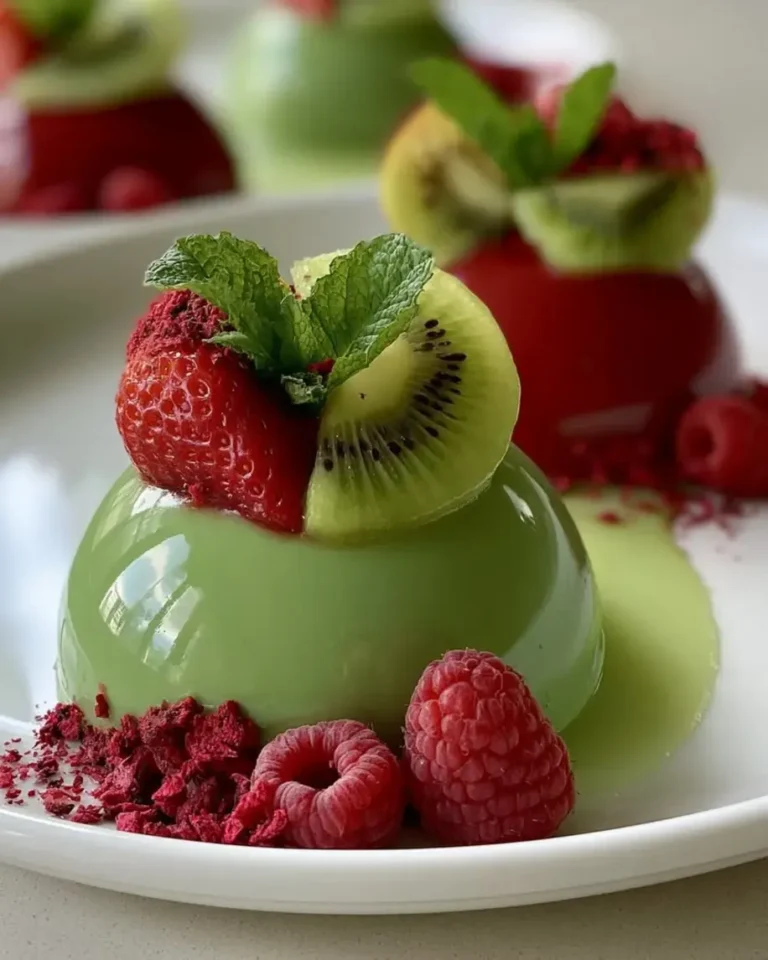
Before the glaze fully hardens, top each dome with a thin slice of fresh kiwi, a small mint leaf, and a sprinkle of crushed freeze-dried berries for color contrast. The garnishes will stick to the tacky glaze. Let the domes sit for another 10 minutes to fully set, then transfer to a serving platter. Serve chilled — not frozen solid, but cold enough that the cream is firm.
⚠️ Common Mistake to Avoid: Don’t skip the garnish — it’s not just for looks. The freeze-dried berries add a pop of tartness that cuts through the sweet glaze, and the fresh mint reinforces the flavor profile.
| Step | Action | Duration | Key Visual Cue |
|---|---|---|---|
| 1 | Cook kiwi mint filling | 3–4 min | Thickens, coats spoon |
| 2 | Cook berry layer | 4–5 min | Jam-like, doesn’t run |
| 3 | Make cream base | 5 min | Smooth, light, fluffy |
| 4 | Assemble domes | 10 min | Clean layers in mold |
| 5 | Freeze | 4+ hrs | Solid, no give when pressed |
| 6 | Make glaze | 5 min | Smooth, emerald green |
| 7 | Unmold and glaze | 5 min | Glaze coats evenly |
| 8 | Garnish and serve | 5 min | Glossy, garnished, domed |
Serving & Presentation
These domes are meant to be the centerpiece of your dessert table. I love serving them on a simple white platter or a marble board — the green glaze pops beautifully against a neutral background. Let the domes sit at room temperature for about 5–7 minutes after glazing so the cream softens slightly to a mousse-like consistency. They should be served cold but not rock-hard.
For garnish, I go with thin kiwi slices (cut into half-moons), tiny mint sprigs, and a light dusting of crushed freeze-dried strawberries or raspberries. The freeze-dried berries add a brilliant red contrast to the green glaze and a lovely crunchy texture. If you want to go all out, drizzle a little extra matcha glaze around the plate and dot with fresh raspberries.
In my NYC cooking classes, I often pair these domes with a light Moroccan mint tea — the sweetness of the tea echoes the mint in the filling, and the warm liquid contrasts with the cold dessert. For a wine pairing, a chilled Moscato d’Asti or a late-harvest Riesling works beautifully. If you’re serving these at a brunch, they’re lovely alongside a simple fruit salad or a plate of butter cookies.
| Pairing Type | Suggestions | Why It Works |
|---|---|---|
| Side Dish | Fresh fruit salad, butter cookies, shortbread | Light, simple sides let the domes shine |
| Sauce / Dip | Extra matcha glaze, raspberry coulis, honey drizzle | Enhances the green tea and berry notes |
| Beverage | Moroccan mint tea, Moscato d’Asti, sparkling water with lime | Refreshing, palate-cleansing, not too sweet |
| Garnish | Kiwi slices, mint sprigs, crushed freeze-dried berries, edible flowers | Adds color, texture, and flavor contrast |
Make-Ahead, Storage & Reheating
These domes are the ultimate make-ahead dessert — in fact, they absolutely need that freezing time, so planning ahead is built into the recipe. I usually make the fillings and cream base the day before, assemble the domes in the evening, and glaze them the next morning before serving. For my busy NYC lifestyle, this is a lifesaver: I can prep everything while I’m waiting for my morning coffee to brew, and dinner party guests have no idea how little last-minute work was involved.
| Method | Container | Duration | Reheating Tip |
|---|---|---|---|
| Refrigerator | Airtight container, layered with parchment | Up to 3 days | Serve cold directly from fridge |
| Freezer | Freezer-safe container, wax paper between layers | Up to 2 months | Thaw in fridge 2 hrs before serving |
| Make-Ahead | In silicone molds, covered | Up to 2 days in advance | Glaze just before serving for best shine |
If you’re storing glazed domes in the fridge, place them in a single layer in an airtight container with a sheet of parchment between layers. The glaze may soften slightly over time, but the flavor will still be lovely. To refresh the shine, you can warm a tiny bit of extra glaze and drizzle it over the domes just before serving. I don’t recommend microwaving these — the cream base is delicate and can separate.
Variations & Easy Swaps
One of the things I love about this recipe is how flexible it is. Once you have the basic technique down, you can swap in different fruits, change up the glaze, or even make it dairy-free. Here are three of my favorite variations to keep things exciting.
| Variation | Key Change | Best For | Difficulty Impact |
|---|---|---|---|
| Mango Passionfruit | Replace kiwi with mango, mint with passionfruit pulp | Summer parties, tropical theme | Same difficulty |
| Dairy-Free / Vegan | Use vegan cream cheese, coconut cream, and dairy-free white chocolate | Dairy-free guests, vegan lifestyle | Slightly harder — coconut cream must be chilled |
| Chocolate Mint Domes | Replace matcha glaze with dark chocolate ganache, add 2 tbsp cocoa to cream base | Chocolate lovers, holiday season | Same difficulty |
Mango Passionfruit Variation
For a tropical twist, swap the kiwi for 2 ripe mangoes (peeled and blended) and replace the mint with the pulp of 3 passionfruits. Omit the mint entirely — the passionfruit brings enough aromatic complexity. Cook the mango mixture with honey and lime juice as directed. The berry layer can stay the same, or you can swap in diced pineapple for a fully tropical vibe. This version tastes like a vacation in a dome.
Dairy-Free / Vegan Domes
I tested a dairy-free version for a friend who’s vegan, and it was a hit. Use a high-quality vegan cream cheese (Miyoko’s is my favorite) and replace the heavy cream with chilled full-fat coconut cream (the solid part from a can of coconut milk). For the glaze, look for dairy-free white chocolate — it’s available at most health food stores. The texture will be slightly softer than the original, so freeze for at least 5 hours. The coconut flavor pairs beautifully with the matcha and kiwi.
Chocolate Mint Domes
If you’re a chocolate purist, this one’s for you. Replace the matcha white chocolate glaze with a simple dark chocolate ganache (1/2 cup heavy cream + 4 oz dark chocolate). Add 2 tbsp unsweetened cocoa powder to the cream base for a mocha flavor. The kiwi mint filling stays the same — the chocolate and mint are a classic pairing, and the tartness of the kiwi cuts through the richness. Garnish with a light dusting of cocoa powder and a mint leaf.
FAQ
What is an emerald kiwi mint scarlet dome recipe?
An emerald kiwi mint scarlet dome recipe is a no-bake layered dessert made in half-sphere molds. It features a creamy base filled with a sweet-tart kiwi mint compote and a scarlet berry layer made from strawberries and raspberries. The frozen domes are glazed with a vibrant green matcha white chocolate coating, giving them their signature emerald color. The combination of fruity, herbal, and creamy flavors makes it a refreshing and visually stunning dessert for special occasions like bridal showers, spring brunches, or dinner parties. The recipe is gluten-free and can be adapted for dairy-free diets.
How do you make scarlet domes with kiwi and mint?
To make scarlet domes with kiwi and mint, start by cooking a kiwi mint filling — blend 3 ripe kiwis, then cook with honey, lime juice, chopped mint, and cornstarch until thickened. Separately, cook strawberries and raspberries with honey and lemon juice into a jam-like scarlet layer. Prepare a cream base by beating cream cheese, powdered sugar, and vanilla, then folding in whipped heavy cream. Layer the cream, kiwi mint filling, and berry compote in half-sphere silicone molds, filling to the top. Freeze for at least 4 hours. Make a matcha white chocolate glaze, unmold the domes, pour the glaze over them, and garnish with kiwi slices, mint, and freeze-dried berries.
Can you substitute fresh mint with dried mint in this dome dessert?
Yes, you can substitute dried mint for fresh mint in this dome dessert, but the flavor will be noticeably different. Dried mint is more concentrated and less bright than fresh mint. If using dried mint, use about 1 teaspoon (rehydrated in 1 teaspoon of warm water) in place of the 6 fresh mint leaves. The dried mint will have a slightly more earthy, less vibrant flavor profile, and it won’t provide the same fresh, cooling finish that makes the kiwi mint filling so refreshing. For the best results, I recommend using fresh mint — it’s widely available and makes a real difference in the final taste.
How long do emerald kiwi mint scarlet domes need to chill before serving?
Emerald kiwi mint scarlet domes need to freeze for at least 4 hours before serving — 6 hours is even better, and overnight is ideal. This extended freezing time ensures that the cream base is fully solid, which is essential for two reasons. First, it allows you to cleanly unmold the domes from the silicone molds without them collapsing or losing their shape. Second, the frozen domes provide a cold surface for the warm matcha white chocolate glaze to set quickly and evenly. If you try to glaze them too early, the heat from the glaze can cause the cream to soften and the layers to blur. Patience is key here — a good freeze makes all the difference.
Can I use frozen berries for the scarlet layer?
Absolutely — frozen strawberries and raspberries work perfectly for the scarlet berry layer. In fact, frozen berries are often picked at peak ripeness and can be more flavorful than out-of-season fresh berries. Simply measure the frozen berries directly into the saucepan (no need to thaw first) and increase the cooking time by about 2 minutes to allow the excess moisture to cook off. Make sure the compote thickens to a jam-like consistency before cooling, as frozen berries release more water than fresh ones. The color and flavor will be just as vibrant, so this is a great swap when fresh berries aren’t in season.
What kind of mold should I use for these domes?
For these domes, I recommend using half-sphere silicone molds with a diameter of about 2 to 2.5 inches. Silicone is essential because it flexes easily, allowing you to unmold the frozen domes without cracking or damaging them. I use a set of cavity molds that holds 8 domes per tray — this makes it easy to prepare a full batch at once. You can find these molds at most kitchen supply stores, on Amazon, or at baking specialty shops. If you don’t have half-sphere molds, you can also use small silicone muffin cups or even disposable plastic cups lined with plastic wrap — just shape them into domes by hand after freezing.
Can I make these domes without a silicone mold?
Yes, you can make these domes without a silicone mold, though the process requires a bit more finesse. One option is to use small glass or ceramic bowls lined with plastic wrap — fill the lined bowls with the cream and fruit layers, then freeze. Once solid, lift the plastic wrap to remove the dome, peel off the wrap, and glaze. Another option is to freeze the cream mixture in a shallow dish, then use a cookie scoop or melon baller to shape the frozen cream into rounds before glazing. The shapes won’t be as perfectly uniform as silicone molds, but they’ll still taste amazing. For the cleanest result, silicone molds are worth the small investment.
How do I store leftover glazed domes?
Store leftover glazed domes in an airtight container in the refrigerator for up to 3 days. Place them in a single layer with a sheet of parchment or wax paper between layers to prevent the glazes from sticking together. The glaze may soften and lose some of its high shine after refrigeration, but the flavor will remain delicious. To refresh the appearance before serving, you can warm a small amount of extra matcha glaze and drizzle it over the domes. I don’t recommend freezing glazed domes, as the glaze can become grainy when thawed. If you want to make them further ahead, freeze the unglazed domes and glaze them the day you plan to serve.
What can I use instead of matcha powder for the glaze?
If you don’t have matcha powder, you can substitute it with spirulina powder for a green color, though spirulina has a very different flavor profile — it’s more earthy and slightly seaweed-like. To balance it, add an extra 1/2 teaspoon of vanilla extract to the glaze. Another option is to simply omit the matcha and use plain white chocolate glaze, which will give you a creamy white dome instead of an emerald one. The flavor will be sweeter and more vanilla-forward, which pairs beautifully with the tangy kiwi and berry layers. For a pastel pink glaze, you can add a drop of natural red food coloring or a teaspoon of beet powder.
Are these emerald kiwi mint scarlet domes gluten-free?
Yes, these emerald kiwi mint scarlet domes are naturally gluten-free! The recipe contains no wheat flour, barley, rye, or any other gluten-containing ingredients. The cream base is made with cream cheese and heavy cream, the fruit fillings are thickened with cornstarch (which is gluten-free), and the glaze uses white chocolate, sweetened condensed milk, coconut oil, and matcha powder — all gluten-free. Just be sure to check the labels on your white chocolate and matcha powder to confirm they are certified gluten-free if you have celiac disease or a severe gluten sensitivity. Some white chocolate brands may contain barley malt extract, so always read the ingredients.
Share Your Version!
I absolutely love seeing how you make these emerald kiwi mint scarlet domes your own — whether you stick with the original or try one of the variations. If you make this recipe, I’d be so grateful if you left a star rating and a comment below telling me how it turned out. Did you use a different fruit? Did your kids help with the garnishes? I want to hear it all!
If you share a photo on Instagram or Pinterest, please tag @leosfoods so I can see your beautiful creations. And if you have a question that I didn’t answer in the FAQ, drop it in the comments — I read every single one and I’ll get back to you with the best advice I can give. From my NYC kitchen to yours — I hope this recipe brings as much warmth to your table as it does to mine. — Stella 🧡
🌟 Did you make this recipe? 🌟
I’d love to know how it turned out! Please leave a star rating ⭐⭐⭐⭐⭐ and a comment below — your feedback helps me create better recipes for you.
📸 Tag @leosfoods on Instagram or Pinterest for a chance to be featured!
Love This Recipe? Save It to Pinterest!
If you enjoyed this Emerald Kiwi Mint Scarlet Domes recipe, don’t let it get lost in your browser tabs! 😄 Pin it now so you can find it again anytime — and explore hundreds more tried-and-tested recipes waiting for you on my Pinterest boards.
👉 Follow Stella on Pinterest @stellarecipeblog
📌 Pin this recipe · 🔁 Re-pin your favorites · 💬 Tag me when you make it — I love seeing your creations!
“`
Print
Emerald Kiwi Mint Scarlet Domes
- Yield: 8 1x
Ingredients
- For the Kiwi Mint Filling:
- 3 ripe kiwis, peeled and blended
- 2 tbsp honey
- 1 tbsp lime juice
- 6 fresh mint leaves, finely chopped
- 1 tsp cornstarch
- 2 tbsp water
- For the Scarlet Berry Layer:
- 1 cup strawberries, chopped
- 1/2 cup raspberries
- 2 tbsp honey
- 1 tsp lemon juice
- 1 tsp cornstarch
- 2 tbsp water
- For the Cream Base:
- 8 oz (225 g) cream cheese, softened
- 1/2 cup heavy cream
- 1/3 cup powdered sugar
- 1 tsp vanilla extract
- For the Glaze:
- 1 cup white chocolate, melted
- 1/2 cup sweetened condensed milk
- 1 tbsp coconut oil
- 1 tsp matcha powder
- For Garnish (optional):
- Fresh kiwi slices
- Mint leaves
- Crushed freeze-dried berries
Instructions
- 1. Cook kiwi, honey, lime juice, cornstarch, and water until slightly thickened. Cool completely.
- 2. Cook strawberries, raspberries, honey, lemon juice, cornstarch, and water until jam-like. Cool completely.
- 3. Beat cream cheese, powdered sugar, and vanilla until smooth.
- 4. Whip heavy cream to soft peaks and fold into cream cheese mixture.
- 5. Fill half-sphere molds halfway with cream base.
- 6. Add a small spoonful of kiwi filling and berry layer into each mold.
- 7. Cover with remaining cream and smooth tops.
- 8. Freeze for at least 4 hours until firm.
- 9. Mix melted white chocolate, condensed milk, coconut oil, and matcha powder until smooth.
- 10. Unmold domes and place on a rack.
- 11. Pour glaze over each dome evenly.
- 12. Let set completely.
- 13. Garnish with kiwi slices, mint, and crushed freeze-dried berries.
Nutrition
- Calories: 260
- Sugar: 24 g
- Fat: 15 g
- Carbohydrates: 28 g
- Protein: 3 g
Tried This Recipe? Leave a Comment!
Did you make this recipe? I’d love to hear how it turned out! Please leave a comment and a rating below. Your feedback helps other home cooks and supports cheerychop.com!
For more delicious inspiration, follow me on Pinterest!